
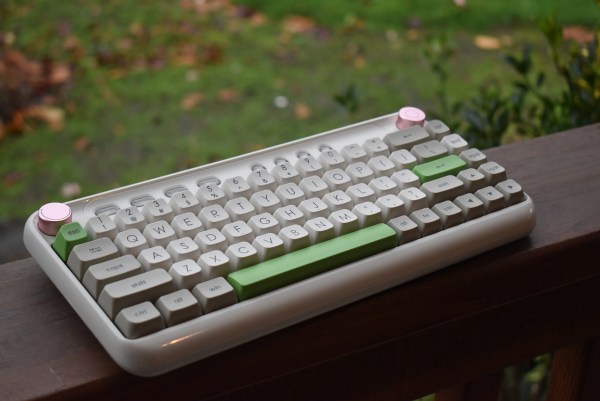
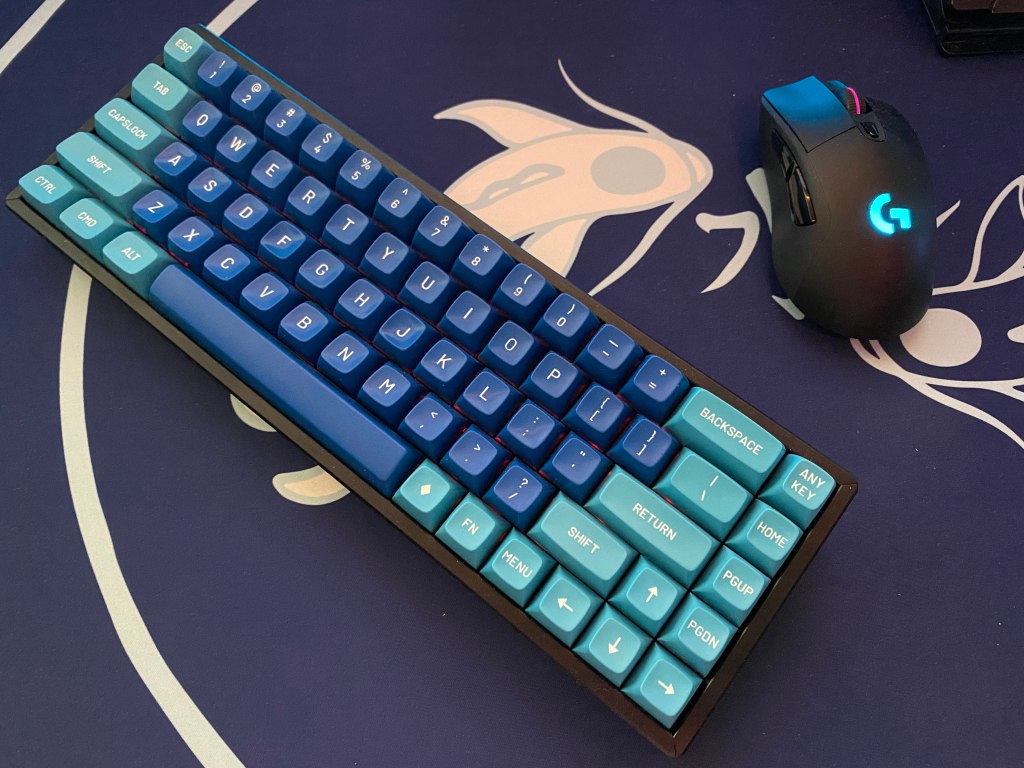
Vissles is relatively new to the mechanical keyboard space. However, their V84 75% mechanical keyboard gives the impression that they have experience in the world of keyboards.
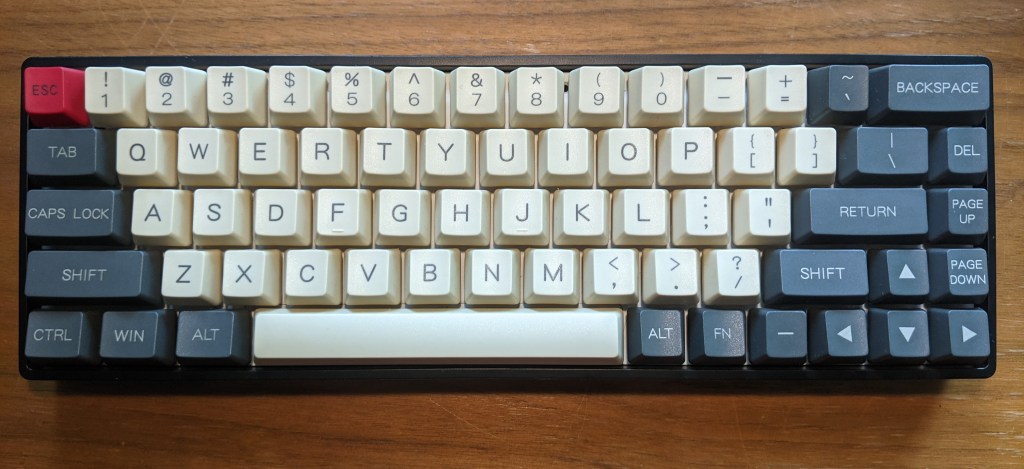
The Vissles V84 is a mechanical keyboard that delivers Bluetooth and a decent stock sound all in an efficient 75% layout.
Today we will take a deeper look at the Vissles V84 and see if this board beats out the competition.
The Verdict
The $100 price point has become a very competitive segment in the past few years. What was once an easy referral to one of Keychron’s K series boards is now matched by many options, including Vissles new V84.
The V84 improves on some of Keychron’s issues and offers a solid overall package that might just be the best option at this price point. You get solid RGB lighting, a painless Bluetooth 5.1 connection, a hefty feeling build, and a decent stock sound experience.
The V84 gives you a quality stock experience but with its hotswap PCB, you can easily modify the board for a better sound and feel. You can choose between a few different switch and keycap offerings too. Additionally, Mac support also makes the V84 more versatile.
If you want a board with a ton of features and a solid competitor in the space, the Vissles V84 is a solid value offering. Regardless if you are working from home, in the office, or gaming the Vissles V84 could be the right option for you.
Note: Before March 31st you can get an additional $10 discount by using the code “V84” if you buy from Vissles website.
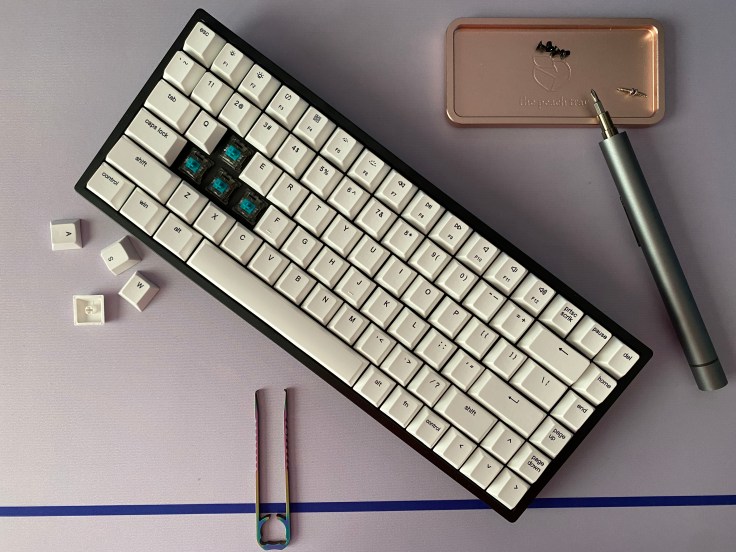
In The Box
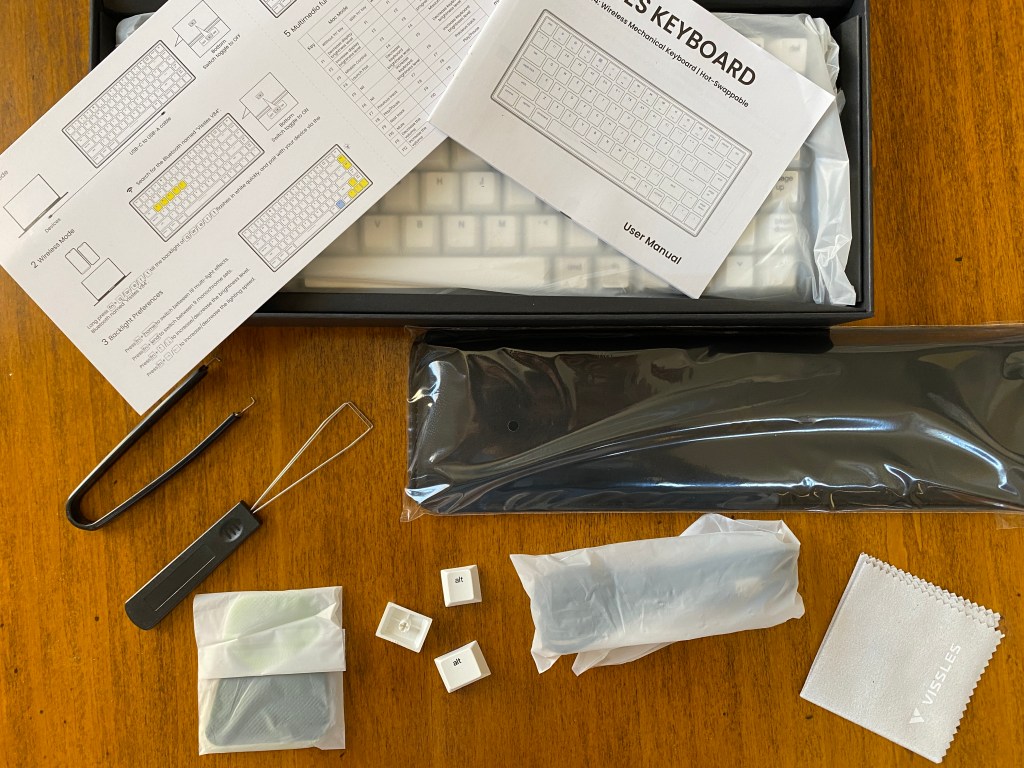
Besides the keyboard, Vissles gives you a variety of accessories to add to your experience with the V84.
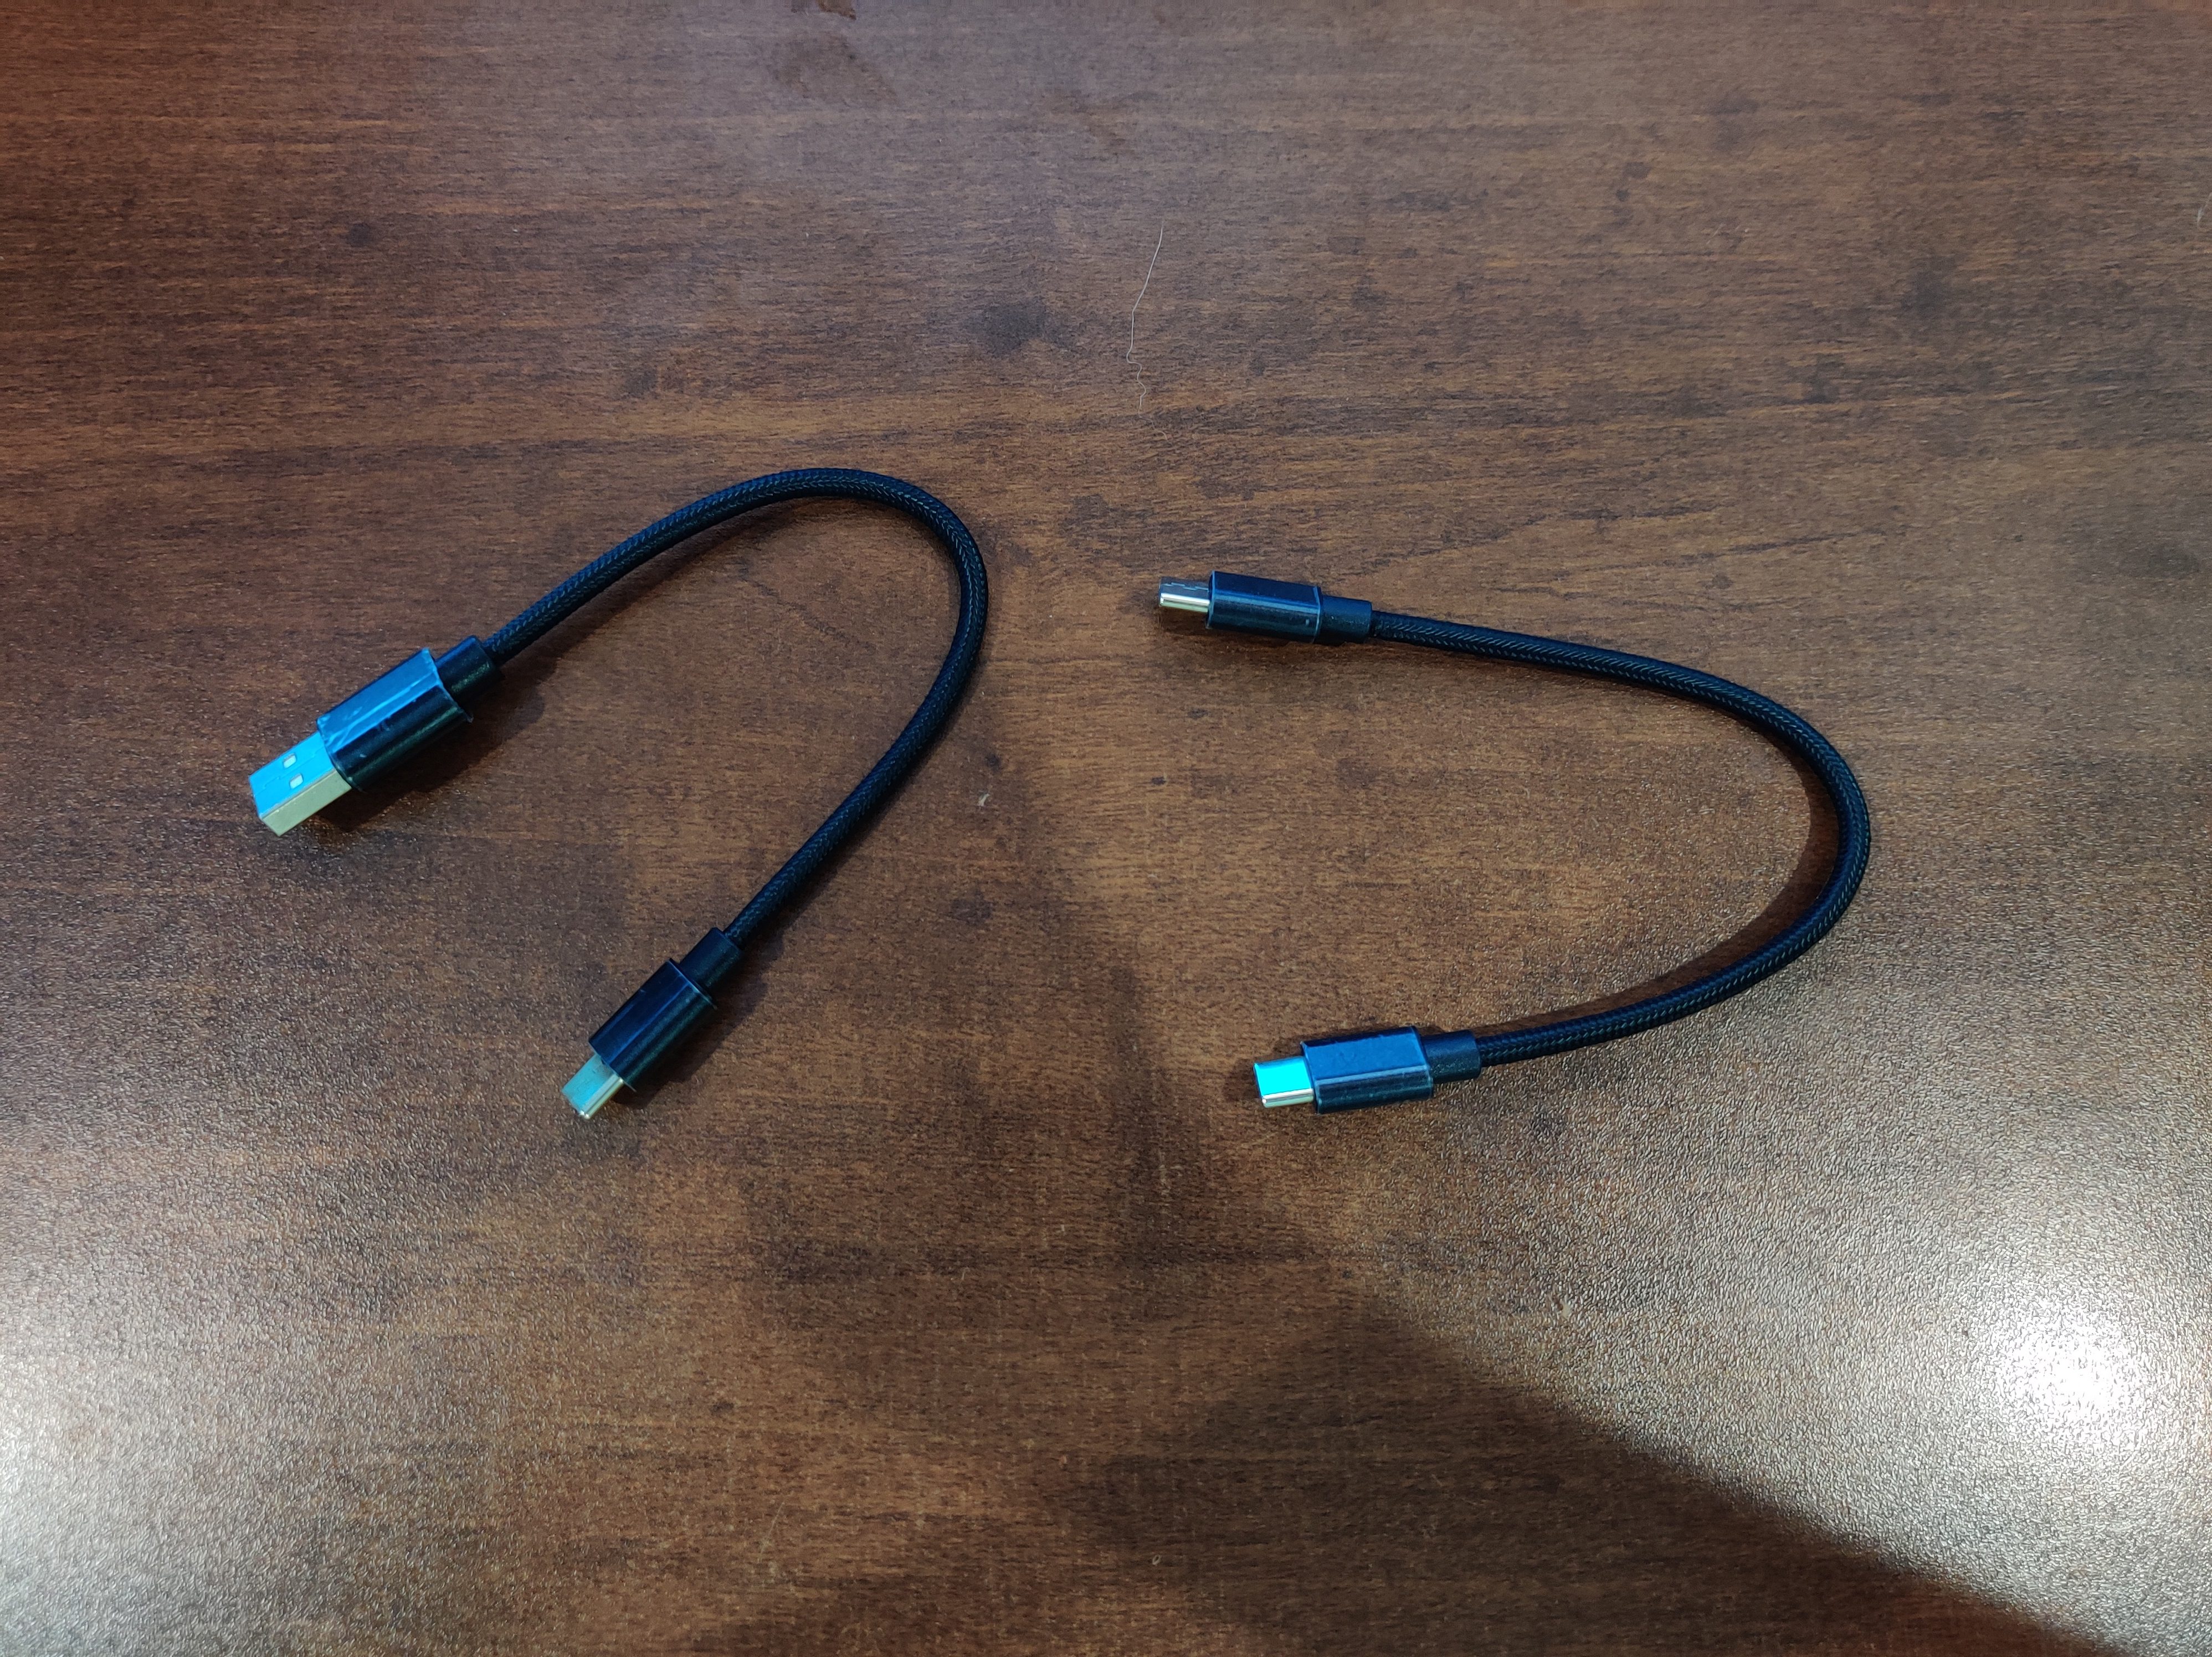
USB-C Cable: You get a rubberized cable included with the board. You will mostly need this if you are charging the board or gaming.
Keycap Puller: If you ever want to mod the keyboard or you are just cleaning it, a wired keycap puller is included.
Switch Puller: You are also given a switch puller to change out switches whenever you would like. Often hotswap keyboards include pretty useless switch pullers but this one I would use while working on other keyboards.
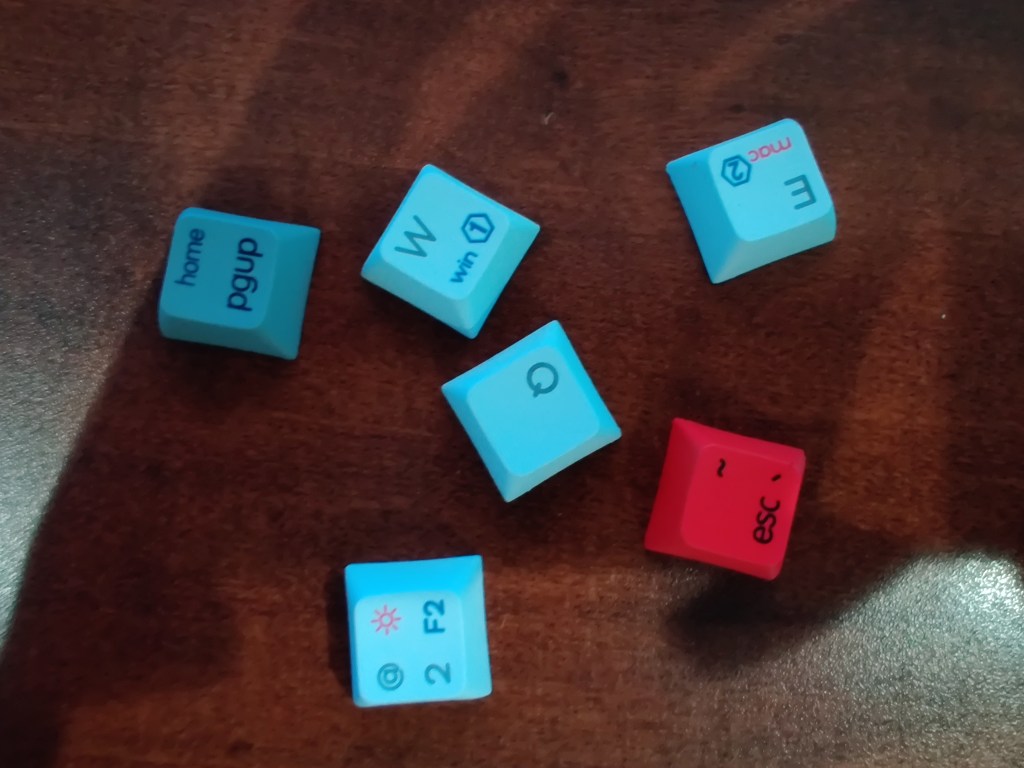
Mac Keycaps: If you are a mac user, mac specific keycaps are provided to go along with the mac support of this keyboard.
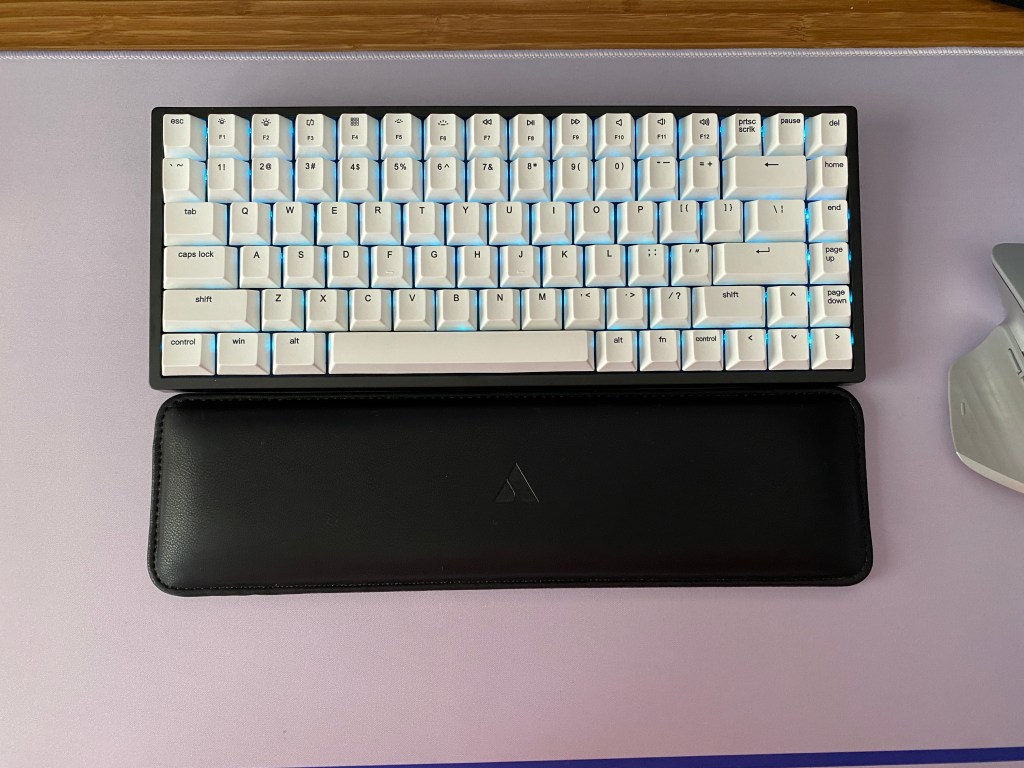
Wrist Rest: If you are someone who likes wrist rests or is not used to the height of mechanical keyboards, the pleather wrist rest is a great addition for you.
Microfiber Cloth: This is great for cleaning the board. Plus it’s always nice to have another microfiber.
Grips with Adhesive: Honestly I didn’t find much use for these but it looks like you can just attach these to the bottom of the board if you would like.
Documentation: There is a sheet that shows you all the macros and keyboard commands along with a user manual with all the information to help you get started.
Overall the packaging is quite nice. It is one of the nicest experiences I have had at this price point and the accessories add to the stock experience of the board.
Build Quality

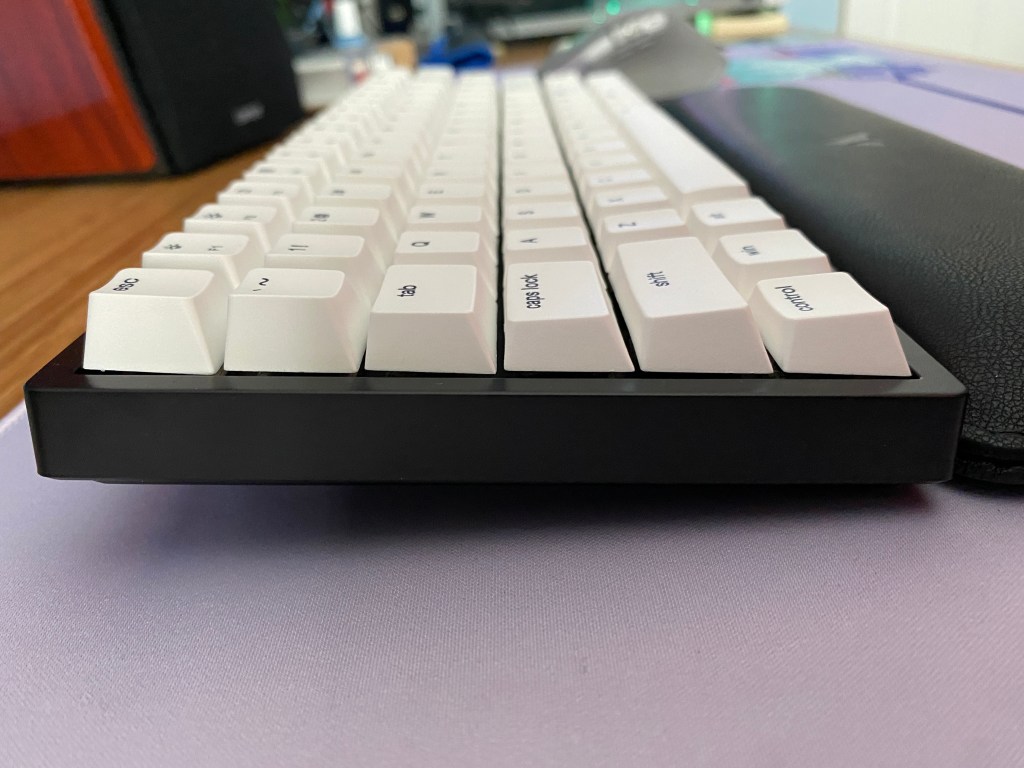
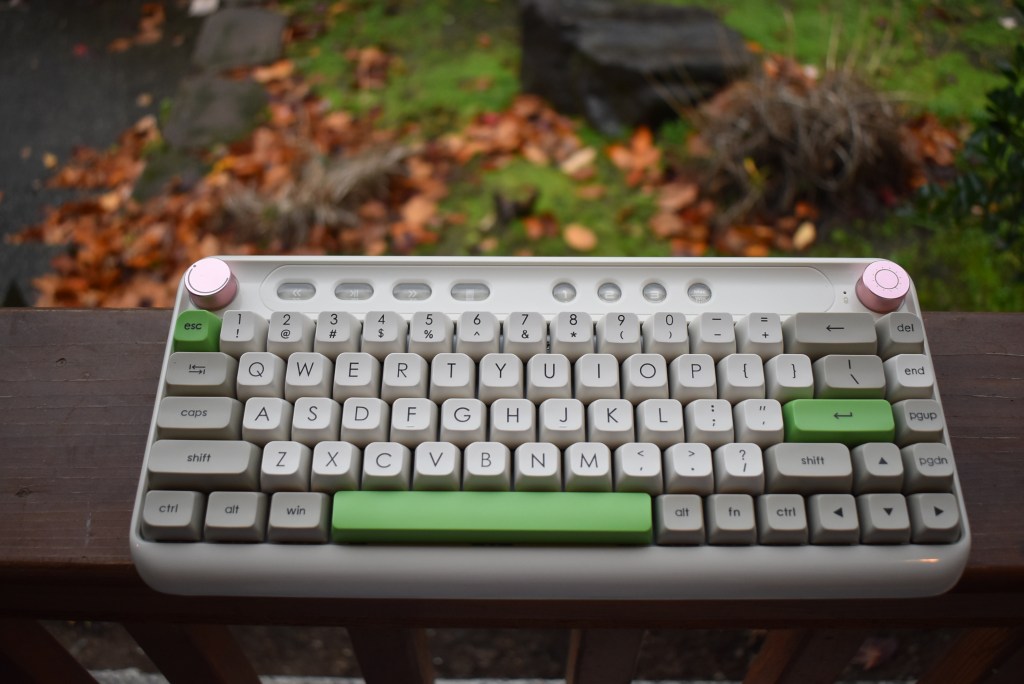
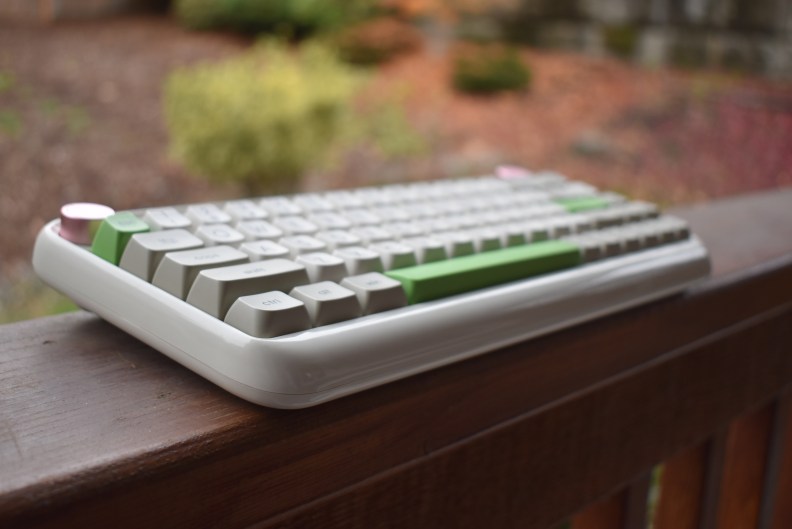
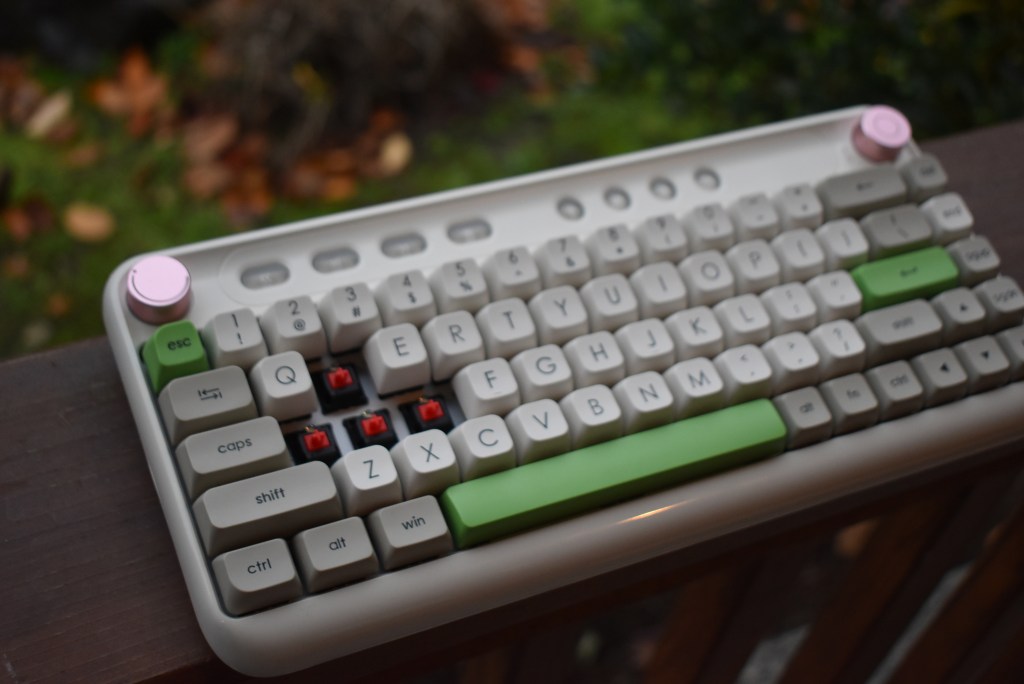
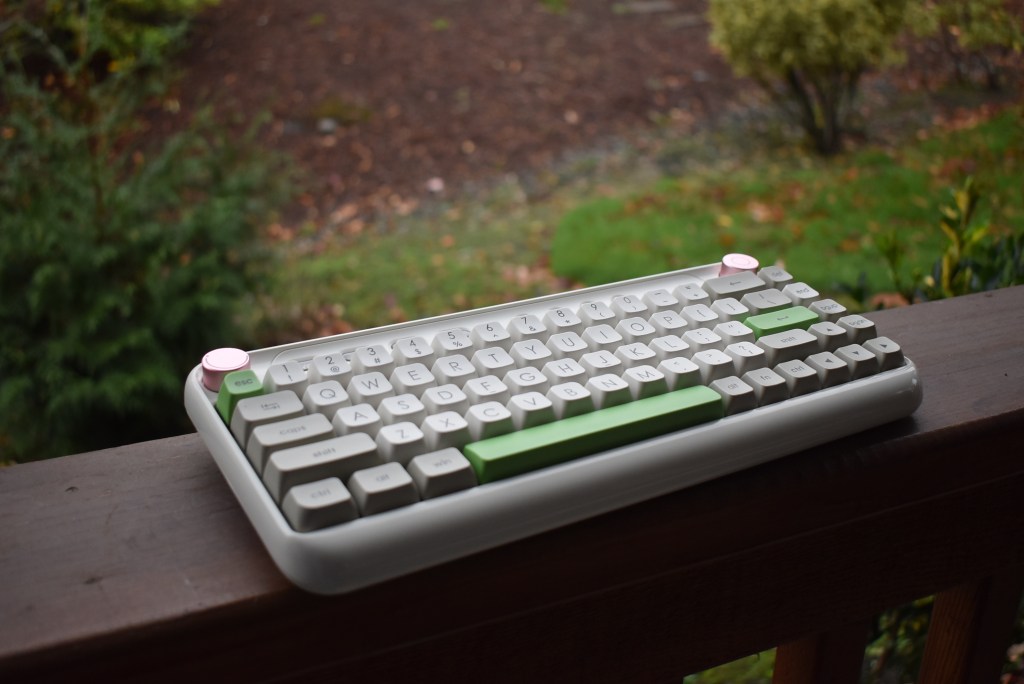
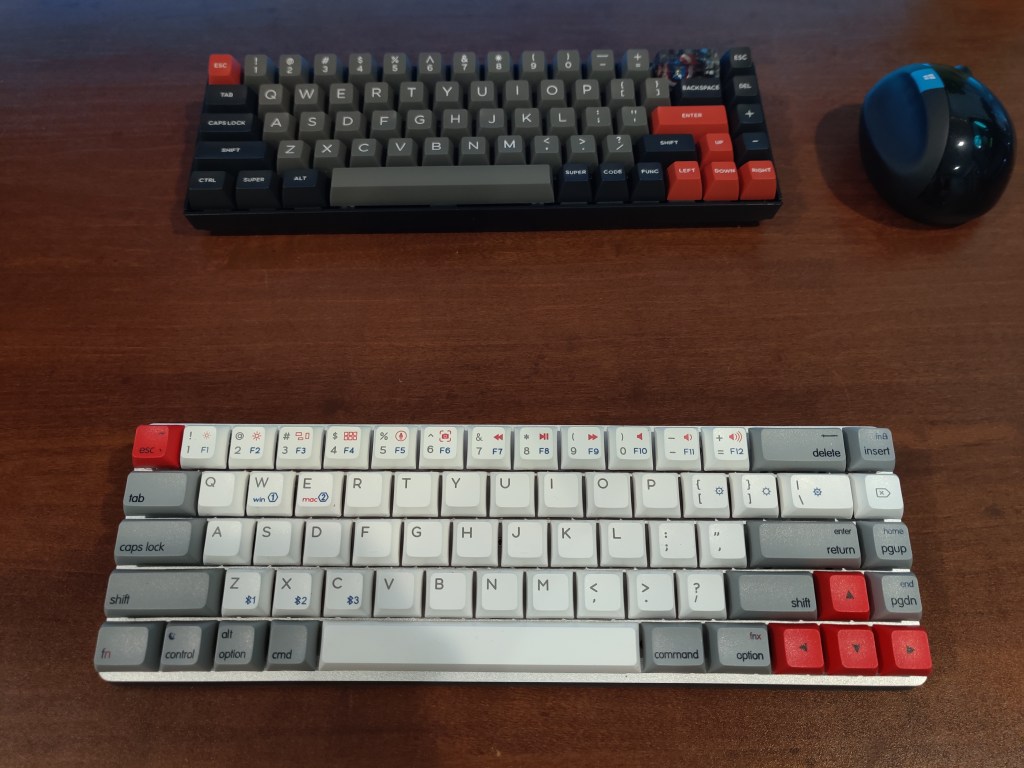
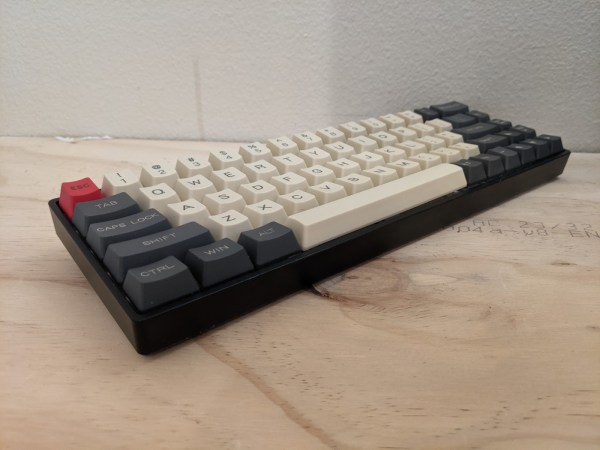
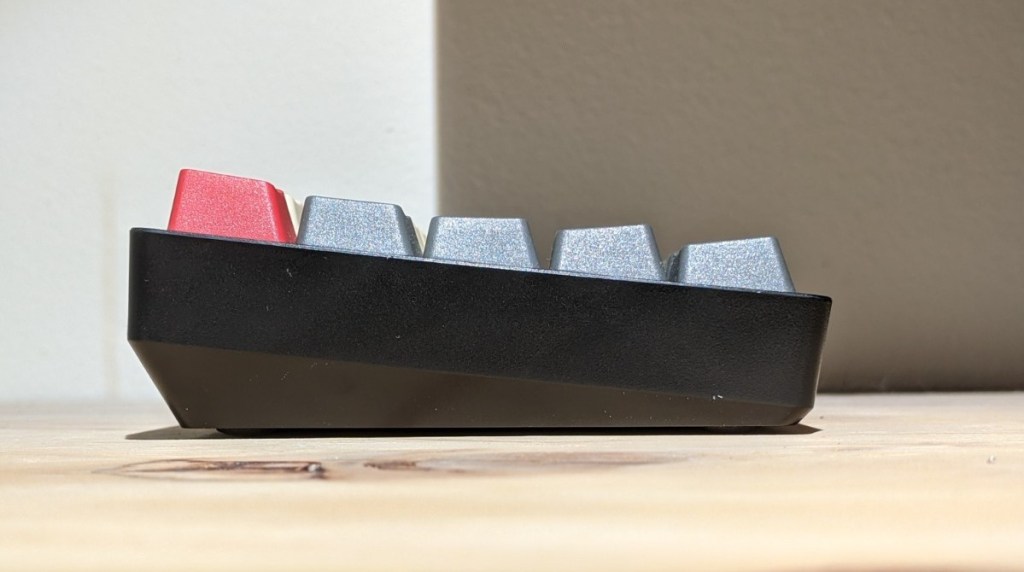
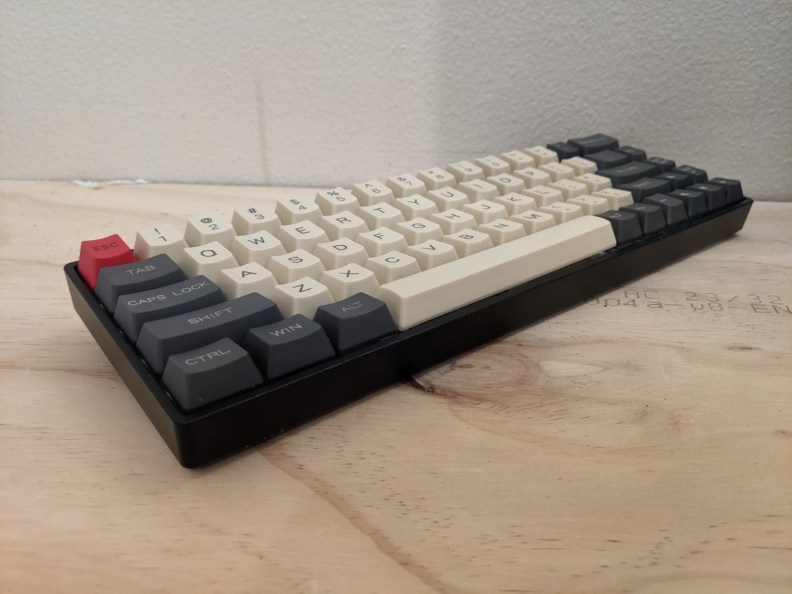
The Vissles V84 offers a dense all-plastic construction with a blacked-out look. The board has a moderate weight at about 0.82 Kg (1.82 lbs). Despite the plastic construction, the weight of the board still makes it feel quite hefty. In the hand, it feels more premium than most gaming keyboards at this price. Vissles also opted to put a removable plastic bezel around the sides of the board to improve the look of the board.
Unfortunately, competitors at the same price point are able to achieve the same look but with better materials like aluminum. The plate appears to also be plastic but feels quite solid and with a tray mount system, it creates a firm typing feel.
The V84 offers a 6-degree typing angle but comes with strong magnetic feet for more adjustment. Also on the bottom are four rubber feet that make the board only move around when you want it to.
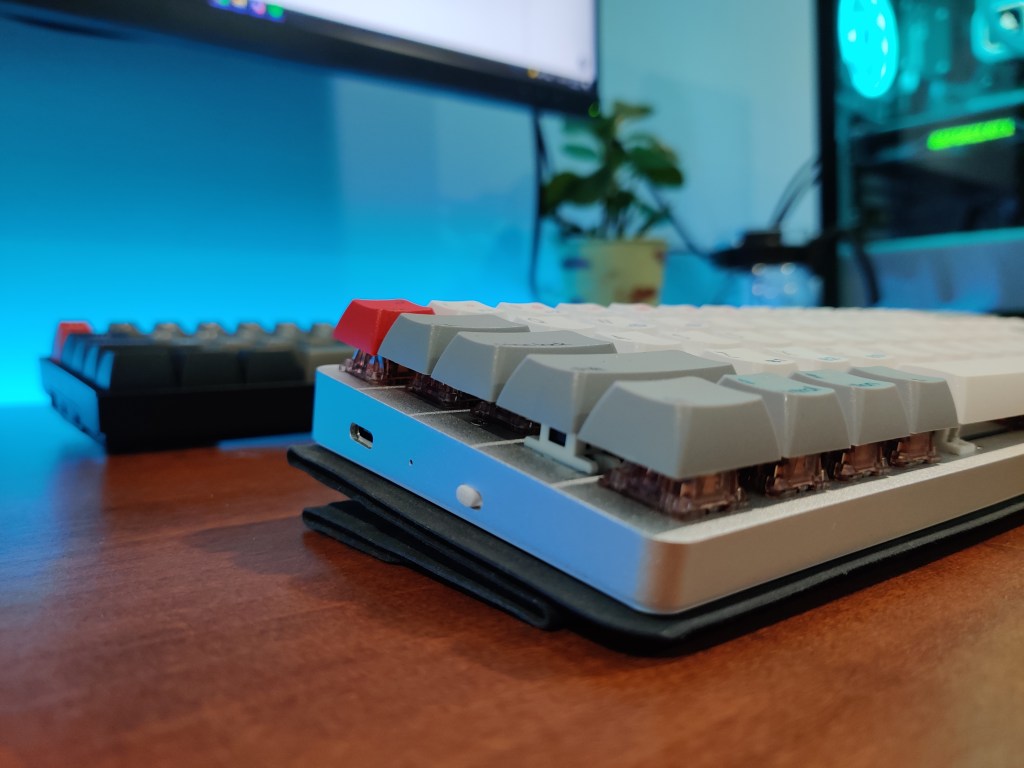
The board utilizes a right-mounted USB-C connection along with a button on the bottom of the keyboard to turn on the keyboard for wireless connectivity.
Although there is no use of metals to be found on this board, the Vissles V84 feels more solid than other keyboards in the price segment such as the Keychron K6 or gaming boards from Corsair or Logitech.
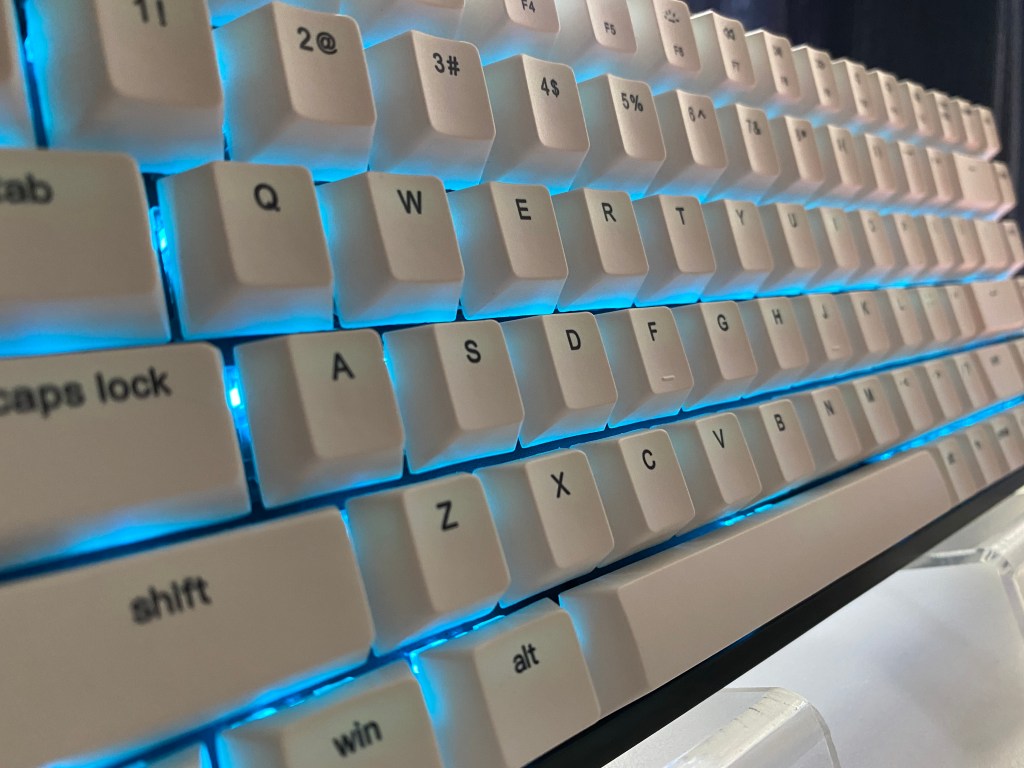
The Keycaps
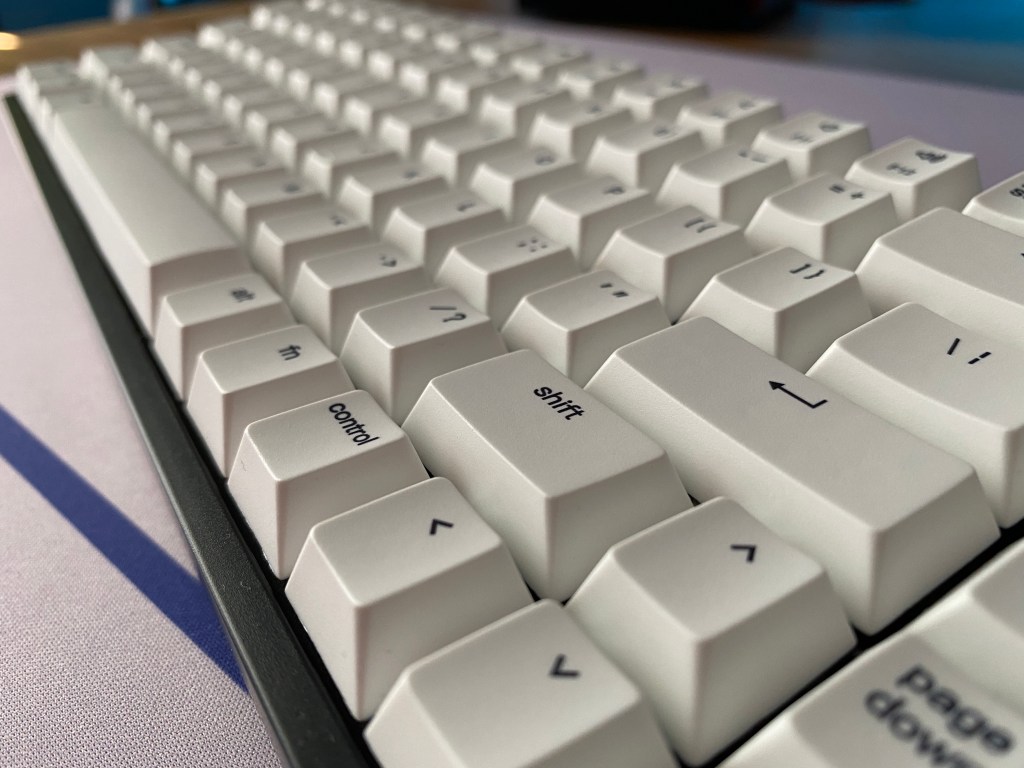
Depending on what version of the keyboard you purchase, there are two options for switches. There is a white PBT set in cherry profile and a grey ABS set in OEM profile with shine-through legends. The PBT option of the board will cost about $10 more but also comes with better switches. The ABS keycaps are the same keycap set offered on Keychron’s K series boards.
ABS material will develop shine more quickly than PBT keycaps. However, in my experience, these keycaps usually don’t develop much shine for the first few months of usage. The shine will come from the natural greases and oils of your hands. The OEM profile that they come in is the standard among pre-build keyboards. Since these keycaps are also shine-through, if you do care about RGB lighting then I would recommend getting the ABS keycaps with your Vissles V84.
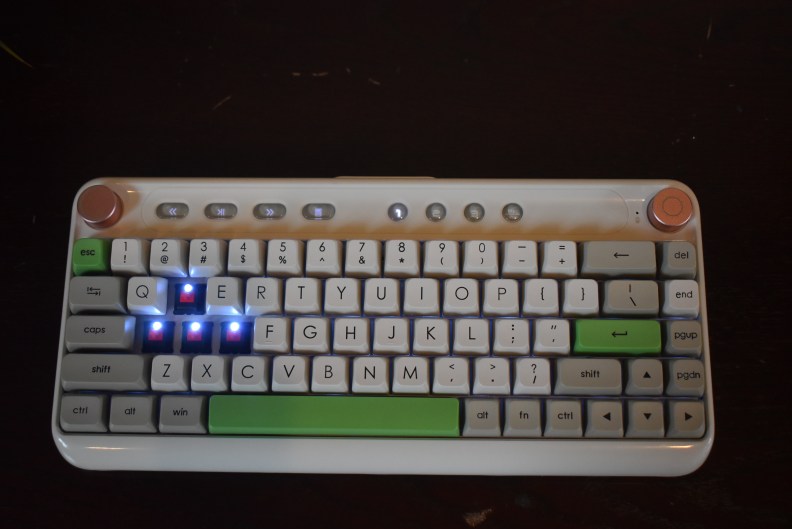
The PBT keycaps, on the other hand, are thicker, sound better, and look more durable. Unfortunately, however, I don’t recommend the PBT keycaps for one main reason. The Vissles V84 offers north-facing switches, what this means is that certain profiles of keycaps are not fully compatible with switches. This is the case with the Vissles V84 and cherry profile keycaps. As the keycaps are pressed down, the switches are not able to bottom out. Although the switches will still activate your key presses. The satisfaction that comes with mechanical keyboards goes away with this issue.
For this reason, I would save your money and go with the ABS keycaps. Then you can upgrade your keycaps to something in the MT3, XDA, or DCX profiles. For most people, the ABS keycaps are already a decent starting point so there is no need to worry about upgrading your keycaps unless you are interested in modifying your keyboard.
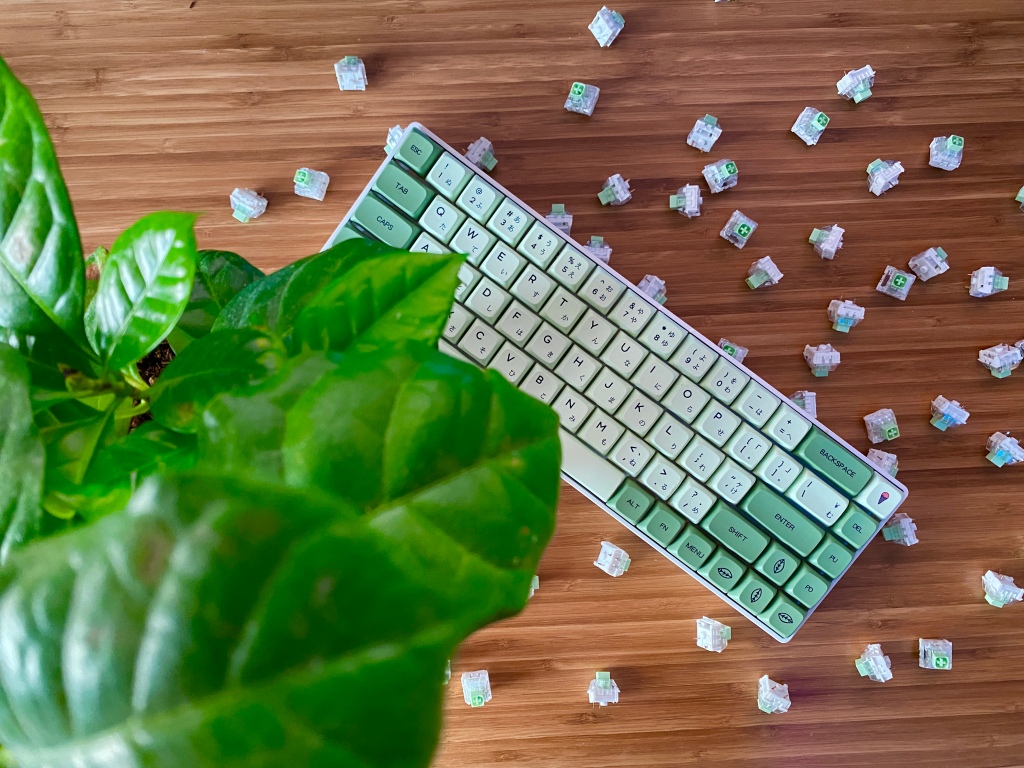
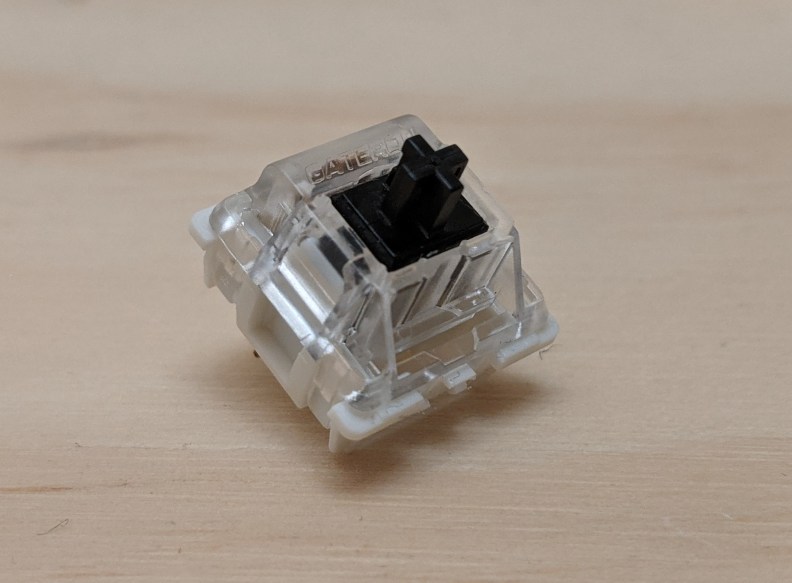
The Switches and Stabilizers
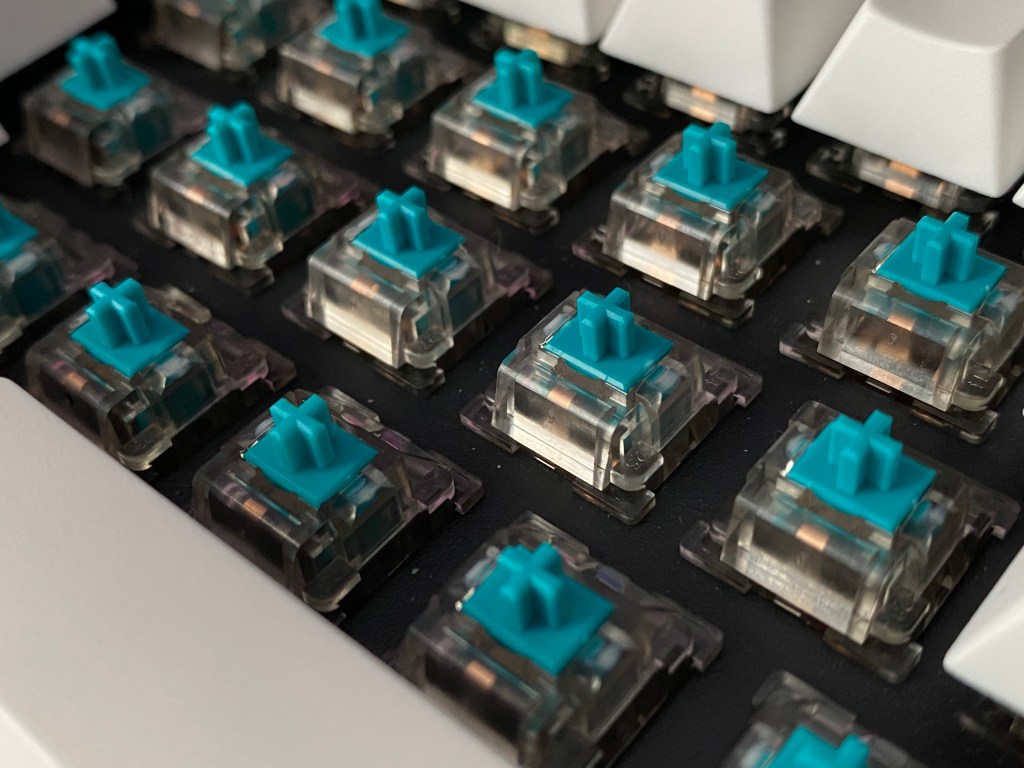
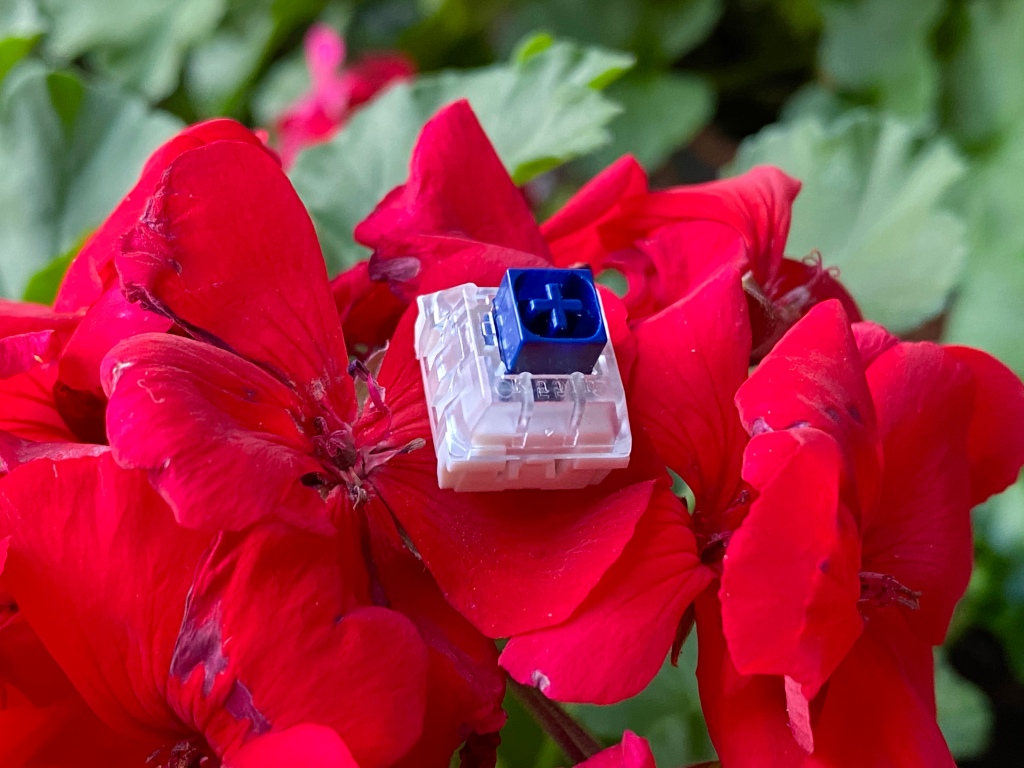
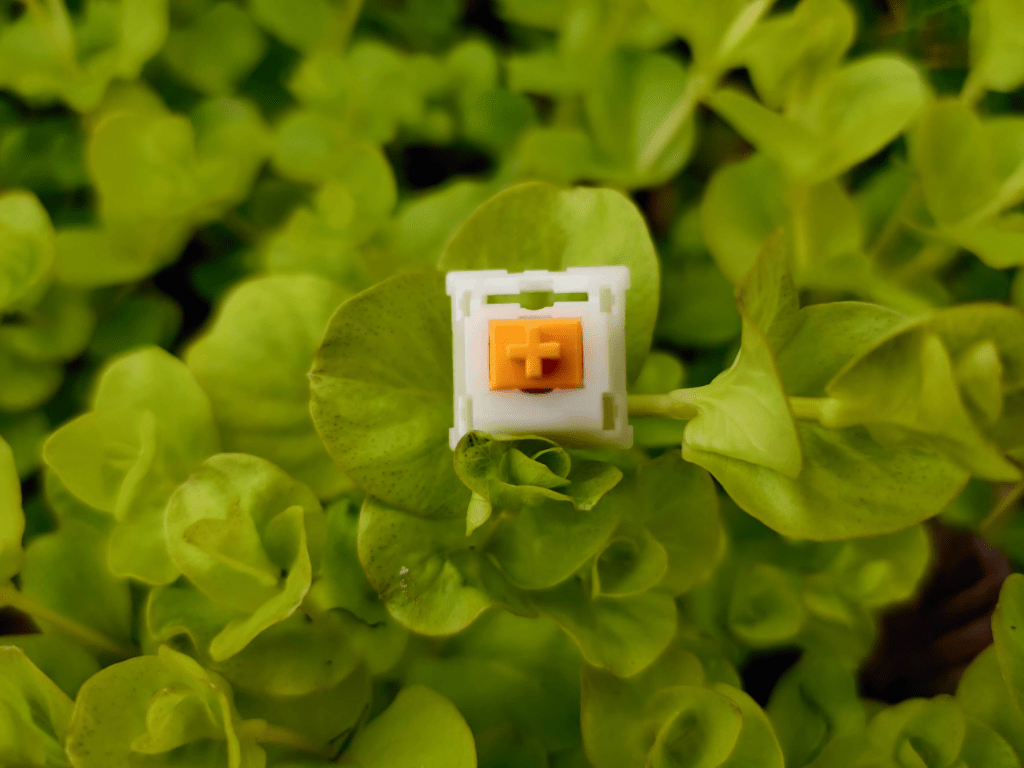
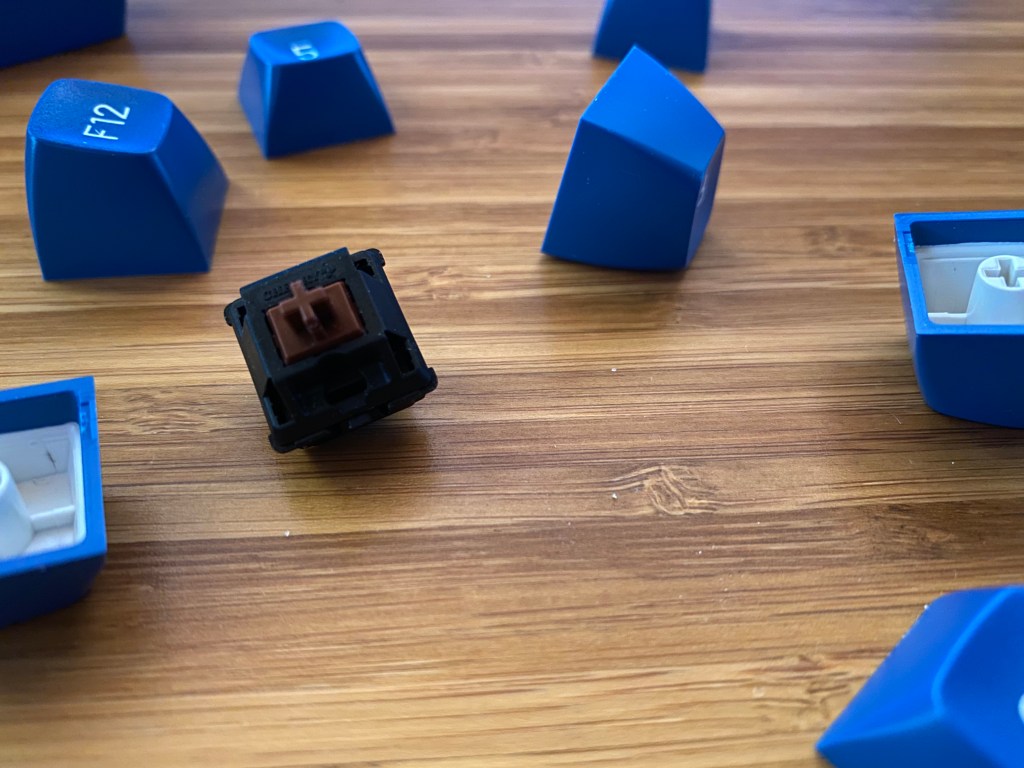
The switches are slightly disappointing for the price. It would have been nice to see some Cherry or Gateron switches. Instead, you can either choose from a selection of Outemu switches or Vissles’ own VS II switches. If you opt to get the Outemu switches you can choose from a linear, tactile, or clicky option, while Vissles’ VS II is a linear switch.
| Vissles VS II | A prelubed, light linear switch with a smooth travel |
| Outemu Blue | A medium-weight clicky switch. It has a loud sound and sharp tactility |
| Outemu Brown | A medium-weight tactile switch with a light tactile bump |
| Outemu Red | A light linear switch with a smooth travel |
Outemu typically provides switches for budget boards around the $50 price point or less. They are quite scratchy and don’t provide the best experience. In contrast, the VS II switches are prelubed and after a few days of usage feel pretty smooth. They aren’t as smooth as some higher-end linear switches, but they feel and sound better than the Outemu offerings.
The VS II switches are advertised as being silent switches. Despite them being quieter than Outemu switches, as they are lubed, they will not be as quiet as silent switches. They should be quiet enough for most office settings though.
As for stabilizers, they come prelubed and sound as good, if not better, than most of the competition at this price point. They sound about as good as Keychron’s options and better than most big gaming brands or companies like Redragon or Royal Kludge.
One of the best things about this keyboard is the sound. The stabs being prelubed as well as the inclusion of foams into the case of the board provide a full sound with no significant ping.
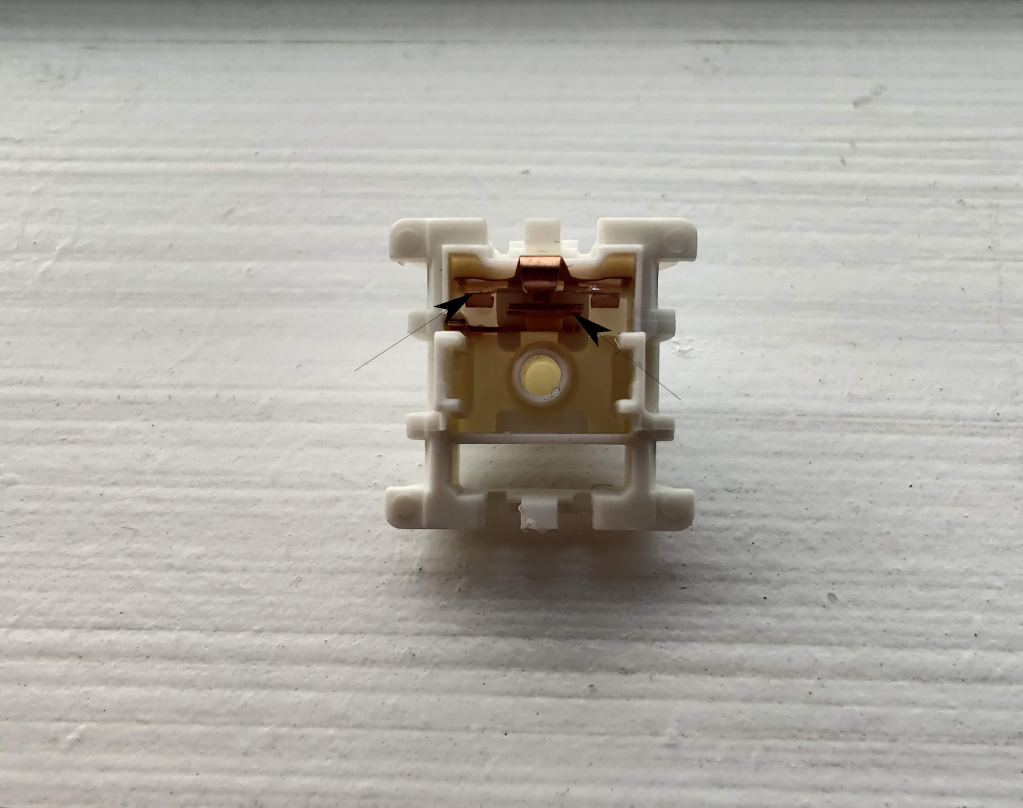
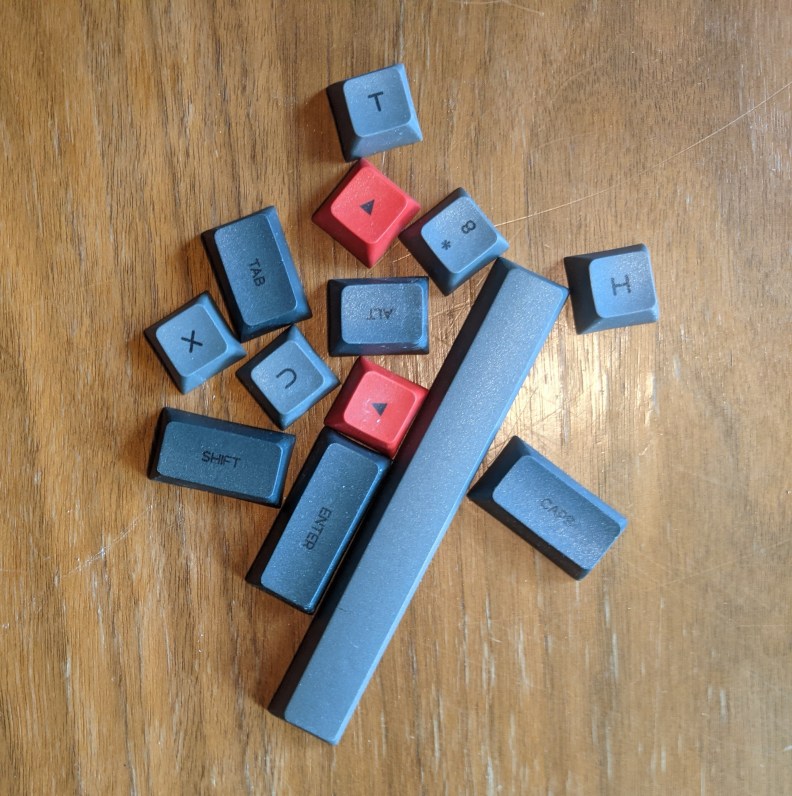
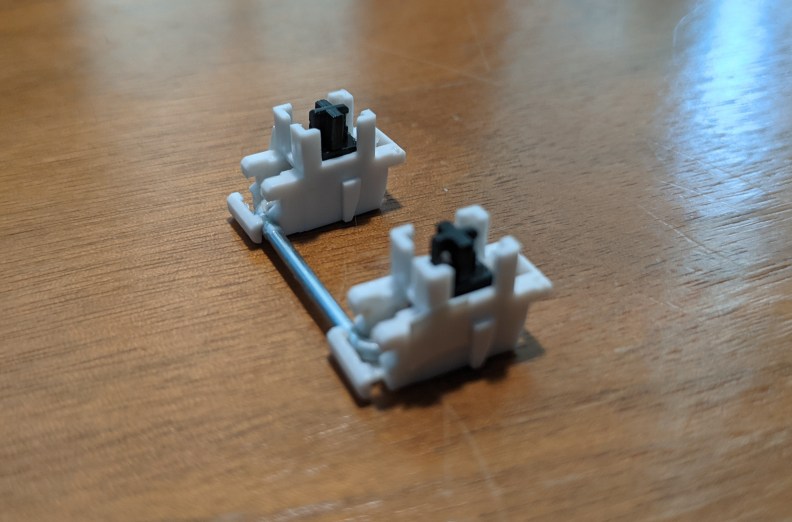
Hotswap PCB
As mentioned previously, the Vissles V84 comes with a hotswap PCB. The PCB supports 5-pin switches in a north-facing configuration. The sockets supporting 5-pin sockets mean that almost all mechanical switches will work with this keyboard. Again the north-facing sockets do prevent you from using cherry profile keycaps with this keyboard though.
Overall this is a great feature to have. If you want to change your switches, tune your stabilizers, or add additional foam to your keyboard. If you want to try out different switches to find your preference or just need to replace a switch that is broken then the V84’s hotswap PCB allows you to change out switches within just a few seconds.
Wireless Connectivity
One of the best features of the Vissles V84 is that it allows you to connect to up to five devices via Bluetooth 5.1. This makes this board a nice option as a work or travel keyboard. The Bluetooth works with all operating systems and is great for keeping your setup clean.
The battery is a 3750mAh rechargeable lithium-ion battery rated for about 20 hours with backlighting on and 160 hours with backlighting off. Their estimates are pretty accurate in my testing. Unless you are using shine-through keycaps, you could turn off the lighting and use your board for weeks or even a month without charging.
The board will go into a low power mode to save battery, however, it will wake up almost instantly. This is much better than other competitors like Keychron’s boards which take a few seconds to wake up from sleep.
The latency with Bluetooth is not really noticeable, although I would still use the wired connection for competitive gaming. Overall my wireless experience with the V84 has been flawless.
Mac Support
A nice feature of the Vissles V84 is that it has official MacOS support. Vissles not only supports Mac with this board but also offers additional keycaps for option, control, and command. Mac support is not uncommon with current keyboards but the additional keycaps are nice to see.
Note you will need to switch the keyboard into MacOS mode by pressing the function and s keys at the same time.
RGB Backlighting and Software
The Vissles V84 offers per-key RGB lighting. This can be controlled both via onboard commands or with Vissles’ software. The software is not too difficult to use and is better than what most of the competition has to offer at the price. The only downside of the software is that it is only supported on Windows. This leaves Mac users to only use onboard functions.
As for lighting, there are a variety of effects and it is decently bright. Their software allows you to control the lighting in more depth, but you can switch between up to 28 different effects without it.
Conclusion
Note: Before March 31st you can get an additional $10 discount by using the code “V84” if you buy from Vissles website.
Even in a competitive segment, the Vissles V84 seems to come out on top and beat out even the long-standing recommendation of the Keycrhon K2.
You get brighter RGB lighting, more accessories, a better stock sound, software, and a heftier feeling build. The use of foam makes the board sound pretty decent stock and the use of software is not even a feature that Keychron offers.
The only downsides compared to Keychron are a worse stock switch selection and no aluminum case option. The use of Outemu switches is pretty disappointing and if you want to opt for Vissles VS II switches you will be given cherry profile keycaps that will cause interference ruining the best available switches between the two of the boards. The no aluminum case option isn’t great but the V84 still managed to have solid-feeling buttons, nice front USB-C placement, and a weight that makes the board feel sturdy.
Additionally, Vissles provides mac support and prelubed stabs. If you do throw in some after-market switches and keycaps into this board though, then you can get a very solid sound experience without needing to build your own keyboard.
If you really want an aluminum case but still want to maintain wireless connectivity, then options like the Royal Kludge RK84 Pro or Keychron K2 may be better for you.
We hope that whatever your needs are, you find the right keyboard for you. If you would like to keep looking at other options, check out some of our other keyboard reviews.


You must be logged in to post a comment.