Skyloong has a reputation for making strong valued keyboards that provide a good medium between gaming keyboards and going fully custom. Skyloong’s GK75 Aluminum Kit allows you to get a keyboard that is well made and sounds good with only ten minutes of actual build time.
The Skyloong GK75 is a 75% mechanical keyboard that you can find either as a prebuilt or kit. The GK75 is feature-packed and offers a lot of flexibility.
If the Skyloong GK75 sounds like an interesting board for you keep reading to find out more.
The Verdict
⭐⭐⭐⭐
Rating: 4 out of 5.
The Skyloong GK75 is a great-value keyboard that gives buyers an opportunity to experiment with the mechanical keyboard hobby without too much risk or difficulty. With a hotswap PCB, preassembled case, installed foam, and prelubed stabs, the GK75 just needs switches and keycaps.
Additionally, the aluminum build, knobs, MacOS support, vibrant backlighting, and optional wireless connectivity are all great features that add to the experience.
Unfortunately, the Skyloong GK75 uses north-facing sockets on its PCB, preventing the use of cherry profile switches keycaps. This is paired with dated software and plate mount stabilizers. At this price point, those are downsides that most competitors don’t have.
That being said if you like the knobs on this board and the GK75’s high-quality design then it is a solid option. Ultimately Skyloong gives the buyer an easy-to-use package. It requires minimal if any modding to make the board sound good and comes with plenty of extras in the box.
If you want a number of features and the GK75 design is enticing then it may be the board for you. Plus if you don’t plan to use cherry profile keycaps then you may find the GK75 does not have any major issues.
Opening the box you will find the GK75 with a plastic cover over it. Additionally, there are a variety of accessories.
Coiled USB-C Cable: There is a pretty decent quality braided and coiled cable. It features an aviator and comes with a black and red colorway that doesn’t really match the theme of the keyboard. At the end is an adapter already plugged in to make it support USB-A but you can remove this for a USB-C to USB-C connection.
Keycap and Switch Puller: This comes as a switch and keycap puller in one. Usually, I find these a bit harder to use than a dedicated one for each purpose but this one does the job.
USB-A to USB-C Adapter: Whether you want to use the GK75 with a laptop or computer you should have no issues with connectivity with this adapter. That being said you probably won’t need this adapter as there is already an adapter on the cable that you can remove.
CNC Aluminum Knobs: You get 4 high-quality CNC aluminum knobs in the box that you can add to the board as you wish.
Split Spacebar Module: If you would like to use the GK75 with a split spacebar then you can. This way you can have 3 buttons instead of just one where the spacebar is. The stabilizers here will already be lubed and ready to go.
2.4 Ghz Dongle: If you opt to get the wireless version of the board then it will come with a 2.4 Ghz dingle in a slot at the bottom of the board.
Extra Parts: In case you ever need them, Skyloong includes some extra screws, standoffs, and silicone washers. This is really nice to see if you ever lose a part or are further modding your keyboard.
Documentation: You get a manual about the board that comes in what appears to be Mandarin Chinese, along with some information about Skyloong.
In my prebuilt copy, I got a few other accessories. These should come with the GK75 kits.
Extra Keycaps: I got all the remaining keycaps that would have been in a set. Skyloong lets you get all the keycaps that you don’t use with your board in case you want to use the keycaps with another board or want to try using different switches.
Extra Switches: Additionally you will have about six switches that match whatever you get in your board. This is helpful if you ever bend a pin or want to replace a knob with a switch.
Note that if you choose to get a prebuilt then the extras that you get may include different keycaps as Skyloong sells many different versions of the GK75.
Overall all the extras inside the box are really nice to see. Few companies match this experience and it is helpful as you don’t need to buy any extras.
Build Quality
The main element that makes the GK75 Aluminum Kit an upgrade over the standard GK75 is the build quality. For $100 more you get an upgraded aluminum case that feels heftier. It comes in at about 1.2 Kg or 2.65 lbs. The aluminum kit comes in either a medium grey or a dark blue color.
Although the stock angle of the board is quite comfortable, there are two additional levels of flip-out feet. These are made of plastic, as is the rest of the bottom of the board. All the major touchpoints like the top case and the knobs are still aluminum though.
You get a left-mounted USB-C port that is quite deep in the board. This is paired with routing channels through the left, center, and right parts of the front of the board. Personally, I find that cable routing channels don’t actually do that much for cable management and just add more hassle. Next to this USB-C port is a spot for the USB dongle.
When buying the kit you get your choice of either a polycarbonate or fiberglass (FR4) plate. Both materials are on the softer side compared to materials like brass or aluminum. I personally went with the FR4 plate for a slightly firmer and muted sound but many people prefer polycarbonate for a flexible and thocky typing experience.
The plate uses a gasket mount structure similar to that of the KBDFans KBD67 Lite. The mount is integrated into the silicone dampening between the plate and the PCB. This offers a deeper and softer typing experience that has made the gasket mounting system popular. However, this form of gasket mount won’t be extremely soft and will still provide a decent layer of firmness because the silicone dampening limits the amount of possible flex in the PCB and plate.
Generally, Skyloong makes well-made products and the GK75 is no different. The build quality of the GK75 Aluminum Kit matches up with other boards at its price point.
The Build Experience
As with all keyboard kits we like to discuss the build experience. Typically when building a keyboard it is nice to have a guide but luckily the GK75 kit is so easy to build with, so you don’t even need a guide.
The case, PCB, plate, and stabilizers are already assembled in the board. Additionally, the already lubed stabs mean you don’t need to open up the board if you don’t want to. You just need to throw in some switches and put on your choice of keycaps. The GK75 Kit can be assembled in about 15 minutes or less.
The best part about the build experience for the GK75 is that it is easy to work with and that sounds good out of the box. This is especially nice for those who are new to keyboards.
The Keycaps
With the GK75 kit, there are no keycaps included with the board. However, Skyloong included some of their own keycaps for me to try out. I tried their Dark Blue Pink set in the custom GK5 profile. This profile is similar to other low profiles like XDA but it has a substantial difference in the angle of each row for a more comfortable typing experience.
This set is included with the Dark Blue GK75 boards and feels pretty high quality. It is made from PBT plastic, with some texture, and doubleshot legends for durability.
Since the GK75 Aluminum comes as a kit, you can choose whatever keycaps you would like. Note that because the GK75 PCB only supports north-facing switches, it will not be compatible with any cherry profile keycaps.
If something similar to cherry profile is important to you, check out Drop’s DCX profile keycaps. However, if price is a concern, there are sets that cost as low as $20 that support the layout of the GK75.
The Switches and Stabilizers
Since this board comes as a kit, no switches come with the GK75. However, the board does come with some prelubed plate mount stabilizers that sound pretty decent.
Typically plate mount stabilizers are not as good as PCB mount stabilizers but I found these to be pretty decent in my unit. At this price point, it would have been nice to see PCB mount stabilizers.
I did have the opportunity to test some of Skyloong’s Glacier Brown switches that come in some of their prebuilts. The Glacier Browns feel about as heavy as Cherry Browns but have a tactile bump that feels similar to some top tactile switches like Boba U4Ts. I am quite impressed with the Glacier Browns and lubed they feel pretty smooth too.
Since this is a kit, almost all mechanical switches will work in this board. If you need any help check out our best linear switch, tactile switch, or clicky switch guides.
If you do opt for a prebuilt version of the GK75 make sure to get one that is mechanical. Not only do the optical switches often feel less satisfying but you have vastly fewer options to choose from on the aftermarket compared to mechanical switches. Additionally, you only save $20 to get optical switches.
The gasket mount system and included foam allow the GK75 to sound good with the majority of switches. If you put in lubed switches then minimal if any modding will need to be done.
Hotswap PCB
Skyloong offers a hotswap PCB with the GK75. This makes it possible to change out switches in just seconds. The sockets support 3 and 5-pin switches.
Unfortunately, the sockets come in a north-facing configuration. This means that there will be interference with cherry profile keycaps. As a result, the typing experience will be less satisfying with cherry profile keycaps.
Some of the sockets are equipped for both switches and knobs. The knobs fit along the right side of the board or can replace the escape key. Swapping the knobs won’t necessarily be as quick as changing out switches but the fact that the knobs don’t need to be soldered is nice to see.
For anyone who likes a split spacebar, Skyloong gives you the choice of both. With a few screws, you can take out the full space module and replace it with the split one. This is a simple solution where you can try both without needing to buy a totally new version of the keyboard.
The hotswappable knobs and spacebar module are unique features to see in a keyboard. However, the north-facing switches are potentially the biggest downside of this board.
Knobs and Media Keys
The GK75 offers media key functions both through onboard commands and with the knobs. You can swap out the knobs in six different positions. This means you can use four different knobs or just one.
The knobs have the ability to do anything from changing the volume in the middle of a game to moving through a timeline while editing a video. Whatever it is, Skyloong offers you more than enough knobs to control whatever you may need to do.
Wireless Connectivity
The GK75 offers wireless connectivity both via 2.4 Ghz and Bluetooth 5.1 with a $10 upgrade. Via Bluetooth, you can connect to up to 3 different devices.
Note with Bluetooth you will also only get 6-key rollover compared to N-key rollover. That being said, I would recommend using the 2.4 Ghz over Bluetooth as it is faster and in my testing had similar performance to a wired connection.
The GK75 comes with a 4000 mAh rechargeable lithium-ion battery. This should get you about three weeks of normal usage. If you don’t plan to use the RGB for a cleaner look you could get more than a month of use and only need to occasionally charge the board.
The GK75 offers the standard 1000 Hz polling rate. This paired with the GK75’s power saving mode helps it keep its solid battery life with good performance. If you start typing, the GK75 will immediately wake from sleep.
Mac Support
Skyloong and Epomaker are typically good about Mac support and the GK75 is no different. On the bottom of the board is a switch to change between Mac or Windows.
You can even use the board with an iPhone or Android although you may not have some functionality in the modifier keys.
If you plan to use the GK75 with a Mac we would recommend getting a set with Mac-specific keycaps. Most of the sets from Skyloong come with support for Mac and Windows keys. If you opt for the GK75 prebuilts then you should find extra Mac-supporting keycaps.
Backlighting and Software Support
Skyloong’s GK75 offers vibrant RGB lighting that is addressable both with the software and onboard controls. Personally, I like the lighting off with regular keycaps but if you choose to get some shine through keycaps then they will look quite good with this board.
Software is another weakness in the GK75. The Epomaker and Skyloong software looks quite dated and is pretty confusing in 2023. The 6+ software is better than offerings from Redragon but at this price point, most custom boards support QMK or VIA.
Changing the lighting requires you to scroll through a list of vague names. Editing the key functions is not very difficult but it also has a potentially confusing labeling scheme. The software does take good use of the knobs and it is worth mentioning that you can enjoy this board without the software.
That being said, I would like to see either a big overhaul of the 6+ software or a switch to VIA. Not only is VIA open source but it is very easy to use, looks good, and runs easily on any system.
Skyloong’s GK75 is a feature-packed keyboard that comes in a practical but efficient 75% form factor. Wireless connectivity, a collection of knobs, a hotswap PCB, and a generally easy-to-build experience make the GK75 Aluminum Kit a great option. The GK75 offers a build that will sound good with minimal work.
If you find that the aluminum build is not important to you, you can save your money and take a look at the plastic GK75 that comes in at about $100 cheaper. In fact, the plastic version of the GK75 is one of Skyloong’s best lines.
Skyloong makes fantastic boards and the GK75 Aluminum Kit is no different. Before you go out and buy the GK75 though, you should consider other options like the Keychron Q1 or Glorious GMKK Pro if you want south-facing switches.
If you are looking for a kit that just needs some switches and keycaps then I would still recommend the GK75 in many cases. The GK75 offers wireless connectivity, multiple knobs, and a split spacebar which are features that you don’t see in many other boards at this price.
If Skyloong upgraded its software and supported a PCB with south-facing switches then the GK75 Aluminum Kit would be an easy favorite over the other competition but for right now it’s just one of the options in the mix.
In the world of gaming mice, we have grown accustomed to slim, lightweight mice for FPS titles. However, the UtechSmart Venus Pro provides a package that suits those with bigger hands who want more buttons for MMO, strategy, or any other non-FPS title.
If the UtechSmart Venus Pro sounds like a potential new mouse for you, then keep reading to find out more.
The Verdict
⭐⭐⭐⭐
Rating: 4 out of 5.
The UtechSmart Venus Pro is a wireless gaming mouse that boasts a total of 19 buttons. This makes the Venus Pro an excellent choice for MMO, MOBA, and RPG titles. If you have a palm grip and medium- to large-sized hands then this mouse could be very comfortable for you.
However, the Venus Pro is also a mixed bag. The buttons and sensor may not be a problem for everyone but in FPS titles they would require a refresh to compete with the newest mice at this price point.
To compound on that, the Venus Pro is quite heavy making it harder to perform quick flicks, despite the high-quality feet. Additionally, while the RGB lighting is impressive for its price point, the software falls behind most of the competition today.
The niche design can make the Venus Pro either a great or terrible fit for you. Its ergonomic shape, vibrant RGB lighting, and numerous buttons make the Venus Pro a perfect option for the right audience. On the other hand, if you are an FPS gamer looking for the quickest response times and lightest possible weight, then the UtechSmart Venus Pro may not be the option for you.
In the box, you will find the UtechSmart Venus Pro with a solid amount of accessories.
Manual: This helps explain the basics of the mouse, the functions of the software, and basic warranty information.
Cable: A 1.9m (6.2 ft) braided USB-A to USB-C Cable.
Dongle: 2.4 Ghz dongle for the wireless connection.
USB Stick: Attached to a small card to download the software for the mouse.
Sticker: A square sticker with the logo.
Bag: Grey-colored bag that holds the mouse if you are on the go.
Extra Feet: Probably not needed but you will find some extra feet just in case.
Build Quality
The UtechSmart Venus Pro is constructed from strong plastic with liberal use of textured material throughout. The mouse features an all-matte black look with one portion in the palm area that is gloss plastic that, honestly, looks a bit out of place.
At just under 127g, the Venus Pro feels quite hefty for a mouse in 2023. That being said, the use of materials makes the Venus Pro feel premium.
One area that makes the weight slightly less noticeable is the feet. The Venus Pro comes with decent-sized feet, made from PTFE, that provide a smooth glide. Now you won’t get quick flicks with this mouse but it does make it better.
The Venus Pro has a standard USB-C port for charging and at the bottom of the mouse is a slot for the dongle. The slot is magnetic which makes it very easy to find the spot for the dongle, but unfortunately, the dongle does not fit flush in the slot.
Overall the mouse feels well made and that is supported by a one-year warranty. There is minimal rattle and no flex in any part of the mouse. It would just be nicer to see a lower weight.
Style and Comfort
The styling of the Venus is really what makes it unique. It has an ergonomic shape that forces all your fingers into place. The Venus is on the taller side and does have a decent curve to it. The 12 side buttons are positioned perfectly for the thumb.
The styling of the Venus Pro is perfect for a palm grip but not the best fit for fingertip or claw grips. Additionally, the mouse is designed for right-handed use. For those with smaller hands, the Venus Pro might not work too well. However, those with medium to large-sized hands should find this mouse to be a comfortable fit.
The main two buttons and scroll wheel are easy to find. However, since there are 12 small side buttons, it can be hard to click the right one. This is especially the case due to the lack of texture on each button. One strong element is that each row is angled differently so you can find each one.
With muscle memory, this could definitely become earlier, but I found the buttons to be more inconvenient than normal button placement in games. They could be nice to have in some slower-paced games or for work-related tasks.
The design of the Venus Pro can be either an upside or a downside. If the Venus Pro suits your hand then it could be perfect because there are not a lot of alternatives at this price. However, if you are not used to a mouse of this style, then it may take some time to get used to.
Switches and Scroll Wheel
The UtechSmart Venus Pro comes with 16 programmable buttons and 19 buttons in total. The DPI buttons, and “profile switch” button on the bottom of the mouse, cannot be programmed.
The scroll wheel is rubberized with light tactile steps. All the buttons on the top side of the mouse are clicky and feel snappy. On the other hand, the side buttons feel a bit inconsistent. Underneath the buttons are Omron switches that are rated for up to 10 million switches.
There is a button that triple clicks very quickly, but it would have been more helpful if this could be switched to a spam click button. In my experience, it is quicker to triple-click with mouse button one rather than move my finger to this dedicated button.
Additionally, the lack of forward and back buttons out of the box was frustrating, but this can be easily changed within the software.
Sensor and Polling Rate
The UtechSmart Venus Pro comes with a Pixart PAW3335 sensor. It offers a DPI range from 100 to 16000 with adjustment steps of 100. While the PAW3335 might be an outstanding option for mice at the $30 price point, it is average for the $50 price point in 2023.
The lack of adjustment of DPI in increments of 50 is pretty disappointing to me as I was not able to use my usual DPI. Additionally, if you aren’t looking for this mouse shape, there are plenty of mice from the likes of Glorious or Logitech that will give you better sensor performance for only about $10 more.
The Venus Pro features an industry-standard 1000 Hz polling rate. This can be changed both in the software and with the profile switch button at the bottom of the mouse.
RGB Lighting
The UtechSmart Venus Pro features RGB lighting on the logo, side buttons, scroll wheel, and front of the mouse. I didn’t find the lighting to be over the top and the lighting is defused quite well. It can help add to the theme of your desk and if you don’t like it, you can easily turn it off.
The lighting also serves some functions. When plugged in, the Venus Pro glows yellow until the battery is full. When the mouse drops to 20% charge, a red breathing effect lets you know that it needs to be charged.
Additionally, four red LEDs display your selected DPI level. These will be on regardless of if the rest of the RGB is on or not.
On the bottom of the mouse, you can either turn on the Venus Pro in RGB On or RGB Off mode. RGB Off is a great way to save battery or have a more discrete look for the office. However, if you are in RGB Off mode, you won’t know that your device is low on battery until it dies.
Wireless Connectivity
The main difference between the regular UtechSmart Venus and Venus Pro is the wireless connectivity. The Venus Pro supports 2.4 GHz wireless via a USB dongle. Note this won’t be as fast and reliable as the wireless tech from top gaming brands like Razer or Logitech, but it is certainly a step up from Bluetooth.
A 2.4 Ghz connection may perform slightly worse than wired but in my experience it did not impact me in RPG, sim, or open-world titles. Only in FPS games may you benefit from a wired or better wireless mouse but that mostly comes from the high switch latency and sensor.
The Venus Pro does not feature Bluetooth but that is pretty common for gaming mice. For travel or using the Venus on multiple devices, this may be annoying but you can store the dongle in the bottom of the mouse and take it with you.
As for battery life, the UtechSmart Venus Pro is rated for 70 hours of battery life but with RGB on at a 1000Hz polling rate, you should get about half a week of regular usage.
Software Support
Generally, software is not the most important element of a gaming mouse, but it is a great way to unlock its potential. This is especially the case with all the programmable buttons. UtechSmart’s software allows you to change DPI, button mappings, lighting effects, and create macros. Battery life is also displayed in increments of ten here.
Honestly, the UtechSmart software is not the best. While it does not miss any major functionality, it lacks refinement. One key flaw is the gamery look with a non-rectangular window. Additionally, you can’t even maximize the window. Unfortunately, this software also only works on Windows, limiting functionality for anyone who primarily runs MacOS or Linux.
In the UtechSmart software, some features don’t feel as complete as other mice in the category. For example, only one lighting effect can be applied to all LEDs. Furthermore, there is only one user profile, which could be inconvenient for someone who potentially shares the mouse between different devices or people.
I will commend the fact that UtechSmart includes a USB with the software. This makes setting up the software easy and saves you from trying to find it on their website.
The UtechSmart Venus Pro might not offer the market’s usual hyper-lightweight, FPS-ready mouse, but it serves a distinct audience. For those who want an ergonomic mouse with tons of buttons, wireless connectivity, and quality RGB lighting, the Venus Pro is a fantastic option that won’t break the bank.
Despite the unique design, there are several flaws that come with its lower price point. You get an average sensor found in $30 mice and a click latency that makes the Venus Pro a second choice for competitive gaming.
If you like the Venus Pro but are looking for top-of-the-line performance, consider the Corsair Scimitar Elite Wireless or Razer Naga V2 Hyperspeed. They will offer more accurate sensors, lower latency, and better software if you are willing to pay double the price.
With plenty of buttons for macros, vibrant RGB, and a design that perfectly suits a palm grip, the UtechSmart Venus Pro is the ideal option under $50 for any MMO, MOBA, RPG, or simulation gamer.
While understanding basic audio terms like bass or treble may not be too confusing, many audio terms can make understanding the world of audio confusing to understand. If you are just getting into the audiophile hobby, you may hear a ton of terms that you are not familiar with.
Today we will help you understand a variety of audio terms that you may find useful now and in the future.
Notes
The audiophile world is filled with subjective opinions. Even though this guide will help you to understand phrases that reviewers or fellow hobbyists may use, many of these terms are used to describe how something subjectively sounds to them. While there is an objective point to many points made about how something sounds it is good to take into account the personal bias and preferences of others.
What Even Is An Audiophile?
What Is An Audiophile?
An audiophile is someone who is enthusiastic about high-fidelity audio in the music that they listen to. Someone who is in the audiophile hobby or has an interest in it may try out different headphones, speakers, amplifiers, and other audio devices to experience music from a different perspective or to get a clearer sound.
What Is Hi-Fi Audio?
Hi-Fi or High Fidelity audio is a type of audio where there is a lot of detail in the sound. A strive for Hi-Fi audio is one of the main interests of audiophiles.
Hi-Fi audio is only supported in certain file formats and on a few platforms. The popularity of Hi-Fi audio is constantly growing and because of that more platforms are supporting it than ever. Still finding tracks with high quality isn’t always the easiest.
Finding a track that has a high resolution is also just one part of the equation. Having a pair of premium headphones, an amp, and maybe a DAC is also necessary to fully appreciate this music.
It is also important to note that you can still appreciate quality music without listening to a song labeled as being Hi-Fi or Hi-Res.
Audiophile VS Regular Listener
While audiophiles and regular music listeners both like music, both appreciate music in different ways. An audiophile appreciates music in the same way as a regular listener but focuses more on the clarity of the sound. They may also focus on how different sounds interact with each other and how these instruments or vocals act within a space.
A regular listener can appreciate their music on any device such as a phone speaker but an audiophile is willing to spend an extra buck to take in every part of the music. This means audiophiles are willing to spend more money on audio equipment and devices.
Am I An Audiophile?
Understanding if you are an audiophile depends on what you want and look for in the music that you listen to. If you find that you are always looking for more in your audio and there is maybe more you are looking for in the sound then that is a common trait among audiophiles.
The thing to know about audiophiles is there is no one perfect way for something to sound and everyone has their own preferences. If you are interested in getting more out of your music and you especially want to analyze your music then it may be a good idea to upgrade to a more premium pair of headphones.
It is important to note that not all audiophiles like to analyze music but those who do often become or are audiophiles.
Ultimately you will know if you find that you appreciate cleaner and higher quality audio.
The A-Z To Headphones
There are a ton of devices, terms, companies, and categories to know if you want to dig deep into the audiophile hobby. Here are the most common terms that are useful to know as well as some in-depth terms.
A
AES: Audio Engineering Society, also known as European Broadcasting Union (EBU), is a standard for audio transfer. It is most popular in professional equipment. The newest version is AES3. AN AES3 signal can carry two channels of PCM audio over several forms of transmission media, for example, balanced cables, unbalanced cables, and fiber optic.
Airy: A way of describing sound with a sense of space and openness. This term is typically used when describing an audio device like a pair of headphones.
ALAC: Apple Lossless Audio Codec is an audio coding format developed by Apple. The Audio compressed with this codec is claimed to be half the size of the original uncompressed data.
Ambience: The overall impression, mood, or feeling invoked by the environment that the music was made in. For example, recorded live in a stadium.
Amplifier: A headphone amplifier, or an amp for short, is a device that takes a low-power signal from a DAC and increases the volume of that signal to something that can be used by headphones, speakers, and IEMs. Better amps will be able to power more premium headphones and can provide a cleaner sound. There are two kinds of amps. Tube amps and solid state amps. To find out more check out our do you need an amp article.
Amplitude: In audio, amplitude is a measure of the height of a sound wave. Amplitude can be defined as the extent that air particles are displaced or the loudness.
Analog Audio: Contrary to digital audio, analog audio is a type of signal that can be understood by devices like headphones or speakers to create sound. Analog audio can also be stored in mediums like vinyl or tape. Recording on analog mediums can have small imperfections that can result in audio artifacts in the playback.
Analytical Listening: A way of listening to music where the listener focuses on the different elements of the song. They may focus on the notes, the mood, or the mastering of the music. This type of listening is popular among many audiophiles, artists, and music critics. It is very different than more laid-back listening as the person is focusing on understanding the elements of the music and potentially critiquing the elements of the music.
APE: Monkey’s Audio, also known as the APE codec is a free lossless audio compression format. Although available for other operating systems, it is mostly used by Windows users as the decompression speeds on operating systems like Linux are not very fast. APE files can be decompressed into identical copies of the original recordings. APE also has better compression rates than codecs lkie FLAC but can be very demanding when trying to decode.
Attenuator: A device or component that lowers the volume of an audio signal. It is effectively the opposite of an amplifier.
B
Balance: A type of tuning in headphones, speakers, and IEMs where there is not one particularly dominant frequency and instead all frequencies appear to be equal or “balanced”.
Balanced Audio: A method of delivering audio information to your device by processing the sound for the left and right ears. Balanced audio can reduce external, unwanted noise and overall improves the sound experience. This system requires a cable going to each of the devices on each side as well as an audio source (typically an external amp) that supports it.
Bass: The sound at the lower frequency range of human hearing. Bass can be measured in quantity and quality. For example a song with a lot of bass that is quite clean may be described as both heavy and clear. Sounds is this range go from about 50 to 200 Hz.
Bit Rate: How much data is in a single second. Bit rate is used to describe digital audio.
Bit Depth: How much data is recorded in an audio sample. Bit depth is used to describe digital audio. Like with bit rate, the higher the bit depth the better the quality and the larger the file size.
Bloat: An issue when there is a lack of clarity and definition in the bass.
BNC: A locking connector often used with coaxial cables.
Bright/Brightness: A boost in upper in the treble. This is can create a nice sound experience for analyzing sound but at times can become unpleasant due to sibilance from the high-frequency sounds.
C
Capacitors: Capacitors or caps for short store energy inside of a device temporarily. They can have a number of functions. They are typically used for amp power supplies, DC coupling, filtering, and tone controls.
Circum-aural: Full size headphones that fit over-the-ear.
Clarity: Referring to high-quality audio that sounds clean.
Closed-Back Headphones: A type of headphone in which the outside of the drivers is sealed. This creates a more closed-off sound stage however you do not have any noise leakage and you should hear less out of the outside world compared to open-back headphones (for more information check out our guide on open and closed-back headphones).
Coloration: An effect when an audio device shifts the way the music sounds. For example when something is more bass-heavy or bright.
Congestion: Poor clarity as a result of too many sounds overlapping each other. Congested sound can make it hard to hear different instruments and can make the music sound muffled.
Crisp: Another word for clear.
Cups: On close-back headphones, cups are the name of the casing on the outer side of the drivers for over-ear and on-ear headphones.
Customs: Customs or custom-fit IEMs are IEMs that have been designed for a specific ear. This provides a better fit to the user.
D
D/A: D/A is short for Digital to Analog. Digital to Analog is the process of digital audio coming from something like a computer being turned into an analog signal that a speaker or headphones can use to make sound.
DAC: A Digital to Analog converter or DAC for short is a device that converts digital information into an analog signal. Most audio today is stored as digital data but things like headphones or speakers only play an analog sound. To make this happen a DAC converts information from something like a computer or phone and then sends that information to an amplifier so that data is loud enough to be turned into sound. DACs are built into most electronics today but external DACs are quite popular because of their boost in sound quality.
Dark/Darkness: A way of describing a sound signature where higher frequencies are less apparent.
Decay: The fade effect of a sound or note.
Decibel (dB): A Way of measuring how loud something is.
Depth: A way of describing how far an instrument sounds in front or behind you.
Detail: A specific element in the sound. For example a certain note.
Digital Audio: Sound that has been recorded or converted to a digital format. Digital audio stores sound saves as encoded numerical samples. Bit rate and bit depth (see above) are two factors that highly influence the quality of digital audio.
Driver: The speaker of a pair of headphones, IEMs, or other audio devices. They can be of various sizes and use various technologies, most notably dynamic and planar magnetic drivers.
DSD: Direct Stream Digital or DSD for short is a high-resolution audio format that is meant to compete with other high-resolution formats like PCM. DSD by some audiophiles is considered the best audio format because it maintains certain “natural” aspects of the sound but ultimately it has many competitors and it is hard to categorize it as the best audio format.
Dynamics: The volume of different sounds or notes on a track.
Dynamic Driver: The most common driver used in headphones and IEMs. They function by using a moving coil of wire to generate sound waves. They are good at creating dynamic range however they aren’t always as accurate as other driver technologies.
E
Earbud/Earphone: A stereo speaker system that is worn inside of the user’s ears.
Efficiency: Referring to how much power a pair of headphones, IEMs, or speakers use. It is often used to explain if a pair of headphones need an amp for them to run properly.
Electrostatic Driver: A Headphone driver with a very thin membrane in between two electrified plates. Static electricity moves the membrane so there are no moving parts. Electrostatic drivers allow almost no distortion but are expensive and require specific amplifiers.
EQ: An EQ or equalizer is a software or hardware device that controls the relative volume of different frequencies in the audio. An EQ can allow a user to add more volume to an area where the listener thinks something is lacking like adding more bass.
F
Fatigue: The result of prolonged listening causing discomfort to the listener. Fatigue can come on with headphones or songs that produce harsh or unpleasant sounds.
FLAC: Free Lossless Audio Codec (FLAC) is an audio coding format for compressing lossless digital audio. FLAC is an open format that is free to use. It has support for things like album cover art and metadata tagging too.
Forward: A way of representing music that is more intense and with sounds that appear to be more in the listener’s face. For example, some headphones can make the upper mid-range more forward so certain vocals may appear closer.
Frequency Response: A measurement of frequency (in Hz) vs amplitude (output volume in dB). This is often used to describe the sound signature of a pair of headphones, speakers, or IEMs.
Frequency Spectrum: The frequency spectrum is the range of audio frequencies measured in Hertz (Hz). The audio hearing ranges from about 20Hz to 20kHz on the sound spectrum.
G
Gain: A level in which an audio signal is increased by an amplifier. The signal is increased or decreased by the number of volts in or out. Gain is normally expressed in dB.
Glassy: A way of describing audio that is very bright.
H
Harsh: Typically used to describe upper-mid frequencies then there is too much treble making it sound unpleasant.
Headphone: A stereo speaker system that is worn either on or over the listener’s ears.
Hi-Fi: Hi-Fi or Hi-Fidelity audio is a term to describe the high-quality reproduction of sound.
Hi-Res: A certification on headphones, amps, and other audio devices to show that a device can support high-resolution audio. This means that these devices can support audio with higher bitrates.
High-End Audio: Refers to the sound equipment that is used by audiophiles. These devices are typically better made than standard consumer gear for a more accurate and clear representation of the sound.
Highs: The upper range of the audible frequency spectrum (6 to 20kHz).
Hiss: An audible, unwanted noise caused by electrical fluctuations.
Hollow: A sound, often produced by lower quality headphones, that causes a lack of fullness in music. A hollow effect is caused by recessed midrange production.
I
In-Ear Monitor (IEM): In-Ear Monitors or IEMs are small audio devices that look similar to earbuds. They often provide a better seal and focus on having better sound quality. In-ear monitors are able to compete with headphones at many different price points too.
Imaging: The placement of a specific instrument within the sound environment. While similar to soundstage, imaging explains how accurate the location in which a sound comes from is rather than the size of the environment.
Impedance: A measurement of how much power is needed to power a driver. The higher the impedance the more power is needed to properly run the headphones or speakers and visa versa. Impedance is measured in Ohms.
Isolation: An effect created by tight sealing headphones, earbuds, or IEMs preventing sound from leaking out.
J
Jitter: A loss of a sample or group of samples in a stream during audio playback introducing noise. This is caused by issues between analog and digital audio conversion. Jitter is considered an unpleasant attribute and can be an issue with all digital devices.
Judgment: A lister’s assessment of the quality and accuracy of a reproduced sound.
K
N/A
L
Layering: A reproduction of depth and distance in which different vocals and instruments are placed one behind another.
Listening Style: The way someone prefers to listen to music. This is all subjective and based on the listener’s preferences. Some enjoy listening more analytically, while others prefer to listen to music more laid back and “get lost” in the music.
Lossless: Music file compression methods that do not remove data when compressing the file. Some popular examples include FLAC, WAV, APE, and ALAC.
Lossy: Music file compression methods that remove the least audible sounds from music to compress them. Compression can not be reversed like with lossless formats. Some examples include MP3, AAC, OGG, and WMA.
Low-Level Detail: The quietest sounds present in an audio recording.
Lush: Music reproduction with a rich tone, which typically is pleasing and warm sounding. This effect typically is the result of tube amplification.
M
Mastering: The final step in the music creation process. This is where the artist corrects issues in the sound and enhances their sound. The quality of mastering can reveal the quality of an artist.
Microphonics: A type of sound heard in headphones caused by movement or rubbing of the cable against itself or another object. The rustling noise is a result of vibrations being converted into or otherwise affecting electrical signals. Microphonics or cable noise can be greatly minimized with higher-quality cables with better shielding.
Midrange: Between around 250 Hz and 4000 Hz this is where vocals and many instruments are. The midrange is sometimes referred to as the mids. Headphones with bad midrange can make instruments and vocals sound hollow or telephone-like.
Monophonic: Monophonic audio or mono is a form of sound reproduction that uses only one channel. This means there is no separate channel for left or right.
MP3: A popular coding format for digital audio that is able to compress audio into small files. The format is a lossy format because some information is lost in compression.
MQA: Master Quality Authenticated or MQA is a lossless audio codec that is about one-third the size of the FLAC format. MQA works by matching a digital fingerprint to guarantee a file came from the original recording. MQA files are also backward compatible with FLAC decoders but if you want all the qualities of MQA then you must use an MQA decoder.
Muddy: An unclear and low-quality presentation of sound. The opposite of clear or clean sounding.
N
Nasal: An unpleasant sound with a quality of a person singing with their nose blocked off. Typically this is a result of a peak in midrange frequencies.
Natural: A sound that is perceived to be a realistic reproduction of the music.
Neutral: Referring to a reproduced sound signature in which the sound has no coloration. There is no emphasis on any part of the sound (bass, midrange, or treble).
Noise: Any background noises that are not a part of the music. This can include hissing, crackles, pops, and more.
O
Ohm: A unit of measurement for electrical resistance or impedance.
Openness: Referring to audio where there is a lot of depth and width to the sound stage. There is plenty of room between the instruments.
Open-Back Headphones:Open-back headphones are a type of headphone with an exposed or partially exposed driver. The earcups will often have grills to allow the sound out. This allows for a much more open sound, other benefits in treble and midrange, and improved long-term comfort. Heat build-up is less of an issue.
P
Pads: The earpads on the earcups of headphones.
PCM: Pulse-Code Modulation or PCM for short is the standard form of digital audio in computers and CDs. PCM is used to digitally represent sampled analog signals. A PCM stream has two variables to determine its accuracy to the original analog signal. The sampling rate, the number of times per second that samples were taken, and the bit depth, the amount of information in a sample.
Planar Magnetic Driver: A popular headphones driver technology. Planar magnetic drivers feature a series of electromagnets on both sides of a large and flexible diaphragm containing very small, electrically charged wires. Planar magnetic drivers typically are known for providing a wide sound stage and a punchy sound, especially in the bass. As a downside, they are often on the heavier side and can be bigger than headphones with dynamic drivers.
Preamp: A preamp or preamplifier is a device that increases the volume of an audio signal and then sends it to the amplifier. This provides a cleaner and louder audio signal for the amplifier.
Q
Quality: A way to describe the accuracy, fidelity, and cleanliness reproduced by an audio device or in an audio track. While much of this measurement is subjective, the quality of a song can be partially judged by the sample rate or the amount of data making up each second of the song.
R
RCA: A type of coaxial connector used for unbalanced analog connections. The center pin connects to the signal while the outer sleeve is connected to the ground.
Recessed: A decrease in a section of the audible frequency spectrum. For example, ‘V Shaped’ sound signatures will have a more recessed midrange.
Relaxed: A non-fatiguing sound as the result of a rolled-off treble. The quality of the sound will not be overly detailed and analytical but can be enjoyable for long listening sessions.
Resistance: When the flow of electrons is slowed, commonly in an electrical circuit. Resistance is measured in Ohms. This coincides with the impedance of a device.
Resolving: An audio equipment’s ability to produce and separate different instruments, vocals, and sounds. This will affect how detailed or undetailed the sound reproduction will be.
Reverb: Reverb or Reverberation describes the reflection of sound waves. Sound waves may be trapped so they continue to reflect off surfaces causing a sort of echo. This can cause distortion in the audio.
Rolloff: When a frequency response gradually rises above or falls below the average frequency in a device like headphones. This contrasts the term cutoff meaning a sudden loss of audio going above or below the average frequency range.
S
Sample Rate: A measurement to see how many samples of audio data were taken in a second.
Sense of Presentation: The way the sound is presented to the listener. The sense of presentation affects the way listeners perceive the location of where sounds come from.
Sensitivity: Sensitivity is a measurement of how loud headphones can get with a certain amount of power (typically 1 milliwatt). Sensitivity is measured in dB/mW. Sensitivity is also known as Efficiency or the Sound Pressure Level.
Sibilance/Sibilant: Upper peaks in the treble that become unpleasant to the ear if too prevalent.
Smooth: Describing a sound reproduction with no irritating qualities. This occurs when there is no sibilance or overly forward sound. This is not always a positive attribute as it can make some tracks feel slow and uninteresting.
Solid State Amp: Also known as transistor amps, solid state amps use transistors to raise the volume of a signal from a DAC. They are known for being efficient and providing a very clean sound. Solid state amps are more popular than tube amps.
Sound Card:A sound card functions as a DAC and amp built in computers and other electronic devices. Sound cards are built into all modern computers but better sound cards can be purchased for an improved sound over the one built into your computer’s motherboard.
Sound Signature: The unique sound qualities of a pair of headphones, an amp, DAC, cable, or other audio devices. There are many unquiet sound profiles Some devices focus on treble, some bass, and others keep a neutral sound. Each is good in its own way. There is no correct sound signature as it is highly related to preference. Each listener will have a preference to suit the way they look at the music and to better enjoy the genres that they listen to.
Soundstage: The 3D environment created by a headphones driver. A wide soundstage allows the listener to discern sound from different positions and can allow for a more realistic sound. A good soundstage is often desired by many audiophiles.
Source: The first device in a signal chain that sends out an audio signal. For example, a computer or turntable.
S/PDIF: Sony/Philips Digital Interconnect Format, or S/PDIF for short, is a type of digital audio connection. It is based on the AES 3 standard and typically uses coaxial cables with RCA connections or fiber optic cables with Toslink connectors.
Studio Monitors: Commonly referred to as monitors, studio monitors are speakers, designed to produce sounds that have been recorded in a studio setting. While they are often designed for professional situations, studio monitors are also very popular among audiophiles because they don’t have the coloration in the audio reproduction that consumer speakers create.
Sub-bass: Sounds that are so low-pitched that they are lower than bass notes. They range from 15 to 60 Hz and are hard for cheaper headphones to replicate. Sub-bass can make instruments that use bass feel more impactful.
Supra-aural: Referring to headphones that rest against the listener’s ears. Also known as “on-ear” headphones.
T
Tall: Referring to sound stage. Tall is used to describe a sound that feels above or below you. Comparatively, short can be used to describe a sound stage that has little space above or below you.
Texture: Texture or texturing is a perceptible pattern or structure in a reproduced sound, even if it is random in nature.
Total Harmonic Distortion: THD or Total Harmonic Distortion is a measurement of the degree to which equipment distorts the sound. This is often used when talking about amps to see how much they affect the sound. An amp with lower THD will allow for a cleaner sound.
THX: THX is an American Audio company founded by George Lucas in 1983. THX is most famous for creating the audio and visual reproduction standards for movie theaters, home theaters, speakers, headphones, gaming consoles, car audio systems, and more.
Timbre: The character of a musical note or vocal. Timbre differentiates different sounds from each other. For example, two instruments can play the same note but the Timbre is different because they are two different instruments.
Tonality: Another word for sound signature.
Transparent: Used to describe audio when there is a lot of clarity in the sound presentation.
Treble: Referring to sound from 10 to 20 kHz. These sounds are high-pitched. They allow for additional detail and clarity in the music. Too much treble can cause problems like fatigue.
TRS: TRS or the Tip Ring Sleeve connector is the most common connector used with headphones. It features sizes such as 2.5mm, 3.5mm, and 1/4 inch.
Tubes: The part that is used in tube amps to amplify the sound. Tube amps can often be replaced to slightly change the sound produced by a tube amp.
Tube Amp: A tube amp is a type of amplifier that uses vacuum tubes to raise the volume of the audio signal from your DAC. They function similarly to light blub by burning electrons from a filament. They are popular because they can provide pleasant coloration to the music. They typically cause the audio to sound a bit warmer.
Turntable: A device with a circular revolving plate supporting that supports a record as it plays. Unlike record players, turntables do not have speakers or an amp built in so these are separate devices that need to be accounted for.
U
Uncolored: Referring to a neutral sound.
Upper Bass: Higher-pitched bass notes that are not high pitched enough to be a part of the midrange.
Upper Highs: The part of the treble that sounds especially high-pitched. This upper range reaches the limit of the human ear.
Upper Mids: Ranging from 900 Hz to 4 kHz, the upper mids make up higher-pitched vocals.
V
Voltage: The electromotive pressure or force that pushes electrons, typically measured in volts. Voltage is typically something that people think about with audio devices like amps.
Veiled: When there is a loss of clarity due to noise or a loss of detail in the sound. Often sounds like there is a haze blocking out the complete sense of clarity so some notes may not fully come through.
W
Warm/Warmth: A way of describing a sound profile with more forward vocals, bumped mid-base, and a clear midrange. This type of profile can be applied to amps, headphones, or IEMs.
Watt: A unit to express the rate of energy usage. It is calculated by getting the voltage times current. Mainly important for devices like amps.
Weight: A feeling of solidity and good foundation delivered to the music by natural and strong bass.
Width: A way of describing the sound stage in a lateral way. Different headphones will be able to display more width to the stereo image that is the music.
WMA: Windows Media Audio Lossless (WMA) is a propriety lossless audio data compression technology developed by Microsoft. It was designed to compete with FLAC and Apple Lossless Audio Codec (ALAC).
WAVE: Waveform Audio File Format (WAVE), more commonly referred to as WAV is a Microsoft and IBM audio file format. It is the standard for storing audio on PCs. A WAV file can contain compressed audio or uncompressed audio. For uncompressed audio, the linear pulse-code modulation (LPCM) format is used. LPCM is also the standard audio coding format for CDs.
X
XLR: A type of connector commonly used with professional and high-end audio. You can find this connector in a three-pin or four-pin configuration for a balanced connection. XLR connections can be used with headphones, mics, and other devices.
Y
N/A
Z
N/A
Other Resources
There are some other resources that we recommend using like the audiophile subreddit page. Another great resource is our discord. There are many experienced people in this hobby that can help answer any additional questions that you may have.
We also have different guides and reviews to help you get started on our audio page.
South-Facing Switches (Left) vs North-Facing Switches (Right)
The world of mechanical keyboards can be complex but can be very fun and satisfying. On keyboards, switches are attached to a PCB, printed circuit board. Switches can be attached in one of two configurations. This often causes confusion as people bring up terms like interference or switch orientation.
When looking to buy a mechanical keyboard, especially if you are looking to modify or build one, understanding what north-facing and south-facing switches are can be important to help you make the best decision for you.
Today we are going to clarify the difference between north-facing and south-facing switches and help you understand everything you need to know to make a better decision when buying your next mechanical keyboard.
North-Facing vs South-Facing Switches: What Are They?
Before we understand what north-facing and south-facing switches are we must first understand switch orientation. The term switch orientation refers to which direction a mechanical keyboard switch is placed on a PCB.
North-facing switches refer to when a switch’s LED hole faces toward the top of the keyboard while placed in the socket of the keyboard’s PCB. North-facing switches are typically seen in budget keyboards but are also seen in older custom keyboards.
South-facing switches refer to when a switch’s LED hole faces toward the bottom of the keyboard or where the user of the keyboard is while paced in the socket of the keyboard’s PCB. South-facing switches are typically seen in custom keyboards but due to consumer demand are starting to be put in some beginner kits and even a few prebuilts.
Typically we hear the terms north and south-facing the most but east and west-facing switches exist too. East and west-facing switches have the same pros and cons as south-facing switches. They are used very rarely and are usually only implemented in PCBs that support multiple layouts and must maximize all space on the PCB available.
Problem With North-Facing Switches: Interferance
The biggest problem that faces north-facing switches is keycap interference when using Cherry profile keycaps. On some rows of the keyboard, Cherry profile keycaps will come into contact with the top of the switches before the switch is able to bottom out. This will change both the sound and feel of the typing experience.
Although using Cherry profile keycaps are still usable, interference can remove a lot of the satisfaction from typing on a mechanical keyboard. Part of what makes this issue annoying is also that it affects certain rows of keys more than others so the feel becomes inconsistent between keys too. Some don’t face the issue while other rows do.
This makes north-facing switch orientations quite unpopular among keyboard enthusiasts who often use Cherry profile keycaps from high-end manufacturers.
Problem With South-Facing Switches: RGB Shine Through
Although south-facing PCBs are highly popular because they don’t face the issues of interference, they still have their own issues. South-facing switches have some issues for fans of RGB and shine through keycaps.
With north-facing PCBs the LEDs lie directly below the legends on the keycaps. This creates a brighter and more consistent look on the legend. With south-facing switches, the LEDs are on the bottom side of the keycaps. This means a lot of the light does not shine through the legend of shine through keycaps.
Note switch orientation has no effect on keyboard underglow or LEDs on the side of the keyboard.
This issue faces fewer enthusiasts because typically enthusiasts aren’t using shine through keycaps. On the other hand, because RGB is very popular for gaming keyboards we most likely will see large gaming brands continue to use north-facing switches in their keyboards.
Can You Change Switch Orientation On Your PCB?
So maybe you are really set on a keyboard or you have already bought a keyboard and now you want a different switch orientation to suit your preferences. The question becomes can you change switch orientation?
Unfortunately no, you cannot change the direction in which the switches are placed on the PCB. Holes were drilled in a specific way from the factory so the pins on the bottom of your switches only can fit in one direction.
There are a few solutions though. One thing you can do is get a totally new PCB. You can buy one that supports a different orientation and use that in your case instead. With this solution, not all cases accept all PCBs so you would need to research what PCBs your board supports. Some mechanical keyboards have a proprietary case design to the manufacturer or have such a unique design that it is very hard or even impossible to find a different PCB that fits the case. It is especially hard to find PCBs for high-end boards that feature north-facing sockets.
Buying a new PCB can also be very expensive so there are a few other options. If you are using a keyboard with north-facing switches but you would like to use Cherry profile keycaps you could get a few of the “box” switches that don’t face the issues of interference like Novelkey Box Cream switches. Another solution is to get special washers to raise up your keycaps so the keycaps don’t make contact with the top of the switches until the switch has been depressed all the way.
There are also switches advertised for having a long pole stem which may not have interference on some cherry profile keycaps. This is because the switches bottom out sooner so the keycap doesn’t come as close to the top of the switch. Some famous long pole stem switches include Drop Holy Pandas or Durock Pom Linears.
If you are looking for more light to shine through your keycaps and you have south-facing switches, then buying some transparent switches like some Aqua King V3 switches might give you a better experience.
Which One Is Better?
There is not necessarily a better option overall however depending on your situation, there is a better option for you.
In most cases, we would recommend keyboards with south-facing switches. The main instance that we would suggest a north-facing keyboard is if you plan to use shine-through keycaps. South-facing keycaps still allow RGB to pass through although just it doesn’t look as vibrant as it may look on a north-facing board.
If you start to get into custom keyboards odds are you will most likely use keycaps that are not shine through. There are also plenty of keyboards that have RGB underglow or on the side of the board and are south-facing.
In most cases, south-facing switches are better as they are more versatile but boards with north-facing switches still have a use case and north-facing switches aren’t the end of the world, especially if you don’t even plan to use Cherry profile keycaps.
Conclusion
There are two main types of switch orientation that can give you the best experience depending on what you are looking for. South-facing switches support more keycap profiles, especially ones that are popular among enthusiasts, while north-facing switches can provide the best experience for shine through keycaps.
Even if you have a keyboard where the switches are oriented in a way that doesn’t suit your preferences or inhibits your options, there are still some possible solutions like getting certain types of switches, changing your PCB, or adding washers that allow you to enjoy your keyboard as much as possible without needing to get a new keyboard.
As enthusiasts ourselves we would recommend buying a keyboard with south-facing switches unless you plan to use shine through keycaps.
If you spend a lot of time typing at your setup you may be looking to improve the ergonomics and comfort of your setup. One of the best ways to improve long-term comfort is by using an ergonomic keyboard.
Ergonomic keyboards position your hands and wrists better for a more comfortable experience and potentially better posture.
Many people consider ergonomic keyboards but understanding if getting one is worth it for you depends on your situation. Having good ergonomics is always a good thing but if you don’t spend much time typing or you spend most of your time gaming, investing in an ergonomic keyboard may not be the right option for you. In contrast, those that are at a computer typing throughout the day could definitely see comfort and even health benefits by using an ergonomic board.
So if you want to find out more and see if you could benefit from an ergonomic keyboard, keep reading to see if they are worth the investment.
Ergonomic vs Normal Keyboards
Ergonomic and normal keyboards definitely have their differences but both have their benefits. One isn’t better than another as it truly depends on your situation.
Size and Form Factors
There are a variety of sizes and form factors with keyboards. Normal keyboards have more layouts to choose from including 40%, 60%, 65%, 75%, TKL, and full-size boards. With ergonomic keyboards, it is a little more complicated.
It is important to note that there are two types of ergonomic keyboards, unibody and split. Unibody keyboards are an ergonomic keyboard in a single case. Split keyboards usually have two parts for each side of the keyboard. This allows you to use only one have of the split board for things like gaming to safe as much space as possible.
With split style boards, you can have any layout of a regular keyboard but with unibody style boards there are 2 popular layouts. The Arisu and Alice layouts. The Alice layout is most similar to a 60% keyboard with some macros on the left-hand side while the Arisu layout is most similar to a 65% keyboard.
In general normal keyboards are smaller for the same amount of functions and there are more layouts available for them but ergonomic boards also have some very unique layouts.
Comfort Level
The biggest benefit of ergonomic keyboards is their improved comfort over regular boards. They were specifically designed to help you type over long periods.
While you are typing you won’t get pains or cramps in your hands, wrists, and arms.
Also, you may find that you have better posture or it is easier to keep good posture. This is because ergonomic keyboards support better hand and arm positioning to promote better posture. As a result, you will be more comfortable throughout your body and this is actually more healthy for you.
If you find that you game most of the time then this is one case where a regular keyboard may help you to be more comfortable. Since many gamers tilt their keyboards and you are interacting with both a mouse and a keyboard there are some reasons to go with a regular keyboard. A regular board will save space and will be just as comfortable as an ergonomic keyboard but will allow you to have more comfort with your hand using the mouse.
If you are looking for comfort but you don’t have the budget for a new keyboard then switching to a new keyboard layout could also help provide better comfort with no cost except the time to switch.
Arm and Wrist Pain
A problem that you may encounter when typing for long periods is that you may suffer from arm and wrist pains. Ergonomic keyboards are great for fixing these issues.
Since ergonomic keyboards are designed for optimal comfort and as a result they greatly reduce the effects of pains or the chance of getting them.
It is important to note that if you are considering an ergonomic board because you have some sort of arm, wrist, or hand problem then a new keyboard will not be a magical fix for you. You should notice benefits to all your problems won’t necessarily go away depending on the severity of the condition.
Typing Speed
Ideally, your fastest typing speed should be similar between an ergonomic keyboard and a normal keyboard if you’re used to both types of keyboards.
This isn’t always the case. In my experience, I found that I can type fastest with a regular keyboard but I type faster for longer with my ergonomic board. Between ergonomic keyboards, you will typically type faster with a unibody board than a split alternative.
The fastest typists in the world still use regular mechanical keyboards as their primary boards. Ultimately if you just are looking for that fastest peak time a regular board still may be the option for you but if you want to have a consistently fast speed all day then an ergonomic board is something you should consider.
Price
So ergonomic keyboards have all these benefits but do they cost more as a result? For the same construction, sound, and feel, ergonomic keyboards are often priced quite well.
Ergonomic keyboards often are more expensive but that is because they are often higher-end keyboards. This is because many ergonomic keyboards are made by creators who also want premium build materials, a nice design, and a thoccy sound.
Although you can find some good value ergonomic boards, the cheapest boards that you will find are normal keyboards. Often you will pay a bit more for an ergo design compared to the regular designed counterparts, especially if looking at a membrane keyboard.
Modding and Accessories
One important factor for those building ergonomic mechanical keyboards, especially enthusiasts, is how easy ergonomic keyboards are to build, mod, and get parts for.
The difficulty of all keyboards vary but building an ergonomic keyboard should be no harder to build than a regular keyboard. Finding parts for modding ergo keyboards or parts may be harder because typically smaller manufactures make ergonomic keyboards but this is common across all limited run and high-end keyboards.
The main issue that you will run into if you are considering an ergonomic mechanical keyboard is access to compatible keycap sets.
All ergonomic keyboards have split spacebars. This means that if you are buying a keycap set you need to make sure that it supports the needed spacebars. Additionally some ergo boards also have an additional ‘B’ key or have macros on the left-hand side.
Overall it isn’t hard to find keycaps but it is an important thing to keep in mind.
Is An Ergonomic Keyboard Right For You?
Understanding how you use your computer will best help you understand if an ergonomic or regular keyboard is best for you.
Developers, writers, managers, and other people who spend some if not the whole workday typing can definitively benefit from an ergonomic keyboard. An ergonomic keyboard can reduce wrist problems in the future and provide better comfort throughout the day.
If you don’t really use a computer much or don’t use your computer for work then an ergonomic keyboard may not be the best for you. Taking the time to switch to an ergonomic keyboard is especially not worth it if you find that you game more than you work.
Ergonomic keyboards are bigger than regular size keyboards for having the same layout or amount of keys. Since having more mouse space is very important for gaming using a regular board that will help give you more mouse space.
The thing is this concept doesn’t apply to all ergonomic keyboards. Split ergonomic boards can be an interesting option to consider for some gamers. Since split keyboards have two parts of the board if you play FPS games you can use only one of the two parts and have a lot more mouse room. The extra investment is most likely not worth it but it can be an interesting option to consider.
Generally, ergonomic keyboards are better for productivity and regular boards are better for gaming or those who don’t use their computer that much.
Is It Difficult To Transition?
Time
Depending on if you can get a split or unibody board it can take more or less time but will a unibody board will generally take less time. With split keyboards you not only need to get used to this new format but it may also take time to find the right placement for both halves of the board.
With a unibody board, it could take a few days to a couple of weeks while a split keyboard could take you a few weeks to even a month to get used to.
Difficulty
Since ergonomic boards have different hand placements it will feel like you are using a slightly different layout. Switching to an ergonomic keyboard isn’t very hard to get used to but time is the main issue with the transition process.
In general, you should not be worried about the difficulty in transitioning to an ergonomic keyboard as the end result will be well worth it.
Different Types Of Ergonomic Keyboards
If you are looking for an ergonomic keyboard, there are two options to consider. Unibody and split.
Unibody
The first type of ergonomic keyboard is the Unibody style. Unibody boards are the easiest to get used to and typically the cheapest options.
A Unibody style board is just one board that is together, as the name suggests. This means that you can get an ergonomic experience without the complexity of a split keyboard. The ergonomics may not be as great as a split keyboard but they will still be superior to the comfort of just a standard keyboard.
If you want something clean and simple while still getting a comfortable experience then a unibody board is the option for you. Unibody boards are all in one package which means you don’t have to worry about cables between different parts.
Split
The other style of ergonomic keyboards is the split layout. A split style keyboard has more customizability in the sense that you can move each side around but this comes at a cost. Typically split keyboards have another set of wires that you have to deal with between both halves. Also, split keyboards are often harder to get used to.
Some split-style keyboards can be combined back into one regular board but these often sacrifice on looks for this extra function.
In general, a split keyboard will sacrifice looks but will give maximum comfort. Since you can adjust a split keyboard to your liking, if you are looking for the best comfort then a split board will best suit you.
Conclusion
Switching to an ergonomic keyboard is a fantastic way to improve your comfort while working. They can solve pains, reduce the chance of long-term problems, and promote better posture. Problems such as carpal tunnel or RSI can be greatly reduced.
While ergonomic keyboards have these benefits, normal keyboards still allow for slightly faster typing speeds, are more available, support many more sizes and layouts.
There are a few different styles for ergonomic keyboards to choose from depending on what you do daily. With Unibody and Split keyboards and a few different layouts for each type of board, there is something that will suit you.
If you have started learning more about audio and if you want to invest in a more premium audio setup, one of the things you have come across is headphone amps.
Headphone amps are one of the best ways to improve sound quality. In many cases, amps are required for specific headphones or speakers. Amps deliver extra power to your headphones or speaker, often helping to bring out sounds that were recessed and lacking before.
Let’s explore how amps benefit an audio setup and if getting one is a worthy investment for your headphones.
Do Headphone Amps Improve Sound Quality?
A headphone amp is a device that amplifies the volume of sound coming from a DAC, a component in all devices that processes the digital signal from a computer and converts it into an analog signal that headphones can use. An amp can take the form of either an external device or a part integrated into your computer. The addition of power that is also cleaner can improve the sound quality of your headphones.
Compared to an integrated solution, a dedicated amp provides more power so your headphones are able to work the best they can. Additionally, if you find that you are using most of the volume scale when listening to things then an amp will give you much more headroom, fixing this issue.
Amps do not do much to improve the clarity or accuracy of the sound but the additional power improves the quality of the sound in other ways. The extra power that an amp provides could help sounds that were once muffled or recessed to be able to reach their full potential.
Another issue that amps fix is distortion. The integrated audio solutions in computers or phones can cause distortion at high volumes. Since amps process sound better this is less of an issue.
It is important to understand that an amp will not always improve audio. If you are using a cheap pair of headphones then you will notice no improvement. On the flip side, some headphones need an amp to function properly. There are many headphones, often in the $100 to $300 range, that are efficient enough that they do not require an amp but could still see some gains.
An amp should not change the sound signature of your headphones but give them the power to have their correct sound signature. Tube amps or amps with EQing built in can make changes to the sound.
Overall amps do improve sound quality.
Is An Amp Necessary?
Headphone amps can improve your audio but in some situations, they are not a worthy investment. If you use headphones that do not need more power or cleaner power then an amp would just be a waste of money.
Something like a pair of cheap earbuds or bluetooth headphones will not see a benefit from the extra power. In contrast, if you use high-fidelity headphones, often costing anywhere from $200 to upwards of $1000, then you often need or will heavily benefit from an amp.
Some headphones do not need an amp but could see a slight benefit from one. In this case, we wouldn’t recommend getting an amp if you are on a tight budget although it could give you a slightly better experience.
To understand how efficient your headphones are there are two things you need to look at. First sensitivity, which shows how loud headphones can get with a certain amount of power. This is usually measured in dB/mW. Second impedance, which shows how much power the headphones need. It is typically measured in ohms.
Headphones with an impedance of 32 ohms or less and sensitivity of 100 dB or more usually do not need an amp. As you get to headphones that use 60-80 ohms or more and sensitivities of 95dB or less, you will notice that many of these headphones need an amp. It is important to look at both factors and read reviews as the necessity for an amp depends.
Another factor is about how much of your volume range you are using. If you need to turn up your volume to 70 to 100% volume, then an amp may benefit you. You will get more headroom for volume and an amp will take away most distortion that integrated audio solutions create at high volumes.
Most modern computers have a decent integrated sound card with an amp so getting a dedicated amp is only important if you are investing in premium headphones. If your current headphones will not see a benefit from getting an amp, then getting new headphones is usually the recommended option. A dedicated amp is just a recommended option if you need or want more power for your headphones.
How Does A Headphone Amp Work ?
An amp’s purpose is to take a very quiet, low-power audio signal from a DAC, and increase the volume of that signal. Then the headphones or speakers will be able to turn this information into sound waves.
Without an amp, either integrated into a computer or as an external device, your headphones would not be able to create any sound for you.
A dedicated amp will provide more power and volume for your headphones than integrated solutions. The better an amp the more power it will be able to provide. Additionally, better amps will give cleaner power to your headphones resulting in a cleaner sound. Cheap amps often have distortion in the sound at higher volumes.
Amps have three core parts to how they work. There is the input, the amplification components themselves, and finally the output. There are two ways that the amplification process works work.
Solid State/Transistor Amps: These amps use, as the name implies, transistors to amplify the signal given to them. Inside there will be multiple positively or negatively charged transistors that are calibrated to boost the sound in a way that is as clean and efficient as possible.
Tube Amps: Tube amps instead use vacuum tubes surrounded by glass. They function similarly to lightbulbs by burning electrons from a filament to instead of creating light, amplify sound. Tube amps can be compared to record players that provide a more fun sound that modern tracks on software or CDs replace with a very clean sound. There is a sort of warmth adding to the bass. As a downside sometimes the glass of the tubes can cause some negative effects on the sound if you are using more sensitive headphones with a less premium tube amp.
In the end, the function of an amp is to increase the volume of the information coming from your audio source, for example, an external DAC or your PC. It does not matter if it is a tube amp or solid-state amp, the end goal is the same.
Different Kinds Of Amps
Although amps can control the power in different ways, transistors or tubes, there are different kinds of amps to look at depending on your situation.
Regular Headphone Amp: This is the standard type of headphone amp.
Gaming Amp: Gaming amps function similarly to regular headphone amps but usually prioritize features that gamers would appreciate like a mic input and virtual surround sound.
Portable Amp: These are great for situations where you want to drive high-quality headphones on the go or if you want a powerful amp in a small package. Portable amps are often designed to fit in your pocket and are a great option for those who want to use premium IEMs while out or if you want an amp between your office and home.
Finding what is right for you is the most important thing in this case. For most people, a regular headphone amp will do the job. There are some cases where a gaming amp or portable option may suit your general needs more.
Conclusion
Amps are beneficial with trying to improve the sound quality of your headphones, IEMs, or speakers and in many cases, they are even necessary for them to run properly. Sounds that were previously recessed, distorted, or not even present will be more significant and apparent.
You should also consider if an amp is worth it in your situation. You will not notice a difference with an amp with a sub $100 pair of headphones or the cheap earbuds that came with your phone.
It is also important to note that most people will not notice a substantial difference by getting an amp. This is because most people do not use power-hungry headphones or are not very bothered by worse audio quality.
For those who want a more premium sound and may be using more powerful headphones, an amp is a more worthy investment for them.
You also do not need to spend alot of money on an amp. You can find options for about $100 that give great performance up until you are spending upwards of $500 on headphones. Just note that you should always prioritize the headphones in your budget but always consider an amp if your headphones need that extra kick.
Additionally, if you are creating a setup with high-quality headphones and you are getting a headphone amp, you may want to consider a DAC to provide a cleaner, more accurate sound that could also benefit your sound experience.
I hope you enjoyed and as always thanks for reading!
If you have any questions please join our discord and feel free to ask anything.
Ever since Apple released their AirPods, in-ear headphones have taken over the audio market.
In-ear headphones, commonly known as earbuds, are the new wave and for good reason. Having your headphones fit into your pockets without needing to deal with the tangled mess of wires, is very convenient.
Today we are going to be taking a closer look at two earbuds that have broken the audio game since their release to see which one is better. The AirPods Pro and PowerBeats Pro, sold by the same company, Apple.
The Main Differences
While being sold by the same company for similar prices, you would be shocked by the number of differences the AirPods Pro and PowerBeats Pro have.
In this article, we are going to split them up into separate sections, including battery life, design, comfort, features, audio quality, and more.
Let’s talk about what we are getting in the box from each of these products.
With the AirPods, we get the actual AirPods and charging case (obviously), two sets of different ear tip replacements, and a USB-C to lightning charging cable. Unfortunately, you do not get a USB-C power adapter or any power adapter. So to charge your earphones, you’re going to need to already own a wall adapter, or buy one.
Let’s move on to the Beats. The Beats packaging is almost identical to that of the Airpods. You get the case, and the earphones, three sets of replacement ear tips, and a USB-A to Lighting charging cable. Now once again, Apple does not supply the user with a power adapter, so you are going to need to buy one, or already own one.
Now obviously, like with any tech product, both of these include manuals in the box. They just weren’t really exciting enough to put in the picture.
Let’s keep track of the score for this showdown. So far it’s PowerBeats Pro: 1 and AirPods Pro: 1.
Design and Comfort
Let’s first talk about the design of the two different cases. Now obviously the PowerBeats Pro have a much larger case in comparison to the AirPods Pro. This can either be a good thing or a bad thing for you. If you are someone who constantly loses things, and can’t seem to be able to keep track of where your stuff is, maybe the Powerbeats are a better option for you. Being so much larger, they would be much harder to lose than the Airpods Pro.
That being said, if you are someone who has grown to love the minimalistic form factor of most wireless earbuds, small and slim, then you are probably going to like the AirPods Pro more than the Powerbeats. About the earbuds themselves, the AirPods have a much smaller design. Unlike their predecessor, the Airpods, the AirPods Pro actually have silicone tips that make sure that no matter how hard you shake your head, they won’t fall out. They also greatly improve comfort and help support compatibility with many more ears.
The Powerbeats Pro have a sort of double protection from falling out. They have the ear tips that the Airpods Pro have, as well as wingtips to guarantee that no matter how hard you are working out, the earbuds stay in your ear. The wingtip might not be favored by all, however, as they stick out a bit more than the AirPods Pro.
For this round, it looks like a tie between the Powerbeats Pro and Airpods Pro. Let’s give them each a point. After this round, its PowerBeats Pro: 2, AirPods Pro: 2.
Sound Quality
Now, this is where it gets a bit more complicated in the comparison. Sound quality is obviously a really important aspect of any audio device. But if you are buying these as an audiophile and need the absolute best sound quality, I’m sorry to tell you, but you’re in the wrong spot.
Ok so let’s get one thing straight, these two pairs of earbuds are not to be bought if you are strictly looking for the best sound quality. These are two great pairs of earbuds when it comes to design, convenience, but not for the optimal sound quality.
Also in this comparison, we won’t use the special audio features that the Airpods pro have in mind, just to make it fair. But do remember when you’re buying either one to remember the features when you click to check out.
The PowerBeats Pro have the typical emphasis on the low-end frequencies, giving users a higher bass while exercising. The mids are more recessed, but if you listen to bass-heavy music primarily, that may be what you are looking for. The highs are nothing too special and being much more predictable with a sharp dropoff, to avoid users from experiencing ear pain while listening to their music.
Now for the AirPods Pro, they have a much more consistent sound profile but still have that fun V-Curve among Bluetooth earbuds. Now the only thing that can possibly edge the AirPods pro over the Powerbeats Pro is the ANC isolation system. Asides from that, it’s mostly subjective.
Overall the main takeaways are that the AirPods Pro have a bit cleaner sound but it is not a huge improvement. Both have similar sound signatures too and will sound great with Pop, Rap, or EDM genres.
At the end here the AirPods Pro come out ahead at 3 to 2.
Battery Life
Battery life can be one of the most important aspects of any sort of technology, but you definitely don’t want your headphones dying on you as you are only halfway through your commute to work.
The PowerBeats Pro supply 9 hours of playback on a full charge. With the charging case, however, users can enjoy another 24 hours of playback. If by somehow, you managed to completely discharge your charging case, don’t despair, as just 5 minutes of charge gives the earbuds 1.5 hours of playback.
The AirPods Pro are a bit of a different story. On a full charge, you can only expect 4.5 hours of playback on each pod. Just like the Beats Pro, users can expect 24 hours with the Airpods pro charging case. When it comes to fast charging, a quick 5-minute plug-in can give you another hour of playback.
Apple users also have the luxury of checking the battery status of their device through the use of the batteries widget, which was introduced in the release of IOS 14.0.
So at the end of this round, I felt that PowerBeats had a minor step up just taking the lead. At this point, its PowerBeats Pro: 3, AirPods Pro: 3.
The Features
Even though the Powerbeats are sold for about $30 less, you would think that two products sold by the same company would have a similar caliber of features right? Well, you would be wrong. The Airpods Pro absolutely blow the PowerBeats Pro out of the water in this aspect.
On the Airpods Pro, you have ANC (Active Noise Cancellation), Transparency mode, and Spatial Audio. ANC is pretty self-explanatory, activate it to block out noise from the outside. Transparency does the opposite, it allows noise in so you can hear your surroundings. Spacial audio essentially provides users with 3D audio when watching supported TV shows or movies. Not only that, but the Airpods Pro have tests to ensure that the ear tip that you have chosen makes a proper seal in your ear. Another great feature the Airpods have is the ability to activate Siri or toggle ANC and Transparency mode, by holding the end of the earbud.
Let’s move on to the PowerBeats Pro. They basically have none of the cool audio settings the AirPods Pro have. With the PowerBeats, you can activate Siri by holding the button on the side. Aside from that, the only better thing about the PowerBeats over the AirPods is the ability to change the volume of the media with a button on the actual earbud.
I think it’s obvious that the AirPods Pro took that round with ease, so the score is now PowerBeats Pro: 3, AirPods Pro: 4.
Conclusion: Which Is Better?
So what is the final verdict? Well, each of these products have their separate pros and cons, and it really depends what you want out of an audio device. Are you looking for the ideal workout device, or something more low-key?
Well, let’s answer these questions. The only thing that the Powerbeats pro have that is objectively advantageous in comparison to the Airpods Pro is the greater battery life, and the only thing the Airpods Pro have that is objectively advantageous to the Powerbeats Pro is the onboard features. They both have different designs and comforts, one isn’t completely better than the other, and they both have virtually the same components in the box.
Now all of this comes at a price, obviously, and the PowerBeats Pro can often be found for a bit cheaper. The PowerBeats are often found for a bit under 200 while the AirPods Pro are often 200 or more. Now which one is better, well we can’t make that decision for you as the best option depends on your situation. If you mostly work out then the PowerBeats may be the best option for you but if you want an all-rounder the AirPods Pro may be the one for you.
Have you been scouring the internet for a good gaming mouse, but everything you find is way out of your budget?
If so, the Razer DeathAdder Essential might just be the answer to your problem, supplying great performance, without taking a huge toll on your bank account.
Let’s dive into the specs, and see if the Razer DeathAdder Essential works for you.
The Verdict
⭐⭐⭐⭐
Rating: 4 out of 5.
The Razer DeathAdder Essential is well built for its affordable price, and is partnered with a high caliber sensor.
If you are a gamer with a low budget, this mouse was practically manufactured just for you. The DeathAdder comes in two colors, black and white, both costing the same, affordable price, of about $30.
The DeathAdder Essential has a very sleek and comfortable design. The mouse boasts a very ergonomic shape, making it a great option for people who prefer the fingertip grip or the claw grip. Another positive aspect of the DeathAdder is that it is very lightweight, meaning after long gaming sessions, your wrists feel no strain.
Being a Razer product, the DeathAdder Essential comes with the inclusion of the Razer Synapse software, allowing users to adjust the LED brightness, adjust the sensitivity, and customize the functions for each of the 5 buttons on the mouse.
The main drawback of the mouse is that the only option for color customization is adjusting the brightness of the preset LED, meaning users cannot change the colors of the LED for their mouse, unlike the Logitech G203, which is priced at a similar mark.
If, by these descriptions, you think the Razer DeathAdder Essential fits your needs, check the price on Amazon.
At such a low price, you wont find any extra things in the box besides the mouse and manual. At higher price points, you tend to find amenities such as charging cables for Bluetooth mice, and maybe even weights for the most top tier of mice.
With the DeathAdder Essential, you don’t get anything other than a Razer sticker, some documentation, and the actual mouse.
The Build
Mice can be the most subjective item when someone is talking peripherals, but when talking about the build quality, sensor, and switches, it can be easy to form an opinion.
Being the reputable brand they are, we all knew that Razer was going to knock it out of the park with the build quality on the DeathAdder Essential. Don’t get me wrong, it definitely does not feel like their more expensive mice, but for around $30, you can be assured that you are paying for something good quality. The main issue that I have found with the overall quality of the mouse is that the scroll wheel can start to make unpleasant squeaking noises occasionally.
Razer gives you a mouse with a plastic build and some rubber. The plastic feels high quality and does not raise any concerns. On the sides of the mouse and on the scroll wheel are rubber pieces that allow the mouse to be more comfortable as it is easier to hold the mouse.
The cable is a nice braided cable and I have no faced any issues. It isn’t a super heavy like many other gaming mice.
The Razer DeathAdder Essential has 5 re-programmable buttons. What does this mean? It means that out of the box, each button has its own function. But through the software, users can change the function for each button.
Shape and Comfort
The Razer DeathAdder Essential is a very comfortable mouse. With some gaming mice, they are almost specifically designed for gaming, giving users a feeling of discomfort after using the mouse for a while. The DeathAdder Essential has an ergonomic shape, making it an excellent choice for those who suffer from pain in their wrists, or in their hand.
You can use this mouse with a palm, fingertip, or claw grip. All work quite well even though it is an ergonomic mouse. The mouse is also compatible with hands of all sizes.
The most important thing about the actual shape is that this mouse is specifically designed for right-handed people. If you are left-handed and in the market for a low-cost mouse, the DeathAdder is not a very good option for you.
Switches and Scroll Wheel
The DeathAdder Essential has mechanical switches with approximately a 10 million click life span. On the mouse, the switches are nothing special. They work and certainly aren’t bad, but the frustrating part is that they could be so much better.
Razer released the optical switches a few years back, that deliver faster clicks and minimal latency. The fact that Razer has implemented this switch on 10 of their other mice, but not this one is definitely a bit upsetting.
The scroll wheel itself is nice with some grippyness and nice tactile steps.
Sensor and Polling Rate
The sensor on the Razer DeathAdder Essential has a range of 200-6400 DPI. For those of you reading the article and wondering what DPI is, it stands for dots-per-inch. You can basically say that DPI is another way of saying mouse sensitivity. The higher the DPI, the higher the sensitivity. Disappointingly, you cannot change the DPI on the mouse through a DPI button, but you have to access the DPI controls through Razer Synapse.
The Polling Rate on the DeathAdder Essential can be toggled from 500 or 1000 MHz. The Polling Rate basically sends an update of the mouse’s position to the computer. 500 MHz means an update is sent every 2 milliseconds, 1000 Mhz means an update is sent every millisecond. The difference between 500 and 1000 is hardly noticeable, but the option is there for those who prefer either of the two.
Razer Synapse
In order to utilize the full potential and features of the DeathAdder Essential, users must install Razer Synapse.
Within the software, three major changes can be made to the mouse. The lighting can be adjusted, the DPI and Polling rate can be changed, and the mouse buttons can be re-programmed.
The customize feature is great for people who like playing around with all sorts of settings and seeing what works best for them. With this feature, users can choose the DPI, change the mouse function, create windows shortcuts, activate multimedia settings such as play, pause, the ability to launch programs or disable each button on the mouse. Suffice to say, if you want a mouse that is jam-packed with features, the Razer DeathAdder Essential is looking pretty good for you right about now.
The DPI changes in increments of 100. In the program, users can set different sensitivity stages, which are effectively different presets for different uses. For instance, while gaming, if you prefer a higher sensitivity, you can make a sensitivity stage of an x amount of DPI, and you can make another one for work/web browsing.
Adjusting the lighting is another feature that Razer has included with the DeathAdder Essential. Although this feature is quite underwhelming and may be a bit of a letdown for the RGB fans out there who were enjoying the features of the mouse so far, you can’t really complain after you see the price of the mouse. You can only change the brightness, toggle between static light and breathing light, and choose if you want the lighting to switch off after a certain amount of minutes (up to 15 minutes).
Conclusion: Is The Razer DeathAdder Essential A Good Fit For You?
All in all, the Razer DeathAdder Essential is a great buy for people who are getting into the PC gaming world and are just playing casually with friends. While the mouse has a plethora of positives, I just want to mention the negatives right now to establish any deal breakers for you guys.
The DeathAdder Essential is designed for righties, if you are left-handed, this mouse won’t work for you. The only lighting available is the preset white or green (depending on which color mouse you purchase), so to all of our RGB fans, you might not be satisfied with the DeathAdder Essential.
Now while the DeathAdder Essential is a great buy for those with a budget of about $30, if you do have the extra price, Razer has many other products. The direct level above the DeathAdder Essential is the DeathAdder V2. The V2 has all the great features of the Essential, and more. The ability for full RGB customization, the world-class Razer Optical switches, up to 20k DPI, and 8 programmable buttons are all present. However, all of these extra features have to come at a raised price, and the V2 comes in at about $60.
The DeathAdder V2 Mini is another great option, but those with bigger hands might not prefer it. The V2 Mini has similar features, with full RGB customization, 8.5k DPI, and 6 programmable buttons. The V2Mini seems like a great pick, but keep in mind that it will come in a significantly smaller size.
Overall the Razer DeathAdder Essential is great for gaming, especially if you are on a budget and it is a great option to consider.

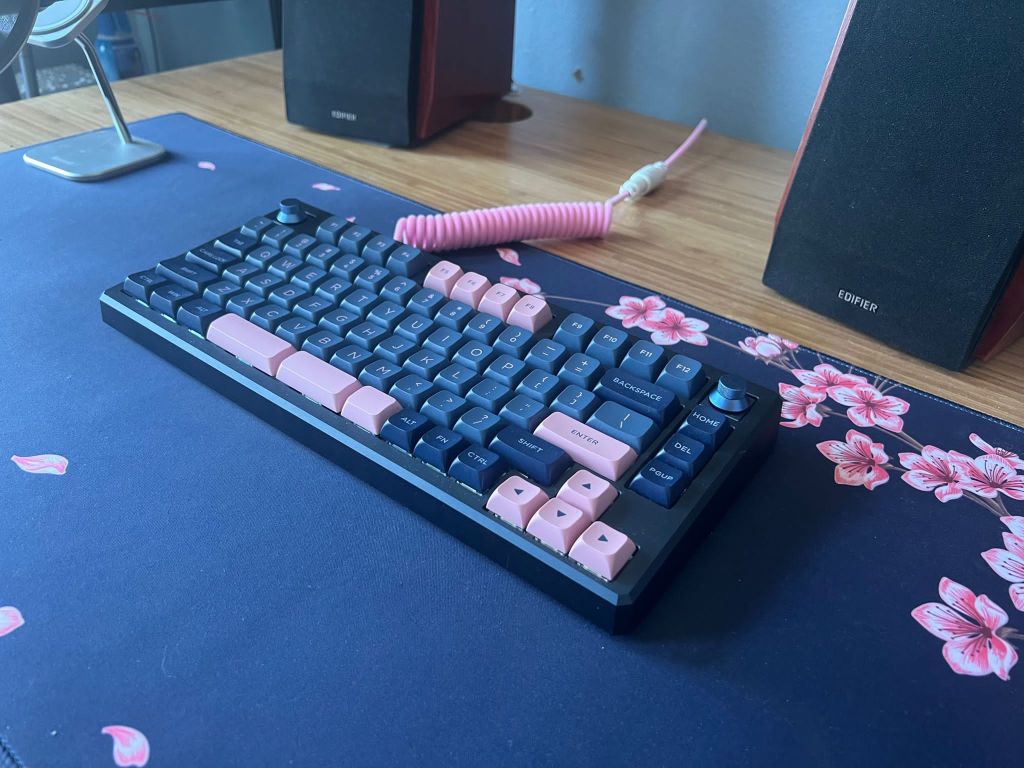
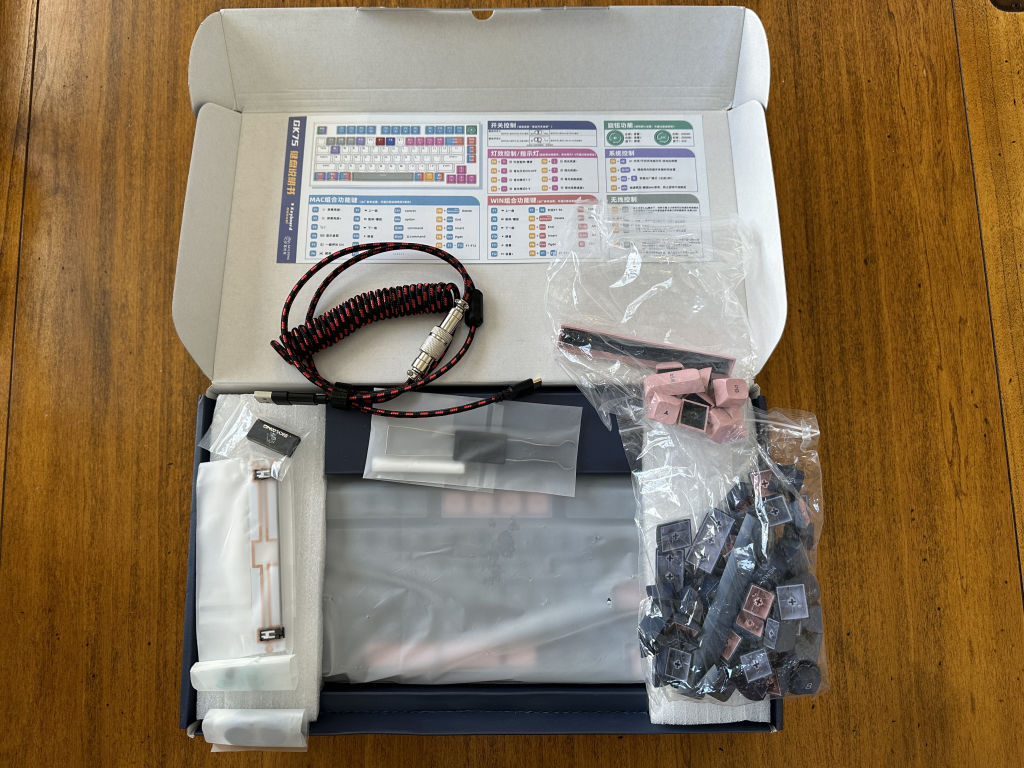
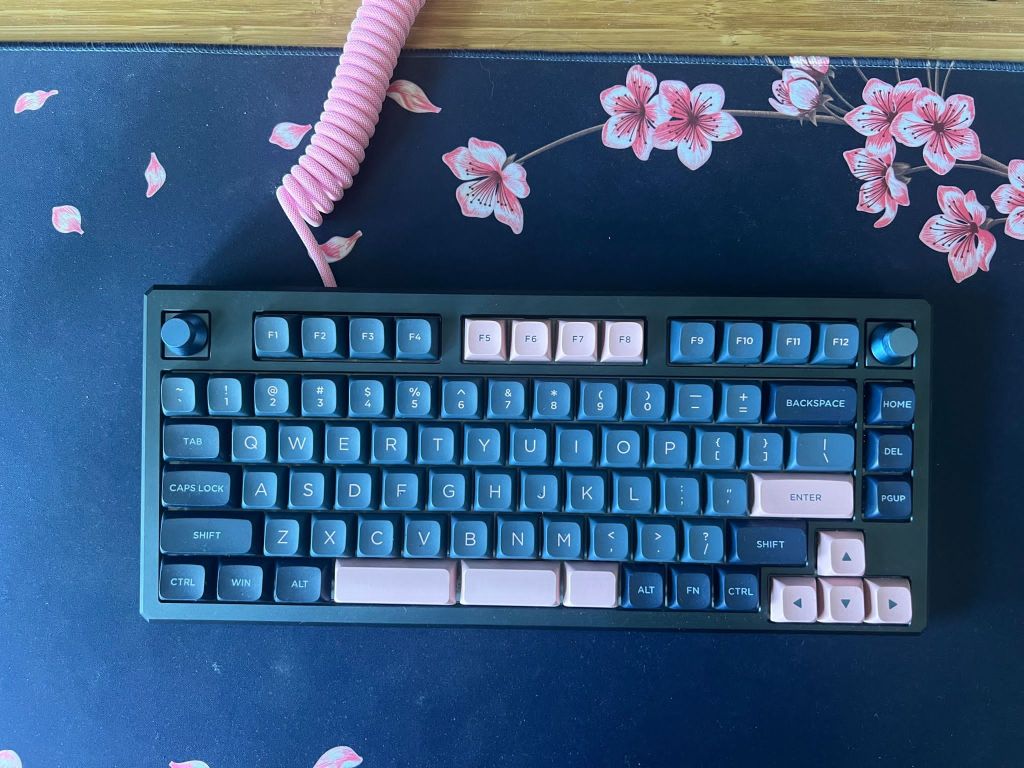
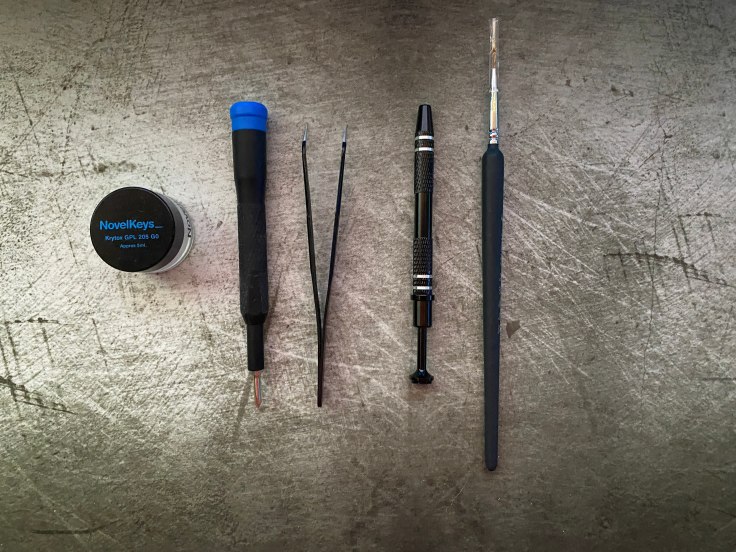
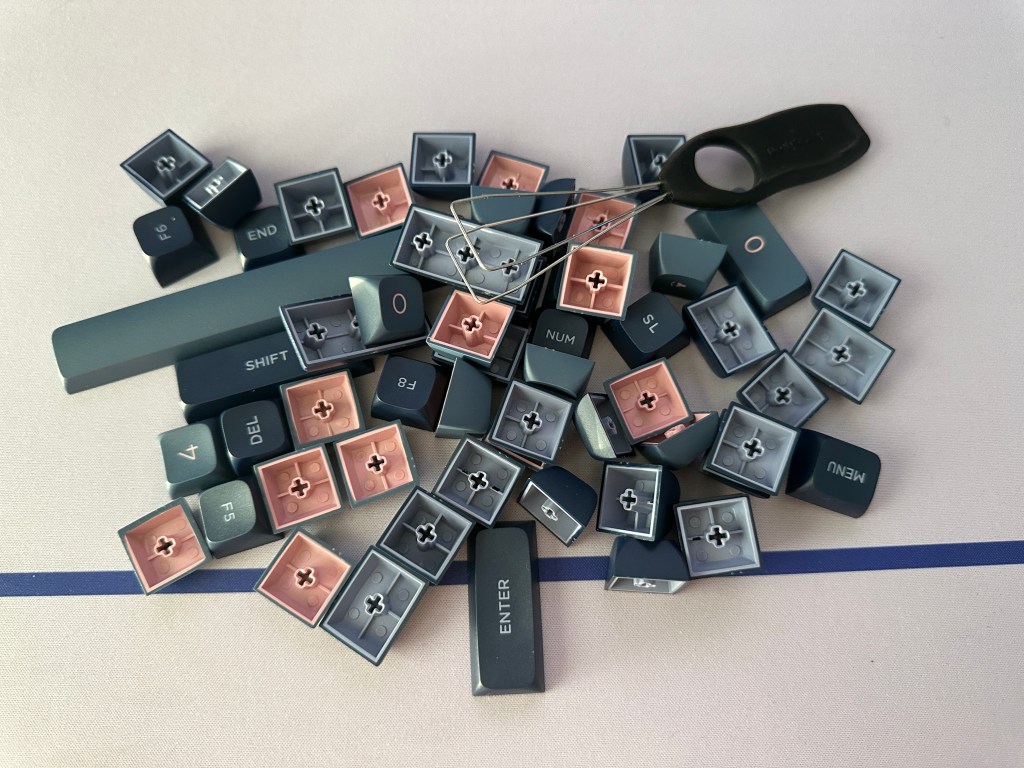
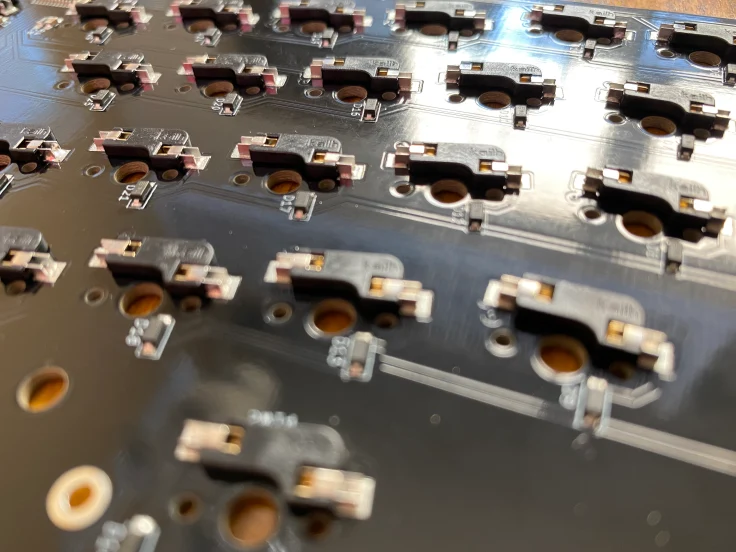
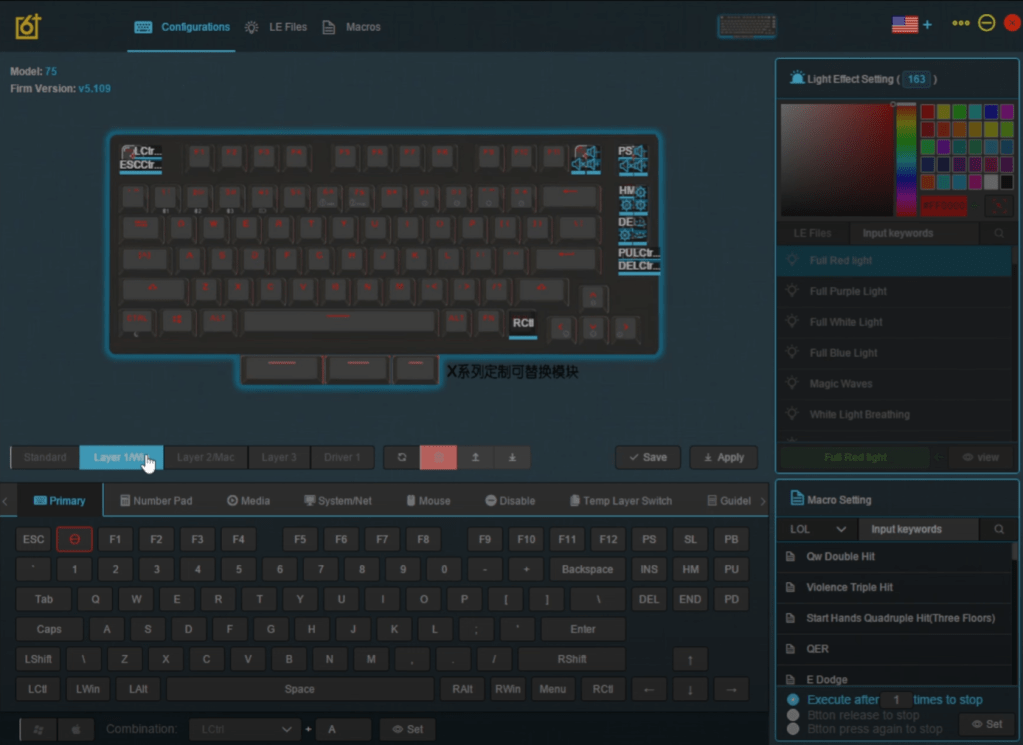
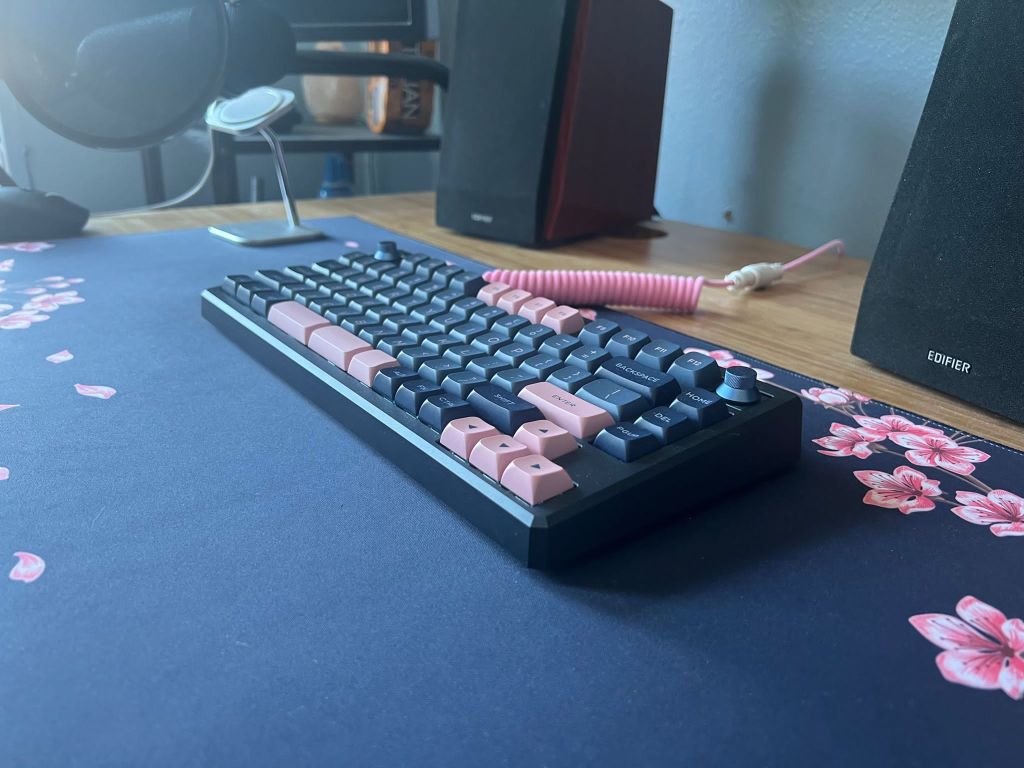
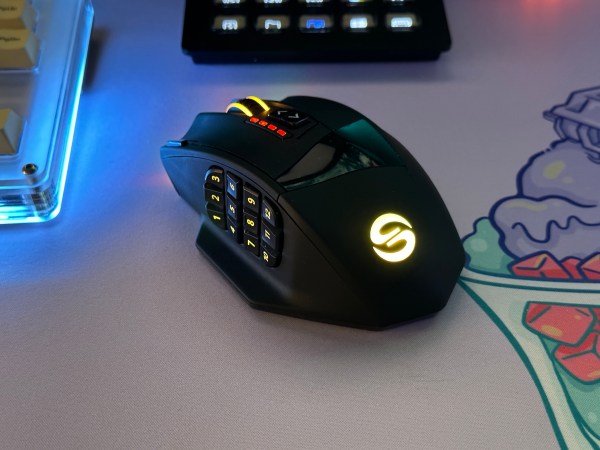

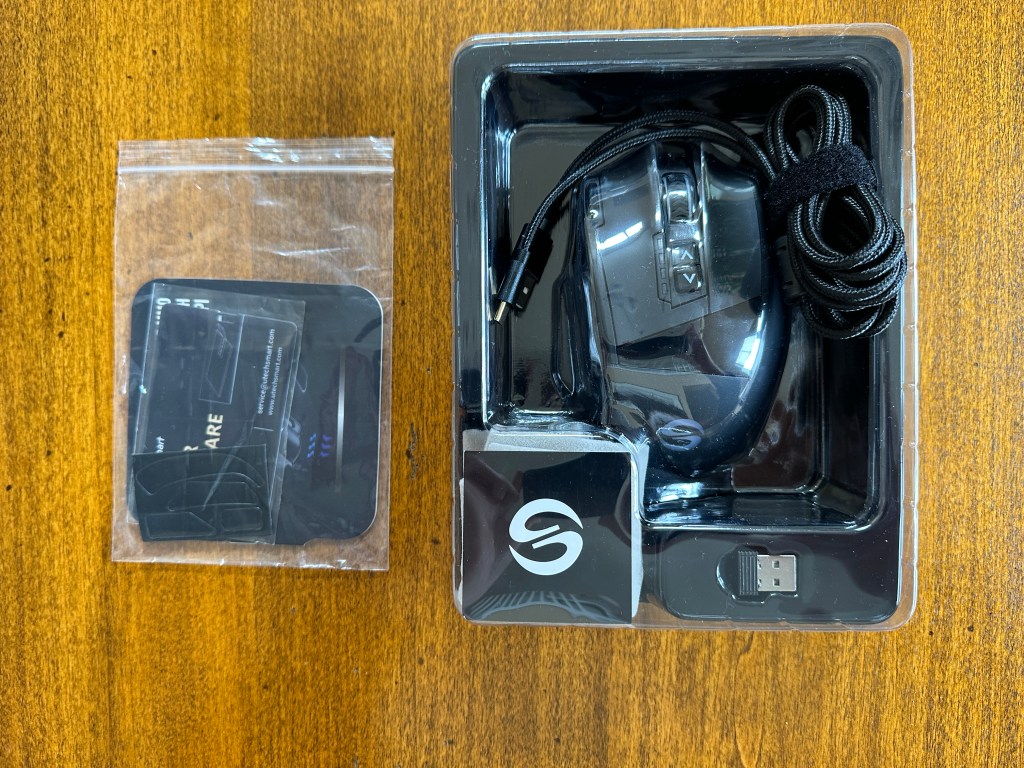
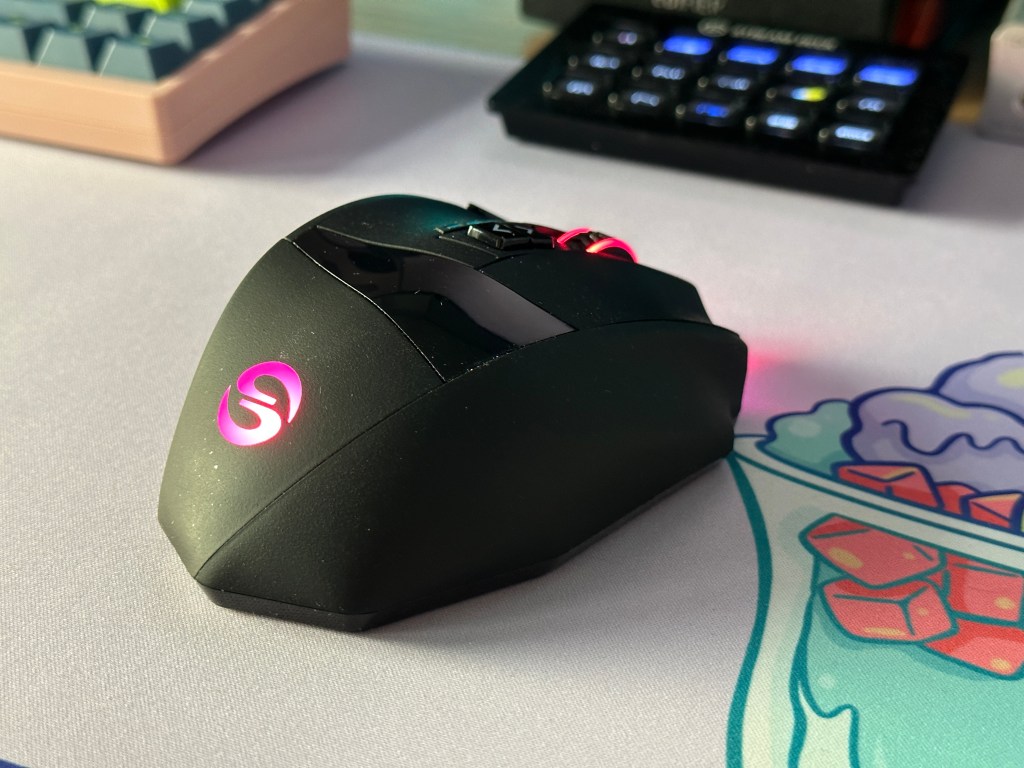

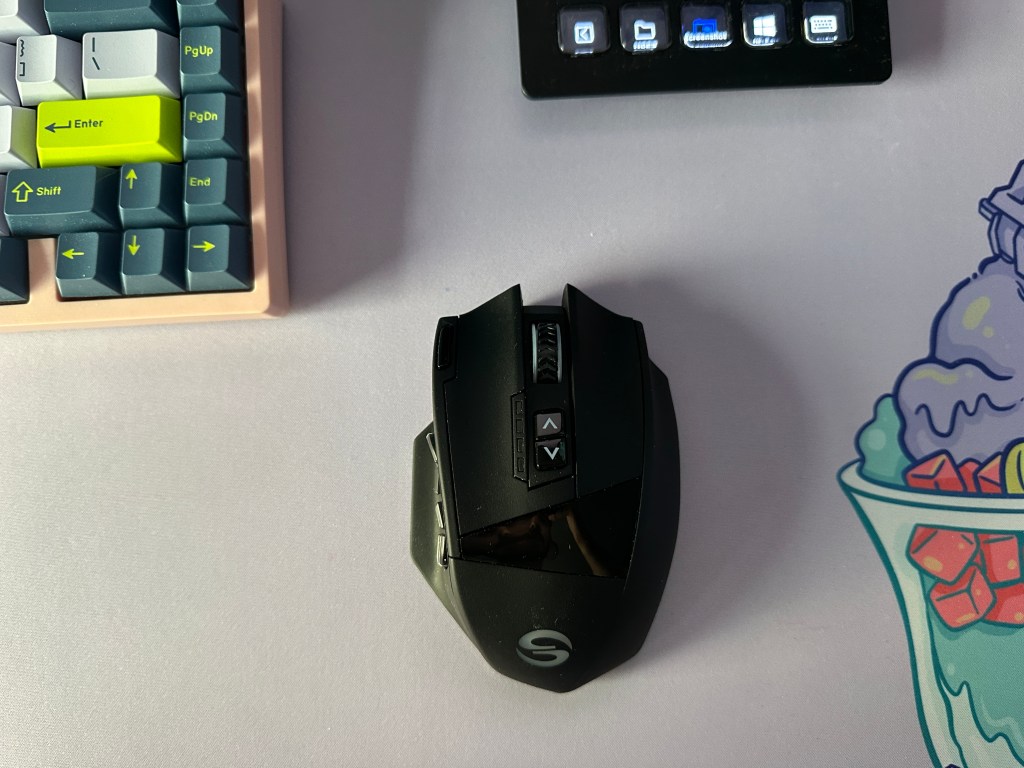


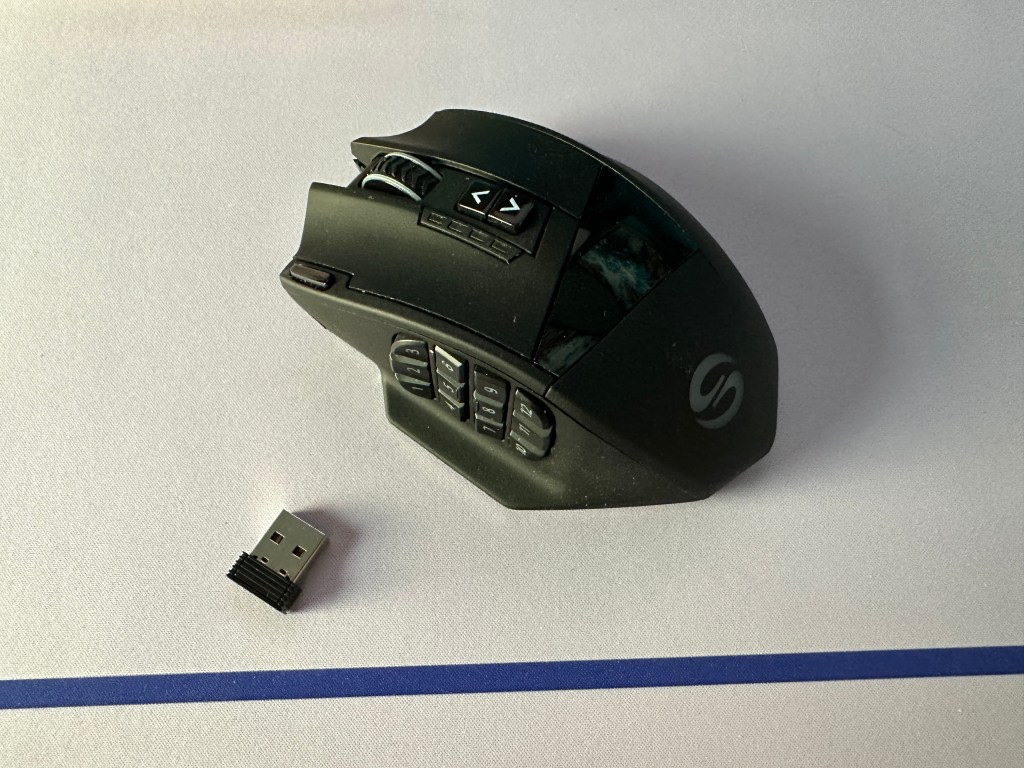
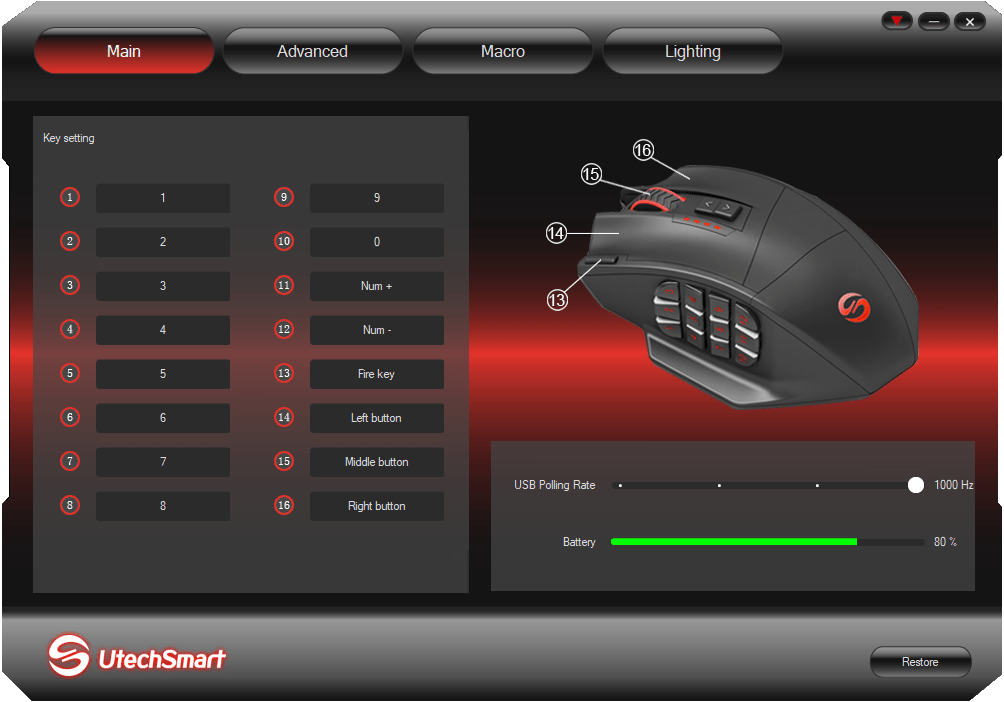
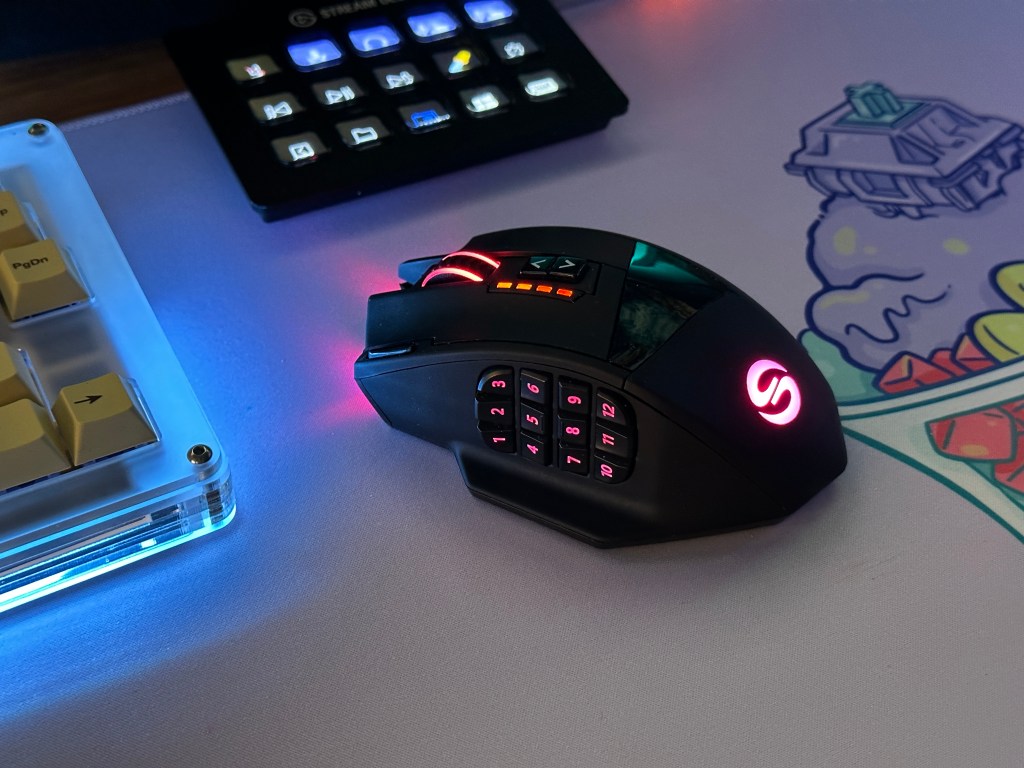
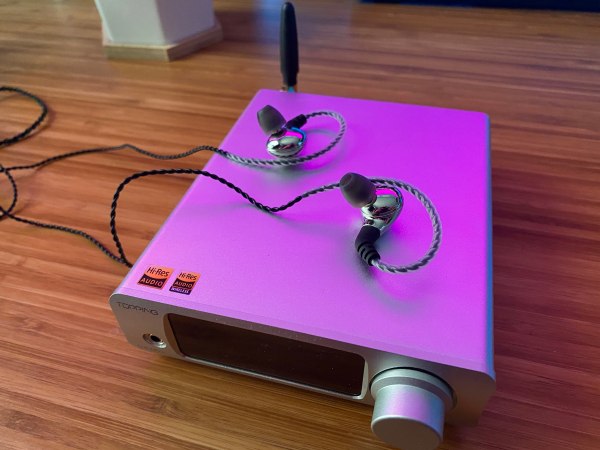

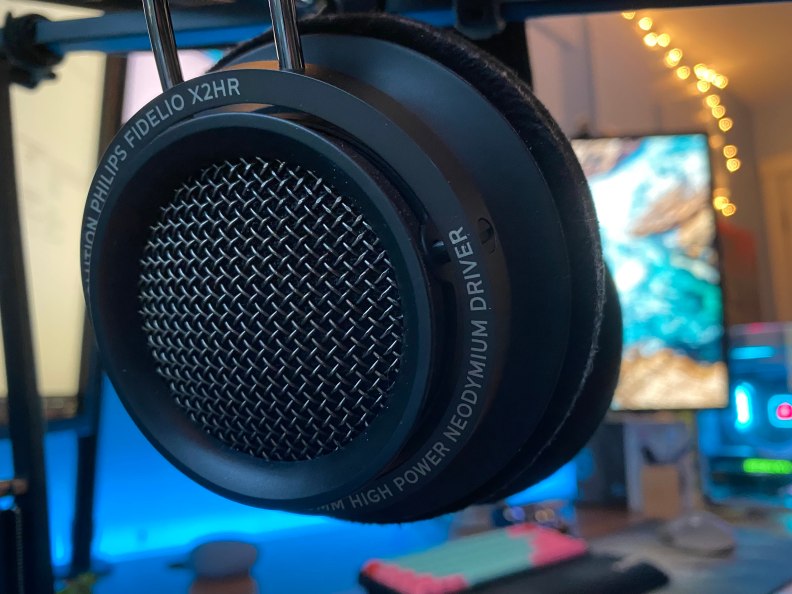
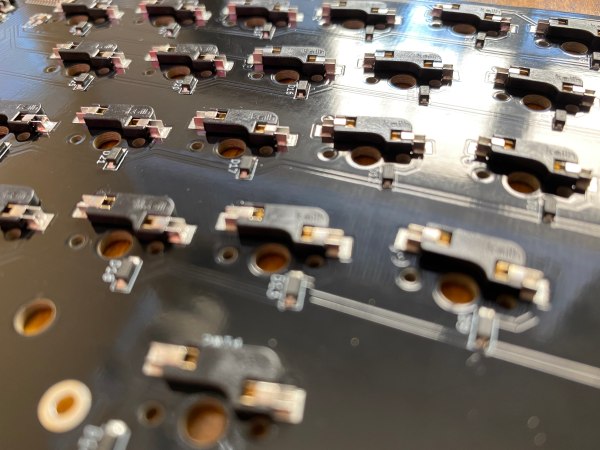
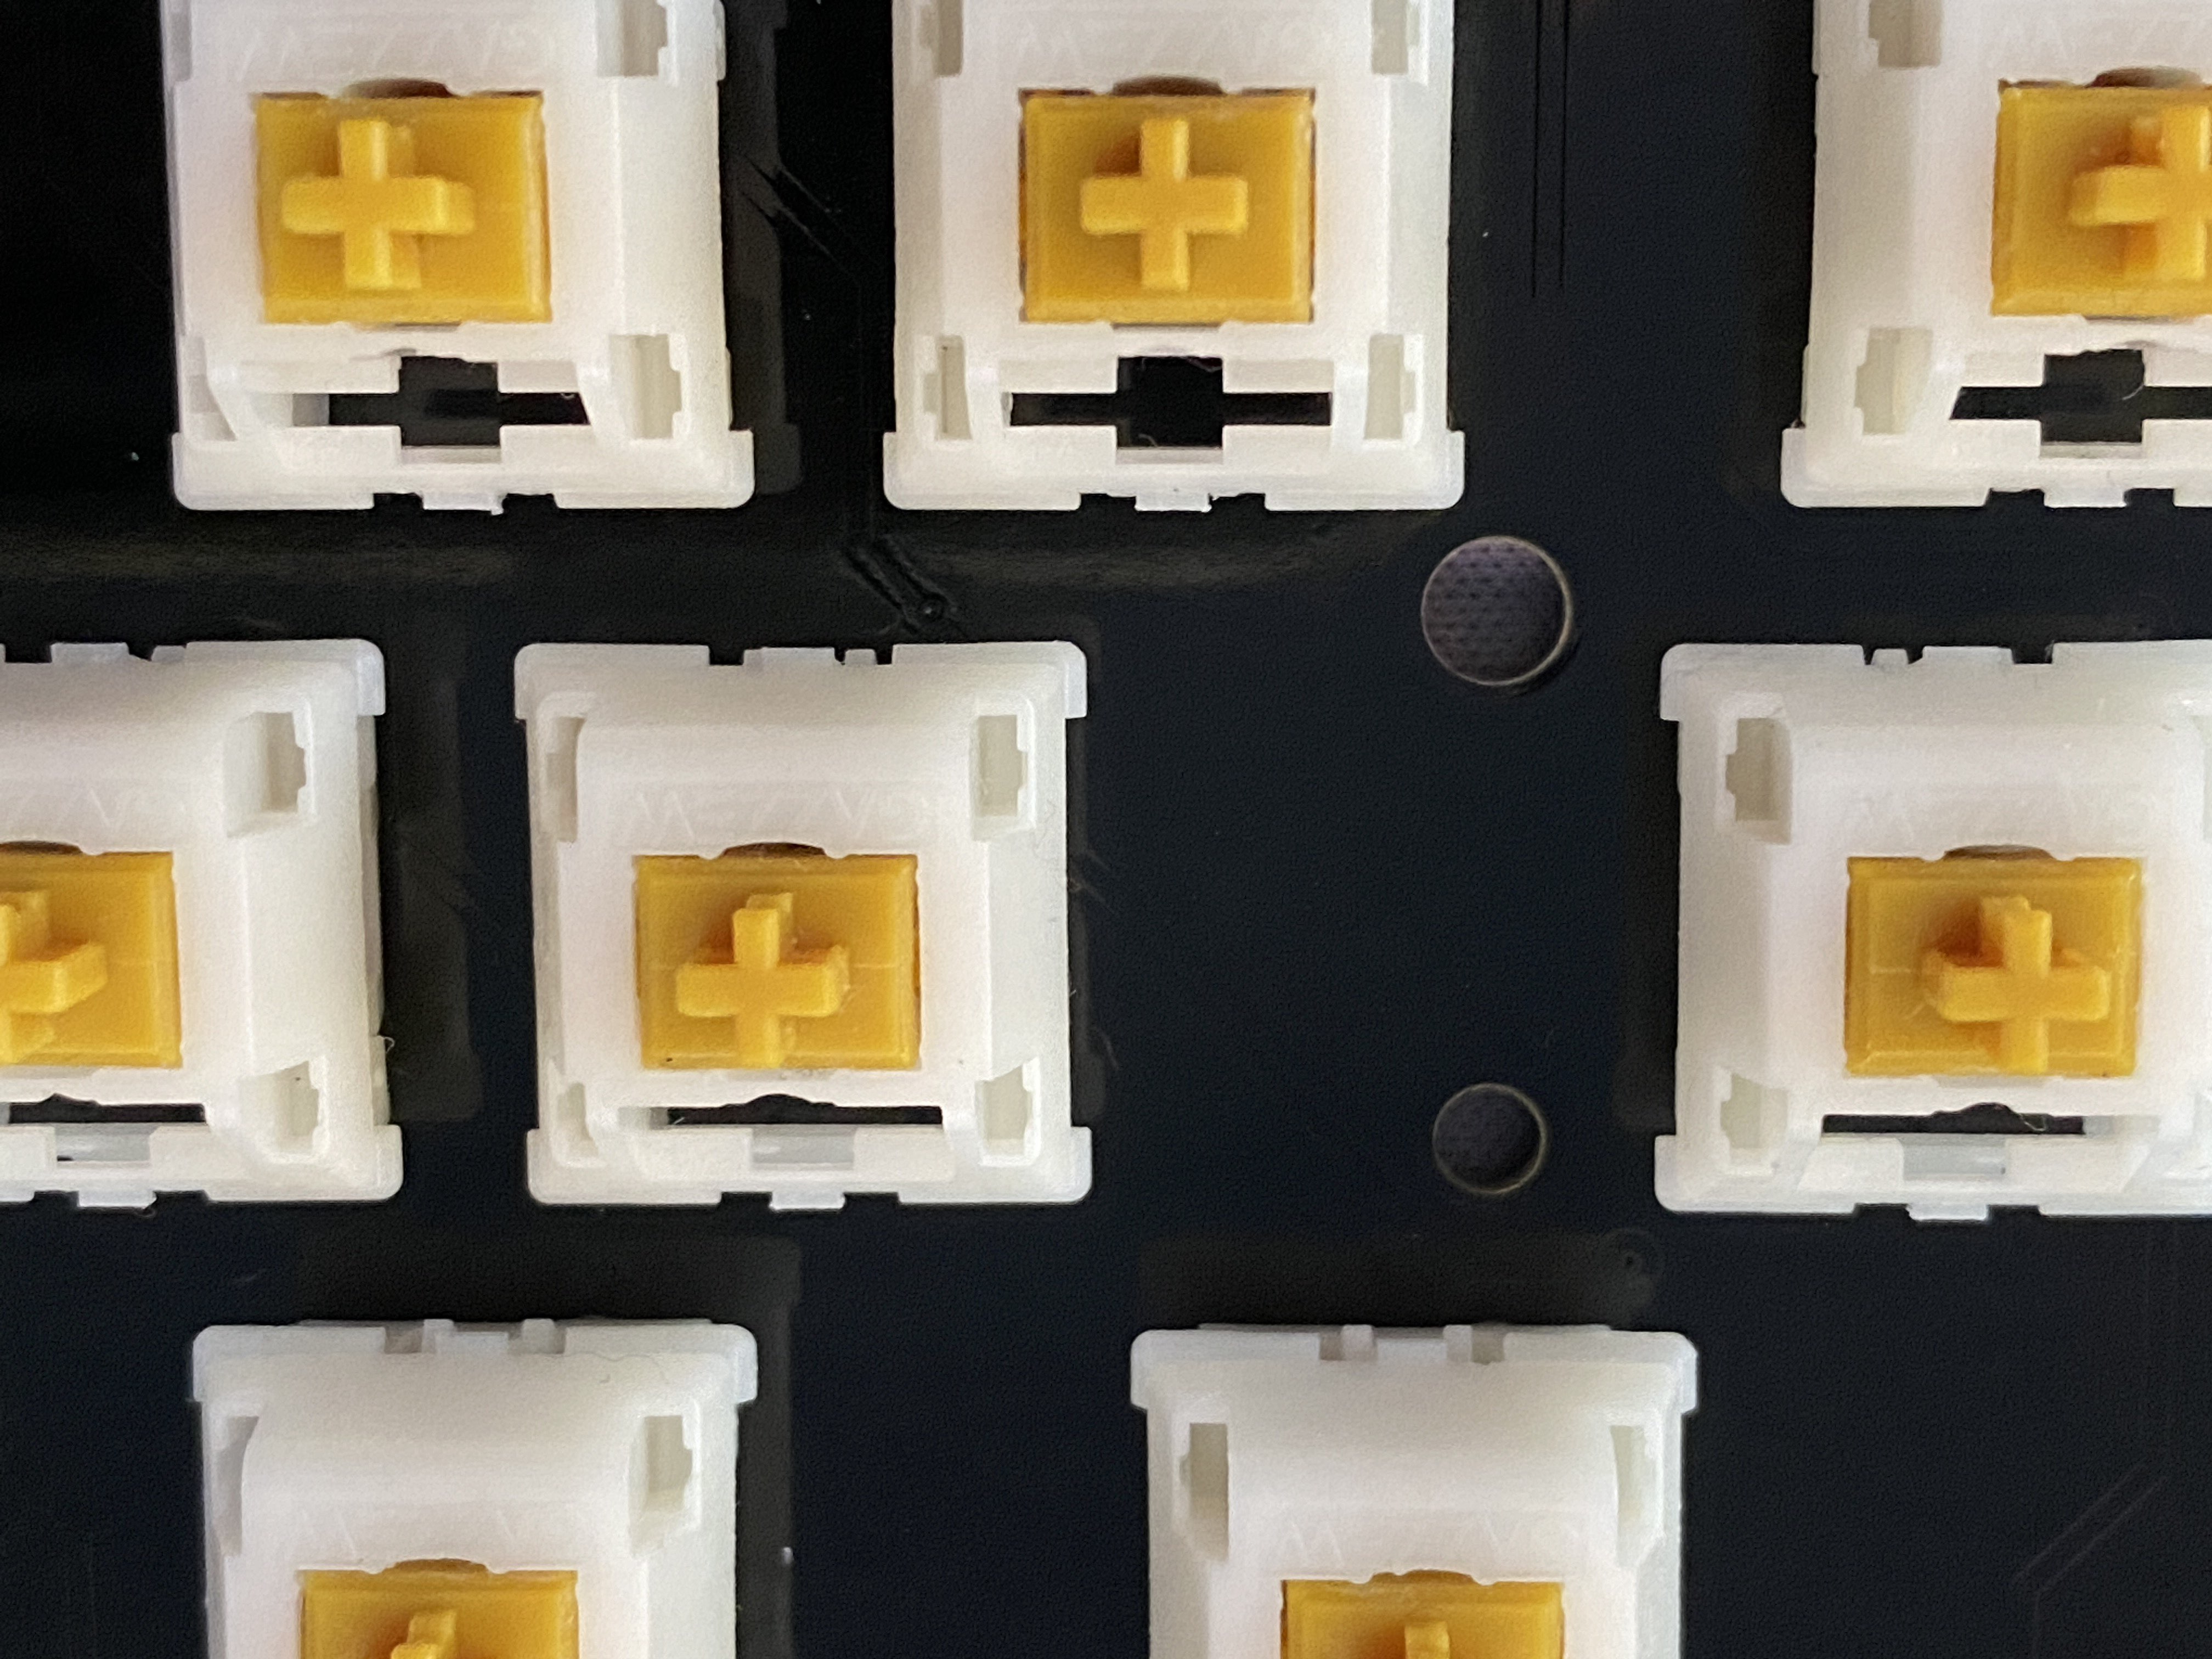
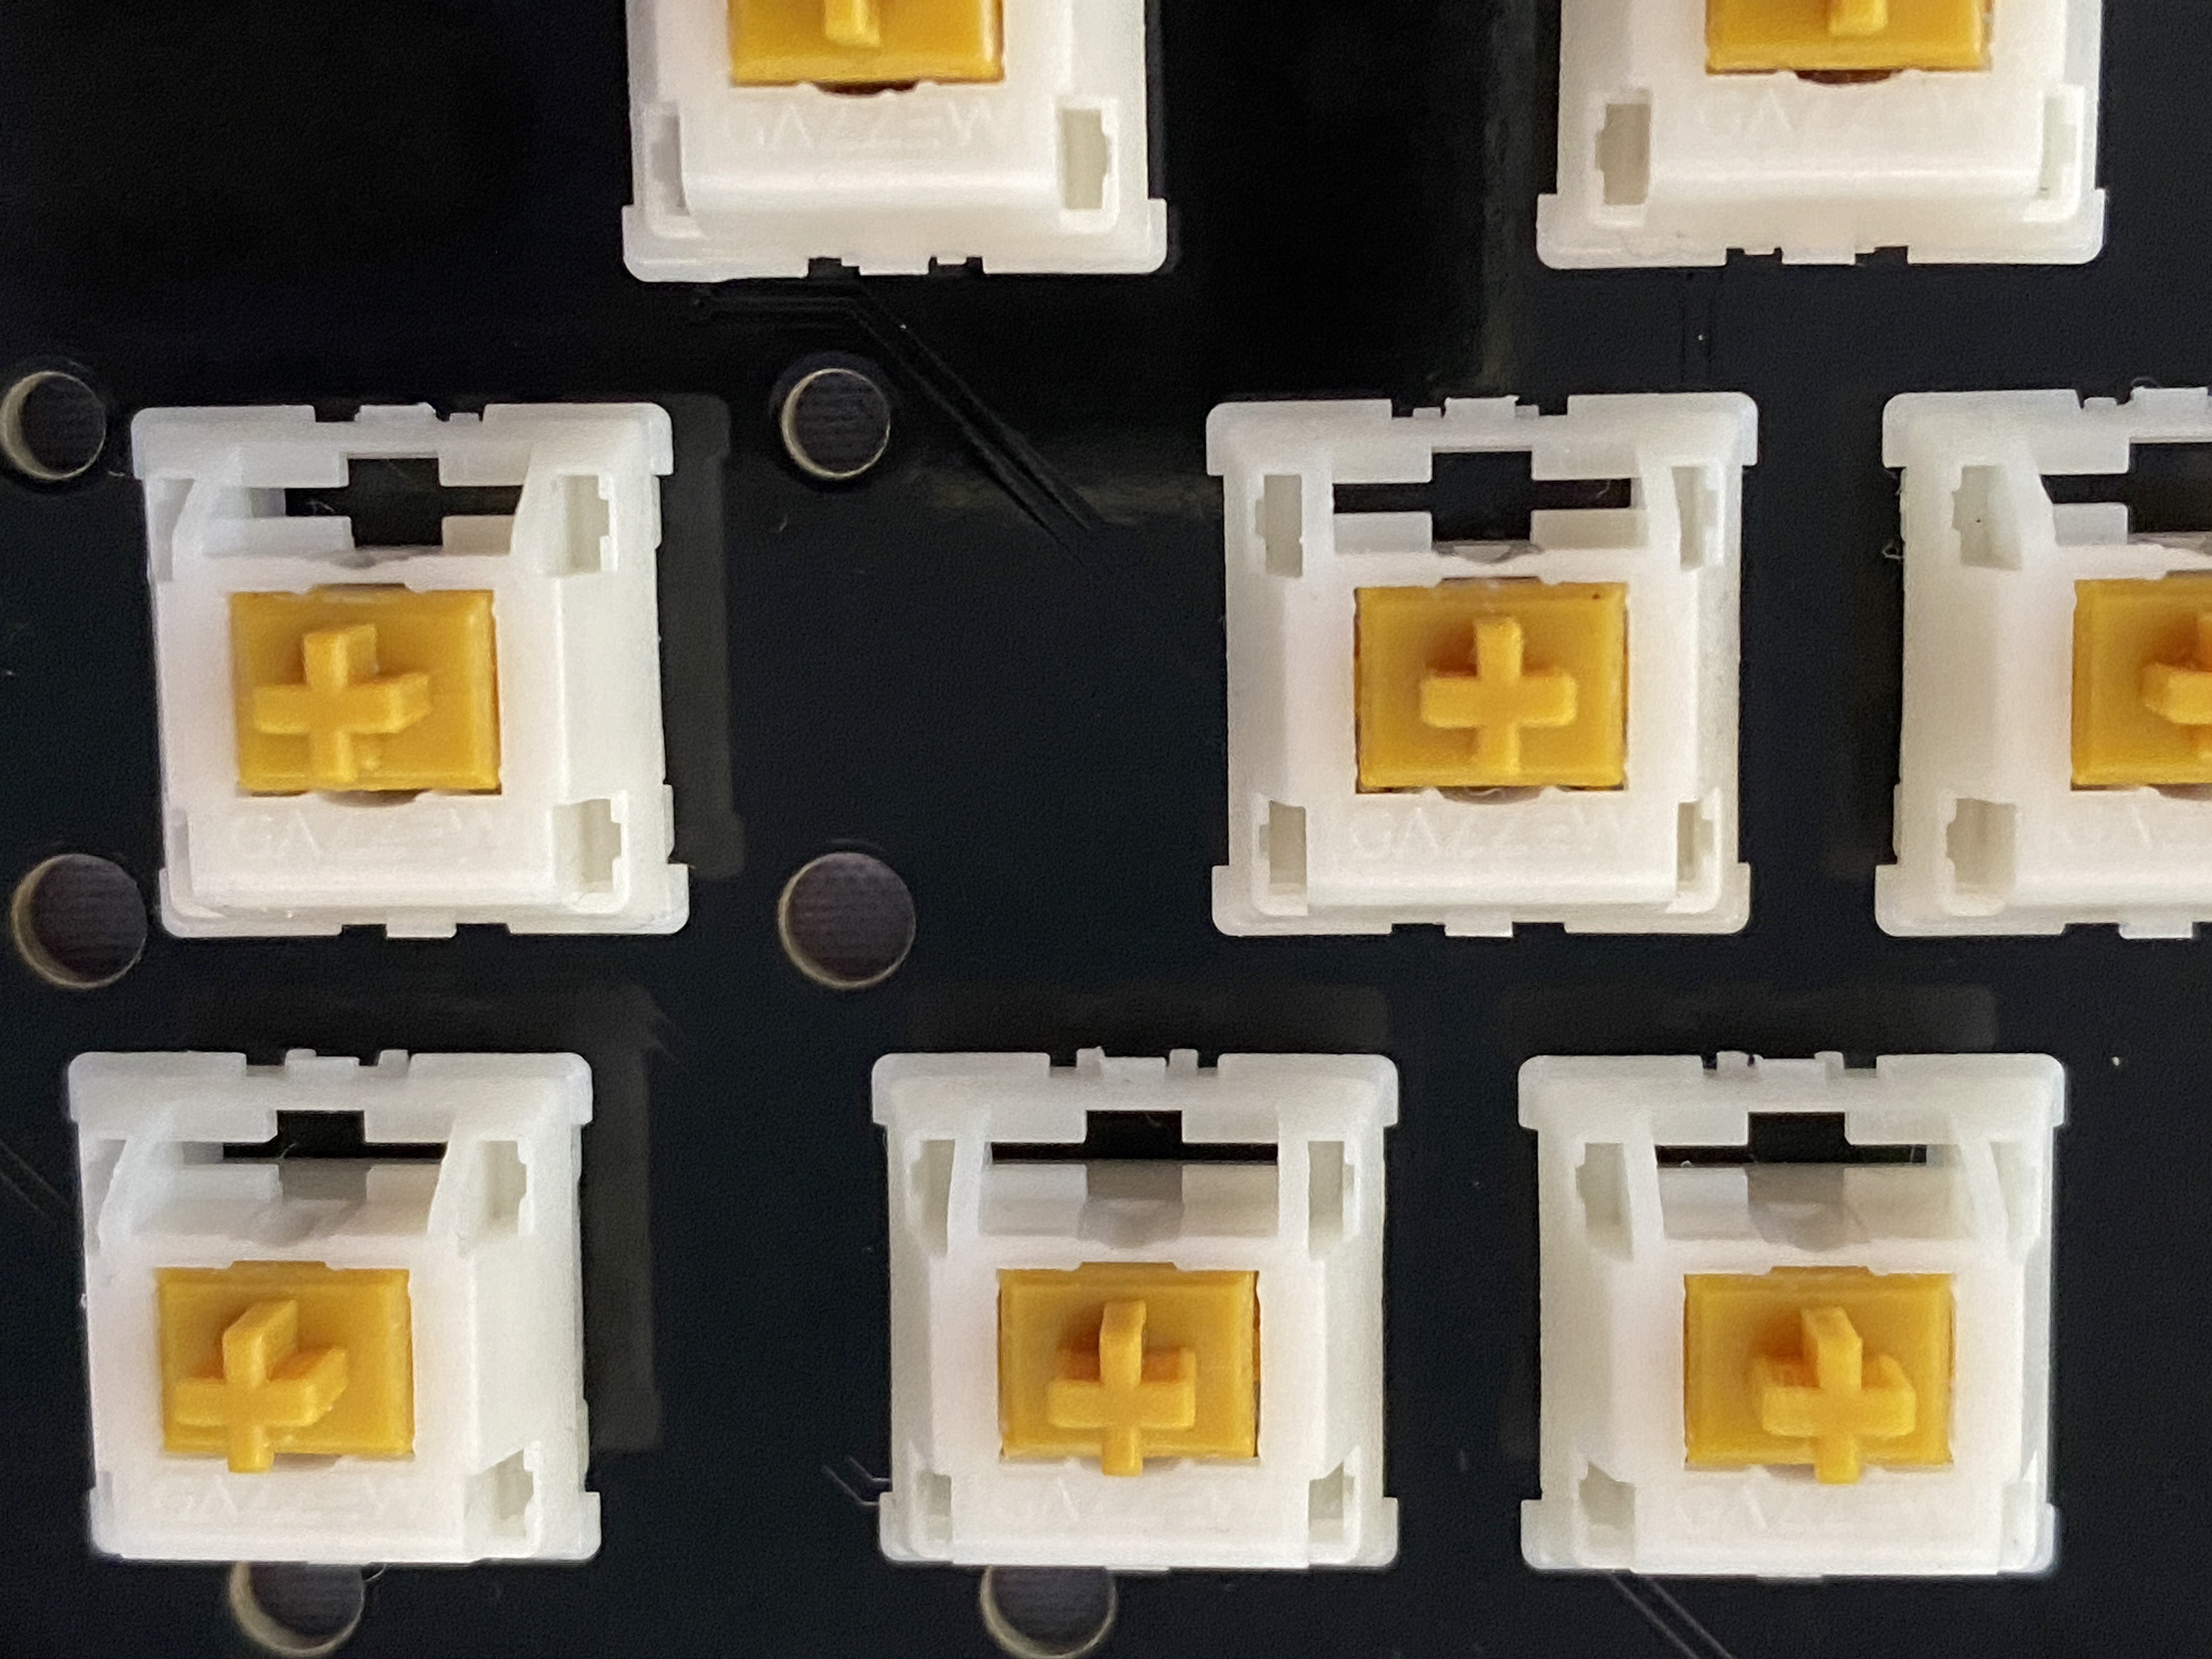
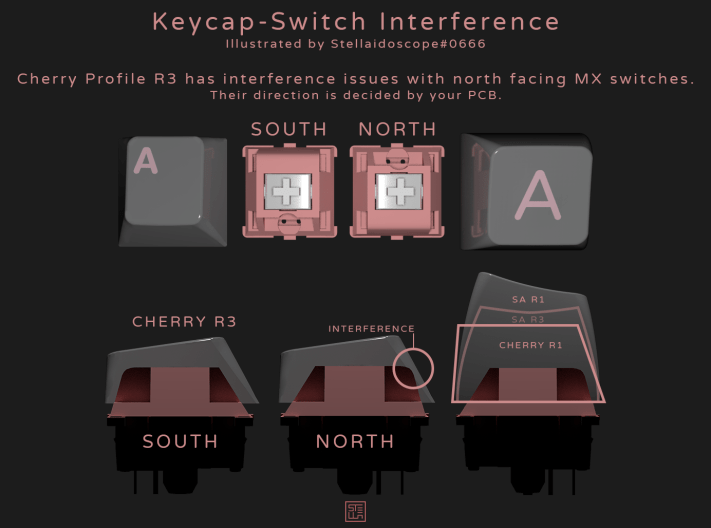

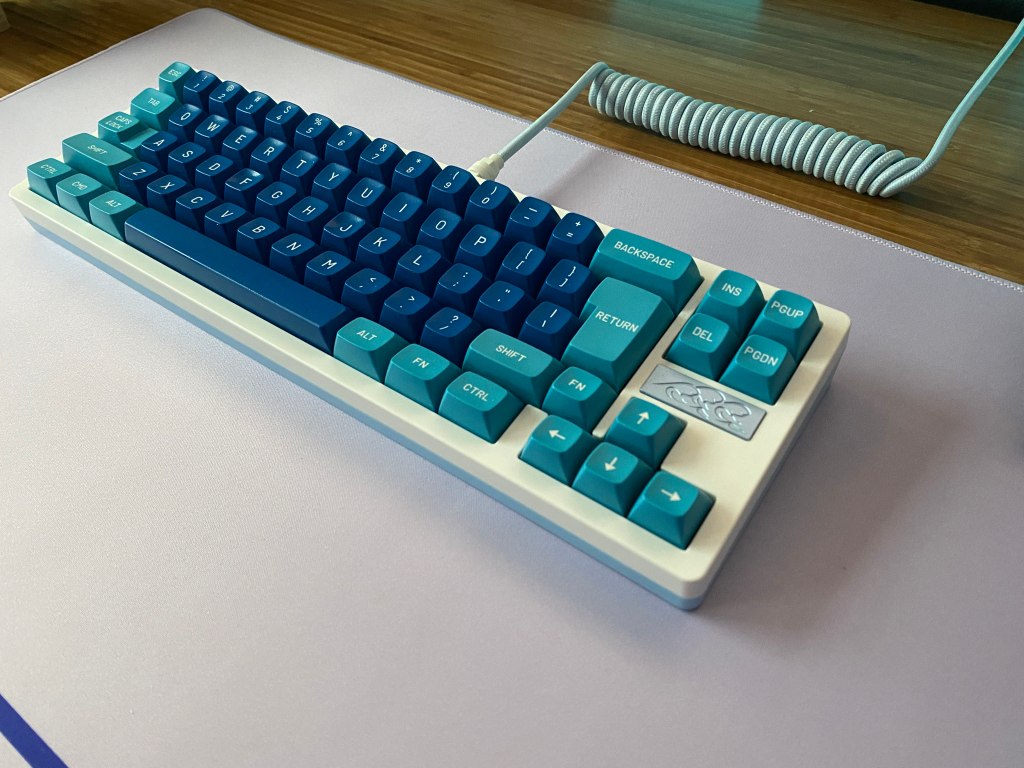

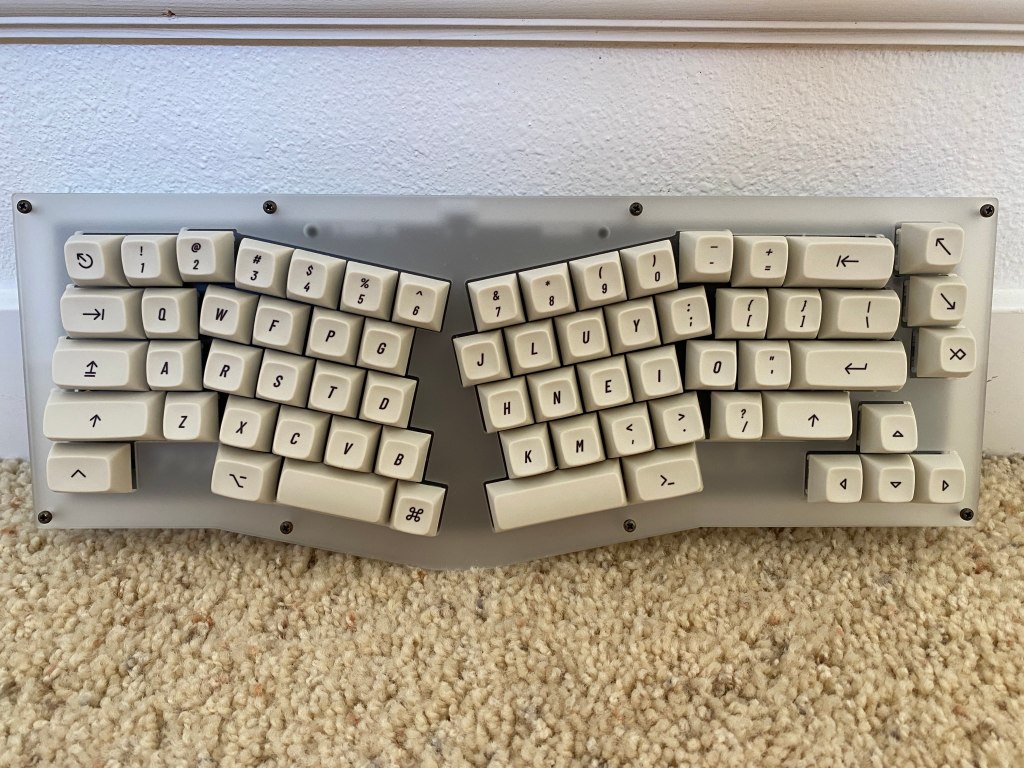

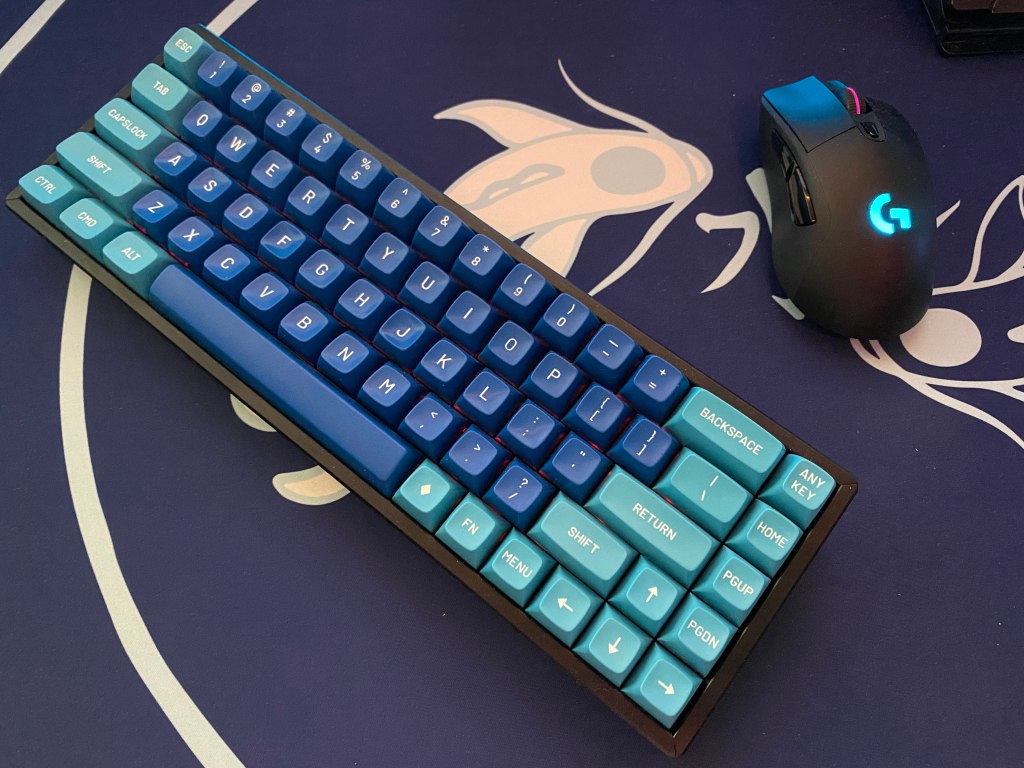
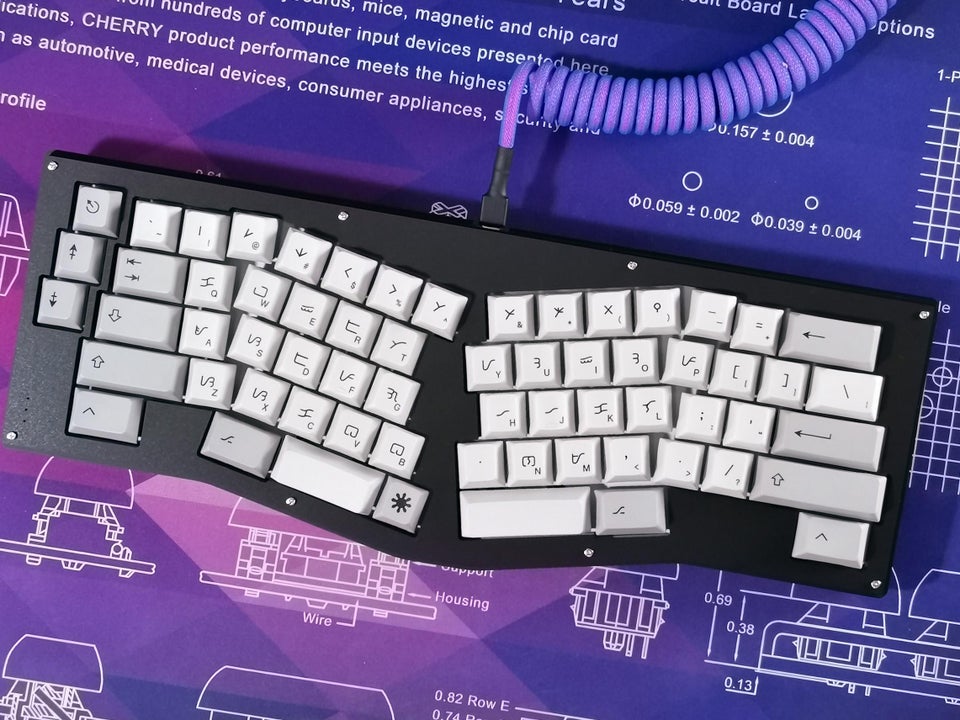
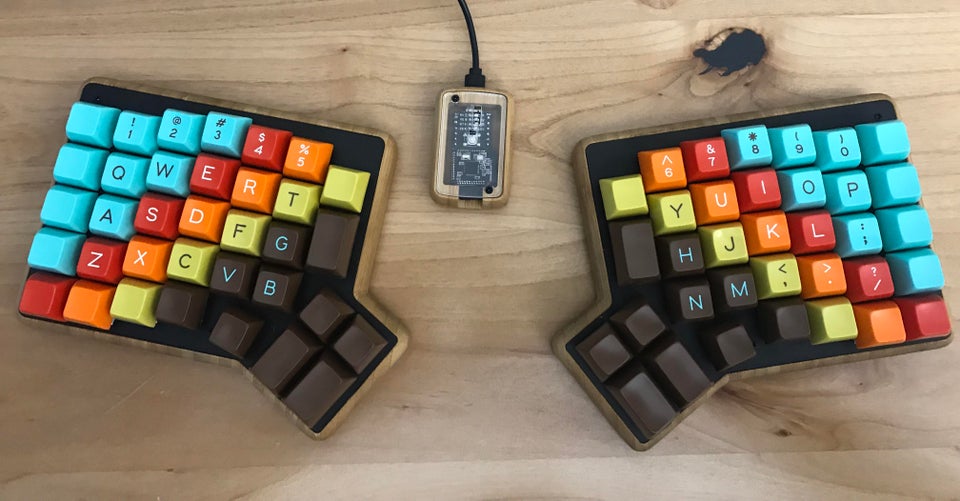
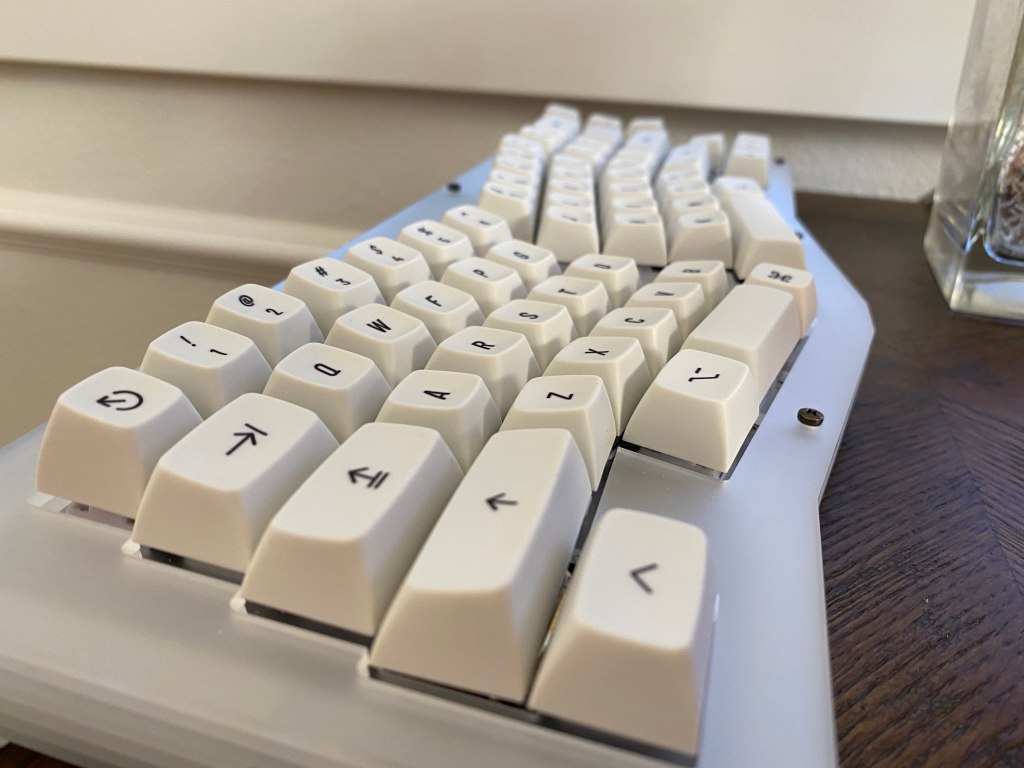
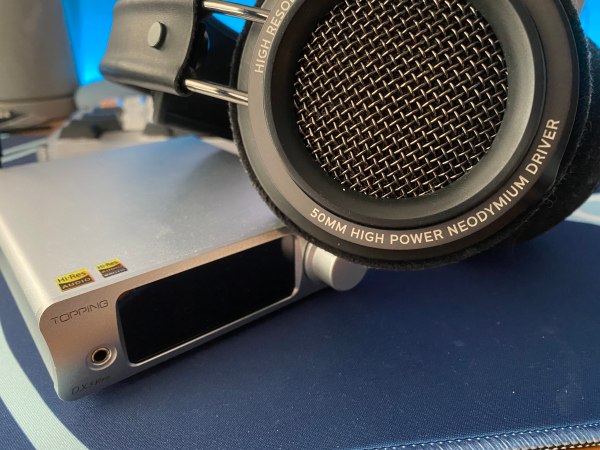

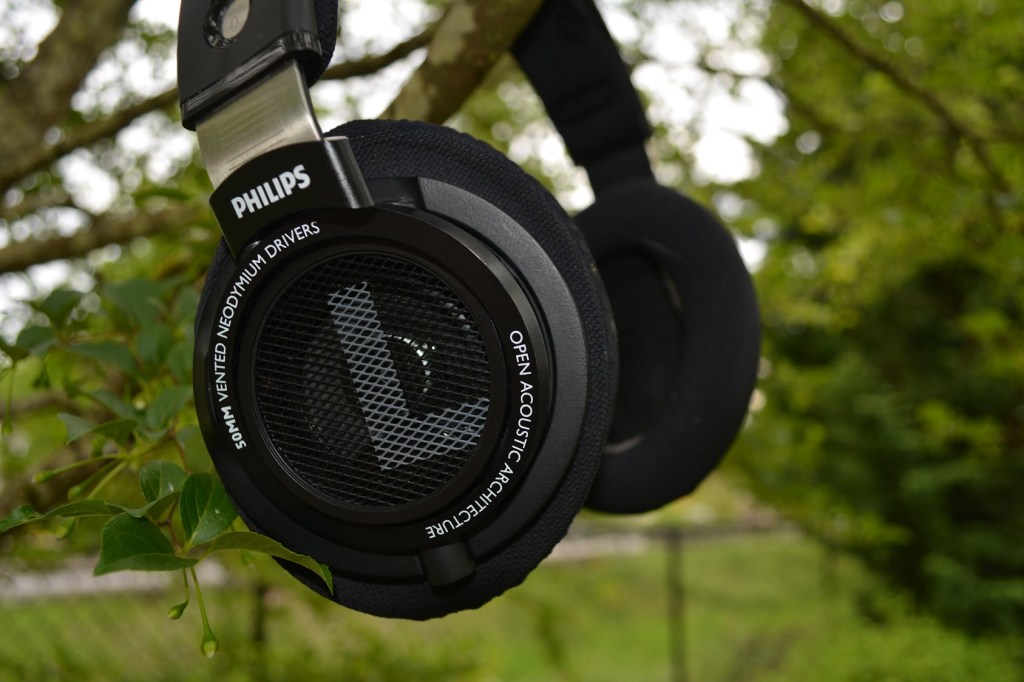
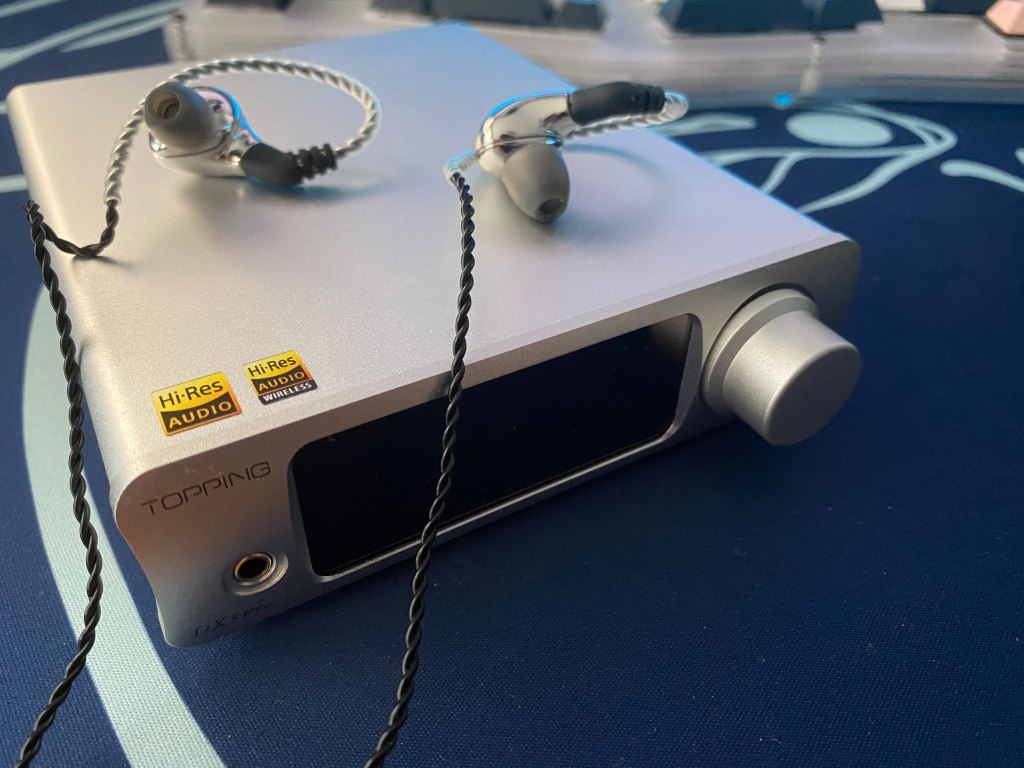
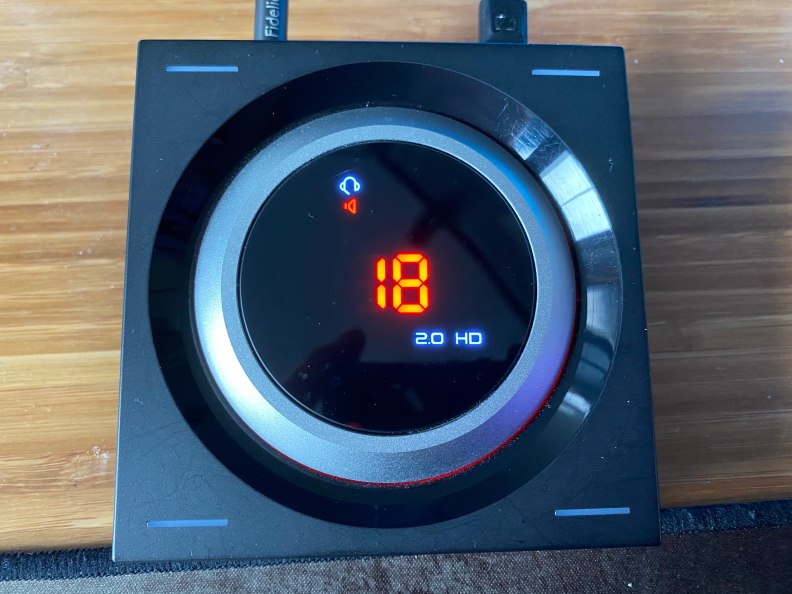


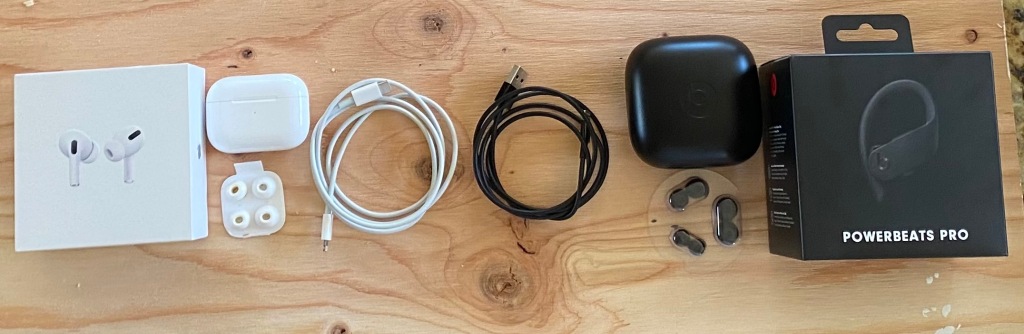
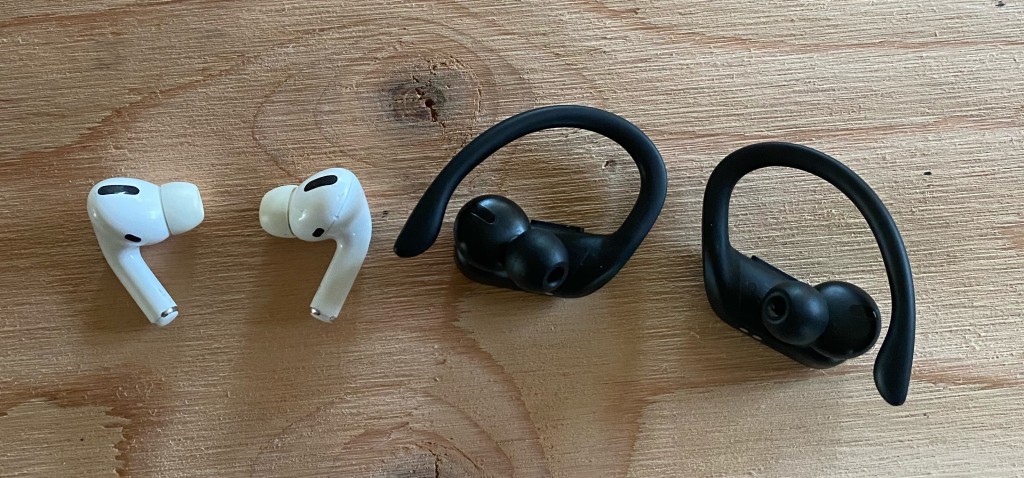
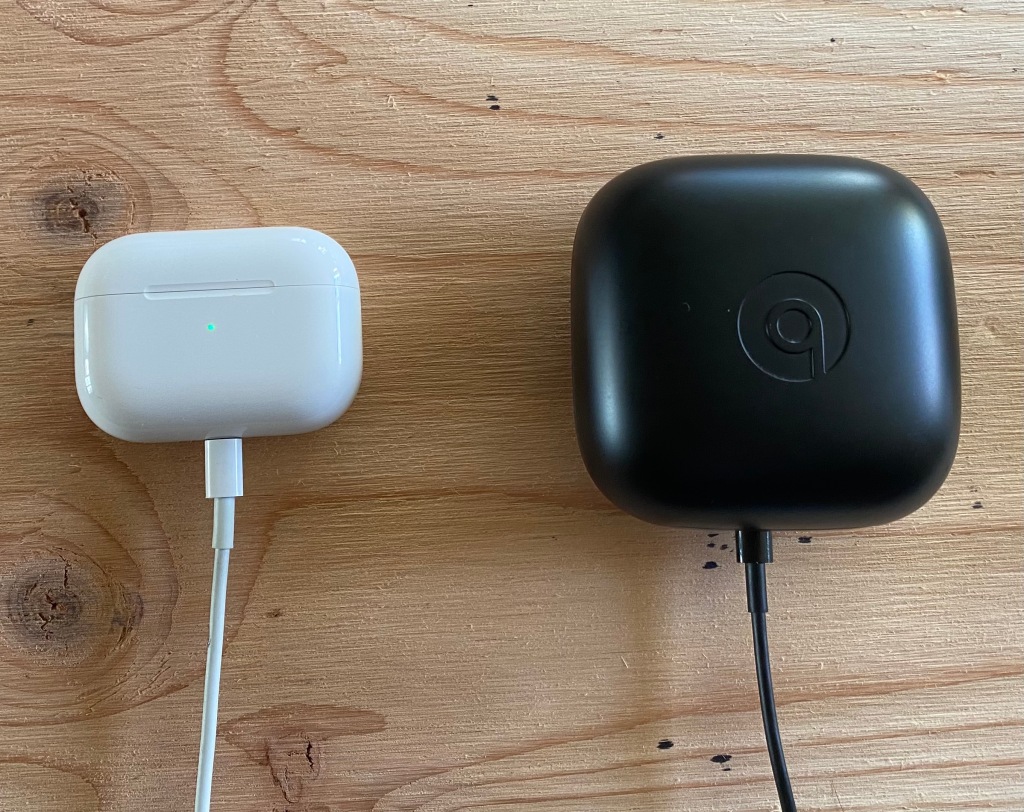
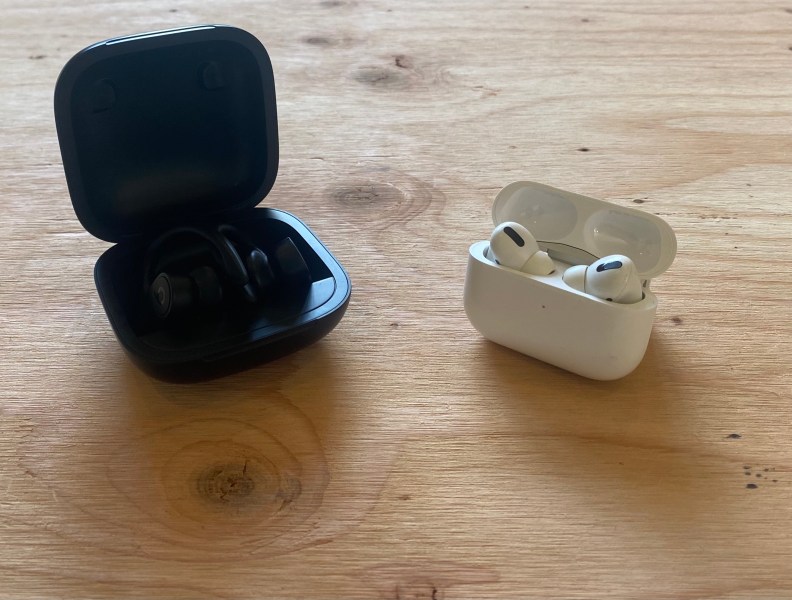

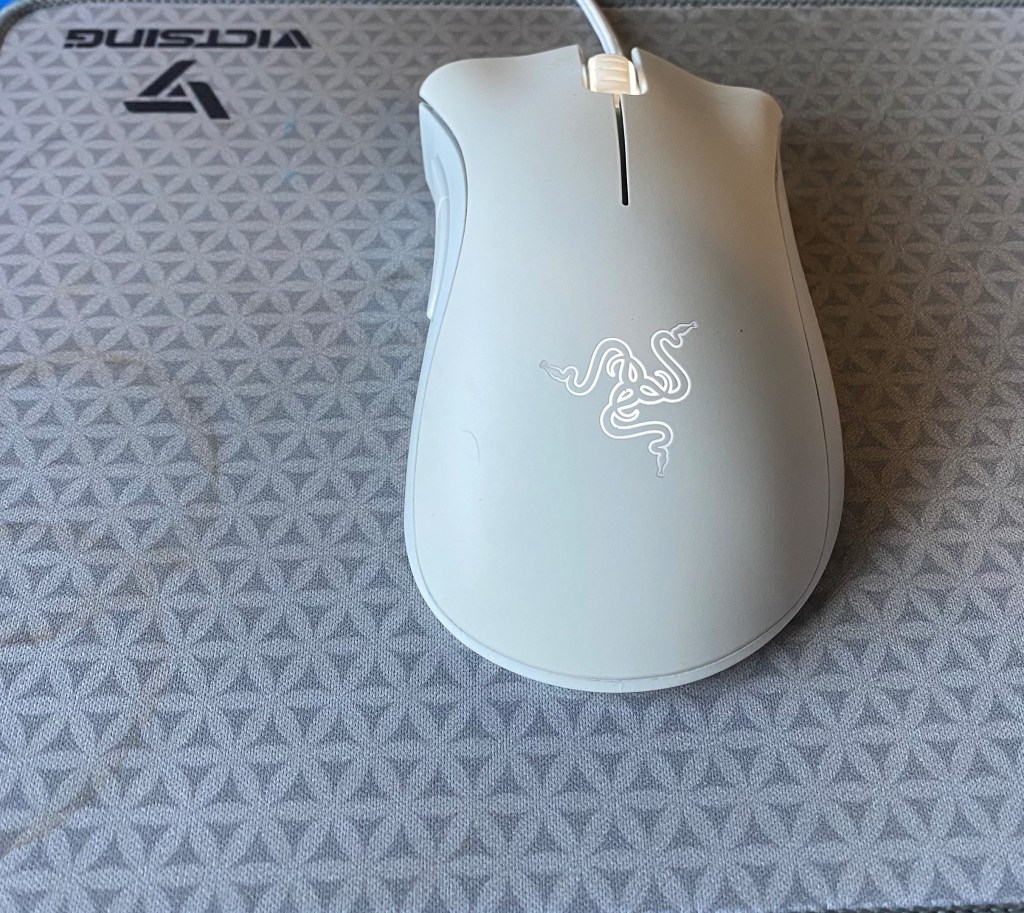
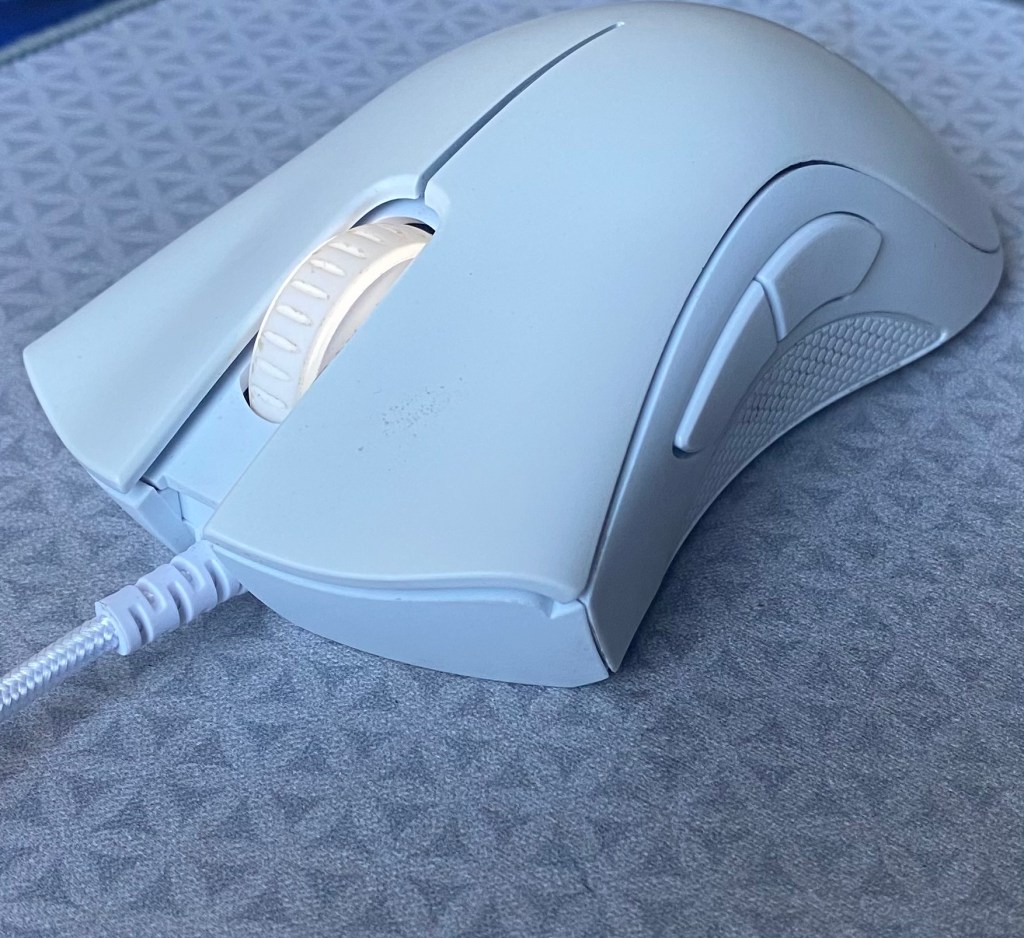
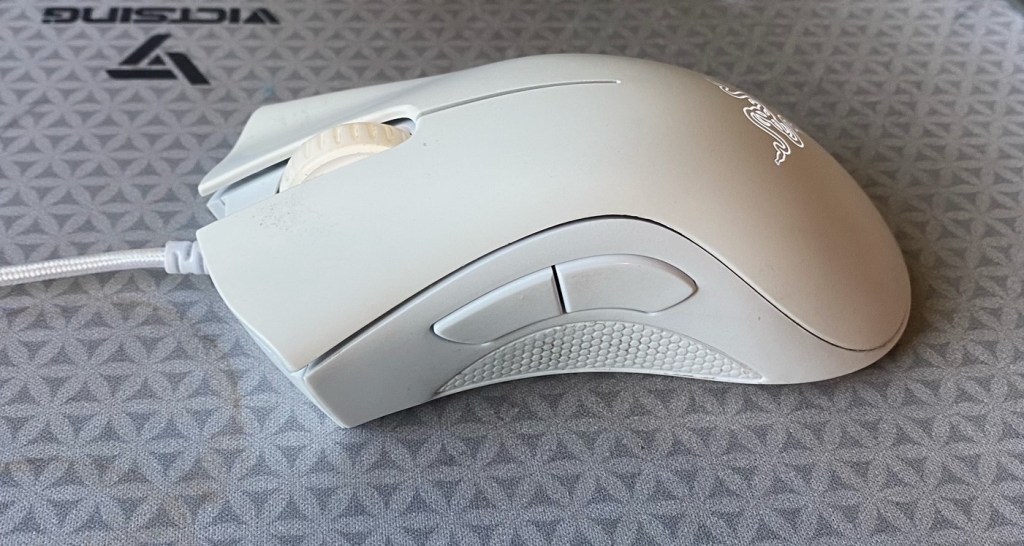

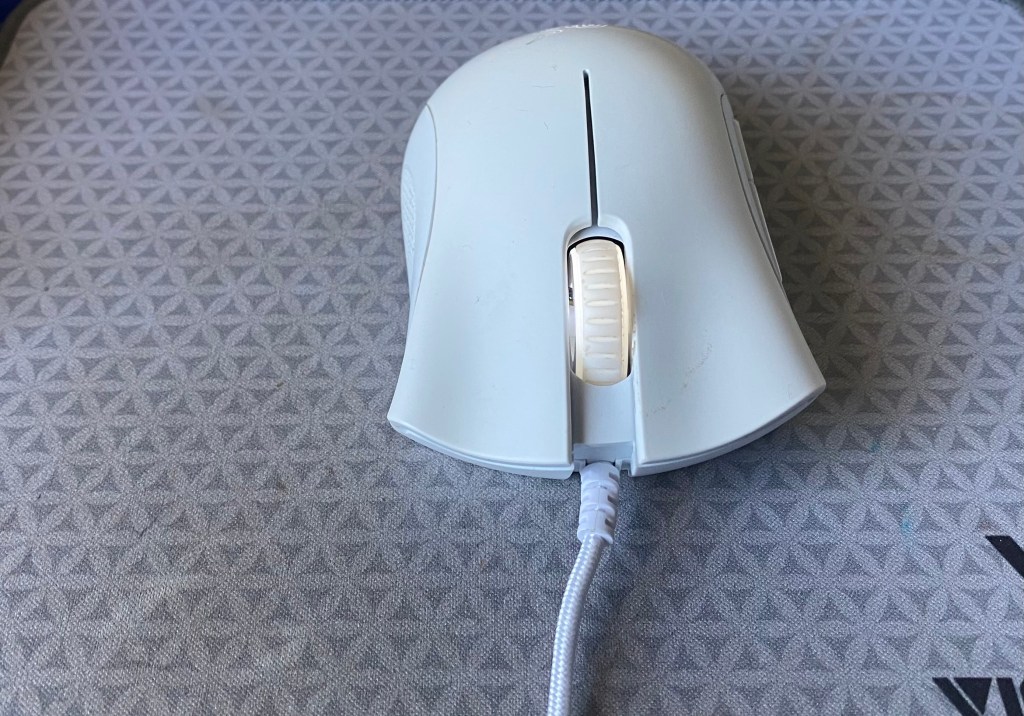

You must be logged in to post a comment.