Epomaker B21 Review: Retro With A Twist

Epomaker has pioneered the budget side of mechanical keyboards making some fantastic value boards. This is no different with the Epomaker B21 mechanical keyboard that features a retro-style design. The B21 is a wireless, 65% mechanical keyboard with a few unique features to pair with its classic design.

Today we will take a look at Epomaker’s B21 to see if the retro board is the one for you.

The Verdict

Top view of Epomaker B21 mecahnical keyboard.

Rating: 4 out of 5.

The Epomaker B21 is a 65% budget wireless keyboard, perfect for those on a budget and want a retro-looking Bluetooth board. The things boasted on the B21 are dynamic backlighting, a 4000mAh battery, media keys, dials, and Mac & Windows support. Now I’ll be honest in this review, the looks definitely are not for me, but it will still attract the eye of those wanting a retro-looking board.

You get a few different switch options in the Cherry MX line, decent stabilizers, and a pretty nice keycap set for the price. The B21 is certainly a unique board and it stands out with a ton of features.

For anyone that wants a retro design, dials, and an overall solid prebuilt package, the Epomaker B21 is a great option.


In the Box

Inside the box, Epomaker gives you everything you need to enjoy the B21.

Keyboard: The keyboard comes wrapped and surrounded by protective foam to ensure that it is in perfect condition when it arrives.

USB-C Power Cable: You get a rubberized cable that seems well made and is detachable. It matches the color scheme of the board.

Manual: The manual will explain how to use the board as well as get it up and running.

Advertisements

Build Quality

Side view of the Epomaker B21 mechanical keyboard

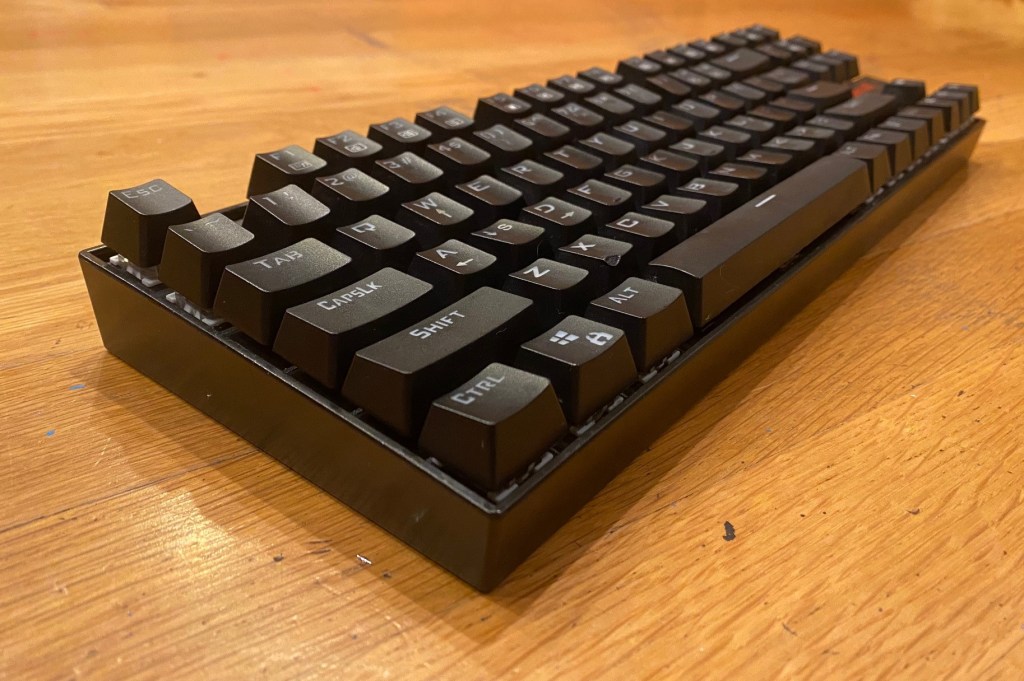
With the B21, Epomaker elected to use strong plastic with this board with a smooth feel. The dials are made of metal and the media keys, although not mechanical, still feel pretty good.

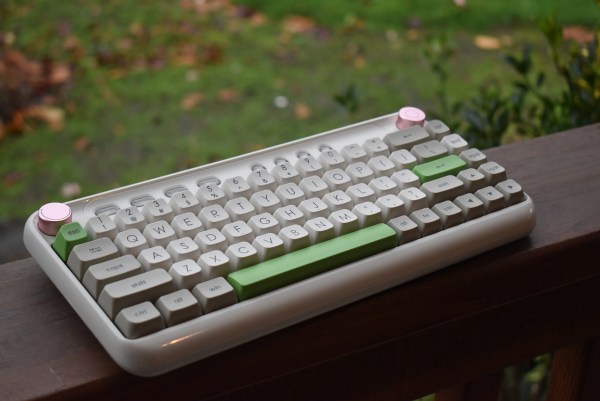
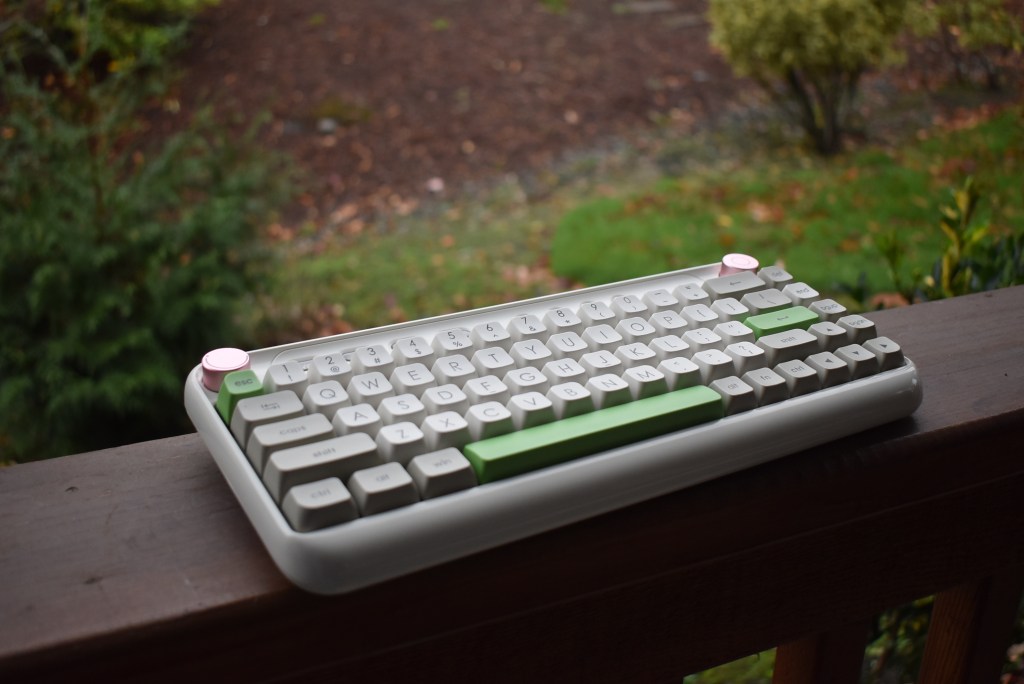
The design is love or hate. The retro theme is something that definitely appeals to a certain audience but I think it is pretty decent. For some, they may really dislike the board. The use of glossy plastic, the combination of pink dials with green and off-white keycaps, and rounded edges make this board look a bit childish. This impression was confirmed when my friend’s first impression was that the board belongs in a nursery, which is quite unfortunate when you think of all the benefits it carries.

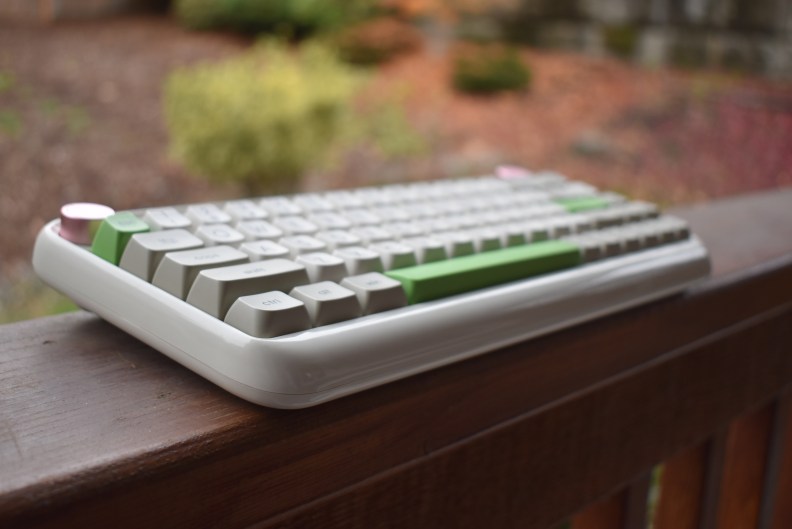
The top part of the B21 definitely makes this board taller than most 65% options on the market but the width is not any bigger than most 65%s so when for gaming you should still have plenty of mouse space. If you want something that is very portable, this board is still pretty good but there are a few other options that we may recommend like Epomaker’s GX68 XS.

The Epomaker B21 has a decent build for the price and your thoughts on the design depend highly on what you are looking for. If you are looking for a retro design, you may love this board, otherwise, you could see the board as more of a toy than a tool.

Advertisements

The Keycaps

Keycaps for the Epomaker B21 mechanical keyboard.

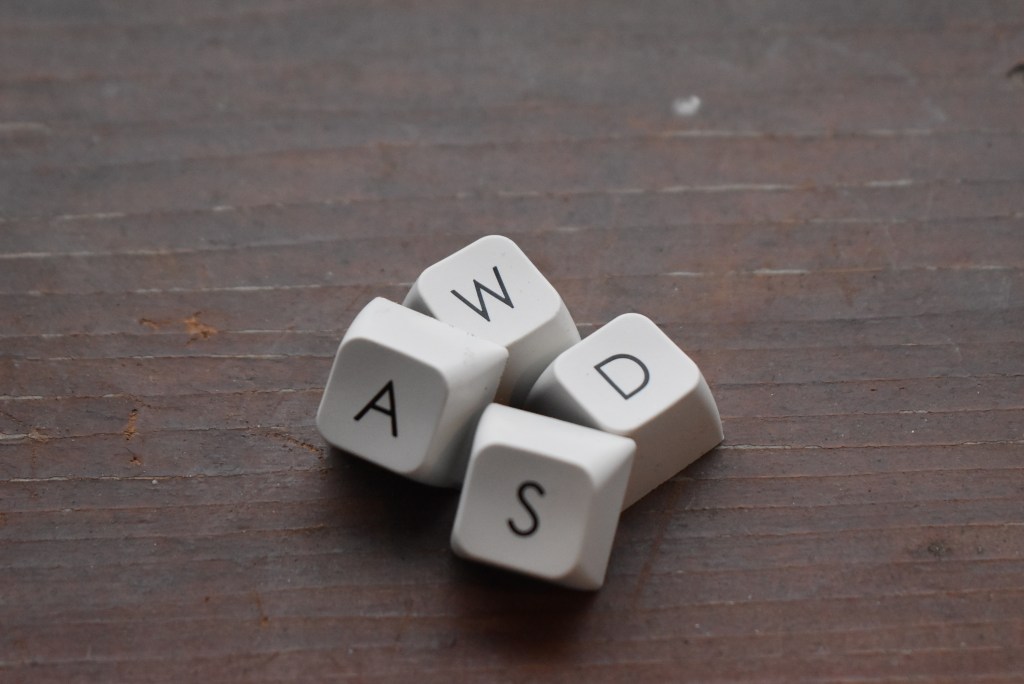
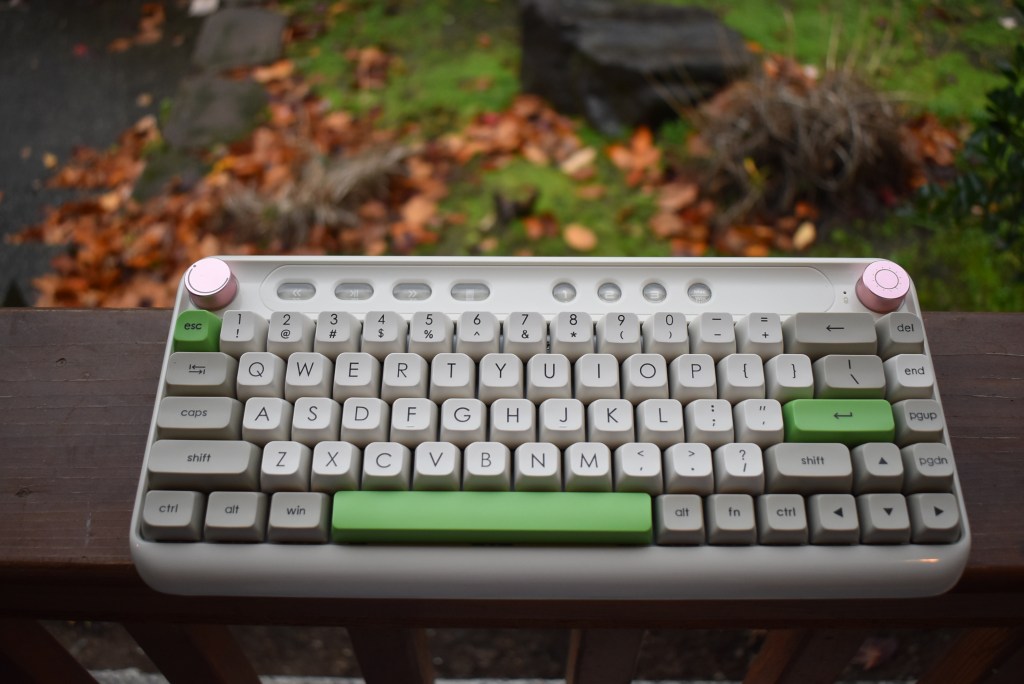
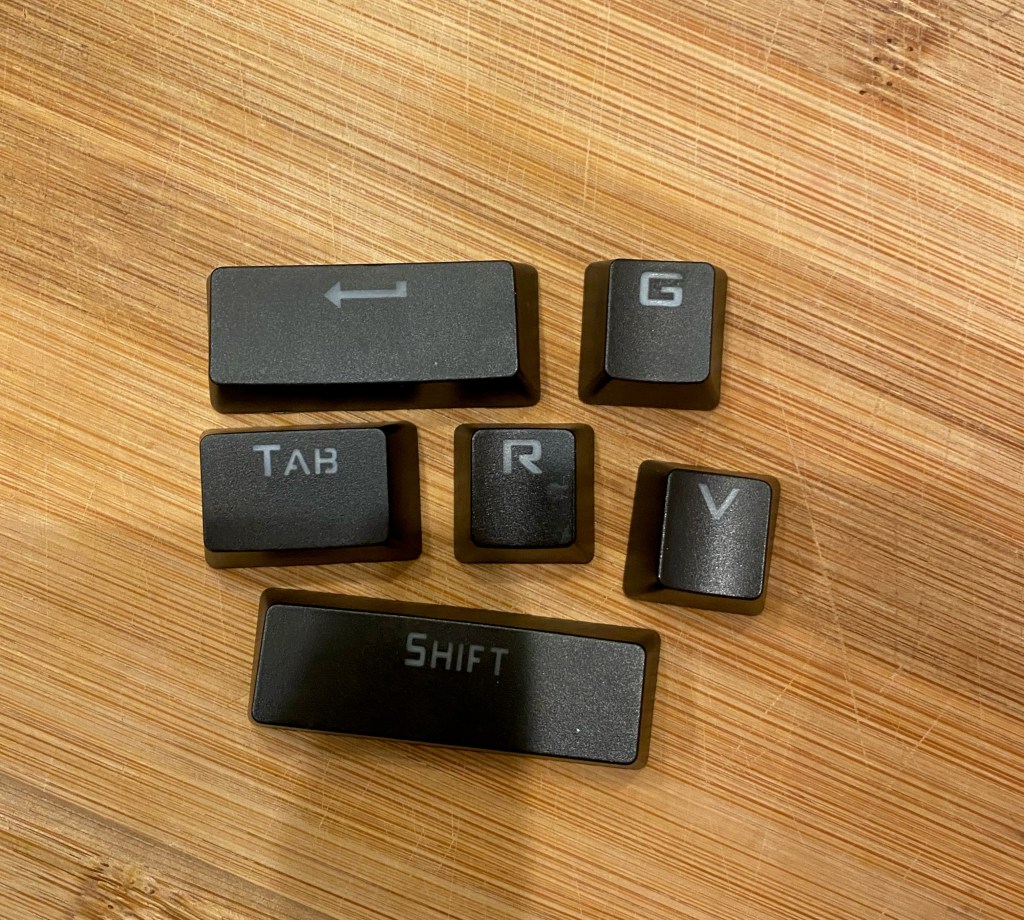
Epomaker ties in the retro theme with some off-white, grey, and green keycaps. The keycaps are made from PBT in the ASA profile. The ASA profile is a higher profile that is a bit taller than the standard OEM profile on gaming keyboards but slightly shorter than SA keycaps seen on some custom keyboards.

The keycaps are rounded and sculpted for comfort but the higher profile could take some time to get used to for those who have never experienced something similar. The keycaps feel quite smooth but due to the concave shape, they still are able to hold your fingers and don’t feel too slippery.

The legends are big and centered. Epomaker uses double-shot legends for peak quality and they don’t seem to have any major issues.

Overall the keycaps feel quite good and seem to be a pretty good profile. I do like how they tie in with the theme of the B21.

The Switches and Stabilizers

Epomaker B21 keyboard with keycaps taken off.

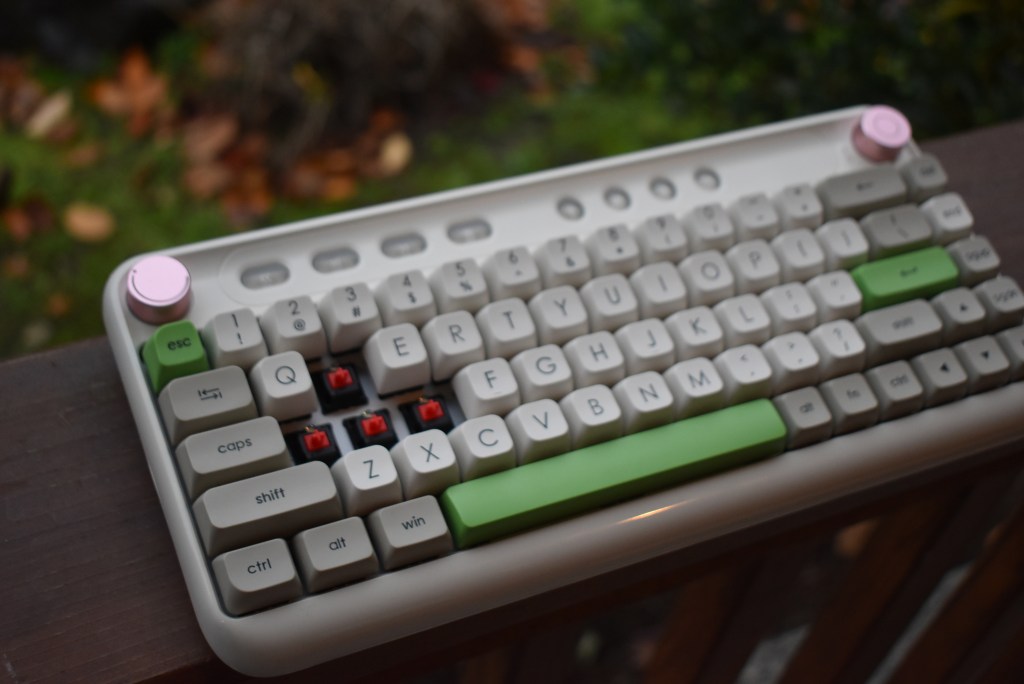
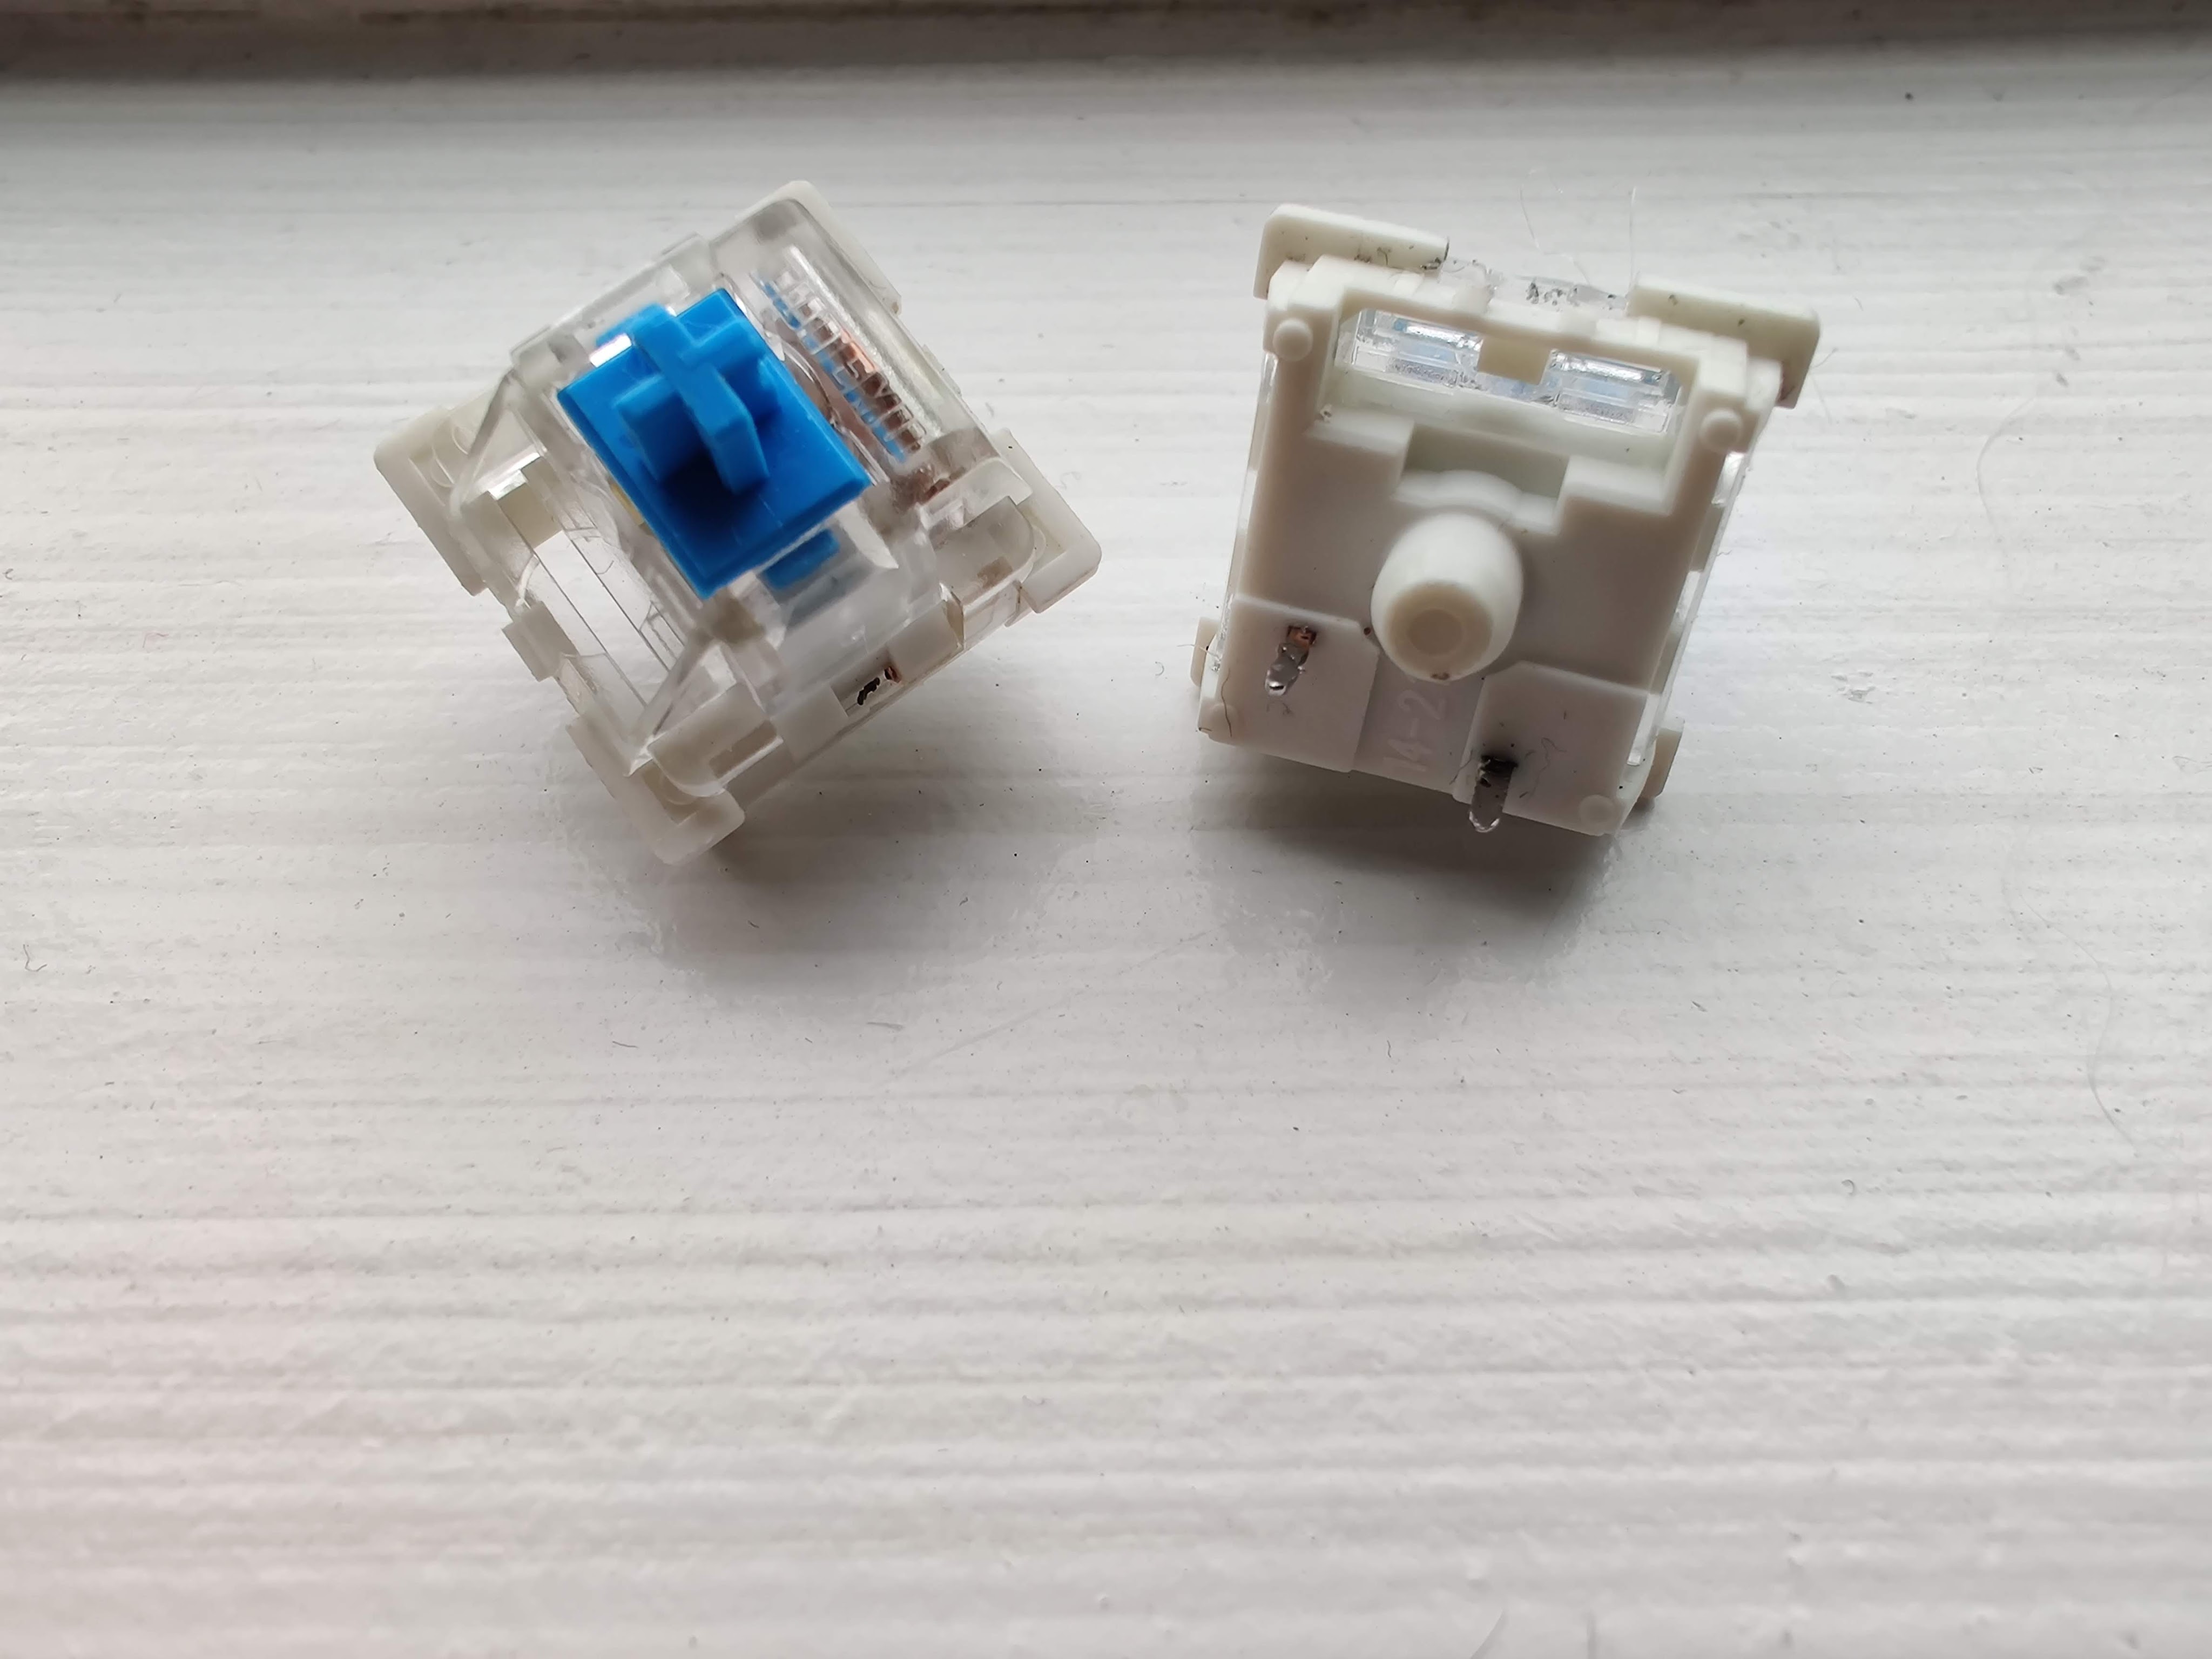
You can order the Epomaker B21 with a few options from Cherry. You get linear, tactile, and clicky options.

Cherry MX RedA light linear switch with a smooth travel.
Actuation force: 45 g         
Travel distance: 2 mm
Cherry MX BrownA medium-weight tactile switch with a light tactile bump.
Actuation force: 55 g         
Travel distance: 2 mm
Cherry MX BlueA medium-weight clicky switch. It has a loud sound and sharp tactility.
Actuation force: 60 g         
Travel distance: 2 mm

Cherry is known for providing some of the best switches for pre-built keyboards, especially in terms of reliability. The linear switches are not the smoothest in the world but they get the job done and are perfectly fine for those who do not have an interest in modding your keyboard. The tactile and clicky switches are great alternatives for those who want a bump in their keypress.

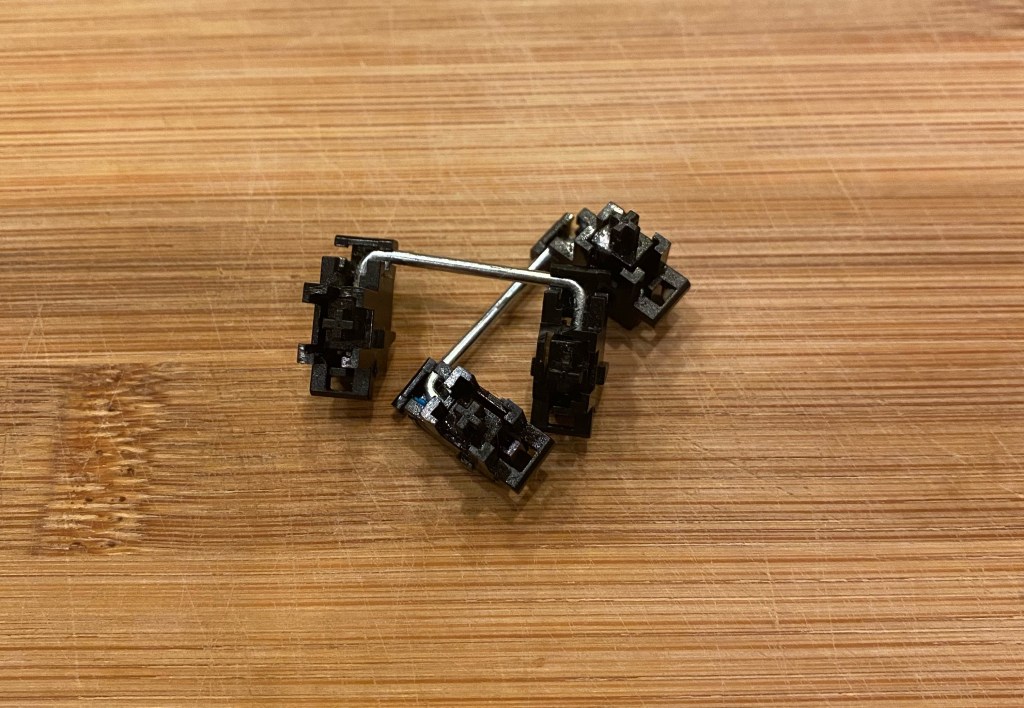
The stabilizers are cherry-style plate mount stabs. They were alright. They definitely stood out as being better than the stabilizers of gaming keyboards from brands like Logitech or Razer with some factory lubing applied to the stabs. The stabs won’t make this board sound amazing but are quite good for a prebuilt keyboard.

One of my biggest disappointments with the board is that it is not hotswap. This means that the user will need to manually desolder each and every switch to replace or modify switches and stabilizers. If you want to buy a keyboard and play around with it, the B21 is not the best option for that. For those that want a keyboard that does the job and does it quite well, the B21 does deliver quite a good stock experience.

Advertisements

Back Lighting and RGB

RGB Led lighting on the Epomaker B21 mechanical keyboard.

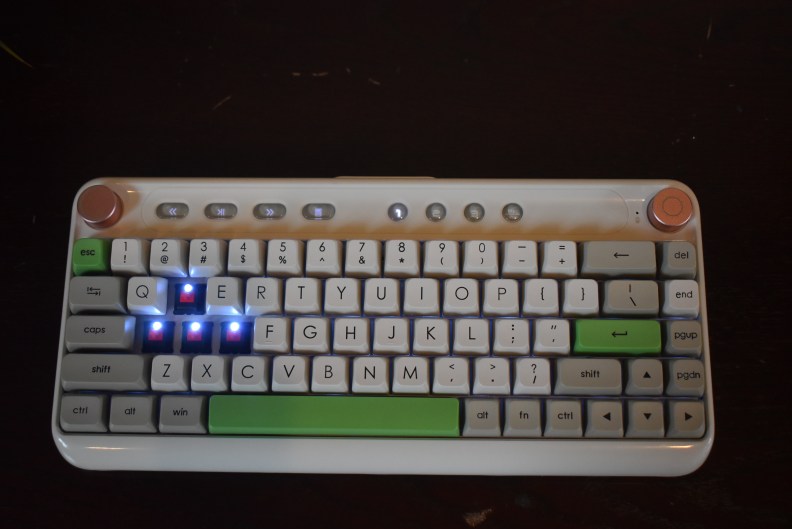
As of right now, there is only one color offered on the B21. The board is backlit with white lighting rather than multicolor RGB lighting. The lights are decently bright but because the keycaps are not shine-through the lighting is not that big of a deal.

A nice thing with the lights on the B21 is that you can change the brightness of the lights via the dials on top. Epomaker has not released any information yet on what, if any, software will be available for this board.

Wireless Connectivity

The Bluetooth on the Epomaker B21 is my favorite part of this board. The convenience of switching between three different devices is an amenity that is so useful and easy to use.

So let’s talk about connecting it to just one device first, and the B21 handles that perfectly, so seamlessly. It took me less time to connect the keyboard than it did to plug my charger into my phone the other day. Bluetooth can be easily controlled by the dedicated buttons at the top of the keyboard.

The B21 carries a 4000mAH battery which can get you a few weeks of use with the lighting on and if you opt to turn it off you can use it for over a month. To charge the board, there is a USB-C port, which is pretty standard. On the B21 users can opt to toggle between wireless and wired connectivity modes.

Advertisements

Media Keys and Dials

Arguably one of the most defining features of the B21 is the media keycaps and dials. The dials are quite a unique feature and allow you to control volume and change the brightness of the lighting.

The media keys are helpful if you are in the middle of working on something and you want to quickly change background music or stop it to focus better. I also am a fan of multimedia keys while gaming so I don’t have to tab out just to change the song.

A nice little quick feature is the ability to open the calculator with a push of a button.

Overall I think the dials and multimedia keys on the Epomaker B21 are quite useful. My only disappointment is the fact that the pink of the dials kind of takes away from this retro theme and feels a little off.

Conclusion

Angled view of the Epomaker B21 mechanical keyboard.

If you want a retro look and a solid prebuilt all at a good price the Epomaker B21 is an excellent option. It delivers good performance and packs quite a few features making it sound out in the market.

The B21 gives you dials, multimedia keys, Bluetooth, and very long battery life. The board also features pretty decent switches, keycaps, and stabilizers.

The only main downsides were the lack of hotswap sockets and the design. Although the design is very subjective I felt like it was a bit childish but if you do love that retro look then it certainly is a nice theme. As a keyboard enthusiast, I would like to see hotswap sockets at this price to allow users to change keys or modify different parts of the board to personalize the feel to their liking if they choose.

All that being said I have enjoyed my experience with the B21 and love to see unique designs like this hit the market.

Thanks for reading this article! If you want updates on our articles, and more information about tech, make sure to join our discord.

Advertisements

Redragon K552 Review: The Best Budget Mechanical Keyboard

So you want a mechanical keyboard, but the market is littered with options that either break your wallet or just seem too good to be true.

The Redragon K552 is a gaming mechanical keyboard that is great for the budget buyer who wants the satisfaction and performance of a mechanical keyboard without breaking the bank.

By the end of this article, you will get full clarity on one of the most popular budget mechanical keyboards, and if its low price point is the only benefit of the K552.

The Verdict

Top view of Redragon K552 mechanical keyboard

Rating: 3.5 out of 5.

The Redragon K552 is a TKL sized board. That means it is basically a full-sized keyboard, but it does not have a numpad. Redragon gives you a mechanical experience for a very cheap price. You do not get the nicest keycaps, stabilizers, or build but the raw performance is what makes this board a compelling offer.

When buying the K552, you have two switch options. You can either get linear Outemu Reds or clicky Outemu Blues giving the buyer a couple of different options to suit their preference.

Now we knew coming into this review that for such a low price point, sacrifices were going to be made, but is that enough to overlook those many faults in the keyboard?

The fact that you get this for such a low price is great and for those who want to get into the world of mechanical keyboards or just want to upgrade their gaming setup then this is a great option for you.


In The Box

In the box, you do not get very much. You just get the keyboard along with some documentation. The board comes with a keycap puller, but unfortunately, no switch puller to help users take advantage of the Outemu hotswap. No extra keycaps or stickers, just everything that you need.

It might seem pretty bland, but at the price point, it is expected.

Advertisements

Build Quality

Angled view of Redragon K552 mechanical keyboard

So the K552 has a bit of a cheap feel to it. It sports a plastic, rectangular case, but does have an aluminum plate. The bezels are quite thin and the paint job feels a bit cheap. Unfortunately, the board does not come with an aluminum build.

Arguably the worst thing about the build is the logo. The logo is on a riser piece that looks quite obtrusive in my opinion. If it bothers you many people have erased it with a regular pencil eraser but it can take upwards of ten minutes to fully get rid of it.

The case does have two kick-up feet for one level of height adjustment.

The board does not have anything else to it, like a USB-C input, a Bluetooth toggle, or a robust aluminum build. If these features are important to you, perhaps you may be interested in the more expensive Redragon K530, which has a USB-C connection and Bluetooth.

The K552 is only sold in the tenkeyless (TKL) size, but if you are interested in a smaller board with less functionality then the Keychron K6 in the 65% form factor is a great option albeit at a much higher price.

The Keycaps

Keycaps of Redragon K552 mechanical keyboard

The K552 features OEM profile keycaps made from ABS plastic. The keycaps develop shine from body oils very quickly. This is because of the use of low-quality ABS plastic. Additionally, the keycaps are very thin.

The OEM profile is the standard among pre-built mechanical keyboards. The keycaps are contoured to match the shape of your hands. Since this is similar to most pre-built mechanical keyboards, if you have used another in the past then there should not be a transition period.

The legends are quite thick and are shine through allowing a lot of the lighting to go through. There are also many inconsistencies in the legends that once you see, you cannot unsee.

The keycaps are one of the weak points of the board. It would have been nice to see PBT keycaps or slightly better legends but for the price, this is expected.

Advertisements

The Switches

Outemu Blue switches for mechanical keyboard

The K552 is sold with an option of two different switches, linear Outemu Reds and clicky Outemu Blues. The Reds will have a smooth travel all the way down and the Blues will have a slight tactile bump along with an audible click when the switch activates.

This is all preference so if you do like the blues then there is nothing wrong with that or you can go with the red switch option.

On my board, I have the blues. They feel a bit worse than Cherry switches. It is also worth noting that in an older version of the board we did have problems with one of the switches sometimes not working but this was after it a couple of years of extensive use of the board. Although this is all true mechanical switches are typically more reliable than your standard membrane keyboard.

In my opinion, the blues are not very good. They are very very loud, pingy, and scratchy. However, on the plus side, the board has Outemu hotswap. So what this means is that you can remove all your switches with a switch puller, and replace them with other Outemu switches. If you want to put in any other switches, you will have to disassemble the board and desolder the switches from the board.

I put some new, better switches into the board and although it took some time, it totally transformed the board. Opting to go with the stock switches will be fine for most and what you are getting is good considering the price. Most keyboards at this price are not even mechanical so they will have a worse feel and performance.

The Stabilizers

2u stabilizers for a mechanical keyboard

Stabilizers often have a big effect on how a keyboard sounds and the K552’s stabilizers are pretty mediocre for a prebuilt keyboard. Redragon has opted to use Cherry Style plate mount stabs that are not factory lubed, which disappointingly gives the keys a rattly sound upon pressing and of the big keys like space or shift.

The sound and feel will also change based on what switches you use. Clicky switches will block out a lot of the rattle from the stabilizers while linear switches could make rattle or ping more obvious.

The stabilizers are what you would expect for this price but there are ways you can improve them. If you are willing to take some extra time and spend about five to ten dollars you can make your stabs sound a lot better if that is a concern for you.

Advertisements

The Backlighting

Top view of Redragon K522 mechanical keyboard with red backlighting

The K552 comes with onboard RGB which can be customized through different presets on the board itself with Redragon’s software. By using different function commands, users can make quick changes to their preference of lighting. The LED’s are quite bright, but maybe not as vibrant as Corsair or Razer gaming keyboards.

The dedicated software given to the user is not very good. You cannot do much with it, such as custom lighting presets like you can with Corsair’s boards, but it gets the job done.

Personally, I think it is nice to use the onboard presets because it is quicker and easier than using the software.

Advertisements

Conclusion: Should You Get The K552?

Angled view of Redragon K552 mechanical keyboard

Should you get the K552? Well like all things, it depends. If you are looking for a mechanical keyboard but do not want to break the bank then this is a fantastic option. 

With mechanical switches, an aluminum plate, and an affordable price, the Redragon K552 definitely has a lot of positives going for it. But at the same time, the terrible keycaps, difficult upgrade path, and no detachability also give the K552 a lot of cons.

The important thing for you as a buyer is to answer the question “is it worth it?” Is it worth having poor keycaps, subpar software, rattly stabilizers, and a weak case for around 30 to 50 dollars?

I would say for a first mechanical board, it is worth it. This is a great way to get a mechanical experience for cheap and if you want something more you can always upgrade if your budget gets bigger. This is a great way to try a mechanical board or improve your setup while not spending money and it is why this board is still one of the most popular keyboards on Amazon.

Overall this board will be good enough for the majority of people that get it but for some, it may pique your interest into something better and more personal like a custom keyboard.

I hope you enjoyed and if you want to learn more about mechanical keyboards, check out some of our other keyboard content.

Advertisements

AirPods Pro vs PowerBeats Pro: Which One Is Better?

Ever since Apple released their AirPods, in-ear headphones have taken over the audio market.

In-ear headphones, commonly known as earbuds, are the new wave and for good reason. Having your headphones fit into your pockets without needing to deal with the tangled mess of wires, is very convenient.

Today we are going to be taking a closer look at two earbuds that have broken the audio game since their release to see which one is better. The AirPods Pro and PowerBeats Pro, sold by the same company, Apple.

PowerBeats Pro case next to Apple Airpods Pro case on a desk

The Main Differences

While being sold by the same company for similar prices, you would be shocked by the number of differences the AirPods Pro and PowerBeats Pro have.

In this article, we are going to split them up into separate sections, including battery life, design, comfort, features, audio quality, and more.


Whats In The Box?

Unboxing experience of PowerBeats Pro and AirPods Pro

Let’s talk about what we are getting in the box from each of these products.

With the AirPods, we get the actual AirPods and charging case (obviously), two sets of different ear tip replacements, and a USB-C to lightning charging cable. Unfortunately, you do not get a USB-C power adapter or any power adapter. So to charge your earphones, you’re going to need to already own a wall adapter, or buy one.

Let’s move on to the Beats. The Beats packaging is almost identical to that of the Airpods. You get the case, and the earphones, three sets of replacement ear tips, and a USB-A to Lighting charging cable. Now once again, Apple does not supply the user with a power adapter, so you are going to need to buy one, or already own one.

Now obviously, like with any tech product, both of these include manuals in the box. They just weren’t really exciting enough to put in the picture.

Let’s keep track of the score for this showdown. So far it’s PowerBeats Pro: 1 and AirPods Pro: 1.

Advertisements

Design and Comfort

Airpod Pros next to PowerBeat Pros

Let’s first talk about the design of the two different cases. Now obviously the PowerBeats Pro have a much larger case in comparison to the AirPods Pro. This can either be a good thing or a bad thing for you. If you are someone who constantly loses things, and can’t seem to be able to keep track of where your stuff is, maybe the Powerbeats are a better option for you. Being so much larger, they would be much harder to lose than the Airpods Pro.

That being said, if you are someone who has grown to love the minimalistic form factor of most wireless earbuds, small and slim, then you are probably going to like the AirPods Pro more than the Powerbeats.
About the earbuds themselves, the AirPods have a much smaller design. Unlike their predecessor, the Airpods, the AirPods Pro actually have silicone tips that make sure that no matter how hard you shake your head, they won’t fall out. They also greatly improve comfort and help support compatibility with many more ears.

The Powerbeats Pro have a sort of double protection from falling out. They have the ear tips that the Airpods Pro have, as well as wingtips to guarantee that no matter how hard you are working out, the earbuds stay in your ear. The wingtip might not be favored by all, however, as they stick out a bit more than the AirPods Pro.

For this round, it looks like a tie between the Powerbeats Pro and Airpods Pro. Let’s give them each a point. After this round, its PowerBeats Pro: 2, AirPods Pro: 2.

Advertisements

Sound Quality

Now, this is where it gets a bit more complicated in the comparison. Sound quality is obviously a really important aspect of any audio device. But if you are buying these as an audiophile and need the absolute best sound quality, I’m sorry to tell you, but you’re in the wrong spot.

Ok so let’s get one thing straight, these two pairs of earbuds are not to be bought if you are strictly looking for the best sound quality. These are two great pairs of earbuds when it comes to design, convenience, but not for the optimal sound quality.

Also in this comparison, we won’t use the special audio features that the Airpods pro have in mind, just to make it fair. But do remember when you’re buying either one to remember the features when you click to check out.

The PowerBeats Pro have the typical emphasis on the low-end frequencies, giving users a higher bass while exercising. The mids are more recessed, but if you listen to bass-heavy music primarily, that may be what you are looking for. The highs are nothing too special and being much more predictable with a sharp dropoff, to avoid users from experiencing ear pain while listening to their music.

Now for the AirPods Pro, they have a much more consistent sound profile but still have that fun V-Curve among Bluetooth earbuds. Now the only thing that can possibly edge the AirPods pro over the Powerbeats Pro is the ANC isolation system. Asides from that, it’s mostly subjective.

Overall the main takeaways are that the AirPods Pro have a bit cleaner sound but it is not a huge improvement. Both have similar sound signatures too and will sound great with Pop, Rap, or EDM genres.

At the end here the AirPods Pro come out ahead at 3 to 2.

Battery Life

AirPods Pro and PowerBeats Pro cases being charged

Battery life can be one of the most important aspects of any sort of technology, but you definitely don’t want your headphones dying on you as you are only halfway through your commute to work.

The PowerBeats Pro supply 9 hours of playback on a full charge. With the charging case, however, users can enjoy another 24 hours of playback. If by somehow, you managed to completely discharge your charging case, don’t despair, as just 5 minutes of charge gives the earbuds 1.5 hours of playback.

The AirPods Pro are a bit of a different story. On a full charge, you can only expect 4.5 hours of playback on each pod. Just like the Beats Pro, users can expect 24 hours with the Airpods pro charging case. When it comes to fast charging, a quick 5-minute plug-in can give you another hour of playback.

Apple users also have the luxury of checking the battery status of their device through the use of the batteries widget, which was introduced in the release of IOS 14.0.

So at the end of this round, I felt that PowerBeats had a minor step up just taking the lead. At this point, its PowerBeats Pro: 3, AirPods Pro: 3.

Advertisements

The Features

Even though the Powerbeats are sold for about $30 less, you would think that two products sold by the same company would have a similar caliber of features right? Well, you would be wrong. The Airpods Pro absolutely blow the PowerBeats Pro out of the water in this aspect.

On the Airpods Pro, you have ANC (Active Noise Cancellation), Transparency mode, and Spatial Audio. ANC is pretty self-explanatory, activate it to block out noise from the outside. Transparency does the opposite, it allows noise in so you can hear your surroundings. Spacial audio essentially provides users with 3D audio when watching supported TV shows or movies. Not only that, but the Airpods Pro have tests to ensure that the ear tip that you have chosen makes a proper seal in your ear. Another great feature the Airpods have is the ability to activate Siri or toggle ANC and Transparency mode, by holding the end of the earbud.

Let’s move on to the PowerBeats Pro. They basically have none of the cool audio settings the AirPods Pro have. With the PowerBeats, you can activate Siri by holding the button on the side. Aside from that, the only better thing about the PowerBeats over the AirPods is the ability to change the volume of the media with a button on the actual earbud.

I think it’s obvious that the AirPods Pro took that round with ease, so the score is now PowerBeats Pro: 3, AirPods Pro: 4.


Conclusion: Which Is Better?

PowerBeats Pro case next to Apple Airpods Pro case on a desk

So what is the final verdict? Well, each of these products have their separate pros and cons, and it really depends what you want out of an audio device. Are you looking for the ideal workout device, or something more low-key?

Well, let’s answer these questions. The only thing that the Powerbeats pro have that is objectively advantageous in comparison to the Airpods Pro is the greater battery life, and the only thing the Airpods Pro have that is objectively advantageous to the Powerbeats Pro is the onboard features. They both have different designs and comforts, one isn’t completely better than the other, and they both have virtually the same components in the box.

Now all of this comes at a price, obviously, and the PowerBeats Pro can often be found for a bit cheaper. The PowerBeats are often found for a bit under 200 while the AirPods Pro are often 200 or more. Now which one is better, well we can’t make that decision for you as the best option depends on your situation. If you mostly work out then the PowerBeats may be the best option for you but if you want an all-rounder the AirPods Pro may be the one for you.

Advertisements

Razer DeathAdder Essential Review: Is It Worth It?

Have you been scouring the internet for a good gaming mouse, but everything you find is way out of your budget?

 If so, the Razer DeathAdder Essential might just be the answer to your problem, supplying great performance, without taking a huge toll on your bank account.

Let’s dive into the specs, and see if the Razer DeathAdder Essential works for you.

The Verdict

Rear view of Razer DeathAdder Essential mouse

Rating: 4 out of 5.

The Razer DeathAdder Essential is well built for its affordable price, and is partnered with a high caliber sensor.

If you are a gamer with a low budget, this mouse was practically manufactured just for you. The DeathAdder comes in two colors, black and white, both costing the same, affordable price, of about $30.

The DeathAdder Essential has a very sleek and comfortable design. The mouse boasts a very ergonomic shape, making it a great option for people who prefer the fingertip grip or the claw grip. Another positive aspect of the DeathAdder is that it is very lightweight, meaning after long gaming sessions, your wrists feel no strain.

Being a Razer product, the DeathAdder Essential comes with the inclusion of the Razer Synapse software, allowing users to adjust the LED brightness, adjust the sensitivity, and customize the functions for each of the 5 buttons on the mouse.

The main drawback of the mouse is that the only option for color customization is adjusting the brightness of the preset LED, meaning users cannot change the colors of the LED for their mouse, unlike the Logitech G203, which is priced at a similar mark.

If, by these descriptions, you think the Razer DeathAdder Essential fits your needs, check the price on Amazon.


Razer DeathAdder Essential Specifications

Length~12 mm
~12.7 cm
~5.01 in
Width~73 mm
~7.3 cm
~2.86 in
Height~43 mm
~4.3 cm
~1.69 in
Weight~96g
~0.1kg
~0.21 lbs
Sensor TypeOptical (200-6400 DPI)
Polling Rate500 or 1000Hz
Cable Length1.8m (5.9ft) Paracord cable

In The Box

At such a low price, you wont find any extra things in the box besides the mouse and manual. At higher price points, you tend to find amenities such as charging cables for Bluetooth mice, and maybe even weights for the most top tier of mice.

With the DeathAdder Essential, you don’t get anything other than a Razer sticker, some documentation, and the actual mouse.

Advertisements

The Build

Angled view of Razer DeathAdder Essential mouse

Mice can be the most subjective item when someone is talking peripherals, but when talking about the build quality, sensor, and switches, it can be easy to form an opinion.

Being the reputable brand they are, we all knew that Razer was going to knock it out of the park with the build quality on the DeathAdder Essential. Don’t get me wrong, it definitely does not feel like their more expensive mice, but for around $30, you can be assured that you are paying for something good quality. The main issue that I have found with the overall quality of the mouse is that the scroll wheel can start to make unpleasant squeaking noises occasionally.

Razer gives you a mouse with a plastic build and some rubber. The plastic feels high quality and does not raise any concerns. On the sides of the mouse and on the scroll wheel are rubber pieces that allow the mouse to be more comfortable as it is easier to hold the mouse.

The cable is a nice braided cable and I have no faced any issues. It isn’t a super heavy like many other gaming mice.

The Razer DeathAdder Essential has 5 re-programmable buttons. What does this mean? It means that out of the box, each button has its own function. But through the software, users can change the function for each button.

Shape and Comfort

Side view of Razer DeathAdder Essential  mouse

The Razer DeathAdder Essential is a very comfortable mouse. With some gaming mice, they are almost specifically designed for gaming, giving users a feeling of discomfort after using the mouse for a while. The DeathAdder Essential has an ergonomic shape, making it an excellent choice for those who suffer from pain in their wrists, or in their hand.

You can use this mouse with a palm, fingertip, or claw grip. All work quite well even though it is an ergonomic mouse. The mouse is also compatible with hands of all sizes.

The most important thing about the actual shape is that this mouse is specifically designed for right-handed people. If you are left-handed and in the market for a low-cost mouse, the DeathAdder is not a very good option for you.

Advertisements

Switches and Scroll Wheel

The DeathAdder Essential has mechanical switches with approximately a 10 million click life span. On the mouse, the switches are nothing special. They work and certainly aren’t bad, but the frustrating part is that they could be so much better.

Razer released the optical switches a few years back, that deliver faster clicks and minimal latency. The fact that Razer has implemented this switch on 10 of their other mice, but not this one is definitely a bit upsetting.

The scroll wheel itself is nice with some grippyness and nice tactile steps.

Sensor and Polling Rate

The sensor on the Razer DeathAdder Essential has a range of 200-6400 DPI. For those of you reading the article and wondering what DPI is, it stands for dots-per-inch. You can basically say that DPI is another way of saying mouse sensitivity. The higher the DPI, the higher the sensitivity. Disappointingly, you cannot change the DPI on the mouse through a DPI button, but you have to access the DPI controls through Razer Synapse.

The Polling Rate on the DeathAdder Essential can be toggled from 500 or 1000 MHz. The Polling Rate basically sends an update of the mouse’s position to the computer. 500 MHz means an update is sent every 2 milliseconds, 1000 Mhz means an update is sent every millisecond. The difference between 500 and 1000 is hardly noticeable, but the option is there for those who prefer either of the two.

Razer Synapse

Synapse Software for Razer DeathAdder Essential mouse

In order to utilize the full potential and features of the DeathAdder Essential, users must install Razer Synapse.

Within the software, three major changes can be made to the mouse. The lighting can be adjusted, the DPI and Polling rate can be changed, and the mouse buttons can be re-programmed.

The customize feature is great for people who like playing around with all sorts of settings and seeing what works best for them. With this feature, users can choose the DPI, change the mouse function, create windows shortcuts, activate multimedia settings such as play, pause, the ability to launch programs or disable each button on the mouse. Suffice to say, if you want a mouse that is jam-packed with features, the Razer DeathAdder Essential is looking pretty good for you right about now.

The DPI changes in increments of 100. In the program, users can set different sensitivity stages, which are effectively different presets for different uses. For instance, while gaming, if you prefer a higher sensitivity, you can make a sensitivity stage of an x amount of DPI, and you can make another one for work/web browsing.

Adjusting the lighting is another feature that Razer has included with the DeathAdder Essential. Although this feature is quite underwhelming and may be a bit of a letdown for the RGB fans out there who were enjoying the features of the mouse so far, you can’t really complain after you see the price of the mouse. You can only change the brightness, toggle between static light and breathing light, and choose if you want the lighting to switch off after a certain amount of minutes (up to 15 minutes).

Advertisements

Conclusion: Is The Razer DeathAdder Essential A Good Fit For You?

Front view of Razer DeathAdder Essential mouse

All in all, the Razer DeathAdder Essential is a great buy for people who are getting into the PC gaming world and are just playing casually with friends. While the mouse has a plethora of positives, I just want to mention the negatives right now to establish any deal breakers for you guys.

The DeathAdder Essential is designed for righties, if you are left-handed, this mouse won’t work for you. The only lighting available is the preset white or green (depending on which color mouse you purchase), so to all of our RGB fans, you might not be satisfied with the DeathAdder Essential.

Now while the DeathAdder Essential is a great buy for those with a budget of about $30, if you do have the extra price, Razer has many other products. The direct level above the DeathAdder Essential is the DeathAdder V2. The V2 has all the great features of the Essential, and more. The ability for full RGB customization, the world-class Razer Optical switches, up to 20k DPI, and 8 programmable buttons are all present. However, all of these extra features have to come at a raised price, and the V2 comes in at about $60.

The DeathAdder V2 Mini is another great option, but those with bigger hands might not prefer it. The V2 Mini has similar features, with full RGB customization, 8.5k DPI, and 6 programmable buttons. The V2Mini seems like a great pick, but keep in mind that it will come in a significantly smaller size.

Overall the Razer DeathAdder Essential is great for gaming, especially if you are on a budget and it is a great option to consider.

Thanks for reading!

Create a website or blog at WordPress.com

Up ↑