I Switched To Colemak Over 2 Years Ago: My Personal Experience

AV4 ergonomic mechanical keyboard from side angle

The QWERTY layout is almost universal on computer keyboards. However, in the past decade, the use of alternative keyboard layouts has gained popularity.

In the midst of COVID lockdowns, with more time to devote to mechanical keyboards, I decided to start an experiment. What if I switched from the popular QWERTY layout to Colemak? After over two years of experience with Colemak, I wanted to share why someone should or shouldn’t switch to Colemak. 

What is Colemak?

Colemak keyboard layout

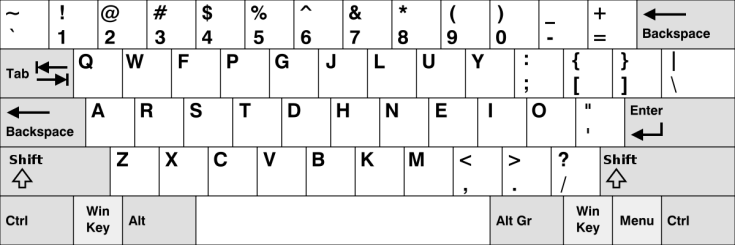
While alternatives to QWERTY are not necessarily new, there are a variety of different options to choose from today. Colemak is a relatively new keyboard layout that combines the benefits of layouts such as Dvorak with a few changes to make the shift less extreme. 

Colemak is now the third most popular keyboard layout in English. Additionally, Colemak makes less than 20 changes to the QWERTY layout, reducing finger movement by 2.2 times compared to QWERTY.

Layouts like Colemak or Dvorak are designed to make typing both more ergonomic and efficient. This is achieved by moving some of the most used keys to the home row. For typists who use the home row frequently, this means they can move their hands around the keyboard less. Theoretically, this makes this layout both faster and better for longer periods of typing.

Advertisements

Why Colemak?

NCR80 mechanical keyboard with Colemak keycaps

After learning about different layouts such as Dvorak, Colemak, and Workman, I decided to try out Colemak. Layouts such as Dvorak or Workman move different keys to new positions, which disrupt functions in Windows and Mac. For example, keys like ‘c’ and ‘v’ are moved to new spots. This means that although functions like copy and paste still work, they are moved to different spots on the keyboard. 

In contrast, Colemak maintains most of this function, allowing you to still have most keyboard shortcuts in the same spots while still getting the benefits of a more efficient layout. In fact, all but one key on the bottom row is the same. This makes Colemak easier to switch to than most other layouts but still very functional. 

Advertisements

Time To Switch

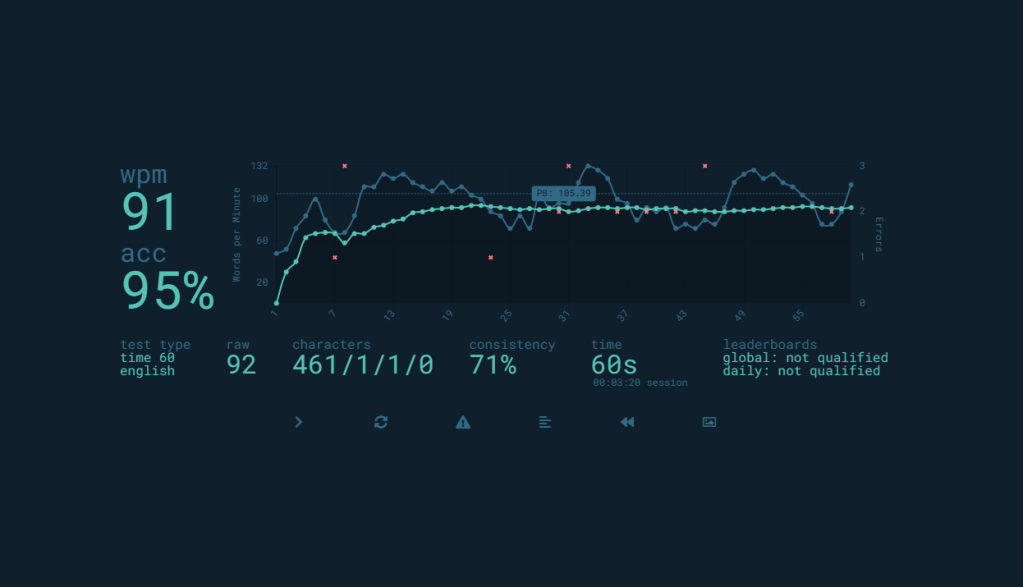
Luckily when I decided to switch, I had the advantage of shifting to online work due to COVID. This gave me significantly more time to practice getting used to the new layout. I tried practicing the layout via Monkeytype and then in January of 2021, I downloaded the Colemak layout to my computer. 

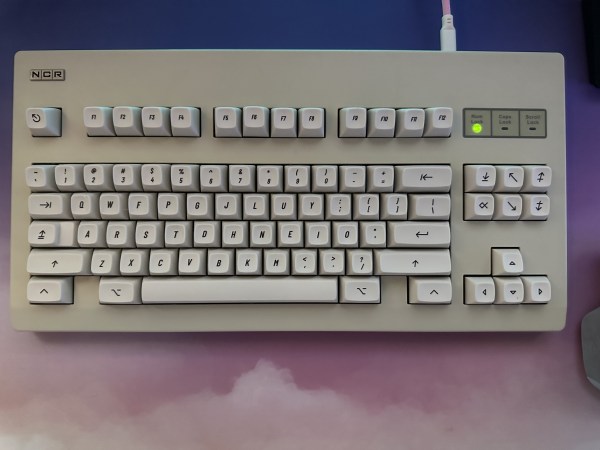
At first, I struggled greatly as I did not know how to use the home row. I even needed a picture of the layout to guide me. However, after downloading the layout to my computer and practicing more, I started growing more confident. 

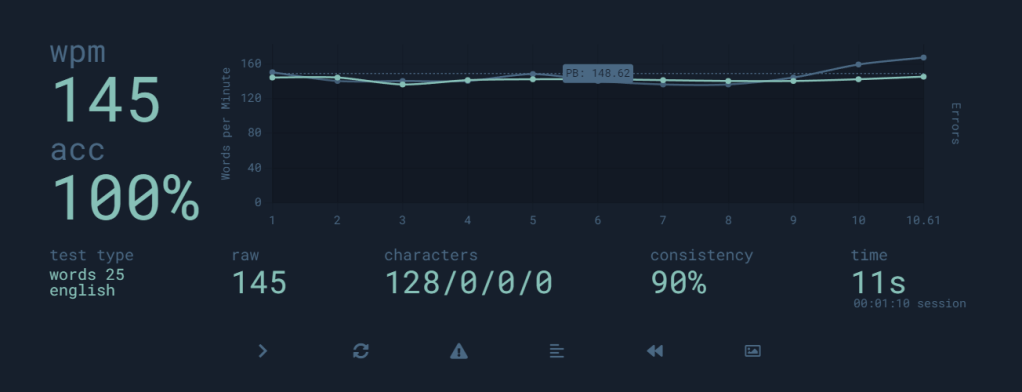
To test my performance, I took three 25-word typing tests. I then took the average typing speed. All tests had accuracy scores of 95% or higher. 

15WPMDecember 10th (start)
30WPMJanuary 10th (first month with it downloaded to my PC)
55WPMFeb 10th (occasionally used it when I had more time to work or text)
91WPMMarch 10th (switched entirely to Colemak)
101WPMApril 10th (only used Colemak)
110 WPMMay 10th (used both Colemak and QWERTY with various keyboards)
118WPMJune 10th
125-140WPMJuly 10th
130-150WPM Today

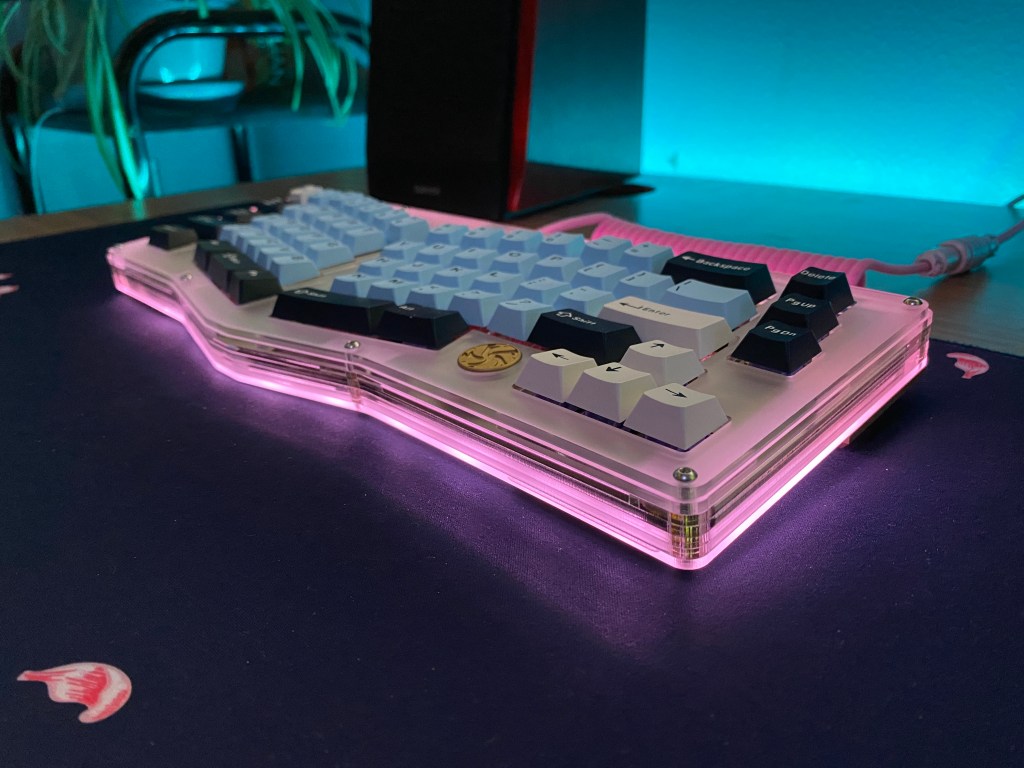
By May 10th, although my average was 110WPM, I was able to reach 140WPM with 90% accuracy. Also, by that time, I felt very comfortable with the layout. I was able to switch between low-profile, ergonomic, and my usual keyboards all without issue. 

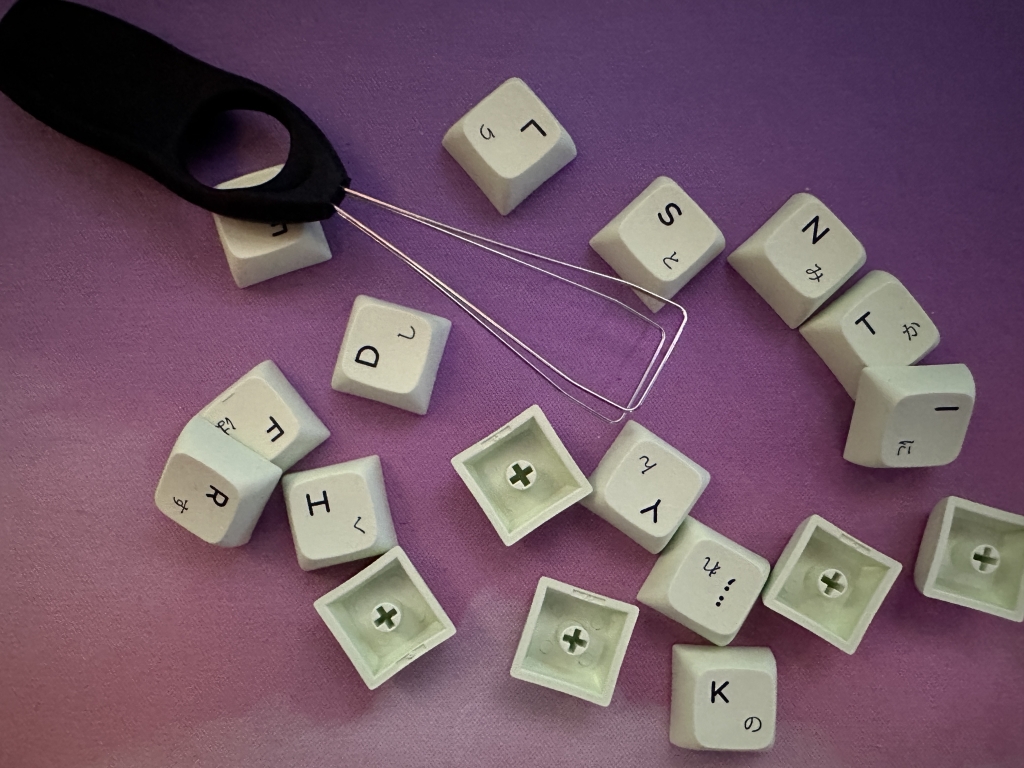
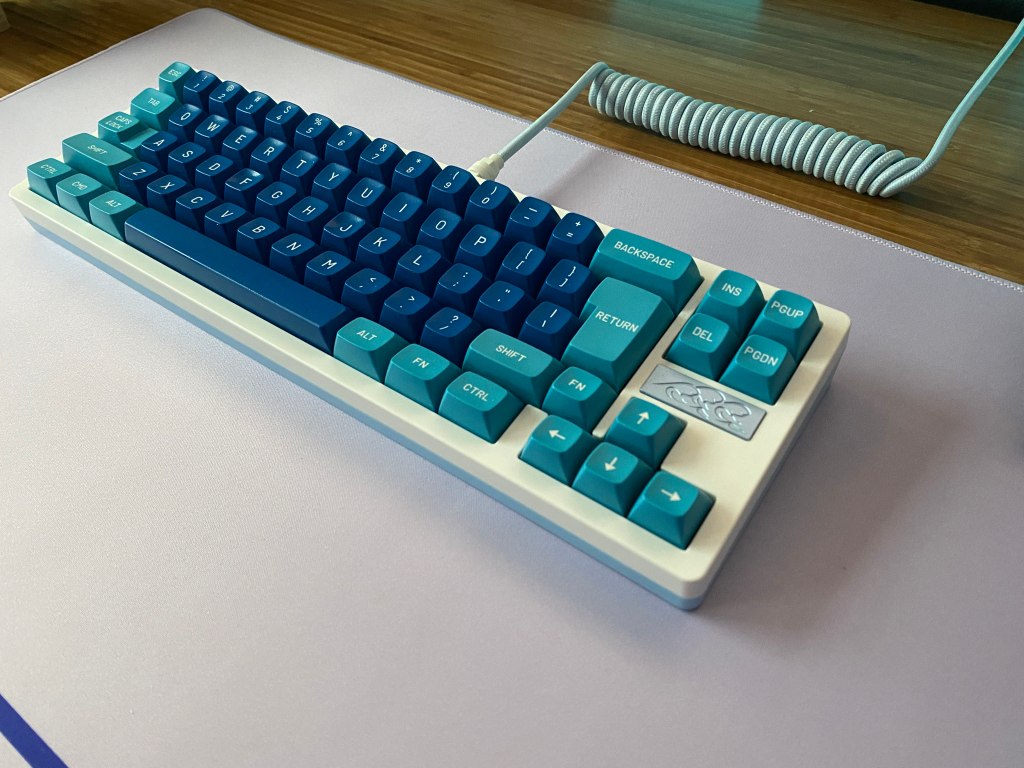
One of the main factors that helped me gain confidence is that I learned with QWERTY keycaps rather than buying keycaps that support other layouts. This meant I had to rely on memorizing keys rather than looking down at my keyboard. This is a key skill to learn a new layout, touch type, and reach typing speed upwards of 100WPM.

Within 6 months, there was no difference between my speed for Colemak and QWERTY. However, I felt comfortable switching to the layout after only three months. If I had switched earlier, I probably would have gotten comfortable with the layout faster, but it would have prevented me from doing some of the work I needed to get done. 

How To Switch

Typing test done with Colemak layout

If you are looking to try Colemak, or any other keyboard layout, the best way to start is by testing it out through typing tests such as Monkeytype. This will allow you to practice without needing to download anything or switch away from the comfort of QWERTY.

If you want to continue further, the next step would be trying Colemak in different apps besides online typing tests. MacOS will include Colemak in the operating system and is as simple as adding it in your keyboard settings. For Windows and many Linux distros, you will have to download it from the official Colemak website

Note some layouts, such as Dvorak, will already be included in Windows and will not require any downloads. Downloading or adding the layout via settings will provide the best experience. Doing things like remapping keys on your keyboard may cause problems in video games or certain apps. In these programs, you will have to remap keys to their correct positions if you remap keys to a new layout. 

Advertisements

Should You Switch?

After my six-month experiment, I decided to continue using Colemak. Today, I use Colemak in the vast majority of situations. If I have to use a different computer for work or I am working on a public computer, I still use QWERTY and am able to type on it just about as fast. Due to my muscle memory with both, I am able to switch between both instantly. 

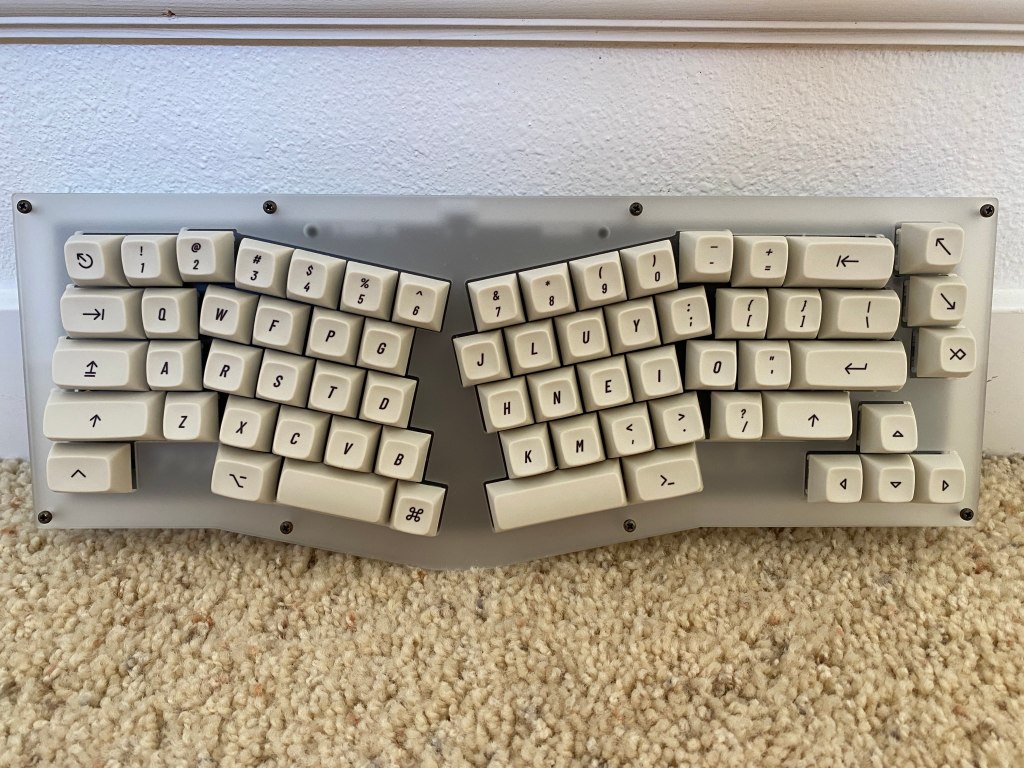
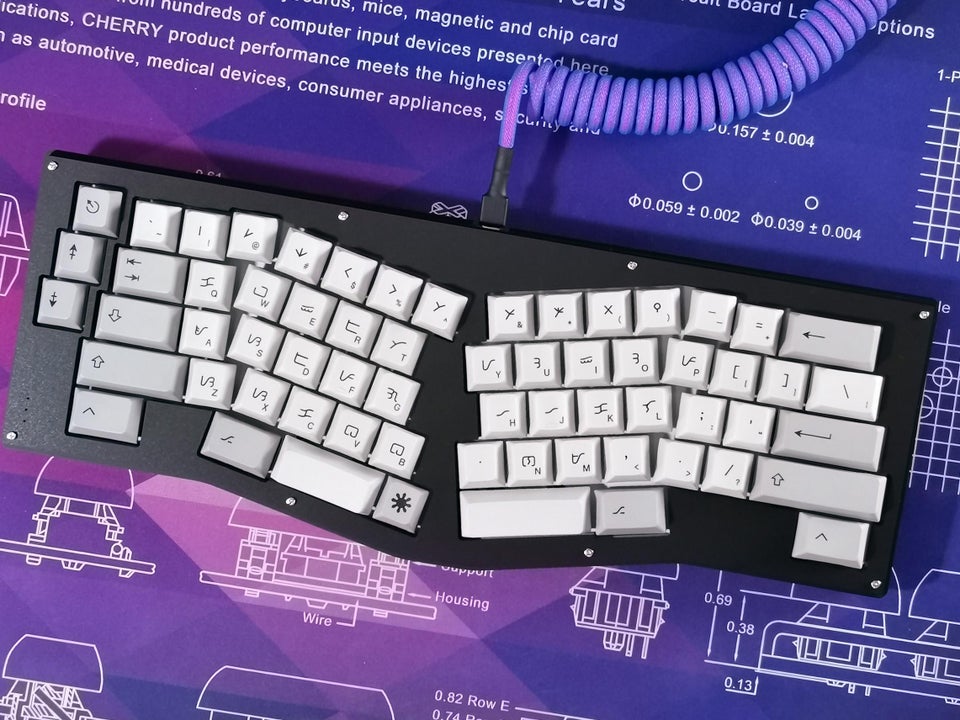
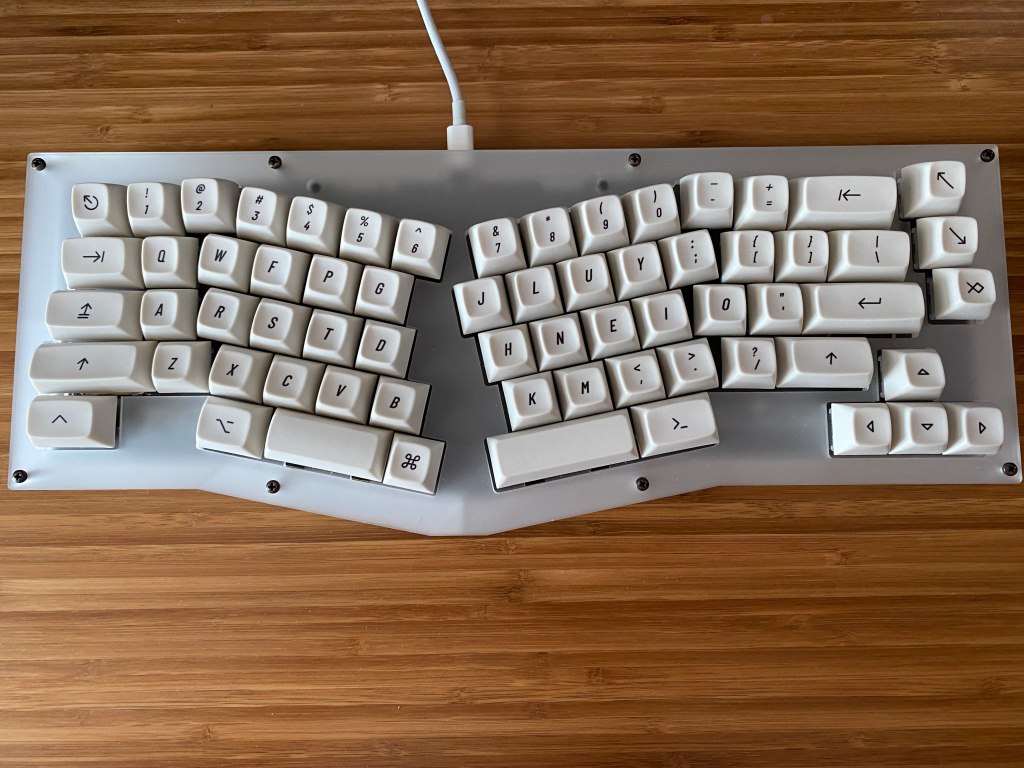
Despite my comfort with both, I still prefer Colemak much more. It makes it easier to type for longer and due to me learning to touch type (type with the home row), I was able to transition to an ergonomic keyboard effortlessly. 

Although Colemak worked out perfectly for me, you may prefer other layouts such as Workman, Dvorak, or Norman. If you do not need keyboard shortcuts, Dvorak and Workman are great options to consider. Reading a little bit about each layout and seeing pictures of where each key is oriented can help you decide better too.

Another important factor to note is that QWERTY may still be the best layout for you. If you don’t type much, don’t want to take time to learn a new layout, or game frequently, alternative keyboard layouts may not be the best option for you. 

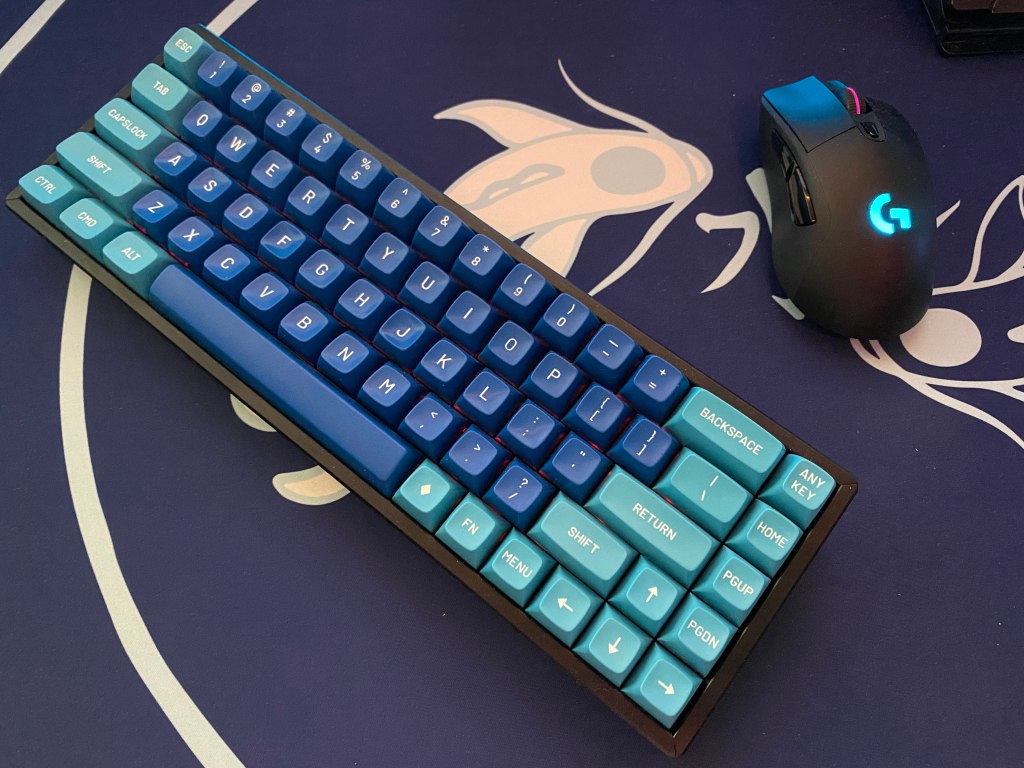
Most games will work ok alternative layouts, but I have had issues with a couple games. A simple fix is just to remap the keys used by the game, but if you spend most of your time gaming, an alternative layout may not be that practical. 

Conclusion

Assortment of keycaps on a desk

If you are willing to take the time to switch to a new layout, I would argue that Colemak gives you the benefits of most alternative layouts while still preserving keyboard shortcuts, a must for me. This makes Colemak a great option to consider, especially for those who type throughout an entire day.

After using Colemak for about two and a half years, I anticipate that I will continue using Colemak in the future. It allows me to type faster for longer and is more comfortable. However, it is important to consider that you will only notice the benefits of a new layout after you are confident with it. 

If you enjoyed this article, check out some of our other keyboard content

Best Linear Switches [2022]

Keyboard switches on a desk next to flowers and headphones.

When building a mechanical keyboard, one of the key decisions is finding which key switch is right for you.

A linear switch is a switch that has uninterrupted travel all the way down. There is no feedback in the travel and the only way to tell you have actuated the switch is when the action shows up on your screen.

If you are a fan of linear switches there are a large number of options available, so which one is the right switch for you? Today we are going to discuss the top ten linear switches in our testing so you can find the right switch for your next build.

Terminology

Just like in our Tactile Switch article we have included a short guide to clarify some terminology that might be thrown around when describing switches.

Actuation: Actuation is when the switch actually activates and outputs to the device.

Bottom out: When the switch finishes traveling and hits the bottom housing.

Leaf: The metal contacts in a switch. The leaf actually is responsible for actually actuating the switch. The leaf is in the bottom housing as the picture shows.

Diagram pointing to the leaf on a mechanical keyboard switch.

Ping / Spring Ping / Leaf Ping: This is a metallic reverb produced by the sound of the spring, leaf, or both. In most cases, it can be fixed by lube.

Advertisements

Disclaimer… Please Read!

This review is largely preference, my rankings will likely be very different from yours. Do not base your opinions solely based on mine. Use this guide to gain a general understanding of the switch and where enthusiasts like me stand on these switches. Guides like this, sound tests, and opinions of content creators like Teaha Types are good ways to find switches that you believe are interesting and worth trying. Ultimately we recommend you to just hit up your local vendor and buy a pack of whatever switch your fingers and ears desire to try out. That way you can find the best switch for you.

1. Durock POM Linear: The Best Long Pole Linear

Durock POM switch sitting on a plant

Durock’s POM linears initially lit up the keyboard market with their interesting sound produced by the long pole stem. Like many popular tactiles such as Drop’s Holy Pandas or Boba U4Ts, the POM linears feature a longer than usual stem which changes how the switch sounds when bottoming out.

The POM linears can be described as having a clacky sound profile but the long pole stem exaggerates this sound by making it sharper and slightly louder than a normal linear bottoming out. Stock these switches are quite smooth but lubed they become one of the best switches on the market. Their smoothness lines up with the performance of many other high-end switches produced by JWK.

We do recommend lubing your POM linears for the best sound and feel but filming is not necessary as the housings are already nice and tight.

Due to the unique and pleasant sound profile paired with the silky smooth travel these switches definitely take the number one spot on our list. They are a top option to consider if you are looking for a long pole linear.

2. KTT Strawberry: Poppy, Smooth, and Great Value

KTT Strawberry switch sitting on a green plant.

KTT’s Strawberries are one of KTT’s offerings as a high-end switch. At around 40 cents per switch, their price puts them in the mid to low-end range of switches in terms of price. However, this switch outperforms its price point by delivering what we would consider to be one of if not the best-valued linear switches on the market.

The KTT Strawberries are one of the smoothest stock switches out there right now as they are prelubed and when lubed they still deliver an experience to many of the other top switches on this list that are as much as double the price. They are not as smooth as Tangerines but when lubed they are able to even outperform popular options such as Ink Blacks.

As for sound, they are similar to the rest of KTT’s linear lineup with a nice poppy sound that is enjoyed by many enthusiasts and content creators. Their clean and not overly thin-sounding clack makes them a satisfying option if you are sick of the thock hype train and you want to try something a bit different.

Like the KTT Roses, the Strawberries come with a 63.5g progressive spring. This is especially enjoyable if you like light initial force when pressing down your switch. Neither lubing nor filming is required with these switches as their housings are quite solid and they are already prelubed. If you do want a slightly deeper sound and smoother travel though, lubing with a thinner lube like Tribosys 3204 over the stem is a good way to improve the experience.

The Strawberries take the number two spot on this list for being a solid option without breaking the bank. Despite being so cheap their combination with carbon fiber plates has made for one of my favorite keyboard configurations out there.

Advertisements

3. Gateron Ink Black V2: Heavy Weight with Thock

Gateron Black Ink mechanical keyboard switch with rocks behind it.

Gateron Ink Black V2s are arguably Gateron’s most popular switch. They are on the heavier side with a 60g actuation and a 70g bottom out. Like most linears they actuate at 2mm with a total travel of 4mm. They do not come prelubed and stock are decently scratchy for the price. However, when lubed they provide their popular thocky sound signature.

We do recommend lubing these switches as stock you don’t really get to experience the Inks’ potential. Filming is also recommended but the switches are not terribly loose without films.

Ink Blacks take the number three spot on this list because they do provide a nice deep sound but there are many switches that provide better smoothness.

4. C3 Equalz x TKC Banana Splits: Good Looking, Good Sounding

C3 equalz Banana split mechanical keyboard switch resting on a flower.

The Banana Splits are amazing. They are produced by both TKC and C3 Equalz adding to their fruit switch lineup with other popular options such as Tangerines, Kiwis, and Dragonfruits. They feature a hyper smooth experience and nice creamy yet clacky sound that is enjoyed by many keyboard enthusiasts. Banana Splits sound especially good on spacebars. Not to mention they also have a creative colorway.

TKC’s Banana Splits feature the typical 2mm actuation point and 4mm bottom out. They have no long stem action and come with only a 62g weight option. Banana Splits do not require filming but lubing really brings out the best in these switches.

They take the fourth place spot on our list because despite having a popular sound and a great feel they are not super accessible, are costly, and there are still a few other switch options that I like a little more.

Advertisements

5. Bobagums: The Best Silent Linear

Bobagum keyboard switch on a flower.

Gazzew’s Bobagum linears took inspiration from the Boba U4s, which are top-tier silent tactiles. Bobagums come in both 62g and 68g spring variations. They also feature great silencing ability and an incredibly smooth travel.

Lubing these switches is always recommended but filming is not as housings may struggle to close with many types of film since they are already so tight.

These switches are perfect for a work or school keyboard. So if you want a mechanical keyboard experience without disturbing the people around you, the Bobagums could be the right choice for you.

6. Gateron Milky Yellow: Thock on a Budget

Gateron Milky Yellow switch on a flower.

Despite being on the market for many years at this point, Gateron’s Milky Yellows are still considered the king of budget switches. Coming in at only 23 cents per switch they deliver a sound that competes with switches three times the cost and only sacrifices a bit on the smoothness. They have a pleasant thocky sound and feature quite a smooth travel after lubing and filming. Milky Yellows weigh in at about 50g actuation and 60g bottom out.

Gateron’s “Yellow” switches come in many forms and revisions but the black bottom and milky top housings are regarded by many as the best configuration. This configuration provides the best smoothness and a creamy, deep sound that is loved by many keyboard enthusiasts.

Do lube and film these, as without they are quite scratchy and the housings are pretty wobbly stock.

7. KTT Roses: Poppy on a Budget

KTT Rose switch sitting on a flower

While not quite as cheap as Milky Yellows, KTT Roses deliver a lower-pitched clack at the low price of about 27 cents a switch. Roses can be decently smooth after being lubed and are better than most budget switches which are often still quite scratchy even after being lubed. KTT Roses have a standard 4mm total travel with a 63.5g progressive spring. This spring is liked by many because of the initially light force of the progressive spring.

If you have a bit more room in your budget and you would like a switch that provides a higher pitched sound than Milky Yellows then Roses might be the option for you. If you would still like a switch with the same sound profile but a lighter spring, KTT also offers recolors in their Grapefruit, Peach, and Sea Salt Lemon switches. They still offer the same housing and stem materials as well as a progressive spring.

Lubing these switches is recommended as they are not prelubed like KTT’s Strawberries. After lubing them their performance reaches a similar level as the Strawberries with a slightly lower pitched sound. You can film them but it is not required.

Advertisements

8. PrimeKB Alpacas V2s: The King of Clack

PrimeKB Alpaca V2 keyboard switch sitting on a pink flower.

The Alpacas are arguably the most popular of JWK’s recolors following famous designer Minterly’s Bliss colorway. They feature asmooth travel and a lower-pitched clack. Essentially you won’t get the same thock as Milky Yellows or Black Ink Blacks but Alpacas are also lower pitched than Tangerines. They feature JWK’s gold-plated 62g springs making Alpacas have a nice medium spring weight.

These switches do not need lube or films as they do come pre-lubed with a slight layer of oil and they have pretty tight housings. Lubing these switches can definitely bring out a smoother feel and creamier sound if you are willing to take the time.

Note that the latest V2 Alpacas were tested. The previous iteration for this switch had quite loose housings but that has since been fixed. All official sellers of Alpacas sell the V2 Alpacas but if you are buying or buying a recolor, make sure you are getting a switch with the V2 molds.

Despite being considered such a great switch they sit at our number eight spot because the JWK recolors are all the same and aren’t considered super interesting.

9. C3 Equalz x TKC Tangerine: Smoothest Stock Switch

C3 Equalz Tangerine switch resting on a flower.

When the Tangerines first came out in late 2020 they shocked the keyboard community for being arguably the smoothest keyboard switch available. Today TKC’s Tangerines are still considered one of the smoothest linears. They feature a standard 2mm actuation with a 4mm bottom out. They are also offered with either a 62g or 67g spring with a light green or dark green stem respectively.

Although the Tangerines are incredibly smooth, the sound profile is considered by many to be boring and flat. This doesn’t make Tangerines a bad switch by any means, especially because sound preference is subjective. However the other switches on this list I have found to still have a similar level of smoothness and as well as more interesting sound profiles. If you do find that you find that the sound of Tangies suits your preferences then it is certainly a fantastic linear switch to consider.

These switches are fantastic stock because they are pre-lubed but if you would like a more creamy sound then lubing could improve the sound. Lubing with a thinner lube like Tribosys 3204 is recommended as Krytox 205g0 may be too thick. Tangerines do benefit from filming but it is not completely necessary.

10. Vintage Cherry MX Blacks: A Classic

Vintage Cherry MX Black switch sitting on a rock.

Chances are if you have even the slightest experience in this hobby you have heard of Cherry’s lineup and cherry MX Blacks. These switches are those exact things, except old. When a switch is made a mold is used to cast the plastic, so these switches use an older mold which was known to be very smooth. This paired with cherry’s magically sounding amazing housings made the holy grail of linears.

Now if there so good why aren’t they number 1? Because these switches are very hard to come by, for starters it is near impossible to get these switches through a commercial vendor like NovelKeys, Cannonkeys, etc. Second, in most cases these switches must be removed from an old keyboard (like really old) and then cleaned and sold via mechmarket or something like that. That being said, these switches follow the standard Cherry MX Black weighting which is about 60g operating and 80g bottom out.

These switches do need lube but filming is hit or miss since they have nice and tight housings from the factory.

If you really want this typing experience but you are unable to find Vintage MX Blacks or you just don’t want to pay that much for a used switch you can also use machine broken in switches like RNKBD’s Cherry MX Black Ultraglides. Machine broken in switches are able to simulate a similar level of smoothness as vintage MX Blacks which have been naturally broken in over time.

Advertisements

Conclusion

All these switches are great choices for any linear build. Some switches that weren’t included which are also great are most JWK manufactured linears such as the Durock L Series, Halu Halos, H1s as well as Tealios, KTT, and TTC switches. If you want to hear some sound tests to better make a decision check out my YouTube channel for some sound tests.

If you want to try or buy any of these switches then a great place to start is by looking at your local vendor. Take a look at our vendor list. A compilation of tons of keyboard vendors sorted by region.

If you enjoyed this article and you want to talk more about tech then consider joining our Discord!

Best Clicky Switches [2022]

Switches and keyboards on a desk with a planet

Are you a fan of a crisp tactile bump paired with a nice, sharp click? Clicky switches are a favorite of many but are often not talked about.

A clicky switch is a keyboard switch that produces a bump at some point in the travel, paired with a higher-pitched click. Clicky switches pair the tactility that is popular with tactile switches with additional audio feedback.

With the abundance of clicky switches in the custom keyboard market, it can get extremely confusing to find the right switches for you. Today we are going to discuss the best clicky switches from our testing.

Terminology

Whenever switches are mentioned, there are always some confusing terms involved, so let’s go through them.

Click Jacket: A system that makes a loud click sound when pressed down but no click when the upstroke. This system functions by having a collar around the stem of the switch that is pushed downward and actually causes the clicking sound and activates the switch. Click jackets are the system used in Cherry MX Blues and clones.

Click Bar: A system in which a metal bar is placed and when pushed it creates a click. The click bar plays no role in the switch actually being activated but simply makes a sound and provides a tactile feel. The stem of the switch then makes contact just under the contact from this bar to activate the switch. This system is preferred by enthusiasts who like clicky switches because it allows for a more satisfying experience with stronger tactility.

Box Switches: Although there are box switches for all types of switches, they are especially popular among clicky switches. Box switches don’t get the word box from the shape of their stem but rather a different internal mechanism for activating the switch that is surrounded by a small box within the switch. This structure allows these switches to be dust-proof.

Tactile Event: The bump in the switches travel.

Pre-Travel: Any linear or smooth uninterrupted travel before the tactile event.

Post-Travel: Post-travel is the linear travel after the tactile event.

Actuation: Actuation is when the switch activates and outputs to the device.

Bottom Out: When the switch finishes traveling and hits the bottom housing.

Leaf: The metallic contacts in a switch, these themselves actually actuate the switch. The leaf is in the bottom housing as the picture shows.

Diagram pointing to the leaf on a mechanical keyboard switch.

Ping / Spring Ping / Leaf Ping: This is a metallic reverb produced by the sound of the spring, leaf, or both. In most cases it can be fixed by lube.

Advertisements

Disclaimer… Please Read!

This review is largely preference, my rankings will likely be very different from yours. Do not base your opinions solely based on mine.Use this guide to gain a general understanding of the switch and where enthusiasts like me stand on these switches. Guides like this, sound tests, and opinions of content creators like Teaha Types are good ways to find switches that you believe are interesting and worth trying. Ultimately we recommend you to just hit up your local vendor and buy a pack of whatever switch your fingers and ears desire to try them out. That way you can find the best switch for you.

Also, note we will not talk about the feel of these switches after lubing. Typically clicky switches do not require lubing and can even take the clickiness or even tactility away from the switch. If you do want to lube your clicky switch then we would suggest lubing the spring with Krytox GPL 105 oil although this truly isn’t needed.

1. Kailh x NovelKeys Box Jades: Thick Clicks, Nice Weight

The NovelKeys Box Jades are a clicky switch designed by NovelKeys and manufactured by Kailh. Box Jades feature a thick clickbar for peak tactility and a click that is probably the loudest of any switch I have tested.

The Jades activate with a force of 50g at a travel distance of 1.8mm and bottom out at 3.6mm with a force of 65g. NovelKeys states they are IP56 water and dust-resistant.

We have put them at the top of this list as they feature an extremely sharp tactile bump paired with a very crisp click. Additionally, the weight does not get too fatiguing after typing for long periods.

2. Kailh x NovelKeys Box Navys: Strong Click, Heavy Weight

Kailh Box Navy keyboard switch sitting on a plant

If you think you would like the Box Jades then NovelKeys’s Box Navy switches are the same switch except with a heavier spring.

The Box Navys have the same IP56 rating, thick clickbar, 1.8mm actuation distance, and 3.6mm total travel. The only difference is that they actuate at 75g and bottom out at 90g.

We do like the thick clickbar of the Navys and Jades but because the spring is heavier we find that they can get fatiguing more easily.

Advertisements

3. Kailh Box Whites: Jades Younger Cousin

Kailh’s Box Whites are a fantastic clicky switch utilizing a clickbar for a strong tactile bump and thick click. Unlike the Jades and Navys, the Box Whites do not use a thick clickbar meaning the tactility will be less sharp and they will not be as loud.

Box whites still utilize the box mechanism, hence the name, so they are rated for IP56 dust and water resistance. The switches activate at 1.8mm with a force of 45g and bottom out at 3.6mm with a force of 55g.

If you want a sharp tactile bump and a crisp click but you find that your finger gets fatigued easily, the Box Whites may be a better option for you over either the Jades or Navys.

Advertisements

4. Kailh x NovelKeys Sherbet: Long Travel, Strong Bump

NovelKeys’s Sherbet switches still provide a clickbar like the previous options on this list but have a few key differences. The Sherbets feature the standard MX switch design rather than the shape of box switches.

The NovelKeys Sherbets feature a 45g actuation force at 2mm and bottom out at 4mm with a force of 85g. For those that prefer a longer travel and may be looking for a slightly quieter click. The Sherbet will provide that over the Jades, Navys, or Whites.

The clickbar allows the Sherbets to still have a very satisfying click and makes them a very solid option for clicky switches.

5. Outemu Phoenix: Solid Clickjacket

Outemu Phoenix keyboard switch by some plants

Typically we find that clicky switches with a clickbar mechanism feature the best experience but there are a few clickjackets that are quite solid. The Outemu Phoneix features a clickjacket, the same system as switches like Cherry MX Blues.

Unlike Blues, Outemu Phoenix’s have a strong tactile bump, albeit less than the Jades, and feature a click both when activating the switch and on the return. You also get two different weight options with either a 62g or 68g option.

Although there are many clicky options to consider the Outemu Phoenix’s provide a unique take on the clickjacket system that is worth trying if interested.

Conclusion

NK Jade keyboard switches on a desk.

All of these switches are great option to make your keyboard clicky. We do recommend that before you make any decisions you consider multiple different options and maybe watch some reviews or listen to some sound tests as it is hard to fully describe the experience of a switch in just a few paragraphs.

If you are also looking at tactile and linear switches, check out our best linear and best tactile switch articles. When you are ready to try or buy any of these switches then a great place to start is by looking at your local vendor. Take a look at our vendor list. A compilation of tons of keyboard vendors sorted by region.

If you enjoyed this article and you want to talk more about tech then consider joining our Discord and as always thanks for reading!

Advertisements

North-Facing vs South-Facing Switches

South-Facing Switches (Left) vs North-Facing Switches (Right)

The world of mechanical keyboards can be complex but can be very fun and satisfying. On keyboards, switches are attached to a PCB, printed circuit board. Switches can be attached in one of two configurations. This often causes confusion as people bring up terms like interference or switch orientation.

When looking to buy a mechanical keyboard, especially if you are looking to modify or build one, understanding what north-facing and south-facing switches are can be important to help you make the best decision for you.

Today we are going to clarify the difference between north-facing and south-facing switches and help you understand everything you need to know to make a better decision when buying your next mechanical keyboard.

North-Facing vs South-Facing Switches: What Are They?

Before we understand what north-facing and south-facing switches are we must first understand switch orientation. The term switch orientation refers to which direction a mechanical keyboard switch is placed on a PCB.

North-facing switches refer to when a switch’s LED hole faces toward the top of the keyboard while placed in the socket of the keyboard’s PCB. North-facing switches are typically seen in budget keyboards but are also seen in older custom keyboards.

South-facing switches refer to when a switch’s LED hole faces toward the bottom of the keyboard or where the user of the keyboard is while paced in the socket of the keyboard’s PCB. South-facing switches are typically seen in custom keyboards but due to consumer demand are starting to be put in some beginner kits and even a few prebuilts.

Typically we hear the terms north and south-facing the most but east and west-facing switches exist too. East and west-facing switches have the same pros and cons as south-facing switches. They are used very rarely and are usually only implemented in PCBs that support multiple layouts and must maximize all space on the PCB available.

Advertisements

Problem With North-Facing Switches: Interferance

Diagram explaining switch interference between north-facing and south-facing switches.

The biggest problem that faces north-facing switches is keycap interference when using Cherry profile keycaps. On some rows of the keyboard, Cherry profile keycaps will come into contact with the top of the switches before the switch is able to bottom out. This will change both the sound and feel of the typing experience.

Although using Cherry profile keycaps are still usable, interference can remove a lot of the satisfaction from typing on a mechanical keyboard. Part of what makes this issue annoying is also that it affects certain rows of keys more than others so the feel becomes inconsistent between keys too. Some don’t face the issue while other rows do.

This makes north-facing switch orientations quite unpopular among keyboard enthusiasts who often use Cherry profile keycaps from high-end manufacturers.

Problem With South-Facing Switches: RGB Shine Through

Mechanical keyboard on desk

Although south-facing PCBs are highly popular because they don’t face the issues of interference, they still have their own issues. South-facing switches have some issues for fans of RGB and shine through keycaps.

With north-facing PCBs the LEDs lie directly below the legends on the keycaps. This creates a brighter and more consistent look on the legend. With south-facing switches, the LEDs are on the bottom side of the keycaps. This means a lot of the light does not shine through the legend of shine through keycaps.

Note switch orientation has no effect on keyboard underglow or LEDs on the side of the keyboard.

This issue faces fewer enthusiasts because typically enthusiasts aren’t using shine through keycaps. On the other hand, because RGB is very popular for gaming keyboards we most likely will see large gaming brands continue to use north-facing switches in their keyboards.

Advertisements

Can You Change Switch Orientation On Your PCB?

Close up picture of a mechanical keyboard PCB.

So maybe you are really set on a keyboard or you have already bought a keyboard and now you want a different switch orientation to suit your preferences. The question becomes can you change switch orientation?

Unfortunately no, you cannot change the direction in which the switches are placed on the PCB. Holes were drilled in a specific way from the factory so the pins on the bottom of your switches only can fit in one direction.

There are a few solutions though. One thing you can do is get a totally new PCB. You can buy one that supports a different orientation and use that in your case instead. With this solution, not all cases accept all PCBs so you would need to research what PCBs your board supports. Some mechanical keyboards have a proprietary case design to the manufacturer or have such a unique design that it is very hard or even impossible to find a different PCB that fits the case. It is especially hard to find PCBs for high-end boards that feature north-facing sockets.

Buying a new PCB can also be very expensive so there are a few other options. If you are using a keyboard with north-facing switches but you would like to use Cherry profile keycaps you could get a few of the “box” switches that don’t face the issues of interference like Novelkey Box Cream switches. Another solution is to get special washers to raise up your keycaps so the keycaps don’t make contact with the top of the switches until the switch has been depressed all the way.

There are also switches advertised for having a long pole stem which may not have interference on some cherry profile keycaps. This is because the switches bottom out sooner so the keycap doesn’t come as close to the top of the switch. Some famous long pole stem switches include Drop Holy Pandas or Durock Pom Linears.

If you are looking for more light to shine through your keycaps and you have south-facing switches, then buying some transparent switches like some Aqua King V3 switches might give you a better experience.

Advertisements

Which One Is Better?

There is not necessarily a better option overall however depending on your situation, there is a better option for you.

In most cases, we would recommend keyboards with south-facing switches. The main instance that we would suggest a north-facing keyboard is if you plan to use shine-through keycaps. South-facing keycaps still allow RGB to pass through although just it doesn’t look as vibrant as it may look on a north-facing board.

If you start to get into custom keyboards odds are you will most likely use keycaps that are not shine through. There are also plenty of keyboards that have RGB underglow or on the side of the board and are south-facing.

In most cases, south-facing switches are better as they are more versatile but boards with north-facing switches still have a use case and north-facing switches aren’t the end of the world, especially if you don’t even plan to use Cherry profile keycaps.

Conclusion

Angled view of Wuque Ikki68 Keyboard on a desk.

There are two main types of switch orientation that can give you the best experience depending on what you are looking for. South-facing switches support more keycap profiles, especially ones that are popular among enthusiasts, while north-facing switches can provide the best experience for shine through keycaps.

Even if you have a keyboard where the switches are oriented in a way that doesn’t suit your preferences or inhibits your options, there are still some possible solutions like getting certain types of switches, changing your PCB, or adding washers that allow you to enjoy your keyboard as much as possible without needing to get a new keyboard.

As enthusiasts ourselves we would recommend buying a keyboard with south-facing switches unless you plan to use shine through keycaps.

If you enjoyed this guide, please check out our other keyboard guides, and if you have any more questions feel free to ask us on our Discord.

Are Ergonomic Keyboards Worth It?

Arisu ergonomic keyboard sitting on a wall.

If you spend a lot of time typing at your setup you may be looking to improve the ergonomics and comfort of your setup. One of the best ways to improve long-term comfort is by using an ergonomic keyboard.

Ergonomic keyboards position your hands and wrists better for a more comfortable experience and potentially better posture.

Many people consider ergonomic keyboards but understanding if getting one is worth it for you depends on your situation. Having good ergonomics is always a good thing but if you don’t spend much time typing or you spend most of your time gaming, investing in an ergonomic keyboard may not be the right option for you. In contrast, those that are at a computer typing throughout the day could definitely see comfort and even health benefits by using an ergonomic board.

So if you want to find out more and see if you could benefit from an ergonomic keyboard, keep reading to see if they are worth the investment.

Ergonomic vs Normal Keyboards

Ergonomic keyboard next to a regular mechanical keyboard.

Ergonomic and normal keyboards definitely have their differences but both have their benefits. One isn’t better than another as it truly depends on your situation.

Advertisements

Size and Form Factors

There are a variety of sizes and form factors with keyboards. Normal keyboards have more layouts to choose from including 40%, 60%, 65%, 75%, TKL, and full-size boards. With ergonomic keyboards, it is a little more complicated.

It is important to note that there are two types of ergonomic keyboards, unibody and split. Unibody keyboards are an ergonomic keyboard in a single case. Split keyboards usually have two parts for each side of the keyboard. This allows you to use only one have of the split board for things like gaming to safe as much space as possible.

With split style boards, you can have any layout of a regular keyboard but with unibody style boards there are 2 popular layouts. The Arisu and Alice layouts. The Alice layout is most similar to a 60% keyboard with some macros on the left-hand side while the Arisu layout is most similar to a 65% keyboard.

In general normal keyboards are smaller for the same amount of functions and there are more layouts available for them but ergonomic boards also have some very unique layouts.

Comfort Level

The biggest benefit of ergonomic keyboards is their improved comfort over regular boards. They were specifically designed to help you type over long periods.

While you are typing you won’t get pains or cramps in your hands, wrists, and arms.

Also, you may find that you have better posture or it is easier to keep good posture. This is because ergonomic keyboards support better hand and arm positioning to promote better posture. As a result, you will be more comfortable throughout your body and this is actually more healthy for you.

If you find that you game most of the time then this is one case where a regular keyboard may help you to be more comfortable. Since many gamers tilt their keyboards and you are interacting with both a mouse and a keyboard there are some reasons to go with a regular keyboard. A regular board will save space and will be just as comfortable as an ergonomic keyboard but will allow you to have more comfort with your hand using the mouse.

If you are looking for comfort but you don’t have the budget for a new keyboard then switching to a new keyboard layout could also help provide better comfort with no cost except the time to switch.

Arm and Wrist Pain

A problem that you may encounter when typing for long periods is that you may suffer from arm and wrist pains. Ergonomic keyboards are great for fixing these issues.

Since ergonomic keyboards are designed for optimal comfort and as a result they greatly reduce the effects of pains or the chance of getting them.

When talking about ergonomic keyboards RSI (Repetitive Strain Injuries) and carpal tunnel are two common topics. Ergonomic keyboards greatly reduce the chance of getting RSI and carpal tunnel by reducing the strain on your wrists.

It is important to note that if you are considering an ergonomic board because you have some sort of arm, wrist, or hand problem then a new keyboard will not be a magical fix for you. You should notice benefits to all your problems won’t necessarily go away depending on the severity of the condition.

Advertisements

Typing Speed

Ideally, your fastest typing speed should be similar between an ergonomic keyboard and a normal keyboard if you’re used to both types of keyboards.

This isn’t always the case. In my experience, I found that I can type fastest with a regular keyboard but I type faster for longer with my ergonomic board. Between ergonomic keyboards, you will typically type faster with a unibody board than a split alternative.

The fastest typists in the world still use regular mechanical keyboards as their primary boards. Ultimately if you just are looking for that fastest peak time a regular board still may be the option for you but if you want to have a consistently fast speed all day then an ergonomic board is something you should consider.

Price

So ergonomic keyboards have all these benefits but do they cost more as a result? For the same construction, sound, and feel, ergonomic keyboards are often priced quite well.

Ergonomic keyboards often are more expensive but that is because they are often higher-end keyboards. This is because many ergonomic keyboards are made by creators who also want premium build materials, a nice design, and a thoccy sound.

Although you can find some good value ergonomic boards, the cheapest boards that you will find are normal keyboards. Often you will pay a bit more for an ergo design compared to the regular designed counterparts, especially if looking at a membrane keyboard.

Modding and Accessories

One important factor for those building ergonomic mechanical keyboards, especially enthusiasts, is how easy ergonomic keyboards are to build, mod, and get parts for.

The difficulty of all keyboards vary but building an ergonomic keyboard should be no harder to build than a regular keyboard. Finding parts for modding ergo keyboards or parts may be harder because typically smaller manufactures make ergonomic keyboards but this is common across all limited run and high-end keyboards.

The main issue that you will run into if you are considering an ergonomic mechanical keyboard is access to compatible keycap sets.

All ergonomic keyboards have split spacebars. This means that if you are buying a keycap set you need to make sure that it supports the needed spacebars. Additionally some ergo boards also have an additional ‘B’ key or have macros on the left-hand side.

Overall it isn’t hard to find keycaps but it is an important thing to keep in mind.

Advertisements

Is An Ergonomic Keyboard Right For You?

Gaming keyboard next to a gaming mouse.

Understanding how you use your computer will best help you understand if an ergonomic or regular keyboard is best for you.

Developers, writers, managers, and other people who spend some if not the whole workday typing can definitively benefit from an ergonomic keyboard. An ergonomic keyboard can reduce wrist problems in the future and provide better comfort throughout the day.

If you don’t really use a computer much or don’t use your computer for work then an ergonomic keyboard may not be the best for you. Taking the time to switch to an ergonomic keyboard is especially not worth it if you find that you game more than you work.

Ergonomic keyboards are bigger than regular size keyboards for having the same layout or amount of keys. Since having more mouse space is very important for gaming using a regular board that will help give you more mouse space.

The thing is this concept doesn’t apply to all ergonomic keyboards. Split ergonomic boards can be an interesting option to consider for some gamers. Since split keyboards have two parts of the board if you play FPS games you can use only one of the two parts and have a lot more mouse room. The extra investment is most likely not worth it but it can be an interesting option to consider.

Generally, ergonomic keyboards are better for productivity and regular boards are better for gaming or those who don’t use their computer that much.

Advertisements

Is It Difficult To Transition?

Time

Depending on if you can get a split or unibody board it can take more or less time but will a unibody board will generally take less time. With split keyboards you not only need to get used to this new format but it may also take time to find the right placement for both halves of the board.

With a unibody board, it could take a few days to a couple of weeks while a split keyboard could take you a few weeks to even a month to get used to.

Difficulty

Since ergonomic boards have different hand placements it will feel like you are using a slightly different layout. Switching to an ergonomic keyboard isn’t very hard to get used to but time is the main issue with the transition process.

In general, you should not be worried about the difficulty in transitioning to an ergonomic keyboard as the end result will be well worth it.

Different Types Of Ergonomic Keyboards

If you are looking for an ergonomic keyboard, there are two options to consider. Unibody and split.

Unibody

Angled view of a unibody ergonomic keyboard.

The first type of ergonomic keyboard is the Unibody style. Unibody boards are the easiest to get used to and typically the cheapest options.

A Unibody style board is just one board that is together, as the name suggests. This means that you can get an ergonomic experience without the complexity of a split keyboard. The ergonomics may not be as great as a split keyboard but they will still be superior to the comfort of just a standard keyboard.

If you want something clean and simple while still getting a comfortable experience then a unibody board is the option for you. Unibody boards are all in one package which means you don’t have to worry about cables between different parts.

Split

Top view of a split ergonomic keyboard.

The other style of ergonomic keyboards is the split layout. A split style keyboard has more customizability in the sense that you can move each side around but this comes at a cost. Typically split keyboards have another set of wires that you have to deal with between both halves. Also, split keyboards are often harder to get used to.

Some split-style keyboards can be combined back into one regular board but these often sacrifice on looks for this extra function.

In general, a split keyboard will sacrifice looks but will give maximum comfort. Since you can adjust a split keyboard to your liking, if you are looking for the best comfort then a split board will best suit you.

Advertisements

Conclusion

Side view of an ergonomic keyboard.

Switching to an ergonomic keyboard is a fantastic way to improve your comfort while working. They can solve pains, reduce the chance of long-term problems, and promote better posture. Problems such as carpal tunnel or RSI can be greatly reduced.

While ergonomic keyboards have these benefits, normal keyboards still allow for slightly faster typing speeds, are more available, support many more sizes and layouts.

There are a few different styles for ergonomic keyboards to choose from depending on what you do daily. With Unibody and Split keyboards and a few different layouts for each type of board, there is something that will suit you.

For additional ergonomics, tips check out some home office tips from the University of Washington.

Advertisements

Are Colemak or Dvorak Worth It?

Mechanical keyboard with Colemak layout next to keyboard with QWERTY layout.

QWERTY, the common keyboard layout that everyone is used to. If you have grown an interest in keyboards then you may have heard about some other keyboard layouts such as Colemak or Dvorak.

Using any of these alternative keyboard layouts has a variety of upsides but is switching to something like Colemak, Dvorak, or any other layout worth taking the time and the struggle to rewrite your muscle memory?

Using an alternative layout can provide many benefits. By switching you could notice an increase in typing efficiency, comfort, and ergonomics. The time that it takes to switch can be especially beneficial if you spend a lot of time at a computer.

Today I will answer the question if alternative keyboard layouts are indeed worth it and add in a bit of my own personal experience trying one of these different keyboard layouts.

The History of QWERTY

When typewriters were created, the people designing them realized a problem. Typewriters would jam if the keys were in alphabetical order. The designer of the QWERTY layout, Christopher Sholes fixed this problem by splitting commonly used letter pairings, for example, ‘S’ and ‘T’.

This layout became the new standard and even as computers started to become popular, nobody questioned the layout that was in place. Everyone was already used to the layout and it wasn’t causing enough problems to make large corporations change their designs.

Some people tried different designed different keyboards but they never caught any traction.

Advertisements

Colemak, Dvorak, etc.

Picture of the Colemak Layout for keyboards.
Colemak Layout

Although different variations of QWERTY were created for different languages like French or German, those edited layouts were still relatively the same.

Next comes the most popular alternative layouts being Dvorak, Colemak, and then Workman. There are many other layouts besides these three but these layouts have the biggest communities and are significantly more popular than many of the other layouts out there.

All three of these layouts were created to be more efficient, ergonomic, and comfortable to type on than QWERTY. Many people switch to these layouts for these benefits and can especially appreciate the comfort over the long term. Additionally, because these layouts are more efficient they should make it easier to type faster for longer. This isn’t necessarily true because most of the fastest typers still use QWERTY.

The Dvorak and Colemak were designed to make your fingers use the home row as much as possible and as a result, this means that your fingers do not need to dance around the keyboard as much. Workman takes a different approach as it works to balance the amount of use between both of your hands.

The goal of these layouts is to make your fingers only move as much as they need to and to minimize the time of travel from one keycap to the next. Theoretically using any of these layouts should be faster than typing on QWERTY with the same amount of experience but it is difficult to truly test this.

Advertisements

Is It Worth It To Switch?

Making the decision to switch from QWERTY entirely depends on you and your situation. For most people, you may find that you have no problems with typing and you see no need to make any changes. Others may be enticed by the improved efficiency and comfort. Trying out a different layout also makes for an interesting test.

Switching to something like Colemak could improve long-term comfort throughout the day and could help with faster-sustained typing speeds. This benefit could be worth it for those who spend a lot of time at a computer or typing but for the everyday person who only uses a computer for basic internet browsing, emails, or gaming changing will not be very beneficial.

All in all, you should do what is most comfortable for you and those who use their computers a lot will see the benefits over the long term.

Which One Is Right For You?

Dvorak, Colemak, and Workman all have the same objectives but some differentiating factors may help your decision.

Dvorak is often considered to be the most efficient of these layouts. Also because Dvorak is the most popular alternative to QWERTY it has built-in support in major operating systems like Windows and macOS.

With Colemak and Workman, you may still need to download them. If you use Windows for example you will need to download Colemak here and Workman here on their respective pages.

Colemak functions similarly to Dvorak by focusing on home row usage but is arguably the easiest to learn out of the three. Colemak is the most similar to QWERTY with a bottom row that is almost exactly the same. Additionally Colemak is great if you use functions like Ctrl + C and Ctrl + V. While Dvorak and Workman support these functions, the keys will be in different places and may feel less natural.

Finally, Workman focuses on evening usage by both hands. Workman fixes problems that even Colemak and Dvorak have of placing commonly used keys close together. Workman sacrifices a bit on efficiency to maximize comfort.

Ultimately all these layouts are good and there isn’t really a wrong decision.

Advertisements

What Do I Use?

In December of 2020, I decided to try using Colemak and I eventually made it my primary layout a few months later. Since then I have still continued to use QWERTY in some situations and I have experience using both layouts on all types of keyboards.

So why did I decide Colemak? Well, Colemak does provide some unique benefits over Workman and Dvorak. While all these layouts are more efficient and comfortable to use than QWERTY, Colemak keeps key functionality. With Colemak you are able to keep macros like Ctrl + C and Ctrl + V to copy and paste in the same place on your keyboard.

Additionally Colemak is most similar to QWERTY out of the three while still providing noticeable improvements. While switching to Colemak was difficult initially, I am very happy with my choice and it is a great option for those who use layered functions on their keyboards or want something that is a bit easier to transition to.

Transitioning

Typing test picture from monkey type with typing speed of 91 WPM.
Typing test on Monkeytype

The biggest issue about switching your layout is the time and difficulty to transition. I found that transitioning personally was very difficult for the first month or two so I only used Colemak during typing tests and times when I could type slower.

If you aren’t someone with much free time and are completely fine using QWERTY then there isn’t a very important need to switch. Otherwise trying out a new layout can not only be a fun test but you may actually find that you prefer it over QWERTY.

In my experience, I was able to switch to Colemak as my main layout after about three months but it took a bit more time to reach my previous typing speed.

The transition may take longer or shorter depending on how much you are willing to spend learning the layout and practicing. While learning the layout you may also not like the fact that the keys on your keyboard will not match your new layout. If you use a mechanical keyboard there are some keycap sets that you can buy that support Dvorak, Colemak, Workman, and a few other alternative layouts if this is a deal-breaker for you though.

Learning the layout without being able look at your keyboard is actually a good habit to start because you will learn touch typing and will be able to type faster in the long run.

End Result

A typing test on monkeytype being taken.

After taking time to transition you will continue to build up muscle memory and confidence. Typing with the new layout will be totally normal and you may even be able to type with the layout without ever needing to look at your keyboard.

After about 6 months I was able to match my old typing speed with QWERTY (120-140WPM). I was able to type faster, for longer too, as my fingers would not get tired as quickly.

This actually more efficient because you are able to type faster for longer. I also noticed that using Colemak all day led me to know problems but using QWERTY all day would leave me typing a lot slower later in the day and some people may experience fatigue too.

Advertisements

Conclusion

Mechanical keyboard with the Colemak layout.

Although it isn’t a must, switching to a new keyboard layout can have many benefits. While the change was not life-changing for me it has still allowed me to type faster for longer periods and has improved comfort over the day.

Trying out a new layout like Colemak or Dvorak can be a very interesting test and you may find that you like it for QWERTY. For those who are interested in keyboards or spend a lot of time typing, trying one out could definitely benefit you. Otherwise, for those who mostly game, check emails, or browse the web the QWERTY layout works perfectly fine, and transitioning may not be worth it.

I have never felt the need to go back to QWERTY. Even when I needed to go back to it at times, like when using different keyboards or computers, I found that I noticed a lot more flaws in the layout than before using Colemak.

I hope this article was beneficial to you and if you want to see more keyboard content, check out our keyboard page.

Advertisements

Best Tactile Switches [2021]

A variety of switches on a desk.

There are a plethora of tactile switches on the market, but which one is the best?

A tactile switch is a keyboard switch that produces a bump somewhere in the travel while still retaining its quietness compared to clicky switches. In theory the perfect blend between the sweet sound of linears and the lovely click of clickies. Tactile switches are perfect if you prefer a feedback when typing, most membrane keyboards will have a small and round feedback when typing, so tactiles are most similar to membranes in that way.

Advertisements

Terminology

To get started, when talking about tactile switches many people will refer to types of bump and cool sciency terms like pre-travel, post-travel, actuation, and much more. Well, don’t let these big words intimidate you because I will explain them all.

Tactile Event: The bump in the switches travel.

Pre-Travel: Any linear or smooth uninterrupted travel before the tactile event.

Post-Travel: Post-travel is the linear travel after the tactile event.

Actuation: Actuation is when the switch actually activates and outputs to the device.

Bottom out: When the switch finishes traveling and hits the bottom housing.

Leaf: The metallic contacts in a switch, these themselves actually actuate the switch. The leaf is in the bottom housing as the picture shows.

Diagram pointing to the leaf of a mechanical keyboard switch.

Ping / Spring Ping / Leaf Ping: This is a metallic reverb produced by the sound of the spring, leaf, or both. In most cases it can be fixed by lube.

Disclaimer… Please Read!

This review is largely preference, my rankings will likely be very different from yours. Do not base your opinions based of mine, the best way to get opinions on a switch is to just try them yourself, guides like this, sound tests, and keyboard senpais like Taeha Types is not a good way to understand how switches feel. Just hit up your local vendor and buy a pack of whatever switch your fingers and ears desire to try them out. Use this guide to gain a general understanding on the switch and where enthusiasts like me stand on these switches.

Advertisements

1. Boba U4t: Fantastic Acoustics and Hefty Tactility

U4T switch with plant.

Boba U4T is a tactile switch designed by gazzew and manufactured by outemu. It’s the sister switch of the Boba U4 which is a silent switch and is mentioned below. It produces a relatively sharp bump which is quite prominent throughout the switch. It comes in both 62g and 68g bottom out.

We recommend lubing this switch but not filming as the housings are extremely tight and well built and may not close with film.

The reason Boba U4t earn such a high position on this list is because of the sound and at what price it comes at. The T in U4T stands for thocc and it definitely lives up to its name as this may be one of the thocciest tactiles I have heard.

2. Durock T1s: Bumpy and Smooth

T1 switch with plant.

Durock T1s are a tactile switch designed by Durock and manufactured by JWK. It features a roundish bump at the top of the switch with no pre-travel. It features a few weighting options ranging from 62 to 67 grams.

These are so high up because of the tactility and how it closely resembles the wildly sought after Holy Pandas at a very affordable price. They also have unrivaled smoothness since they do copy the material of Gateron Ink switches which are among the smoothest linears.

These aren’t number 1 since they don’t have the best sound and they have very loose housings. This can, of course, be fixed by film. These switches are pre-lubed with a thin coating of oil which makes lubing not required.

3. Glorious Pandas: Budget Snappiness… Relatively

Glorious Panda switch with plant.

Glorious Pandas are Glorious PC Masterrace’s attempt at recreating the wildly popular Holy Panda frankenswitch. It features a sharp P bump with a quick and sharp bump at the top.

These switches recreate the feel of the sought after holy pandas without the price and pain of having to frankenswitch. Although this switch is far from perfect, it has immense spring and leaf ping. Although the springs can be fixed with a spring swap the leaf ping is still there and still plays a large part in the acoustics of the switch.

Even though these have a similar feel to the Holy Pandas which are a staple in the keyboard world its spring and leaf ping bring it down to number 3.

4. TKC x C^3 Equalz Kiwis: Ideal if You Don’t Like Heavy Tactility

Kiwi switches on a desk.
Picture Creds: Caughtquick, check him out at https://www.caughtquick.tech

Kiwis are the 2nd installment in the fruit switches by TKC in collaboration with C^3, and it does not disappoint. They feature medium-level tactility which is a nice breath of fresh air with all the high tactility switches on the market. With around a 67g bottom out the switch has a prominent P Bump with smooth pre-travel after a quick bump at the top. This switch does feature light lubing which makes it very smooth.

Personally, I think these switches are great if you don’t like heavy tactility and do benefit from gasket films and lubing.

These are number 4 because I prefer a heavier tactility and recently TKC has been having quality control issues where their fruit switches have been having actuation inconsistencies due to problems with the switch molds.

Advertisements

5. Invyr Holy Pandas: Tactile Switch Royalty Sharp and Quick

Holy Panda switch with plant.

For years Holy Pandas have been the pinnacle of tactile switches, since then companies like glorious and in this case, Invyr has tried to replicate these switches. Similar to glorious pandas these switches have a sharp p bump at the top followed by smooth linear travel.

These switches benefit from both lube and film. Although the housings are quite tight the acoustics won’t be negatively affected by film. From my testing lubing these switches is a must as they are quite scratchy on the linear travel and there is quite a bit of spring ping, so lubing them is a must.

These aren’t number 1 because they have quite the hefty price tag at above 1 dollar per switch. This is quite expensive especially with the problems these switches are known for like spring and leaf ping. While you can’t go wrong with these switches they can be a bit disappointing especially with how much you are paying for them.

6. NovelKeys x Kailh Blueberries: Heavy Weight with Heavy Tactility

 NovelKeys x Kailh Blueberry switch with plant.

Blueberries are Novelkeys and Kailhs take at a tactile switch after the critical reception of Novelkey Creams. They feature a D-Bump with about 1 mm of post-travel and little pre-travel. The bump on these things is massive in duration but very round.

While filming these is optional lubing is necessary otherwise the switch will be very scratchy and pingy. These switches have the exact same material composition as Novelkey Creams which means they are quite scratchy before break in.

These switches are sixth on the list because they are very scratchy and the bump is frankly nothing special compared to the other switches on this list although it does get points for being a very long bump. Acoustics are also not very pleasant as they sound quite scratchy.

7. Zealios V2: Sharp Cheddar Cheese… Except in Switches

Zealios V2 switch on a mousepad.

These switches are like the bigger stronger and older brother too Holy Pandas, the tactility is as sharp as a knife and maybe even sharper. They boast a P-Bump with no pre-travel and about 3 millimeters of post-travel which is quite smooth out of the box. Zealios V2s are the product of a collaboration between ZealPC and Gateron.

Filming these is optional and same with lubing. From my research even lubing the stems of legs, which is not normally done in tactile switches but is common in these because of how sharp and harsh the tactility in the switch is.

These are seventh because of the price of these switches at about a dollar per switch they have mediocre sound as the tactility is so sharp you can hear the reverb from the leaf flicking back into place after the tactile event.

Advertisements

8. Boba U4: Best Silent Tactile

Boba U4 switch with plant

This switch designed by gazzew is a silenced version of the U4t. These switches definitely take the cake when talking about silenced switches, they feature a nice round bump which takes up most of the switch and they have very little pre-travel. The stem wobble control is excellent with very tight housings.

Filming and lubing these is optional as they have very tight housings and quite a smooth switch. If you are lubing these to improve acoustics no need because it produces a mush sound which cant be improved much. Filming is not necessary, in fact recommended against, since they have a nice and tight housing.

These are eight because silent switches really aren’t my thing unless I’m at a public place. When you think of mechanical you think of clickity calckity and thoccity thaccity not mush mush, for that reason silent switches just got boring after a couple days of daily use. They made this list because they have quite an amazing tactile event and are a great experience for when I want to use a mechanical keyboard without disturbing others.

9. Cherry MX Clears: Solid Potential

 Cherry MX Clear switch on a rock.

This is one of three tactile switches by cherry, the others being the MX Browns and the MX Gray. These are considered to be the best out of those two. They feature a medium-sized bump with 2 millimeters of pre-travel and about 1 millimeter of post-travel. While they aren’t the greatest stock they still quite nice. Many people do swap the springs on them to something a bit lighter as the stock ones are quite heavy with around an 80 gram bottom-out force.

While filming these aren’t required they will still benefit from filming. Lubing these switches is definitely recommended since the nylon cherry housings are quite scratchy stock. As I was saying previously the springs on these switches are quite heavy and do benefit from a spring swap.

These switches don’t have the greatest stock form nor do they have very good acoustics and feel. For that reason, they ended up at number 9.

10. Cherry MX Browns: Mainstream

Cherry MX Brown switch surrounded by keycaps.

Cherry MX Browns are super common and what most people think off when tactile switches are mentioned. They are featured on almost every gaming board as the tactile option. Well, you may be asking since there on practically every mainstream prebuilt then why isn’t it number 1 on this list? It’s because these switches are not very tactile after all, especially in comparison to many other switches on this list. Wildly popular YouTubers like Glarses have dedicated their existence to hating these switches but he along with many others are joking about this, no functional switch is objectively bad and nearly everything in this hobby is up to your preference.

That being said this switch has quite a small bump and does not feel as tactile nor as smooth as other switches on this list. And I prefer more pronounced tactility over light tactility, but everybody is different and has their own preferences. These switches start out at about 45 grams of actuation and bottom out at 55 grams making it quite light especially considering how light the tactility is.

While filming this switch isn’t necessary lubing this switch is advisable since it has quite a scratchy and pingy housing. Filming this switch isn’t necessary but won’t hurt the sound nor the feel of the switch.

This switch is number 10 because the tactility is light which is not my preference but, it may be yours.

Where To Start?

If you wanna try these or any switches check out your local vendor! Who are those you may ask? Take a look at our vendor list. It’s a great compilation of all the keyboard related vendors sorted by region.

As always thank you for reading and please check out our discord and chat a little. We will happily answer any questions you have!

Advertisements

Create a website or blog at WordPress.com

Up ↑