Best Bluetooth Headphones Buying Guide [2022]

Bose QC35 headphones on a desk next to some plant and a coffee pot

The market for Bluetooth headphones has grown a lot and there are plenty of options to go through. This can make it very confusing to decide what options to go with, especially if you want specific features or need to meet a budget.

After testing many headphones options, doing hours of research, and getting opinions from others we have decided the best options in various categories for you.

Let’s check out our favorite options now.


Our Top Recommendations

1. Sony WH-1000XM5s – Our Favorite Pick

Sony’s WH-1000XM5s are regarded as one of if not the best Bluetooth headphones on the market. They build off their predecessor with a new design and slight improvements in a variety of areas like battery life, ANC, and mic quality.

Sony delivers an extended battery life of up 40 hours and about 30 hours with noise-cancellation enabled. The new microphone array also allows these headphones to have the best ANC of any Bluetooth headphones and slightly better call quality.

Advertisements

2. Drop + THX Panda – Best Sound

If sound is your main priority but you still want Bluetooth then Drop and THX’s Pandas is your best bet. They deliver excellent sound quality, especially for a Bluetooth pair of headphones. For the on the go audiophile, this is an excellent option to consider.

Unfortunately, the Pandas do not have ANC but for some, the audio quality is worth the sacrifice. Drop’s Pandas still don’t have the best audio for any headphone but in the Bluetooth category, it is second to none. The sound is clean, balanced, and packs punches in all the right areas.

It is also rated for about 30 hours of battery life and has fantastic comfort.

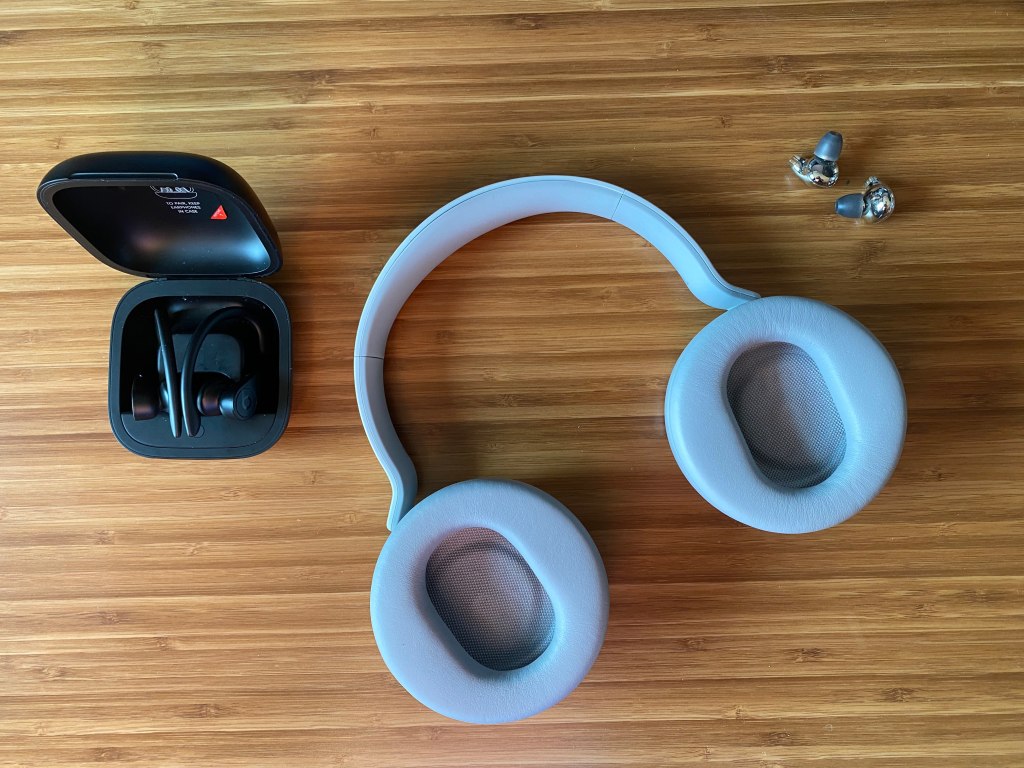
3. Apple AirPods Max – Best Apple Exeprience

Apple’s AirPods Max is fantastic in multiple categories but where is it is best at is ANC. It is great at blocking out consistent background noise as well as sudden noises. It also features a 20 hours battery life, an aluminum design, great comfort, and sound quality that is almost as good as Drop +THX’s Pandas.

Unfortunately, you only have full access to the features of the AirPods Max if you use the headphones with an iPhone. Although the AirPods Max are great in a variety of categories because of the lack of in-depth support with Android and Windows, these headphones are not our favorite pick.

The fact of the matter is these headphones are fantastic if you use Apple products but if you plan to use Android and you prioritize ANC then the Sony XM5s may be the best option for you.

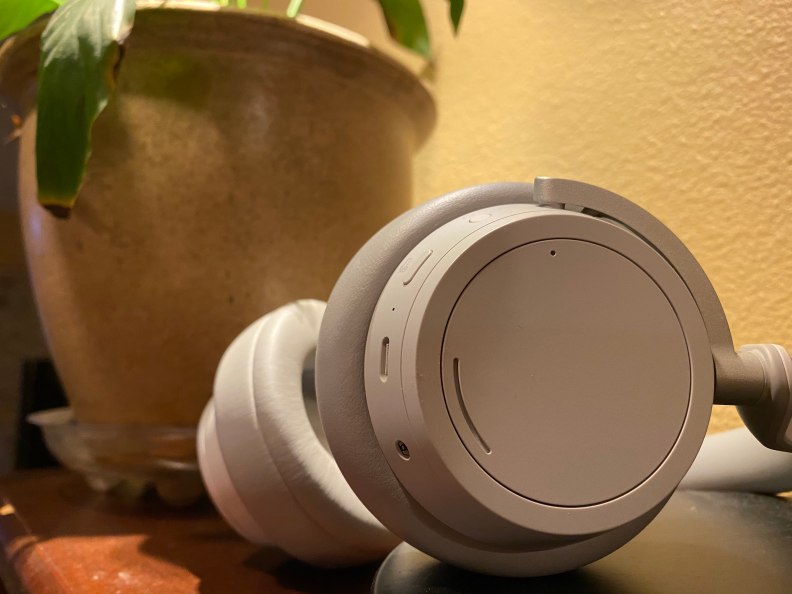
4. Microsoft Surface Headphones 2 – Best Interface

Angled view of Surface headphones from Microsoft.

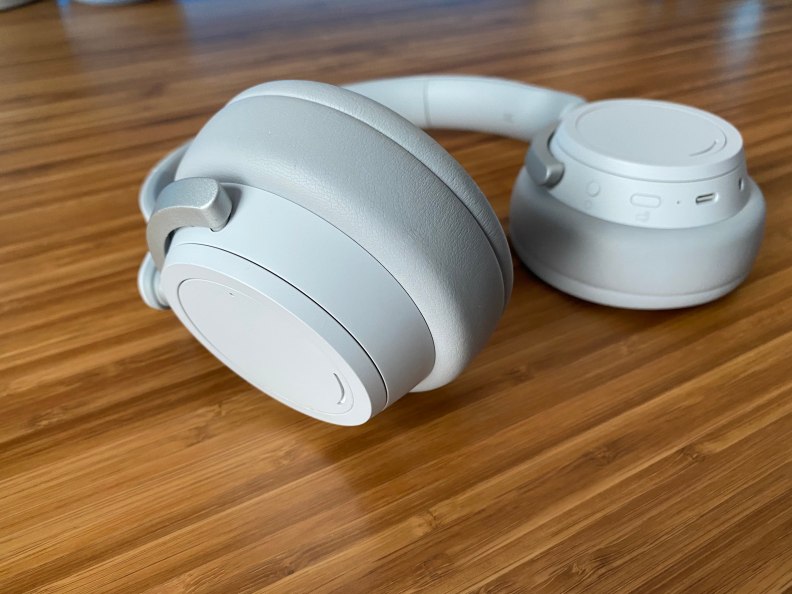
The Surface Headphones 2 from Microsoft are a phenomenal pair of headphones but one area that makes them unique is the interface. Microsoft not only utilizes touch-capacitive functions that are on many Bluetooth headphones but they also provide two dials built into each earcup. The dials feel great and are very easy to understand. It allows changing volume and the level of ANC or background noise to be a very smooth process.

Microsoft’s Surface Headphones 2 have pretty good sound quality, a pretty decent battery life, and a comfortable design. They deliver a lot of what you would get with the top players like Sony’s XM5s but come at a cheaper price. If you are willing to make sacrifices on things like a smaller battery life (which is still quite good) and a slightly worse sound then the Surface Headphones 2 can provide a great experience at a fantastic price.

If you want to find out more about Surface Headphones 2, check out our review on them here.

5. Jabra Elite 85h – Best Value

If you are looking for a Bluetooth pair of headphones that gives you as much as possible at a fair price Jabra has a great option with their Elite 85h headphones.

The Jabra Elite 85h gives you ANC, a long battery life (up to 36 hours), fast charging, rain and water resistance, solid comfort, and a pretty decent sounding pair of headphones.

Jabra is known for providing great value audio devices and the Elite 85h is no different. These headphones are a great option to go for if you want all the key features and solid performance, without breaking the bank.

6. Razer Opus – Best Budget

For those who do not want to spend upwards of $200 for a pair of headphones, the Razer Opus gives you a ton of great features at a great price. While this pair still is not the cheapest Bluetooth pair out there, it is giving you a lot while not being overly expensive like the bigger players like the Sony XM5s or AirPods Max.

It is important to note that occasionally you can find the Jabra Elite 85h at a cheaper price and the Surface Headphones (1st generation) also hover at around the same price. Both are two great options to consider and out compete the Razer Opus in different ways depending on what you are looking for.

Advertisements

Also Great

There are also some other competitive options that may be great for you but may not be the best in any one category.
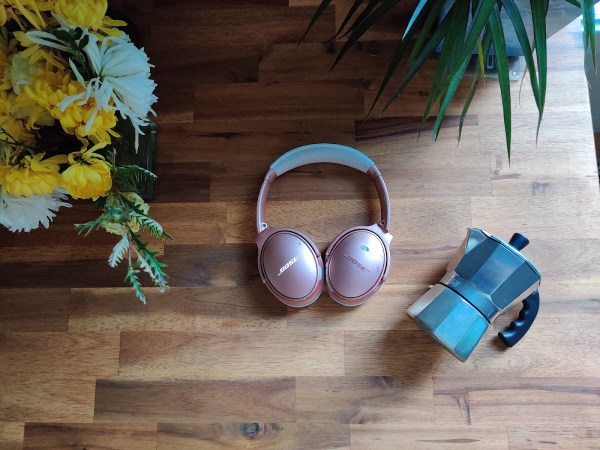
Bose NC700

Bose NC700 headphones on a desk next to some keyboard switches

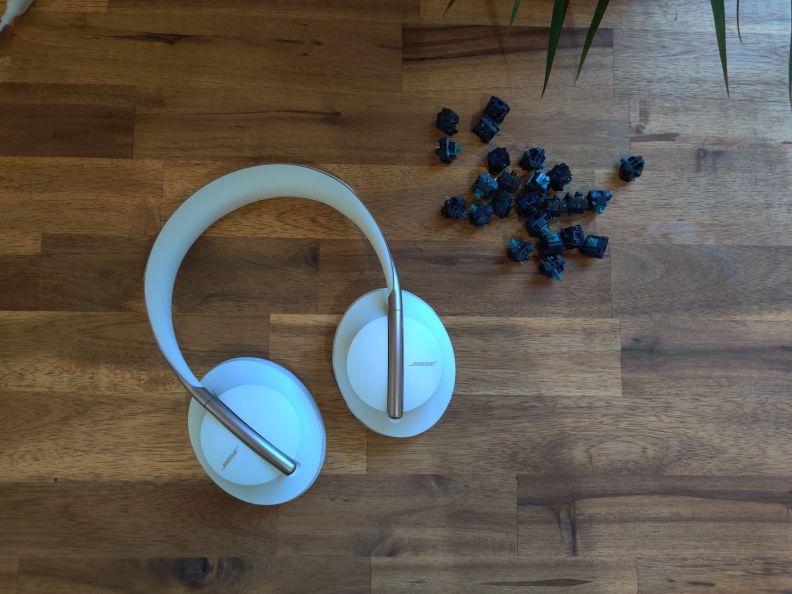
Another great pair of Bluetooth headphones is the Bose NC700. The NC700s deliver performance that is close to the Sony XM5s in every category but aren’t the best at anything. They are still a great option but we would usually just recommend going with the XM5s over them.

One reason you may choose to get Bose’s NC700s is if you like the looks. The sleek, modern design makes the headphones look good in any setting.

Surface Headphones (1st Generation)

If you still want the performance of the Surface Headphones 2 but you don’t have the budget then the original Surface Headphones are a great option. Not only are they a great value offering but they offer the same sound quality and almost all the same features as the Surface Headphones 2. The main differences are the battery life, more color options, and support for some more audio codecs.

Microsoft’s Surface Headphones are very comfortable, have a great sound for the price, and the overall package is quite solid.

Sony WH-1000XM4s

Despite being updated by Sony with their XM5s, Sony’s WH-1000XM4s, or XM4s for short, are still regarded as one of the best Bluetooth headphones on the market. This is especially the case if you prefer the design of the XM4s over the XM5s and you want to spend less money. They are great in all categories and often set the bar for things like battery life, ANC, and design.

The XM4s get around 30 hours of battery life, deliver a pretty clean sound, and have arguably the best ANC in any headphone. You also get key features like a transparency mode so you can hear everything around you.


Advertisements

Is ANC Necessary?

One of the most common features among Bluetooth headphones is ANC or active noise cancellation. A question for many though is if they need ANC and if it is worth the additional cost.

ANC is a very nice feature to have because it can allow you to listen to music in more environments without being bothered by sounds from the outside world. This can help you stay focused while working in a public environment, allow you to able to listen to music outside in your own bubble or make everything quieter in a place like a plane.

In short, ANC is not a necessary feature but it can be very beneficial in many situations and along with ANC often comes a “transparency mode”. This will allow you to hear what’s around you, sometimes at an elevated volume, in case your in a situation where someone is talking to you or you need to hear anything else around you.

If you often use headphones while outside or work in a public or loud environment then ANC is very useful and a worthwhile investment. You can be more focused and enjoy music better in peace. Not to mention having ANC can make a flight much more enjoyable.

If you have extra money in your budget or ANC is useful in your use case it is a very useful feature.

Does Bluetooth Ruin Sound Quality?

One of the most important factors to consider when buying a new pair of headphones is the sound quality.

Bluetooth can affect sound quality but it also depends on the price point. For the vast majority of people, the sound quality from Bluetooth headphones above the $200 price tag will have great sound quality.

Only those who are used to very premium headphones or high fidelity audio will not be able to get the same experience with Bluetooth headphones but the Drop + THX Pandas and Apple AirPod Maxs deliver fantastic audio quality.

The amount of information that can go to Bluetooth headphones is capped unless you use them with a wire because only a specific amount of information can travel wirelessly. Again this issue won’t affect the majority of people.

In general, Bluetooth does not ruin audio quality but it will cap the potential for the audio quality. If you want the best audio possible you will either have to go with some of the more expensive Bluetooth options at $400 and $500 or just get premium headphones that aren’t Bluetooth.

Advertisements

How Does Sound Quality Compare

If the only thing you value is sound quality, there are many options to consider. There are many Bluetooth headphones that have solid sound quality but the headphones with the best quality are not Bluetooth and you can get higher quality sound for the price as many Bluetooth headphones.

A lot of what you are paying for with Bluetooth headphones is the feature of Bluetooth. If all you care about is sound quality and the feature of Bluetooth is not important to you, there are various options on the market that you can look at. A solid Bluetooth pair will typically cost anywhere from 200 to 600 dollars but you can get the sound quality of a $200 pair of Bluetooth headphones for half the cost.

If sound quality is your main priority, there are many different headphones that you can consider like open-back headphones, which can offer a cleaner and wider sound.

Overall the sound quality of open-back headphones is not bad but for the price, there are better options and the best sounding headphones on the market are mostly wired, especially professional-grade options.

How To Choose Bluetooth Headphones

Top view of Bluetooth headphones and earbuds on a desk.

Choosing headphones can be very complicated and confusing. It is important to understand what budget you are looking at and then what features you prioritize the most.

Do You Need Bluetooth?

Before considering what Bluetooth headphones you want, you need to decide if you really would benefit from Bluetooth headphones.

If you want headphones to use on the go or you just want the ease of use of a Bluetooth device then Bluetooth may suit you perfectly. Bluetooth can make your setup easier and it can also make using headphones easier to use because there is no cable that you have to worry about.

If you plan to use your headphones with a desktop or in a studio environment then Bluetooth headphones may not be worth it for you and investing in a wired pair may give you better sound quality and price to performance.

Advertisements

The Price

If Bluetooth headphones are right for you then the next important thing to decide is your budget. There are many Bluetooth headphones at various price ranges. If you have more money you can get headphones with features such as ANC in addition to great sound quality. There are also many fantastic value options.

Once you find what price is right for you, you should look at all the options in your price range. Finding what features matter to you is a great way to narrow down options and then you can find the best option for your price tag.

Sound Quality

The most important thing about headphones is how they actually sound. All the best sounding options will cost about $400 or more but you can still get great sound quality at a lower price tag.

When you have narrowed down your budget, understanding what options in your price range have the best sound quality is an important consideration. Of course, it is always good to maintain a balance of the best sound quality you can get in your budget while also getting the features that you prioritize.

Looking at comparisons between different options can be very helpful in deciding what are the best options.

Advertisements

ANC

One of the most common features of Bluetooth headphones is ANC or active noise cancellation. This uses microphones on the outside of the headphones so an offset sound can be played allowing you to hear less sounds from the outside world.

ANC quality depends greatly but it gets better usually as you spend more. Headphones with better ANC will block out more outside noise especially sudden sounds like a door closing or someone coughing.

Noise cancellation is incredibly useful in public environments, especially very noisy ones like a plane or a public building. This will allow you to be able to listen better and get distracted less. If you want Bluetooth but are not in loud environments often you can potentially save some money. Most people will benefit from having ANC but unless you are always in loud environments you should not stretch your budget to get a pair with ANC.

Looks and Build

The build among Bluetooth headphones is mostly similar among all the options. Typically they use a mainly plastic fame with the use of materials like pleather and potentially some metal. Occasionally you can find some options that have mostly metal designs like the Apple AirPods Max.

Although more premium feeling and looking builds are nice to have they are not necessarily needed. Most premium Bluetooth headphones have solid build quality even with mostly plastic construction. If you do prioritize having an all-metal build there are a few options to consider but you will most likely have to pay a premium.

Advertisements

Other Important Features

Apart from the main priorities of build quality, sound, and price, there are other nice to haves like software support, a carrying case, or other features that improve your experience with the device. These other features may help you narrow down which headphone is right for you.

Many headphones do have these additional features like software, a carrying case, and potentially additional cables so you may need to look out for more specific things about each like how good the software is.

Why Trust Us

As a team with tech and audio enthusiasts, we not only study these subjects for work but also outside of that. We gather the most relevant information and like to test as much as possible ourselves.

We have had the opportunity to test these different headphones and also have experience in many other areas of the audio world. Additionally with this content not only can you get a recommendation from a user that may have similar interests as you but you can get a view from an audiophile’s perspective.

At The Tech Frontier, we have compiled this list through our testing of different Bluetooth headphones. We also have used previous knowledge with different kinds of headphones, platforms, and operating systems to provide recommendations for all kinds of audiences.


Conclusion

Surface Headphones with a plant in the background.

Hopefully these options have helped you narrow down your search as to what options are best for you and you now know what to look for in headphones when you’re researching what to purchase.

There are many great Bluetooth headphones that have little differences in their interface of an improvement in a specific part of how it sounds so doing some additional research is very useful to make a more informed decision.

If you want to check out more guides and reviews check out the rest of our site with new articles coming out every week.

Advertisements

Is Ray Tracing Worth It?

As new hardware comes out, new graphics technologies develop. The newest leap is ray tracing, made mainstream by Nvidia’s RTX graphics cards.

Now that most modern GPUs are integrating the technology and games are starting to add support, let’s see if Ray Tracing is actually worth it.

Ray Tracing vs Rasterization

CC: Nvidia

Ray tracing may be new and exciting but what came before it? Rasterization is the current norm for graphics in video games.

Rasterization creates a 3D environment by processing polygons. The polygons are then processed by a shader to make up a specific color and shade. These polygons get turned into pixels. All the colors and shades are decided by parameters that the game developer has set up.

Ray tracing on the other hand directs lines from the light source in the game and calculates how light bounces off objects or gets impedes by them to show where the lighting would go. This makes effects a lot more realistic.

While rasterization can look very good, there is a lot less potential. Ray tracing can portray how different objects affect lighting around a room but rasterization cannot. For example, with ray tracing, if you have a very reflective material, then the light will bounce off that material onto other things. In contrast with rasterization that material may look metallic but still will not have any effect on anything else in the environment.

Additionally, ray tracing requires fewer initial parameters to be set up by game developers. Ray tracing uses realistic lighting physics which means developers do not need to make many calculations to suit their specific game environment and physics can be more consistent across games.

Advertisements

Does Ray Tracing Improve Your Gaming Experience?

Screenshot of Call of Duty Warzone with ray tracing enabled

Although ray tracing does provide some eye candy, how much does it improve the gaming experience and will enabling it make you a better gamer?

The main takeaway about ray tracing is that it most likely will not make you a better gamer. The whole point of ray tracing is the improvement in graphics.

Real-time ray tracing provides no improvements in games like competitive shooters but in some games, the improvement in shadows and reflections may help you to see things that are off your screen.

Where ray tracing improves your experience is in the actual looks and immersion. Better graphics can help you get sucked into the game, especially when you are in a campaign or story game that gives you time to enjoy eye candy. You are able to appreciate your environment more as ray tracing makes games look more realistic.

A graphic increase is often able to transfer a game like Minecraft with RTX which keeps the same core concept and physics but the gameplay is altered.

If you do not care about graphics or only play online competitive shooters such as CS:GO or Valorant then ray tracing wont benefit you.

Advertisements

Too Early To Invest?

Steam survey from april 2021
Steam Survey April 2021

One of the biggest criticisms about ray tracing is the lack of games that support the feature. Currently, there are around 40 titles with 10 to 20 more that are said to release in 2021. All these titles fully support ray tracing with Nvidia’s RTX GPUs but the same cannot be said about AMD. AMD supports a decent amount of these games but the performance is not that good on most of them or the creators worked on DXR for AMD as an afterthought.

Some games that feature ray tracing are Battlefield V, Cyberpunk 2077, Fortnite, and Metro Exodus. If you want more information about different games that support ray tracing, check out this list from Wikipedia.

The experience with Nvidia’s graphics cards is pretty good, especially with their DLSS technology, which optimizes the onscreen image to look the same while putting less load on the GPU. You can get 60 fps at 1080p on any of Nvidia’s RTX cards but if you want to play at a higher resolution then you have to pay for a better RTX card.

The issue is that to get a quality high refresh experience, you still need to pay quite a bit of money if you want to play at any resolution higher than 1080p. This also assumes that you are able to even get a graphics card in this current climate.

We would not recommend waiting to get a graphics card just because you want an RTX card from Nvidia but in the coming years, many of the most popular games will support ray tracing. Getting a system with the hardware to support ray tracing is not necessary yet and we would not say that it is too early to invest, especially if some of your favorite titles do or will not gain support soon.

Ray tracing is a great feature for those who care about graphics. If you want to future proof then getting an RTX card or a next-gen console is your best bet.

Advertisements

Ray Tracing Beyond Gaming

Unreal engine logo

Ray tracing is not just for gaming. Ray tracing has been used for years in professional situations. For example, many animated movies use ray tracing. It has especially gotten popular for 3D modeling, rendering, and movie animation in recent years.

As ray tracing has become more popular smaller creators and studios have been able to use ray tracing. This is causing it to continue to grow in the professional space. Not only will games start to look more realistic in forms of lighting and reflections but the same will also apply to animated movies and renders.

Additionally, ray tracing has grown very popular in the world of game development. Game engines like Unity or Unreal Engine are making it easier for smaller game developers to make games that have better-looking graphics.

Overall this all helps movie and game developing industries forward as smaller creators are starting to be able to work with ray tracing.

Different Implementations

Inside of gaming PC with an RTX graphics card

Although Nvidia started the movement towards real-time ray tracing, they now have other competitors. Aside from Nvidia’s 20 and 30 series GPUs, AMD has their 6000 series GPUs, and then the next-gen consoles from Sony and Microsoft also have their own implementations.

Nvidia has their RTX implementation that works with DLSS rather than AMD that uses the universal standard DXR. While both can look the same, Nvidia’s system works with more games and runs faster. This is partially due to the fact that DLSS improves the framerate of games.

Sony’s PS5 and Microsoft’s Xbox Series X also support ray tracing and due to great optimizations, the performance is pretty good for the price.

Overall Nvidia still does ray tracing the best.

Advertisements

Conclusion: Is Ray Tracing The Future?

Top view of PC with RGB fans

To put it shortly, ray tracing is the future.

This is just the beginning of a new wave. The benefits to graphics are great for the consumer and with all this tech going mainstream it will only push forward innovation. Games will look a lot better in the future and with the easy access to enable it in game engines now, many indie games or titles may be able to have ray tracing.

It is important to understand that the tech is not perfect right now and it is not everywhere. Many games do not have all the elements of ray tracing as they may only support ray-traced shadows or reflections for example. Ray tracing is constantly improving to look and run better.

Over the next, five to ten years is when we could start to see ray tracing properly replace rasterization. During this time hardware will also improve greatly as companies like Nvidia have made large strides towards their RTX tech.

If you enjoyed this article and you want to talk more about tech then consider joining our Discord and as always thanks for reading!

Advertisements

Epomaker GK68XS Review: Features, Performance, and A Great Price

Are you looking for a keyboard with a ton features and a great value. Epomaker’s GK68XS is a 65% mechanical keyboard that is packed with features like Bluetooth connectivity and a hotswappable PCB.

Today we will take a deep look at Epomaker’s GK68XS and see if it is right for you.

The Verdict

Top view of the Epomaker GK68XS mechanical keyboard
GK68XS with a custom keycap set

Rating: 4 out of 5.

The Epomaker GK68XS is a great value keyboard for those wanting to join the custom mechanical scene without spending their life savings. For the price, it is one of the better 65% keyboards you can get coming with a whole host of features such as Bluetooth and a hotswapable PCB.

You also get a variety of switch choices, pretty decent stabilizers, and a decent keycap set.

For anyone wanting to start modding their keyboard but don’t want to give up the arrow keys with a 60% board, Epomaker’s GK68XS is a great option.


In The Box

The Epomaker GK68XS is packed with things in the box. Besides the keyboard, inside you will see:

USB-C Power Cable: You get a braided cable that is well made and is detachable. The cable does the job and looks pretty decent.

Split Spacebar Module: This can be swapped with the big spacebar to allow 3 buttons rather than just one. Changing it in and out is as simple as removing 3 screws.

Extra Keycaps: In addition to the keycaps already on the board there are a few extra keycaps for things like a split spacebar, mac specific keys, and for alternate modifier keys.

Extra Switches: If you use the split spacebar there are some extra included switches. They will be the same kind of switch as the rest of your switches.

Keycap and Switch Puller: A wired keycap puller is included. It is better than the cheap plastic one that many companies throw in the box. The wire puller won’t scratch your keycaps. The keycap puller also functions as a switch puller on the other side so you can swap out the stock switches for anything of your choice.

Manual: The manual will explain how to control the RGB lighting, where to download the software, and how to control the secondary functions and shortcuts on the board.

The board has tons of features and it gives you everything that you need to make the most of them. It is very nice to see at a board at such a good price.

Advertisements

Build Quality

Side view of the Epomaker GK68XS mechanical keyboard

The build quality is adequate for the price with a plastic case with a tilt for more comfort. It is quite simple which I appreciate and has a nice angular design to the case where it tapers down. There are also acrylic and aluminum versions of this case albeit at a much higher cost.

In my opinion, it looks nice however, it has a hollow sound. This is especially bad when you press the space bar since there is some reverb in the sound. If you get this board I’d highly encourage you to put some foam. It is a quick mod that takes about five minutes and makes it sound so much better.

At the back of the case, it has an indented USB-C port. This is quite nice to see because many budget boards still have not switched to USB-C or allow a detachable cable at all.

On the bottom, four rubber feet keep the board from sliding around too much however there are no flip-up feet so you cannot adjust the height. This is not too much of an issue because the case is already at a comfortable height.

The Keycaps

PBT DSA keycaps for the Epomaker GK68XS mechanical keyboard

Epomaker’s GK68XS comes with a pretty nice set of PBT keycaps in the GSA keycaps profile. The legends are dye-sublimated for long-lasting quality. There are also a few extra keycaps in case you want legends for mac or you want to use the split spacebar.

PBT material means that the keycaps will not develop a shine over time. They have a slight texture to them so they are easier to grip onto.

The GSA profile has a uniform height among the keys and is a pretty low profile. There is a slight curvature in the center of each keycap so they mold to the shape of your finger. These keycaps are quite comfortable to use but may take a couple of days to get accustomed to.

Advertisements

The Switches

Gateron Black mechanical keyboard switch

You can order the GK 68 XS with a variety of Gateron switches. You get linear, tactile, and clicky options.

Gateron Red
A light linear switch with a smooth travel.
Actuation force: 45 g         
Travel distance: 2 mm
Gateron BlackA heavy linear switch with a smooth travel.
Actuation force: 60 g         
Travel distance: 2 mm
Gateron BrownA medium weight tactile switch with a light tactile bump.
Actuation force: 55 g         
Travel distance: 2 mm
Gateron BlueA medium weight clicky switch. It has a loud sound and sharp tactility.
Actuation force: 60 g         
Travel distance: 2 mm

Gateron provides some of the best switches for pre-built keyboards. Their linear switches are often smoother than the competition and their tactile switches have a slightly more noticeable bump than Cherry options. Also since this board is hotswap, you can just change out the switches if you want to.

The Stabilizers

Stabilizers from the Epomaker GK68XS mechanical keyboard

With the GK68XS you will find minimally lubed plate mount stabs. Stock they sound rattly and are a bit scratchy but they have quite a bit of potential if you are willing to mod them.

Stabilizers are very important to how a board sounds and in this case, the GK68’s stabilizers are much better than boards from bigger gaming brands such as Logitech or Corsair.

We found that after making some mods to the board by lubing the stabilizers and adding foam to the bottom of the board helped the stabilizers feel quite smooth and not sound nearly as rattly. If you want that perfect sound for your stabs we would recommend going with some better plate amount stabs from either Durock or Novelkeys for a better experience.

Advertisements

The Software

Although the GK68 does have software support, it is one of the weaker areas of the board. The software does provide useful functionality but it is complicated to use. It took us some time to understand the software. We found that the interface is not that easy to work with or nice to look at.

While the software does have some issues, it provides a ton of functionality. If you want to remap buttons or have more in-depth lighting then this is the way for you.

In our experience, we found that we did not need it that much as most functions like changing lighting or using a macro can be enabled with a simple key combination but having dedicated software is very nice to see.

RGB Backlighting

Top view of the Epomaker GK68XS mechanical keyboard with RGB lighting on

The GK68 XS features per-key RGB backlighting with a variety of onboard presets. You can change them using different key combinations or via the software.

The onboard solution is a quick way to change lighting but if you want more control the software provides tons of options. It is important to mention that using the software will take some time to understand.

The only issue I faced was that there is seemingly no combination to make a static color unless you want a simple white backlight. I figured you can change to the color-changing mode and just pause it on the color you like but I would have still liked a dedicated key combination.

Hotswap PCB

One of the most exciting features about this board is the fact that it features a hotswappable PCB. This means that you can change out the switches without needing to solder any switches. It takes just a few seconds to replace a switch.

The PCB supports both 3 and 5 pin switches and it is north-facing. This means that the keyboard supports switches from most switch manufactures including Kailh, Cherry, and more. The fact that the sockets are north-facing means that there could be interference with Cherry Profile keycaps.

A hotswap PCB is great for those who want to mod their keyboard to make it sound or feel better. They are also great for those who may want to try different switches.

Advertisements

Bluetooth Connectivity

Another exciting feature of the GK68 XS is Bluetooth 5.1. You can connect up to three devices. With the 1900mAH battery, you can get a day or two of use out of it depending on if the lighting is on and how much you use the keyboard.

The latency is quite good but I did sometimes notice a delay when playing video games or typing very quickly. In most cases, this is not an issue and I found the connectivity to be quite good.


Conclusion: Should You Get The GK68XS?

Angled view of the Epomaker GK68XS mechanical keyboard

If you heavily rely on arrow keys and want a good value board the Epomaker GK68XS is an excellent option. It delivers excellent performance and tons of features.

For the price, it comes with some good options such as Bluetooth and hotswap sockets which just makes modding and using the board a lot more convenient. The board also has great switches, keycaps, and stabilizers considering the price and the competition.

The main downsides are the plastic case which, unfoamed, sounds quite hollow, and the north-facing switches, causing interference with cherry profile keycaps. There are other boards that may address these issues but if you want a board now and do not want to wait months for a board to arrive or you prioritize Bluetooth, this is a fantastic option.

If you are interested in the Epomaker GK68XS, consider checking it out on Amazon for a great price.

As always thanks for reading and if you are interested in more keyboard content check out our keyboard page.

Please join our Discord if you have any more questions.

Advertisements

Logitech G703 Hero Mouse Review: Wireless For A Fair Price

When looking for a new gaming mouse you may have been considering switching to a new wireless gaming mouse. The Logitech G703 Hero adds to Logitech’s extensive line of wireless gaming mice, providing performance striking above its price point.

Let’s dig in and see if the Logitech G703 Hero is the mouse for you.

The Verdict

Logitech G703 Hero with a laptop and keyboard.

Rating: 4 out of 5.

The Logitech G703 Hero is a wireless gaming mouse with excellent performance.

It improves over the previous version with the use of the accurate HERO sensor and it supports Logitech’s Lightspeed connectivity.

The G703 has an ergonomic shape with large buttons and comfortable rubber side grips. The mouse supports tons of grip styles and is very comfortable over long periods of use.

You also get a lot of in-depth functionality with the software. The G703 also supports a lot of different features like an adjustable weight, Powerplay compatibility, and onboard memory.

The only major downsides of the mouse are the outdated micro-USB connection and the software that could be a bit confusing to use at first. Additionally, the shape of the mouse applies to a specific niche but I found it quite easy to adjust to.

So if you are looking for a wireless mouse with a great sensor, decent lightweight, and solid build then the G703 is a fantastic option to consider.


Specifications

Length~124 mm
~ 4.88 in
Width~68 mm
~ 2.67 in
Height~43 mm
~1.69 in
Weight ~95g (+10 with weight)
Sensor TypeOptical (100 – 25.6K DPI)
Polling Rate125 – 1000Hz
Cable Length 1.8m (6ft) Braided Cable
Advertisements

In The Box

Logitech G703 unboxed

In the box, you will find the mouse with all the essentials and some accessories.

  • Manual: There is a quick start guide to walk you through basic things like using and charging the mouse.
  • Cable: Logitech includes a braided USB-A (regular USB) to micro-USB cable to both charge the mouse or use the extender.
  • Dongle: This dongle allows for the mouse’s lightspeed wireless connection for very low latency.
  • Extender: If your mouse is far away from your computer or you are experiencing connection issues, an extender is included as a great solution to the issue.
  • Powerplay Puck: The puck is attached to the bottom of the mouse with magnets and is necessary for using the Powerplay feature.
  • Weight: Included is a 10g weight if you feel the mouse is too light.
  • Sticker: Logitech always throws in a sticker showing their blue G logo with their gaming products. It’s a nice touch.
Advertisements

Build Quality

Angled view of Logitech G703

The Logitech G703 is made from a mix of strong plastic and rubber. Rubber is used on the scroll wheel and on the sides for extra comfort and grip. Even at 95g, the G703 is quite robust.

The mouse looks all black with a translucent section for the G logo. The style obviously belongs to a gaming mouse but is not overly gamery.

The mouse feet on the bottom provide a smooth glide, allowing quick flicks and consistent travel. In my testing, they were not as good as the most premium mice like the Logitech G Pro Superlight or Razer Viper but they are better than many popular mice like the Logitech G203 or G502.

Overall the G703 has a fantastic build, especially for the price. My only disappointment with the design of the mouse is the use of micro-USB over USB-C. While this doesn’t affect the functionality, it’s nice to have.

Style and Comfort

Side view of Logitech G703

Logitech’s G703 has an ergonomic design but is not super sculpted. The mouse is great for those who are right-handed but it doesn’t lock you into any position so it is comfortable with all mouse grip styles.

I had no issues using the G703 with a fingertip, claw, and palm grip. Some mice lock you into a palm grip or claw grip but the G703 provides flexibility in this field.

Many people don’t like the design but I found it very easy to get used to and very comfortable, even during multiple-hour gaming sessions. The rubber helps a lot over time and it makes the mouse very easy to grip and hold.

Additionally, the buttons are quite large so they are easy to find. Typically buttons are quite small on the side of the mouse but the G703 has the biggest side buttons on any mouse so you can easily rest your fingers on the side buttons.

Switches and Scroll Wheel

The Logitech G703 has 6 buttons in total. They all have satisfying clicks and are very responsive. The switches are from Omron and have eliminated the double-clicking issues that Logitech used to face. These switches are some of the best ones that I have used in any gaming mouse.

On the left side of the mouse are two side buttons. They are some of the biggest side buttons that I have seen on the mouse making them very easy to find. Additionally, the scroll wheel has nice tactile steps and feels very solid.

Advertisements

Sensor and Polling Rate

Logitech’s Hero sensor uses optical technology, which is the norm among modern gaming mice. It is one of the most accurate and efficient sensors in any mouse. Additionally, the sensor itself is quite lightweight which is why Logitech makes some of the lightest mice on the market.

The sensor goes up to 25.6K DPI and can be adjusted through the software in increments of 50. Most people opt for a DPI between 200 and 1200, but the high range shows the accuracy of this mouse.

This fantastic sensor goes along with the industry-standard 1000Hz polling rate.

Powerplay Compatibility

If you want a wireless peripheral but the requirement to charge it is an issue for you, Logitech’s Powerplay could be the solution for you.

For this to work with the G703 you must purchase their Powerplay mousemat. This is an additional investment, but the mousemat will charge the mouse resulting in endless battery life.

Adjustable Weight

Weight and underside of Logitech G703

If you want a slightly heavier mouse, you can utilize the 10g weight. Adding the weight will increase the overall weight to 105g. You can easily add the weight by pressing it into the slot on the bottom of the mouse.

Using the mouse with its stock weight was the best for me. The G703 felt balanced and it made me more consistent in shooters. I was able to land headshots more frequently, manage recoil more easily, and make more accurate flicks.

If you want to further lower the weight, taking off the Powerplay puck on the bottom is an easy way to shave off a few grams making the mouse about 92g. The difference isn’t huge but still noticeable.

Advertisements

Vibrant RGB Lighting

Top view of Logitech G703 with RGB lighting

The Logitech G703 supports bright RGB lighting on the logo and scroll wheel. The lighting looks good at night and throughout the day. If RGB isn’t for you you can always turn it off or dim it.

You can control all the lighting with the G Hub software and you get a lot of functionality. You can have separate or synced lighting between the logo and wheel. Also, there are tons of colors and present affect to choose from.

You can also sync the lighting with a game or movie you are watching. For, example the color of your mouse will change because of the team you are on. This isn’t too crazy just on the mouse because you probably will be more focused on the game but if you have other Logitech products then you can sync this with them and the experience is quite unique.

Wireless Connectivity

Angled view of Logitech G703 with wireless adapter

Apart from the standard wired connection, the G703 also supports wireless connectivity via Logitech’s low latency Lightspeed technology.

The lightspeed connection via a dongle is about as fast as a wired connection. It is incredibly fast and reliable. If you ever have any issues like interference or you are just very far from your device you can also use the included extender. Without the extender, I was able to use my mouse over 20 feet away from my computer with no issues.

With wireless mice, battery life is always an important consideration. The battery is quite strong considering the mouse supports RGB lighting. You can get 35-60 hours of use off a single charge depending on how bright the lighting is and the polling rate. When you need more battery, you can completely charge the mouse in about 2 hours.

The mouse also has battery-saving methods. The lighting will dim after a minute of inactivity and the G703 goes to sleep after 5 minutes. Waking from sleep is essentially instant. Additionally, the lighting on the mouse will turn red if the battery goes below 15%. Overall the battery life is pretty good and the power-saving measures make it not a concern.

In-Depth G Hub Software

Logitech G Hub software used with the G703 mouse

The Logitech G703 works with the G Hub software to control it. You can do basic things like change the lighting, sensitivity, remap buttons or do more complex things like control game integration.

Setting everything up isn’t too difficult once you have gotten used to the software. As soon as you open the Software you will be able to see the estimated battery life.

Although G Hub is very functional, it can be very confusing to those who are new to it. Pages like game integration are not the easiest to find and saving profiles and presets can be confusing.

Additionally, I have run into occasional bugs. Sometimes a different DPI than I wanted would become my default DPI for the onboard profile or not all my lighting presets would save. Logitech has fixed most of the bugs that I have faced but I still think the software has its issues.

Advertisements

Onboard Memory

Logitech’s G703 stores up to five onboard profiles. You can save your preferred sensitivity, button mappings, and lighting all to the mouse.

Onboard memory is helpful if use your mouse with different devices. Additionally, if you don’t like Logitech G Hub this is nice because you can quickly save your profiles, and then you won’t need the software anymore.


Conclusion: Is The Logitech G703 Hero Good For Gaming?

Logitech G703 Hero on a mousepad.

The Logitech G703 Hero delivers a great experience for gamers, even for pros, at a great value.

The G703 supports the Lightspeed connection that has equal latency to a wired connection but the lack of a wire means you don’t have to worry about your mouse getting caught on anything or drag. The need for a mouse bungee is not existent.

Inside the mouse, you get high-quality Omron switches and Logitech’s famous HERO sensor that is among the best on the market.

The shape may not be for everyone but most people can get used to it and the mouse supports a wide variety of grips. It also has a solid build while still maintaining a decently low weight.

If you think this mouse is a good fit for you then consider checking it out on Amazon.

Thanks for reading and if you have any more questions check out our Instagram and Discord.

Advertisements

AirPods Pro vs PowerBeats Pro: Which One Is Better?

Ever since Apple released their AirPods, in-ear headphones have taken over the audio market.

In-ear headphones, commonly known as earbuds, are the new wave and for good reason. Having your headphones fit into your pockets without needing to deal with the tangled mess of wires, is very convenient.

Today we are going to be taking a closer look at two earbuds that have broken the audio game since their release to see which one is better. The AirPods Pro and PowerBeats Pro, sold by the same company, Apple.

PowerBeats Pro case next to Apple Airpods Pro case on a desk

The Main Differences

While being sold by the same company for similar prices, you would be shocked by the number of differences the AirPods Pro and PowerBeats Pro have.

In this article, we are going to split them up into separate sections, including battery life, design, comfort, features, audio quality, and more.


Whats In The Box?

Unboxing experience of PowerBeats Pro and AirPods Pro

Let’s talk about what we are getting in the box from each of these products.

With the AirPods, we get the actual AirPods and charging case (obviously), two sets of different ear tip replacements, and a USB-C to lightning charging cable. Unfortunately, you do not get a USB-C power adapter or any power adapter. So to charge your earphones, you’re going to need to already own a wall adapter, or buy one.

Let’s move on to the Beats. The Beats packaging is almost identical to that of the Airpods. You get the case, and the earphones, three sets of replacement ear tips, and a USB-A to Lighting charging cable. Now once again, Apple does not supply the user with a power adapter, so you are going to need to buy one, or already own one.

Now obviously, like with any tech product, both of these include manuals in the box. They just weren’t really exciting enough to put in the picture.

Let’s keep track of the score for this showdown. So far it’s PowerBeats Pro: 1 and AirPods Pro: 1.

Advertisements

Design and Comfort

Airpod Pros next to PowerBeat Pros

Let’s first talk about the design of the two different cases. Now obviously the PowerBeats Pro have a much larger case in comparison to the AirPods Pro. This can either be a good thing or a bad thing for you. If you are someone who constantly loses things, and can’t seem to be able to keep track of where your stuff is, maybe the Powerbeats are a better option for you. Being so much larger, they would be much harder to lose than the Airpods Pro.

That being said, if you are someone who has grown to love the minimalistic form factor of most wireless earbuds, small and slim, then you are probably going to like the AirPods Pro more than the Powerbeats.
About the earbuds themselves, the AirPods have a much smaller design. Unlike their predecessor, the Airpods, the AirPods Pro actually have silicone tips that make sure that no matter how hard you shake your head, they won’t fall out. They also greatly improve comfort and help support compatibility with many more ears.

The Powerbeats Pro have a sort of double protection from falling out. They have the ear tips that the Airpods Pro have, as well as wingtips to guarantee that no matter how hard you are working out, the earbuds stay in your ear. The wingtip might not be favored by all, however, as they stick out a bit more than the AirPods Pro.

For this round, it looks like a tie between the Powerbeats Pro and Airpods Pro. Let’s give them each a point. After this round, its PowerBeats Pro: 2, AirPods Pro: 2.

Advertisements

Sound Quality

Now, this is where it gets a bit more complicated in the comparison. Sound quality is obviously a really important aspect of any audio device. But if you are buying these as an audiophile and need the absolute best sound quality, I’m sorry to tell you, but you’re in the wrong spot.

Ok so let’s get one thing straight, these two pairs of earbuds are not to be bought if you are strictly looking for the best sound quality. These are two great pairs of earbuds when it comes to design, convenience, but not for the optimal sound quality.

Also in this comparison, we won’t use the special audio features that the Airpods pro have in mind, just to make it fair. But do remember when you’re buying either one to remember the features when you click to check out.

The PowerBeats Pro have the typical emphasis on the low-end frequencies, giving users a higher bass while exercising. The mids are more recessed, but if you listen to bass-heavy music primarily, that may be what you are looking for. The highs are nothing too special and being much more predictable with a sharp dropoff, to avoid users from experiencing ear pain while listening to their music.

Now for the AirPods Pro, they have a much more consistent sound profile but still have that fun V-Curve among Bluetooth earbuds. Now the only thing that can possibly edge the AirPods pro over the Powerbeats Pro is the ANC isolation system. Asides from that, it’s mostly subjective.

Overall the main takeaways are that the AirPods Pro have a bit cleaner sound but it is not a huge improvement. Both have similar sound signatures too and will sound great with Pop, Rap, or EDM genres.

At the end here the AirPods Pro come out ahead at 3 to 2.

Battery Life

AirPods Pro and PowerBeats Pro cases being charged

Battery life can be one of the most important aspects of any sort of technology, but you definitely don’t want your headphones dying on you as you are only halfway through your commute to work.

The PowerBeats Pro supply 9 hours of playback on a full charge. With the charging case, however, users can enjoy another 24 hours of playback. If by somehow, you managed to completely discharge your charging case, don’t despair, as just 5 minutes of charge gives the earbuds 1.5 hours of playback.

The AirPods Pro are a bit of a different story. On a full charge, you can only expect 4.5 hours of playback on each pod. Just like the Beats Pro, users can expect 24 hours with the Airpods pro charging case. When it comes to fast charging, a quick 5-minute plug-in can give you another hour of playback.

Apple users also have the luxury of checking the battery status of their device through the use of the batteries widget, which was introduced in the release of IOS 14.0.

So at the end of this round, I felt that PowerBeats had a minor step up just taking the lead. At this point, its PowerBeats Pro: 3, AirPods Pro: 3.

Advertisements

The Features

Even though the Powerbeats are sold for about $30 less, you would think that two products sold by the same company would have a similar caliber of features right? Well, you would be wrong. The Airpods Pro absolutely blow the PowerBeats Pro out of the water in this aspect.

On the Airpods Pro, you have ANC (Active Noise Cancellation), Transparency mode, and Spatial Audio. ANC is pretty self-explanatory, activate it to block out noise from the outside. Transparency does the opposite, it allows noise in so you can hear your surroundings. Spacial audio essentially provides users with 3D audio when watching supported TV shows or movies. Not only that, but the Airpods Pro have tests to ensure that the ear tip that you have chosen makes a proper seal in your ear. Another great feature the Airpods have is the ability to activate Siri or toggle ANC and Transparency mode, by holding the end of the earbud.

Let’s move on to the PowerBeats Pro. They basically have none of the cool audio settings the AirPods Pro have. With the PowerBeats, you can activate Siri by holding the button on the side. Aside from that, the only better thing about the PowerBeats over the AirPods is the ability to change the volume of the media with a button on the actual earbud.

I think it’s obvious that the AirPods Pro took that round with ease, so the score is now PowerBeats Pro: 3, AirPods Pro: 4.


Conclusion: Which Is Better?

PowerBeats Pro case next to Apple Airpods Pro case on a desk

So what is the final verdict? Well, each of these products have their separate pros and cons, and it really depends what you want out of an audio device. Are you looking for the ideal workout device, or something more low-key?

Well, let’s answer these questions. The only thing that the Powerbeats pro have that is objectively advantageous in comparison to the Airpods Pro is the greater battery life, and the only thing the Airpods Pro have that is objectively advantageous to the Powerbeats Pro is the onboard features. They both have different designs and comforts, one isn’t completely better than the other, and they both have virtually the same components in the box.

Now all of this comes at a price, obviously, and the PowerBeats Pro can often be found for a bit cheaper. The PowerBeats are often found for a bit under 200 while the AirPods Pro are often 200 or more. Now which one is better, well we can’t make that decision for you as the best option depends on your situation. If you mostly work out then the PowerBeats may be the best option for you but if you want an all-rounder the AirPods Pro may be the one for you.

Advertisements

Keychron K6 Review: The Best Board For 100?

The Keychron K6 is a mechanical keyboard that is absolutely packed with features such as Bluetooth connectivity and RGB lighting.

In a compact and efficient 65% layout, the K6 delivers many features that make it a great option for anyone who needs a solid keyboard for a good price.

Let’s dive in and take a deeper look at the Keychron K6.

The Verdict

Top view of Keychron K6 mechanical keyboard.

Rating: 4.5 out of 5.

The Keychron K6 is 65% that delivers backlighting, macOS support, and the option to get a hotswappable PCB.

In addition to that, the board features wireless connectivity with Bluetooth 5.1 with an 80-hour battery life.

You get a solid case with an adjustable height and if you are willing to pay about 10 dollars more you can get aluminum bezels.

Keychron gives you a ton of customization on what features you want, obviously at an increased cost, to get an aluminum case, hotswap PCB, and RGB lighting. You are also given the option to choose the three main kinds of switch, clicky, tactile, and linear.

If you want a board with a ton of features and great value all with a compact layout, the Keychron K6 is a great option. It’s not only a great value offering but the K6 also makes for a great travel board.


In The Box

Unboxing of Keychron K6 mechanical keyboard

In the box, the K6 comes with several items that will help you get up and running as well as some extras to improve your experience with the board. In the box you will find:

  • USB-C Power Cable: You get a nice braided cable that is USB-C and has a 90-degree angle because the port is on the side. No kinks developed after months of use.
  • Warranty and Information: Keychron gives you all the essential information on how to use the board with clear instructions along with a pamphlet for warranty information.
  • Extra Keycaps: You get additional keycaps to add orange accents and for better support for both Windows and macOS. There are modifier keys for Windows and macOS-specific keys.
  • Keycap Puller: A wire puller is included which makes the process of taking off keycaps very easy while not scratching your keycaps like with cheaper plastic pullers.
  • Key Switch Puller: If you get the hotswap version of the board then a metal switch puller is included. It is not amazing but it does the job.

Overall it is great that you get so many things in the box and the extras really tie in the experience.


Advertisements

Build Quality

Angled view of Keychron K6 mechanical keyboard

The Keychron K6 has two case designs. Plastic and aluminum. The majority of the case is made from plastic aside from the aluminum top plate. If you do opt for the aluminum version there will be aluminum bezels around the sides for a more hefty feel and premium look.

There is little flex to the board and it feels quite sturdy, especially if you get the aluminum version.

There are 3 levels of height adjustment to the board with a flat typing angle, 6-degree angle, and 10-degree angle. On the bottom of the board, you will also find for moderately size rubber feet to keep the board from sliding around.

The front height was a common complaint with older Keychron boards but while it is still not ideal it is a bit better with the K6. I am able to comfortably type without my wrist rest.

On the left side of the board, you will find a USB-C port along with two buttons. The first button allows you to switch between Windows/Android and macOS/iOS. The other button allows you to switch between Bluetooth, wired, and off.

This is quite a convenient spot for the buttons as it is not in the way and easy to reach but it is not the nicest spot for the cable. It makes cable managing your keyboard cable a lot harder if you are using it in wired and removes the possibility to use custom cables.

For most people, this won’t be too much of an issue, especially if you plan to use the board with Bluetooth.

Advertisements

The Keycaps

Keycaps for Keychron K6 mechanical keyboard

The K6 comes with a set of ABS keycaps in the OEM profile with doubleshot, shine-through legends. Included are some alternate keycaps including some mac keys and accent keys if you want to add an orange accent to the light or escape keys.

Since the keycaps are made of ABS they will develop shine over time but since the set is pretty good quality for a prebuilt board, it will take at least a month for it to show up. This shine will come from the natural greases and oils from your hands.

The OEM profile is the standard among pre-built mechanical keyboards. The keycaps are contoured to match the shape of your hands. Since this is similar to most pre-built mechanical keyboards, if you have used another in the past it will be very easy to get used to.

Since the keycaps use the doubleshot method for the main legends this means that the legends are reliable and won’t fade away. Although the main legends are shine through there are some printed sub legends to show extra functions that work with the fn1 and fn2 keys.

The keycaps, aside from the orange accent keys, have a gray theme with the use of both light and dark gray. They have a very smooth feel too. The legends on the modifiers look modern and simplistic which is very nice in comparison to other pre-built boards that have aggressive-looking legends.

The Switches

Switches for Keychron K6 mechanical keyboard

Underneath the keycaps, Keychron gives you 3 switch options. You get a clicky, tactile, and linear switch from Gateron.

Gateron RedA light linear switch with a smooth travel
Gateron BrownA medium weight tactile switch with a light tactile bump
Gateron BlueA medium weight clicky switch. It has a loud sound and sharp tactility

Gateron provides some great switches for pre-built boards. All these switches are good options but if you get the hotswappable version of the board, you can replace the stock switches with any option of your choosing.

Gateron’s switches have a durability of 50 million keystrokes which just means that these switches will last a very long time and will probably last longer than the majority of other components on the board.

Advertisements

The Stabilizers

Stabilizers often have a big effect on how a keyboard sounds and Keychron’s stabilizers are some of the better ones that I have tried on a prebuilt keyboard. Keychron has opted to use Cherry Style plate mount stabs that are factory lubed for a better sound and feel.

The sound and feel will also change based on what switches you use. Clicky switches will block out any rattle from the stabilizers while linear switches could make rattle or ping more obvious.

Overall the stabs are not perfect but they are much better than the stabilizers on most gaming keyboards. If you are coming from a Corsair, Razer, or similar keyboards these stabilizers will be an upgrade. If you get hotswap version of the board then you can easily mod the spacebar to sound and feel even better by lubing it and clipping it yourself.

Software (or Lack Thereof)

Sharpkeys Software for Keychron K6

Unfortunately, Keychron has no official software or firmware for any of their keyboards.

Keychron has rumored that they are making a software of some sort but little details are known about it and its release date.

Luckily there are some options that Keychron suggests for you to use. On Windows, they recommend that you use Sharpkeys and Karabiner for MacOS (Note: Karabiner won’t work on Linux and GNU based systems). Both softwares work by remapping the buttons of the keyboard input at a low level in the operating system.

This means that all these changes will not actually save to the board so if you move the board to another device none of your mappings will be there. This also means that if you plan to use any other board with your computer that the mappings will be changed because of these softwares.

Hotswap PCB

Keychron K6 with switches, keycaps, and switch puller

If you choose to pay extra, you can get a K6 with a hotswappable PCB. This means that you can change the switches without needing to desolder anything. This process takes a few seconds just to take out or put in a switch.

The board supports both 3 and 5 pin switches and it is north-facing. This means that the keyboard supports switches from most switch manufactures including Kailh, Cherry, Drop, and much more. The fact that the sockets are north-facing means that there could be interference between the switch and the keycap with high-end GMK keycap sets but it does allow more of the lighting to get through. This will not be an issue for most people that are in the market for this board though.

A PCB with hotswap sockets is a very useful feature and it makes this board great for those who want to get into the mechanical keyboard hobby but if you just want a keyboard to type on then there is no need to spend the extra money.

Advertisements

Bluetooth Connectivity

One feature that makes the Keychron K6 such a great option is the fact that you can connect the board to three devices with Bluetooth 5.1. This is very useful for those who may use multiple devices or want to travel with the keyboard.

The Bluetooth works with Windows, MacOS, iOS, and Android.

The board supports a 4000maH rechargeable lithium-ion battery. The battery is rated for 80 hours or 10 days with 8 hours of usage, while backlighting is on. This was consistent with my testing. After about 5 minutes of inactivity, the board will go into a low power mode turning off the LEDs. The only complaint you may have is that it takes a few seconds for the board to turn back on.

The latency with Bluetooth actually is not bad. Although I would not recommend it for gaming it is not a terrible experience. Depending on the game, it was not even noticeable that I was still on Bluetooth.

It is worth mentioning that I did have some connectivity issues when I first got the board. At first, the board would not go into pairing mode. I fixed this issue by leaving the board to charge for a few hours and then it worked. Ever since I have never had any issues with Bluetooth.

Mac Support

Angled view of Keychron K6

A very nice feature about all Keychron boards is MacOS support. Many boards only officially support Windows so some boards either won’t work or some of the modifier keys may have no functionality.

On the side of the K6 is a button to change between Windows/Android or Mac/IOS. This is complemented nicely by the Apple-specific keycaps.

This feature is very nice because it means you can use this keyboard no matter what operating system you plan to use. If you are primarily a Mac user then this is one of the best boards that you can get.

Back Lighting

RGB lighting on Keychron K6 mechanical keyboard

The Keychron K6 features either white or RGB backlighting the RGB option will cost a bit more. The RGB lighting is not as bright as gaming keyboards that I have tried from Corsair, Logitech, or Razer. It is not very bright but is still noticeable.

RGB lighting is always nice to have to add to a desk theme and the white blends well in an office environment.

The LEDs along with the modern font of the keycaps are not obtrusive and don’t make the board look overly gamery. The LEDs are versatile for any situation.

Due to the keyboard having no dedicated software currently, all the effects are on the board. There are a variety of effects from static colors to type lighting. With the white LED models you won’t have nearly as many lighting effects.

You can also easily turn on and off the LEDs by pressing either fn1 or fn2 and the light button.

Conclusion: Should You Get The K6?

Side view of Keychron K6 mechanical keyboard

The sub $100 price range is very competitive but the Keychron K6 emerges as a great option with great performance and features.

It delivers tons of utility with a nice-looking case. You get Bluetooth, macOS support, backlighting, and the chance to get a hotswappable PCB. You get all the utility that you need while in a compact 65% layout.

The wireless connectivity helps this board be very portable and it allows you to have a clean setup.

The board is quite sturdy with minimal flex and a decent weight for its size.

The only major drawbacks of the board are the fact that the USB-C port is on the side limiting your options for custom cables and cable management options as well as potential Bluetooth connectivity issues. Luckily the connection issue that I faced had a simple fix but, unfortunately, these issues are common.

If you are interested in checking out this board then you can see the Keychron K6 on Amazon.

Also if you enjoyed this article consider checking out some of our other keyboard reviews.

Advertisements

Logitech G203 Review: Top Tier Mouse For A Decent Price

Are you looking for a cheap but decent entry into the PC Gaming world?

The Logitech G203 may be perfect for you. Logitech delivers great performance without breaking the bank making the G203 a very popular option.

Let’s take a closer look at the Logitech G203 and see if it suits your needs.

The Verdict

Logitech G203 next to keyboard

Rating: 4.5 out of 5.

The Logitech G203 has a solid shell accompanied with a robust and good quality sensor.

This mouse is an ideal choice for PC Gamers on a budget. Its cheap price tag won’t dent your wallet while still won’t yield a technical disadvantage over other gamers with better mice. If you are like me and love RGB then fear not because the G203 has RGB accents on the logo and at the edge of this mouse.

The smaller size is very good for a claw grip although a palm grip will also work great for it. Its sides are very recessed but are symmetrical besides the buttons on the side which are not present on the left side. Furthermore, this mouse is fine for left-handers but they will not have use of the secondary buttons.

The main downsides of the Logitech G203 include the build quality, the lacking sensor compared to other mice in 2021, the lackluster software, and lastly Logitech’s history with double-clicking mice.

If the user can overlook these issues this mouse can objectively be one of the best budget gaming mice even in 2021, 3 years after its launch.

If you think the Logitech G203 is right for you, check it out on Amazon for a great price.


Logitech G203 Specifications

Length~116.6 mm
~11.66 cm
~29.62 in
Width~62.15 mm
~6.22 cm
~15.79 in
Height~38.2 mm
~3.82 cm
~9.7 in
Weight~85 g
~0.09 kg
~0.19 lbs.
Sensor TypeOptical (200-8000 DPI)
Sensor ModelLogitech Sensor 8k DPI (By Mercury)
Polling Rate125-1000 Hz
Cable Length2.1m (6.9 ft) Rubber Cable
Advertisements

In The Box

Top view of Logitech G203

At this price point, you can not expect very many extras in the box and that trend continues with the G203.

In the box, you find nothing besides the mouse and some documentation. It does not include extra skates or more commonly a weight other mice may have.

All in all, besides the mouse nothing very interesting.

The Build

Mice in general are all subjective in terms of shape but sensor, build quality, and switches are some of the objective parts of a mouse.

Logitech mice are generally very well built and look like the same thing continues with this mouse even at its low price point.

The mouse does not feel like it will break if you drop it but at the same time its relatively light at a cool 85 Grams. That being said its is not the best quality. There is a sort of metallic springy reverb around the buttons when you press them quickly or if you put the mouse down with force.

Lastly, we can move on to the switches. Logitech mice have very good switches in terms of feel and responsiveness. Though one issue plagues Logitech mice; double-clicking. While this issue has been mitigated by new switches in all mice, thousands were still affected by it. That being said all the mice I have had from Logitech (G502 Hero, G203, G703) have not had these issues even after years of use. So, it’s safe to say all for the mice that Logitech will sell will likely not have double-clicking issues.

Logitech G203 next to other mice

Shape and Comfort

The G203 is a symmetrical mouse with two buttons on the left hand side. You can use it with your left hand but it is not recommended,

The mouse is definitely on the smaller side as it is much smaller than the Glorious Model D and Zowie EC-2. Depending on what you like in a mouse this may or may not bother you. If you like a bigger more ergonomic mouse this is definitely not the mouse for you as it is very short and small. That being said, if you are a left-handed user then this is gonna be great for you as it is symmetrical besides the side buttons which are on the right.

The mouse is very comfortable for the claw grip. but the palm grip can get a bit uncomfortable after long periods especially after long periods of use.

As for the button positioning it is all in excellent positions.

Buttons include:

  • Left Click
  • Right Click
  • Two buttons on the left
  • Scroll wheel
  • DPI adjustment between left & right click

As already stated, the mouse buttons are very comfortable and clicky. The same goes for all the other buttons sans the DPI adjust which has a ton of spring ping especially if you click fast.

Perhaps one of the best parts of Logitech mice is the scroll wheel. It has a very satisfying click and is very easy to grip. The only problem I found during testing was the low height. Some people may find that uncomfortable.

Advertisements

Sensor and Polling Rate

On the bottom of the mouse is an undisclosed sensor by Logitech. It reaches 8K DPI (dots per inch) with a minimum of 200.

It features a 1000hz Polling Rate (how fast info is reported to the device). The mouse is very snappy in windows but compared to the hero sensor on my G502 there is a notable difference in responsiveness and speed at the same DPI and sensivity.

Colors and RGB Lighting

The Mouse comes in 4 colors. Lilac, Black, White, and Blue. These colors are flashy and look quite good overall.

The RGB on the mouse is great. It is exciting and bright compared to other budget offerings. There is lighting on the back and side in a strip and on the logo. This looks great especially considering Logitech’s three-zone lighting mode which looks great if configured properly.

The lighting is vibrant and supports a ton of effects.

Advertisements

Connectivity

This mouse is not wireless, but the cable is quite good. The cable is not braided, which sounds like a con, but in reality, it’s a plus for this mouse. This is because the drag on this mouse is far better than it is on cables that are braided from mice like the Logitech G502 Hero.

The connectivity is flawless and the cable is long and isn’t prone to kinks. The cable is not detachable which is a standard in wired mice. It would have been nice to see a detachable cable but that would add weight.

Logitech G203 on the Amazon page.
CC: Amazon

Software

What good is a mouse without customization and what better way to have that than with software?

Logitech G Hub software works but is nothing great. The functionality is not its fault but the bugs. Users have reported seeing issues of profiles being reset, software not even loading, and much much more. While it seems they have fixed these bugs the past is still the past.

Aside from the bugs there is a lot of functionality with the G Hub software from in depth macros to lighting interactions with what is on your screen.

You can tune everything you would expect from a mouse software.

  • Polling rate (125Hz – 1000Hz)
  • DPI (200-8000 DPI, in increments of 50)
  • RGB
  • Button bindings

These are just some of the things that you can change with the G Hub software. It may have bugs but it is very powerful.

Logitech G Hub Software

Onboard Memory

The Logitech G203 has onboard memory so you can save specific settings like lighting, sensitivity, and button mappings on the mouse.

Onboard memory is helpful if you use your device with multiple devices or take your mouse to different places. It also enables you to keep all of your settings without a software running.

If you don’t want to run Logitech’s G Hub in the background or you want to uninstall it, you can quickly save your profiles to the memory.

Advertisements

An Alternative/Upgrade: The G305

The bigger brother of the Logitech G203, the G305 is a wireless version of the G203. It retains the same shape while making some improvements to the inside and cutting the wire.

The G305 does cost more than the G203 but it has an improved Hero sensor that is more accurate and the same latency while being wireless.

If you do like RGB then sadly the G305 doesn’t have any but if you want a great sensor and lightspeed wireless connectivity, the Logitech G305 is a great value.


Conclusion: Is It Good For Gaming?

Logitech G203 next to a keyboard

The Logitech G203 is a great mouse for the 20-30 dollar price point and perfect for people who are new to the PC Gaming community. It packs punch in performance with great internals at a great price point and has amazing availability on amazon which is always a plus.

There aren’t many cons to this mouse besides commodities you would expect in a higher-end mouse. The accurate sensor, great buttons, and comfortable shape at around 30 dollars makes this mouse very easy to recommend.

It is a great mouse for gaming, especially if you are just getting into gaming or are on a budget. It delivers better performance and a nicer build than most of the competition at the same price.

And it has plenty of RGB, which obviously increases performance.

(It doesn’t)

Advertisements

Sennheiser GSX 1000 Review: The Best Gaming DAC?

The Sennheiser GSX 1000 is a great DAC for gamers and those who can benefit from its many features.

With support for a mic input, virtual surround sound, a screen interface, and more, Sennheiser’s GSX 1000 is a great option for those who game often. It delivers plenty of features with only one drawback, the price.

Let’s take a look at the GSX and see if it is right for you.

Sennheiser GSX 1000 DAC

The Verdict

Rating: 4.5 out of 5.

If you game often but want an improved audio experience the Sennheiser GSX 1000 is a great option for you. It will improve the audio quality for both your headphones and microphone.

Those who have been looking for more adjustment to their mic and sound setting or are looking for more clarity. If you are a fan of virtual surround sound, the GSX 1000 has the best surround sound processing in any DAC in terms of accuracy and sound clarity. As a result, the GSX 1000 can further your immersion in games.

Features such as a touch screen, dial, profiles, and more allow you to have more customization. This allows you to change the settings to suit your preferences.

The GSX 1000 won’t be able to drive power-hungry, premium headphones but that is also not what it was designed to do. It is a great way to improve a gaming headset or make a regular pair of headphones have features such as virtual surround sound.

If you need to power premium headphones or you don’t need things like the input or virtual surround sound then this option is not the best for you. Getting a non-gaming DAC and amp will probably suit your needs best.

It is worth mentioning that we tested the GSX 1200 Pro but it is exactly the same as the GSX 1000 with the addition of a couple minor features. We will high highlight the additional features of the GSX 1200 Pro in this review too.

You can find the Sennheiser GSX 1000 and GSX 1200 Pro, for a bit more, on amazon for their best prices.


In The Box

Sennheiser GSX 1000 Unboxing

When you open up the box you will find everything you need to get started. In the box you will find:

  • The DAC: The GSX comes surrounded with foam presented to you quite nicely.
  • Micro USB Cable: To power the device and send information to the DAC, Sennheiser gives you a red USB A to Micro USB cable. It is best to use this cables as you may have issues with other cables.
  • 3.5mm to 3.5mm Cable: This cable only comes with the GSX 1200 Pro so you can connect it to other GSX 1200s for latency-free LAN parties.
  • Quick Start Guide: This guide tells you how to get the device up and running and provides links to their website so you can learn how to use the device.
  • Manual: This tells you anything you would need to know that is not the basic stuff on the quick start guide.

Advertisements

The Build

The build of the GSX is pretty good. The materials aren’t necessarily high end but like most Sennheiser products it is built well and does not give the impression that it can be broken easily or it won’t break quickly.

The construction is mostly plastic with some rubber, aluminum, and glass. The body is all plastic and it doesn’t feel cheap. Rubber is used for some long pads on the bottom so the DAC doesn’t move when doing things like adjusting the volume. The scroll wheel is made of aluminum with glass for the screen.

Sennheiser’s GSX 1000 weighs in at about 10.6 ounces or 0.66 pounds.

Looks And Interface

The GSX 1000 has a black build with silver and white accents on the scroll wheel and logo on the flip-out leg. There are also red accents as the wire is red and there is red LED lighting around the scroll wheel to go with the screen. Although the LEDs can’t change color it is nothing too intrusive and would not ruin a desktop theme.

The GSX 1000 is quite small being 5.63 inches long by 5.47 inches wide with a height of 2.76 inches. It is quite portable if you want to take it to move it to a different setup or go to LAN parties.

One of the most unique features of the GSX 1000 is its interface and the way you interact with it. On the top of the device, there is a screen. On the screen not only does it display the volume but it is a touch screen. On the screen, you can change the output, add sidetone, switch between stereo and surround sound, add reverb to the sound, change the direction of where the sound is focused, and choose from preset EQs.

In addition to the screen, there are also four touch-capacitive buttons or sensors on the four edges of the device to select profiles. Just slide your finger over the LED and you will switch to that profile. The only issue is that profiles will not work when HD audio is enabled. Having four profiles is nice if you want one profile for regular stereo audio and then different profiles for the different games that you play.

On the GSX 1200 Pro variant, you can hold the top left and bottom right sensors for 10 seconds and then your device will go into “Tournament Mode” meaning the settings cannot be changed. This is to make sure you don’t accidentally press something when quickly changing volume or anything else.

Gaming DACs and amps have a dial to change the volume but they are usually oriented on the front rather than on the top of the device with the GSX. Depending on your preference the dial of GSX 1000 may be more comfortable to use for you.

In addition to the main volume wheel, you have a scroll wheel on the right side to control your mic input volume and with the GSX 1200 Pro, you will also have another scroll wheel on the left side to control the amount of volume coming in from people talking to you. This scroll wheel is only needed if you are using the feature of zero latency talking via connecting this DAC to other GSX 1200s.

Advertisements

Inputs and Outputs

Sennheiser GSX 1000 Inputs and outputs

As for inputs and outputs, the selection is sufficient for most people, especially the market that the GSX 1000 applies to. The GSX is not recommended for those who want a ton of outputs for a speaker setup but for gamers who it is for it will have everything that you need.

To send all the information to the DAC and power there is a micro USB cable. On the GSX 1200 model only you can have latency-free conversations with others who have the DAC next to you which is what the 2.5mm ports are for. The last three ports are 3.5mm for the speaker and headphone outputs and the mic input.

The fact that the ports for a headphone and mic connection are on the back is one of the biggest cons for me as it can make cable management harder and it can put the cable in an awkward position.

Advertisements

The Sound

Sennheiser GSX 1000 screen

Although modern motherboards have pretty decent sound, the GSX 1000 is a step up and a good improvement if you have an older computer or a laptop.

You will notice an improvement an increase in the clarity of the sound and separation between different elements of music like instruments.

After using this DAC it will feel as if a veil has been lifted away from the sound and the detail of each note will be more noticeable. Sounds that may have sounded more recessed and in the background like vocals will be more forward.

Overall this benefit in sound won’t be necessarily noticeable while gaming but you will notice it when listening to music.

If you are listening to music for a longer period of time it is recommended that you enable HD audio. When you do enable this mode the sound clarity will be even clearer than before but you will be locked with stereo sound and will not be able to change the EQ, use profiles, or control Sidetone.

This mode is only really good while listening to music but while gaming you will want to go back to the regular mode or you won’t have access to most of the settings.

To enable HD audio you must go to your “Sound Settings” then go to the “Sound Control Panel”. Then you will find the GSX 1000. In the settings of the device, you will go to the “Advanced” tab and then put the quality to the highest quality.

Depending on what you are doing you will want to select a different option. If you are listening to music putting the DAC’s quality to the highest setting will put it into HD audio mode but otherwise putting it to the second-highest setting will enable all the features while retaining most of the audio quality.

It is unfortunate that you have to choose between having HD quality sound and having access to the features of this device but the option of HD audio is nice and there is definitely an improvement in clarity.

Even though the GSX 1000 will improve sound quality if you don’t need the features of this device, a dedicated amp and DAC will improve your setup the most.

7.1 Surround Surround Sound

Sennheiser GSX 1000 DAC with virtual surround sound enabled.

One of the most unique features that the GSX delivers is virtual surround sound. Headphones are a stereo device meaning they create sound using two speakers or drivers but the GSX1000 makes it possible to simulate an experience where there are more speakers for an overall more immersive sound.

The GSX 1000 is known for its virtual surround because of how accurate and immersive it is. Most gaming headsets support virtual surround sound but the directionality of the sound is often not that accurate and the sound may actually be more distorted because of how bad the surround sound method is for the headset.

Sennheiser developed this device to have much better surround sound than gaming headsets. The difference is night and day. The implementation is probably the best out of any gaming DAC or gaming headset out there in accuracy and the customization that you can have on the sound to make it more immersive. A GSX 1000 can make most stereo headphones perform better in the surround sound experience than even dedicated gaming headsets.

The virtual surround sound implementation from Sennheiser helps position sounds better than headsets from Logitech, Corsair, and other companies. These other companies create a surround experience by making all of the sounds seem to surround you rather than correctly positioning where each gunshot, engine sound, or plane is coming from.

With the GSX 1000 you can hear the exact floor and room someone may be in while gaming headsets often have more distortion and less accuracy in the sound.

I found that while testing the GSX in various titles, it was great for simulators, open-world titles, and some competitive shooters. In contrast, you will see no benefit in 2D games or titles where locations of sound are not as important.

It is also worth mentioning that surround sound is often not all competitive shooters will benefit from surround sound. You may like using it with games like CSGO or Rainbow Six Siege but surround sound won’t necessarily make you a better player.

Overall what matters are the games that you play and your preferences.

Advertisements

Mic input

Another great feature about the GSX 1000 is the option for a mic input. If you have a headset with both a microphone and headphone jack then you can plug them into the GSX 1000 for more control and better sound.

With the GSX 1000, the sound of your mic should be cleaner and you can adjust the gain easily. The option to change the mic volume so quickly is great as some applications take in more or less sound than others. This can also make it easier than having to go into settings to change the volume of your mic.

Sidetone

If you have closed-back headphones, like a gaming headset or noise-canceling headphones, it can be annoying or weird to not be able to hear yourself.

Sidetone fixes this by taking your mic input and putting some of that back into what you hear. The quality of it is also quite good. It sounds as good as your mic would sound raw and you could potentially not even notice a difference.

It is similar to the transparency mode of Apple’s noise cancellation products or any other noise cancelling product with that option.

On the screen you can also change if you don’t want Sidetone or the amount of volume that you want to hear of yourself.

Zero Latency Communication

Unfortunately this feature only works with the GSX 1200 Pro but in theory what it allows you to do is quite interesting.

Typically when using apps like Discord, Zoom, or Teams there is a little bit of delay between when people talk and the other person hears it. Typically this ok when you’re not in the same room but if you are calling other people while in the same room this slight delay can be quite annoying.

If you are at a tournament or LAN party and the rest of your team or friends have the GSX 1200 Pro then you can connect up to eight devices together. Doing so will allow you to have communication with each other with no latency or lag between the sound.

You can also change the volume of how much you hear your teammates with the scroll wheel on the left hand side.

Although this is quite a cool concept in theory, in practice it probably isn’t worth it for everyone in a team to get one for just this feature.

Advertisements

Alternatives

Sound Blaster G6

The biggest competitor to the GSX 1000 is the Sound Blaster G6. They share features like a mic input and virtual surround sound.

When comparing the GSX to the G6 the GSX has the step up in the interface, the mic input, and virtual surround sound.

While both have a dial for the device volume, the GSX has a screen to control the interface and a scroll wheel control for your mic volume. The G6 has neither but it does have software support and a few buttons to enable things like virtual surround sound. The software gives you the same functionality as the GSX’s screen like EQ editing.

The mic input is the same but the GSX has more features like Sidetone so you can hear yourself and control your mic volume.

Although both options have virtual surround the GSX 1000 has slightly more accurate virtual surround sound and the option to add reverb to the sound and change where the direction of sound is coming from.

There are two areas where the G6 has a step up over the GSX 1000. It provides more power and it is usually a lower price. If you want to use something that is more power-hungry than a gaming headset or efficient headphones then the G6 will fair better. The price difference is not very big but is notable because it brings up the idea of value. If you won’t need the mic input, don’t care for the screen, and are willing to sacrifice on slightly worse virtual surround then the G6 is a better option.

Advertisements

Schiit Fulla 3

The Schiit Fulla 3 does not have all the features of the GSX 1000 like Sidetone, virtual surround sound, or a screen but it still packs as much power as the G6, is the most compact option here, and is the cheapest option.

If you don’t care for exciting features like virtual surround sound then this is one of the best options you can get if you need a mic input. You can find the Fulla 3 for about $100 on Schiit’s for most of the year.

The sound quality is quite good and it can power power-hungry headphones at the $300 price range. If you want to use a Sennheiser HD6XX with this then it can drive the pair really well.

Schiit Hel

Schiit’s Hel is the most expensive alternative to the GSX 1000/1200 Pro but also provides the most power. It delivers the same features as the younger brother, the Fulla 3, but significantly more power. If you have premium headphones but still want to use a mic input then this your best option.

The Hel can power premium headphones like the Beyerdynamic DT990, HiFiMan HE400i, HiFiMan Sundara, and Sennheiser HD6XX.


Conclusion

Top view of Sennheiser GSX 1000 DAC

In the category of gaming DACs and amps, the GSX 1000 delivers the most features to the consumer, albeit at a higher cost.

You may not be able to power $300+ headphones but, the GSX is a step over motherboard audio so you will get cleaner sound in your headphones or speakers with more separation between sounds and less distortion. The GSX 1000 will also improve your mic sound so you can sound better not just in discord but if you are recording something like a voice-over.

In addition to better sound, the interface, virtual surround sound, and other customization make the GSX 1000 and great DAC. The screen that always displays the volume is very useful to see volume instantly along with an easy to use touch screen and dials. The virtual surround sound implementation is accurate and probably the best out. Finally the customization to things like the mic with Sidetone is a really nice addition and gives the GSX 1000 a step over the competition.

Although the GSX 1200 Pro has a couple additional features, the sound and core features are the same. It is not worth it to pay more for the GSX 1200 Pro unless you need the additional features so for most people it is recommended to buy whatever is the cheapest option.

If you think that either suits your needs, check out the GSX 1000 and GSX 1200 Pro on Amazon for a good price.

Happy listening!

Advertisements

Create a website or blog at WordPress.com

Up ↑