North-Facing vs South-Facing Switches

South-Facing Switches (Left) vs North-Facing Switches (Right)

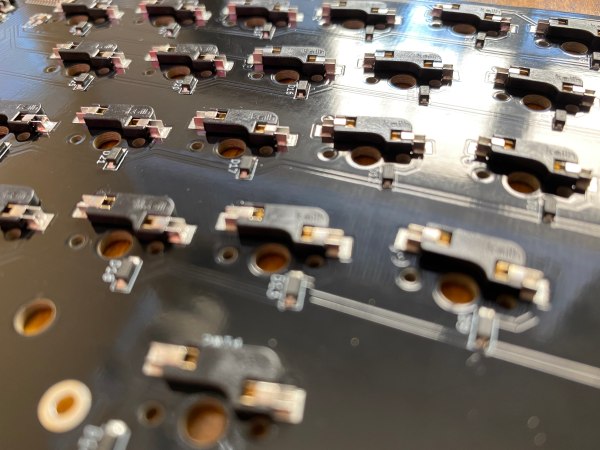
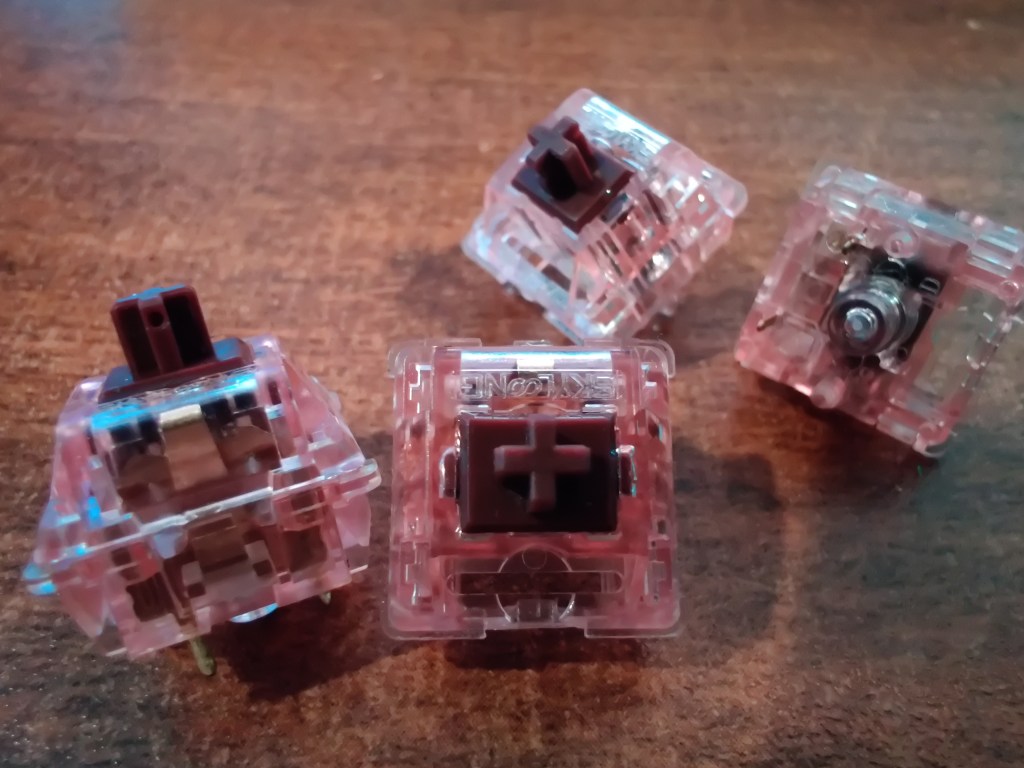
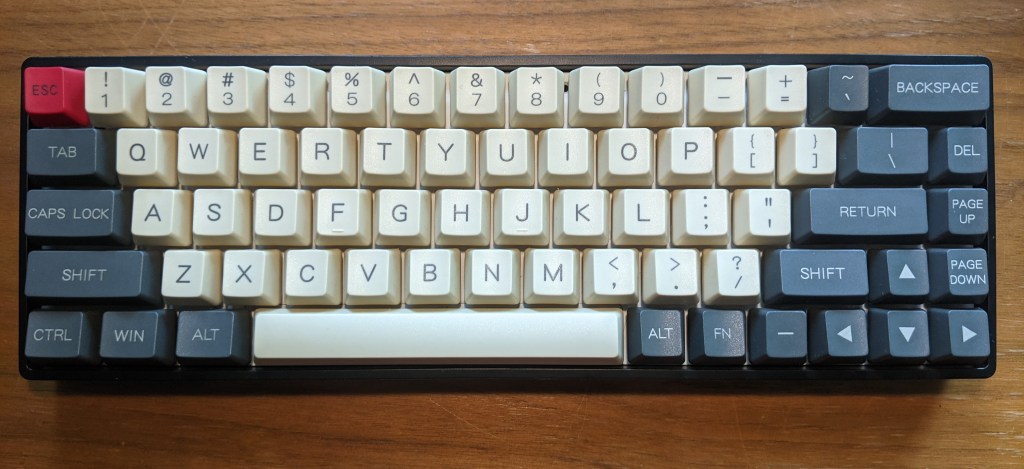
The world of mechanical keyboards can be complex but can be very fun and satisfying. On keyboards, switches are attached to a PCB, printed circuit board. Switches can be attached in one of two configurations. This often causes confusion as people bring up terms like interference or switch orientation.

When looking to buy a mechanical keyboard, especially if you are looking to modify or build one, understanding what north-facing and south-facing switches are can be important to help you make the best decision for you.

Today we are going to clarify the difference between north-facing and south-facing switches and help you understand everything you need to know to make a better decision when buying your next mechanical keyboard.

North-Facing vs South-Facing Switches: What Are They?

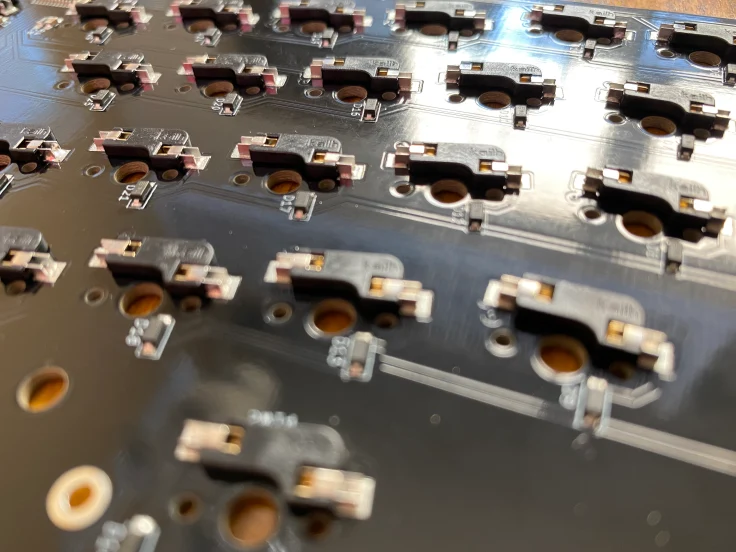
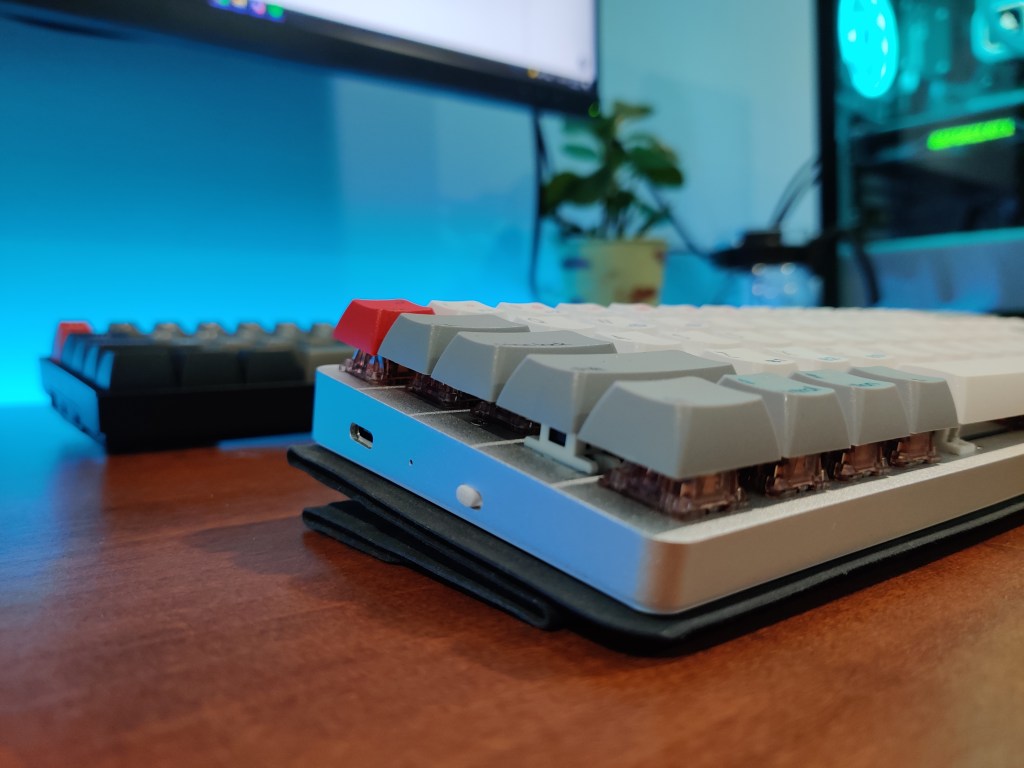
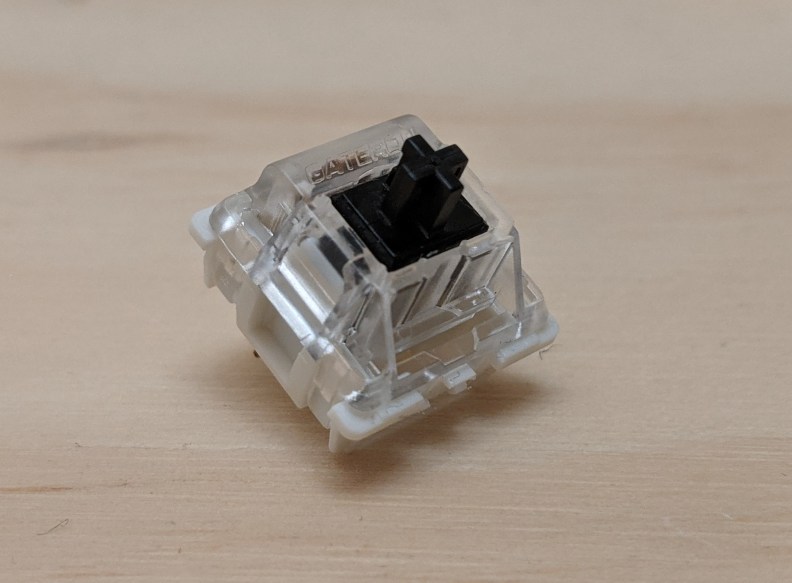
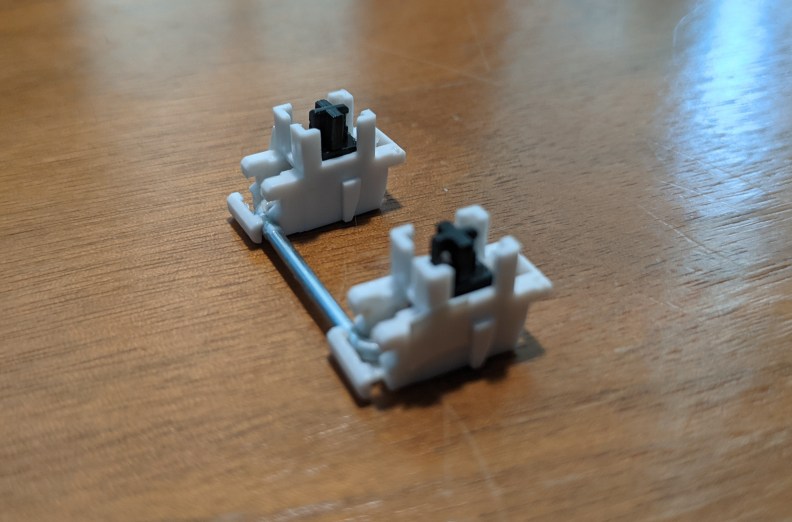
Before we understand what north-facing and south-facing switches are we must first understand switch orientation. The term switch orientation refers to which direction a mechanical keyboard switch is placed on a PCB.

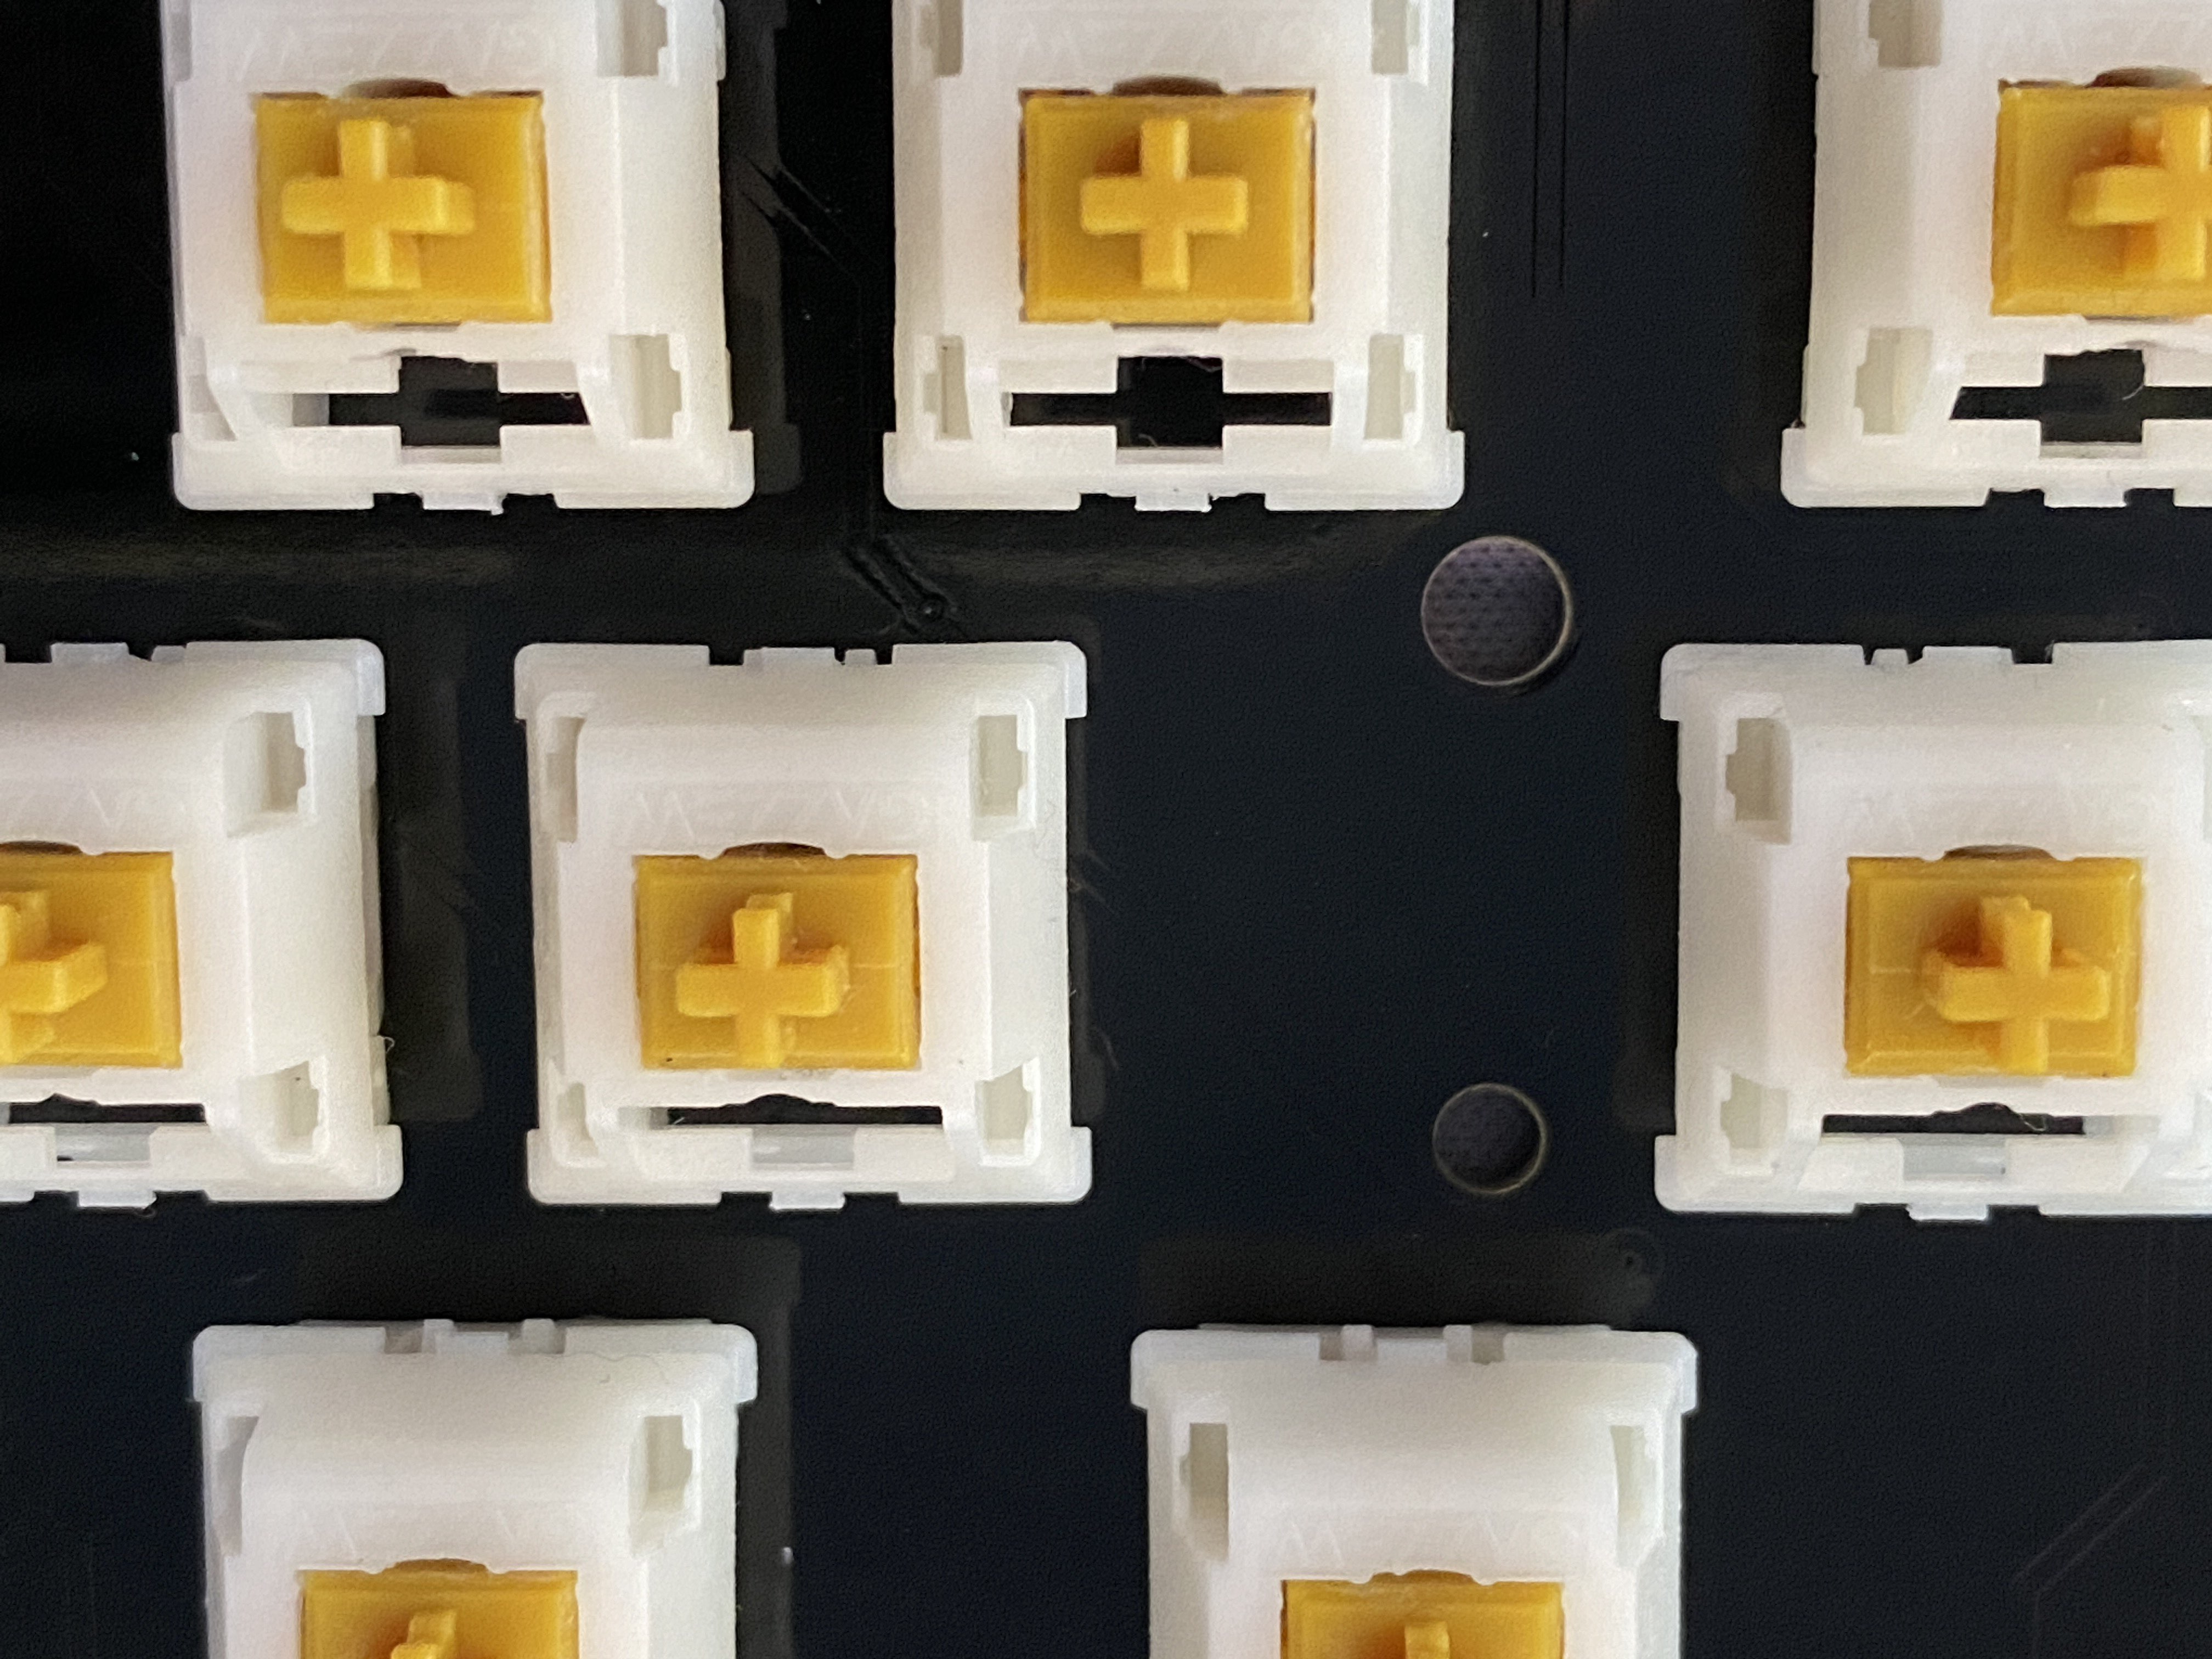
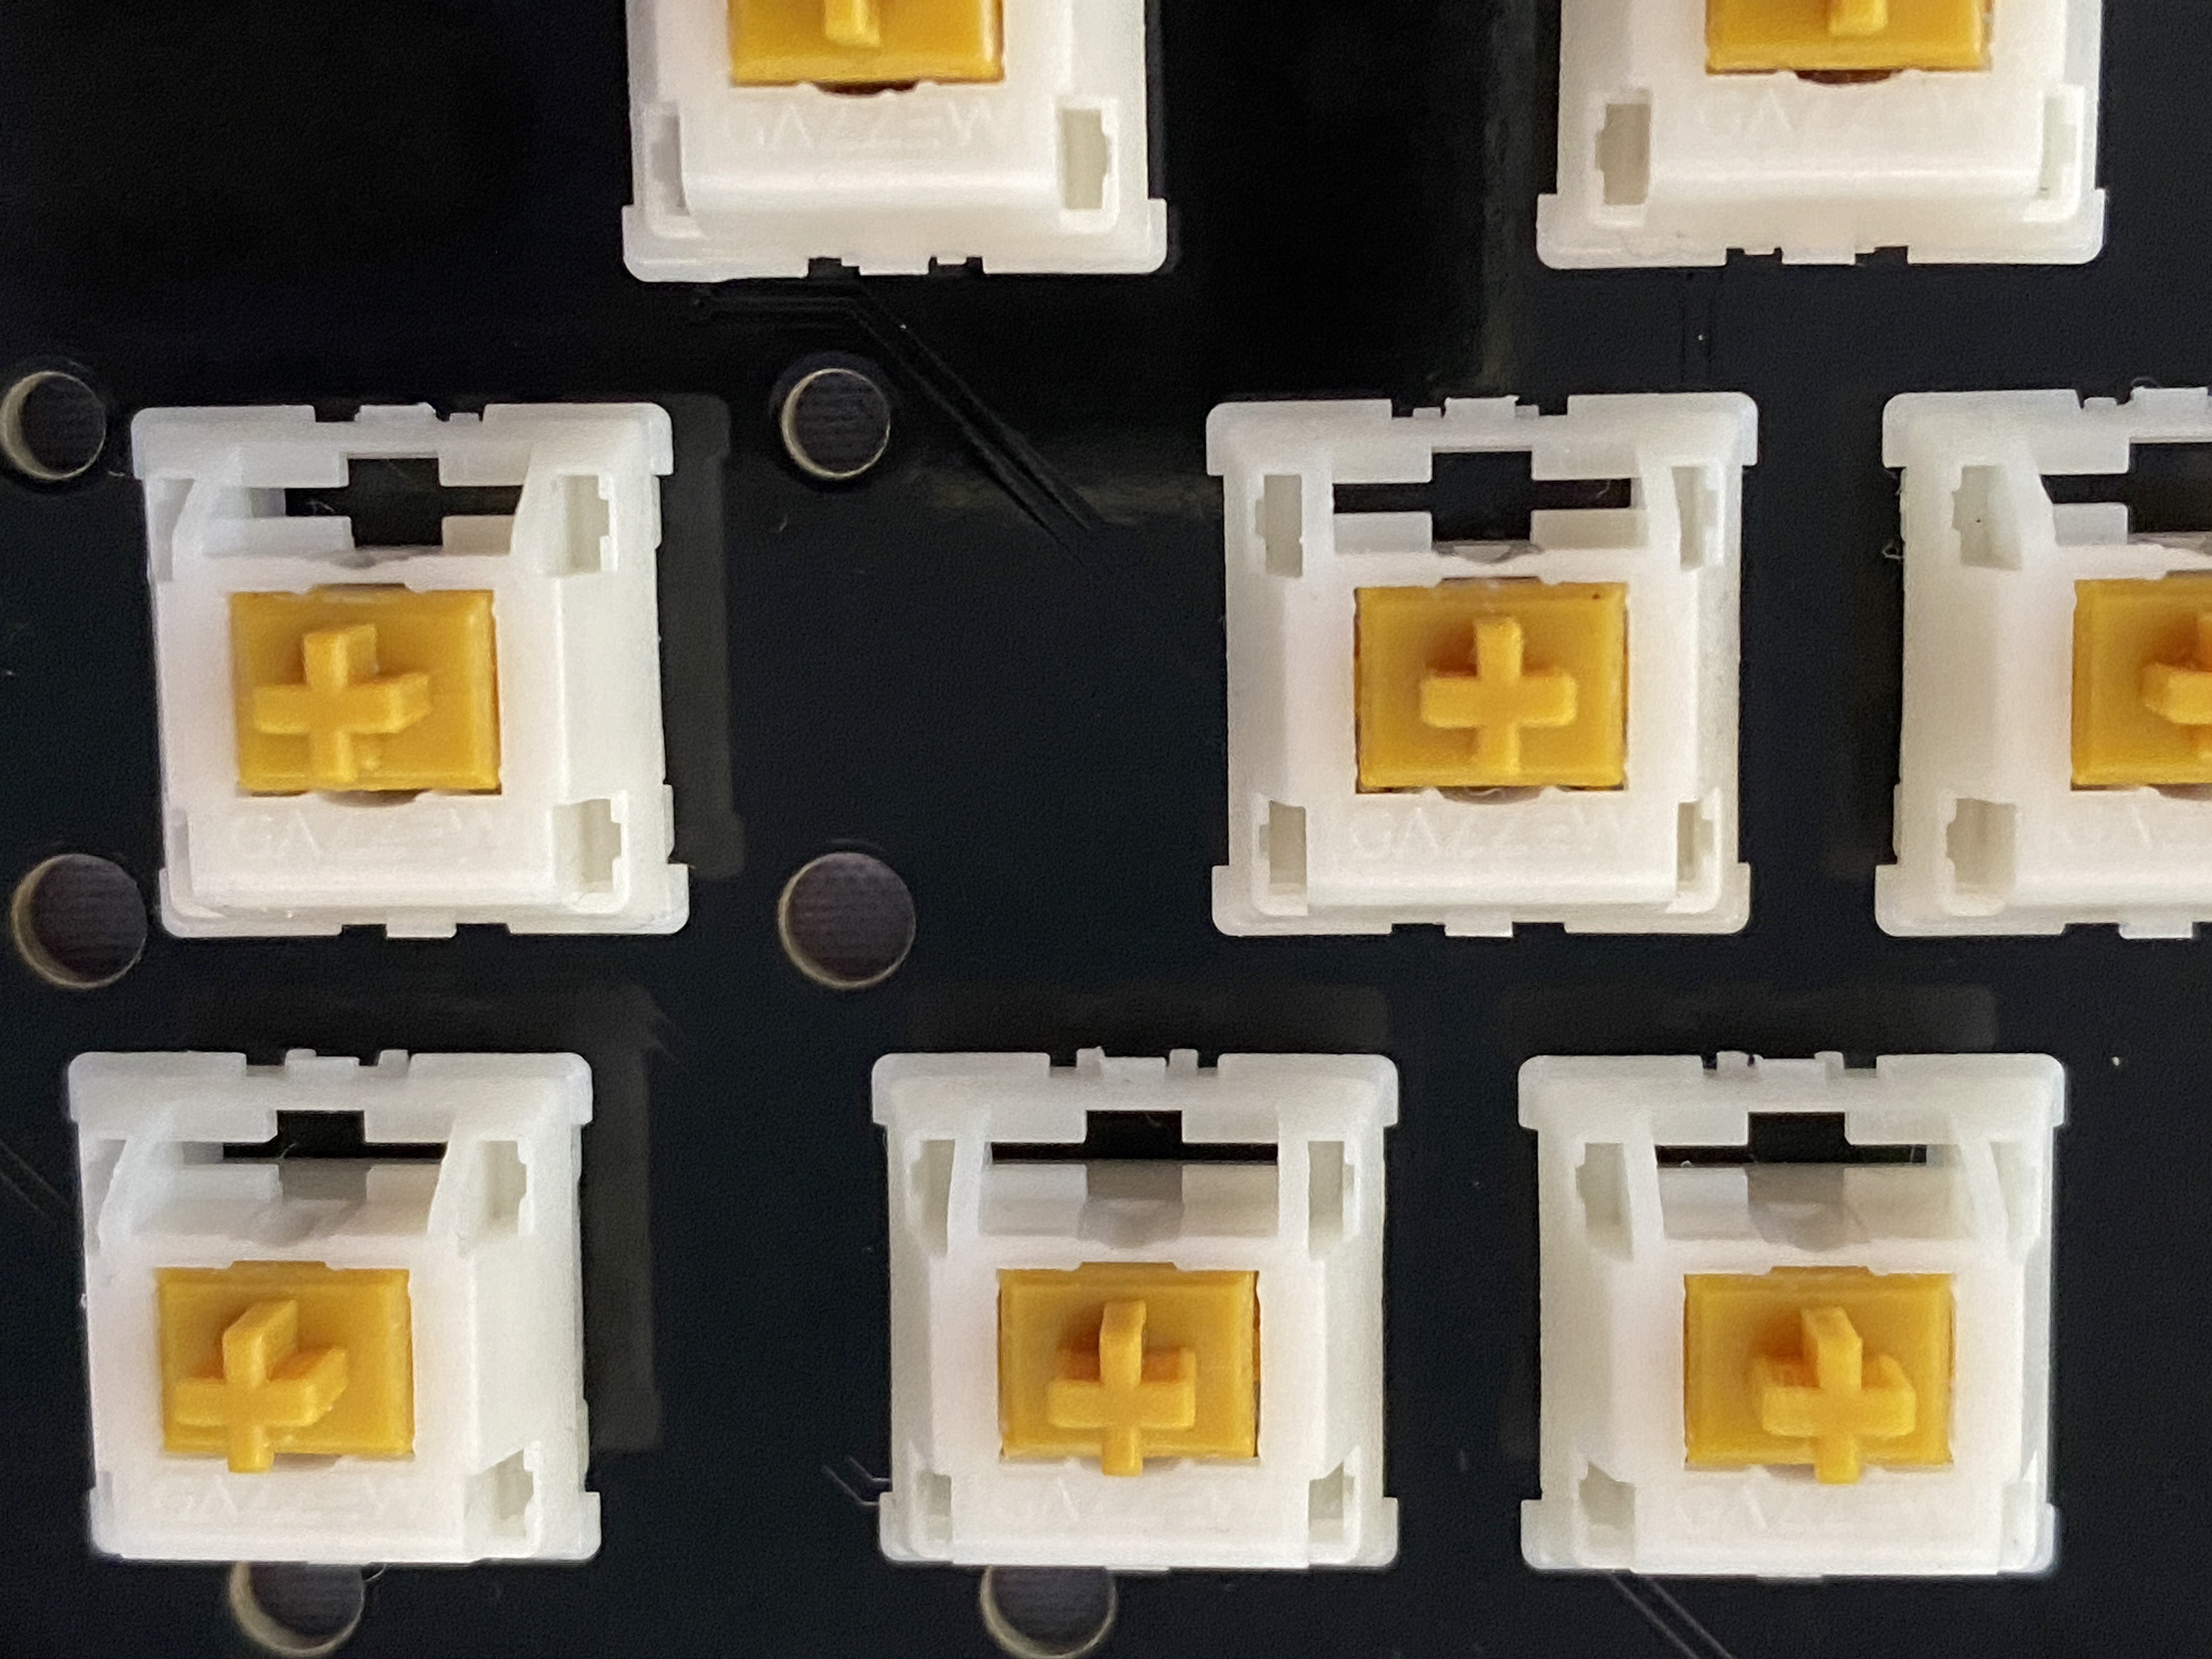
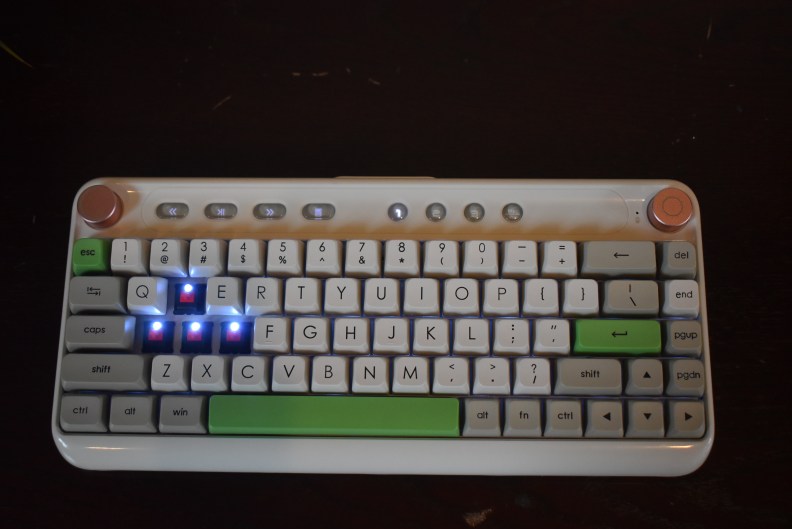
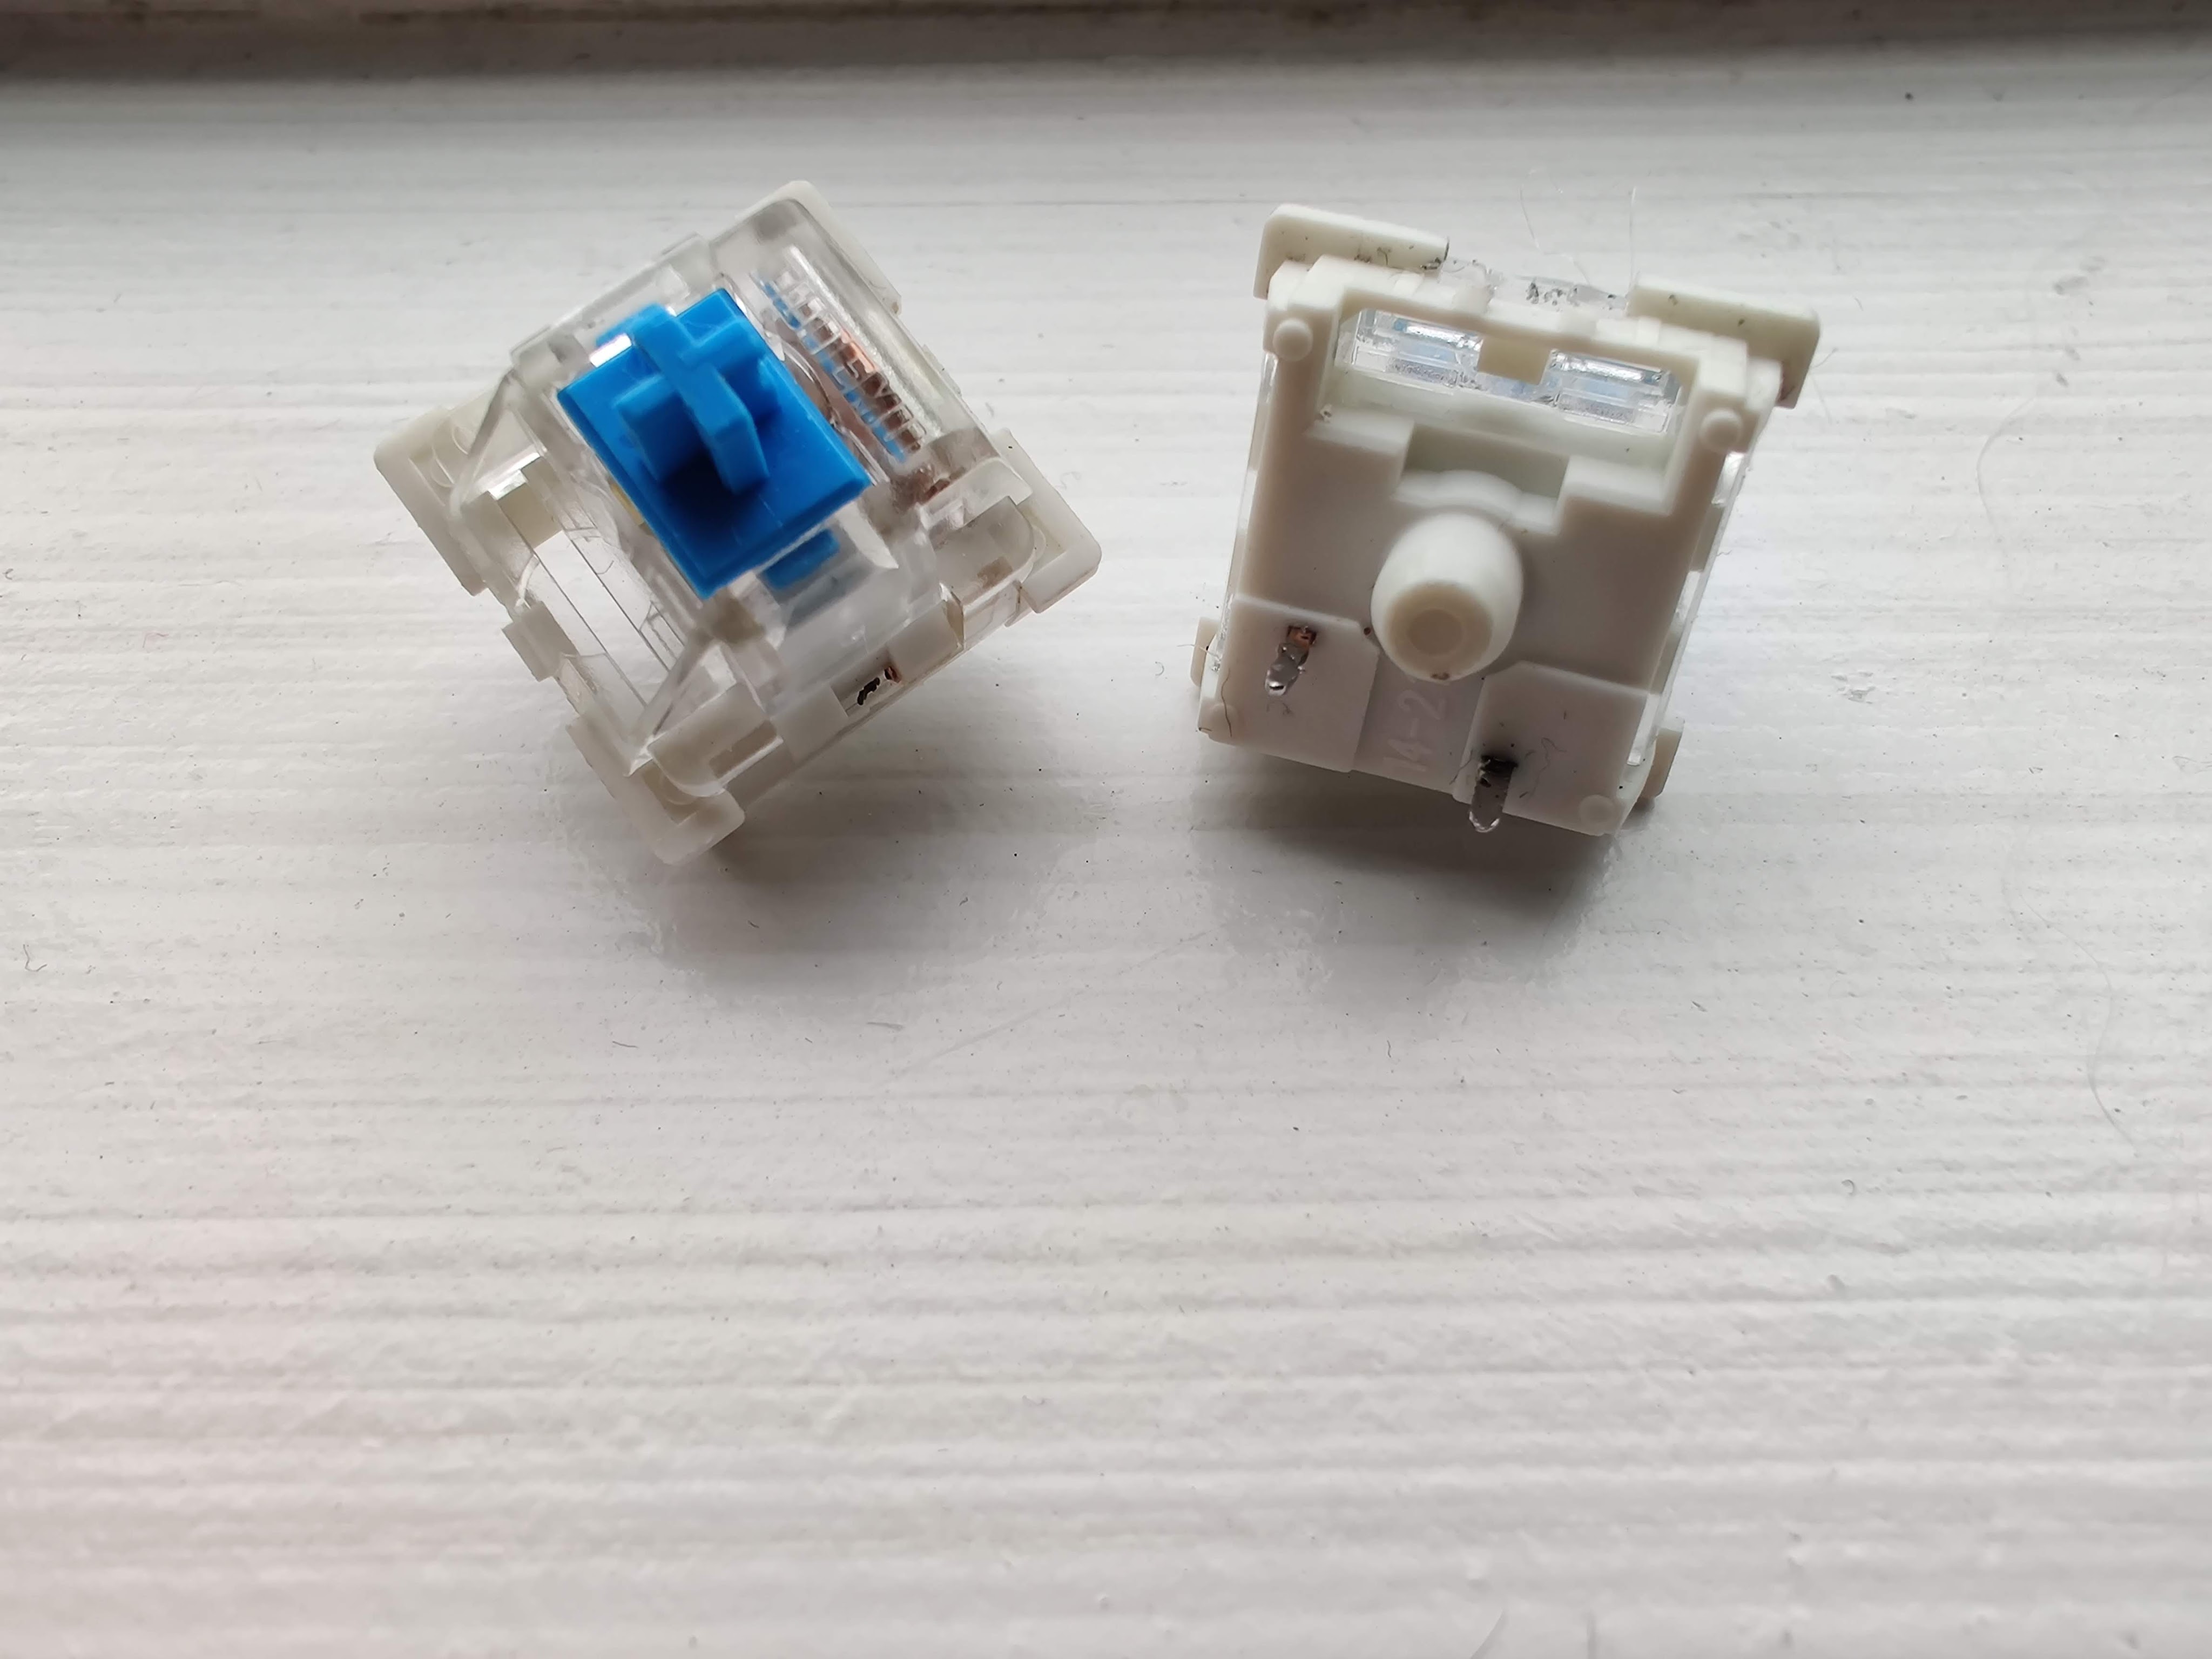
North-facing switches refer to when a switch’s LED hole faces toward the top of the keyboard while placed in the socket of the keyboard’s PCB. North-facing switches are typically seen in budget keyboards but are also seen in older custom keyboards.

South-facing switches refer to when a switch’s LED hole faces toward the bottom of the keyboard or where the user of the keyboard is while paced in the socket of the keyboard’s PCB. South-facing switches are typically seen in custom keyboards but due to consumer demand are starting to be put in some beginner kits and even a few prebuilts.

Typically we hear the terms north and south-facing the most but east and west-facing switches exist too. East and west-facing switches have the same pros and cons as south-facing switches. They are used very rarely and are usually only implemented in PCBs that support multiple layouts and must maximize all space on the PCB available.

Problem With North-Facing Switches: Interferance

Diagram explaining switch interference between north-facing and south-facing switches.

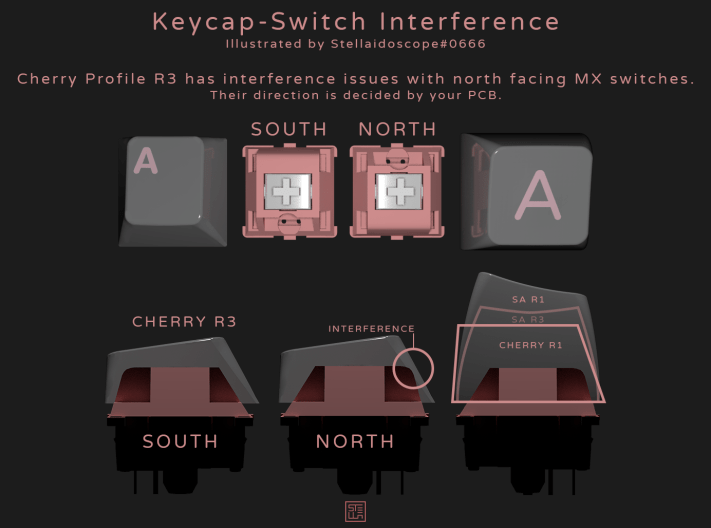
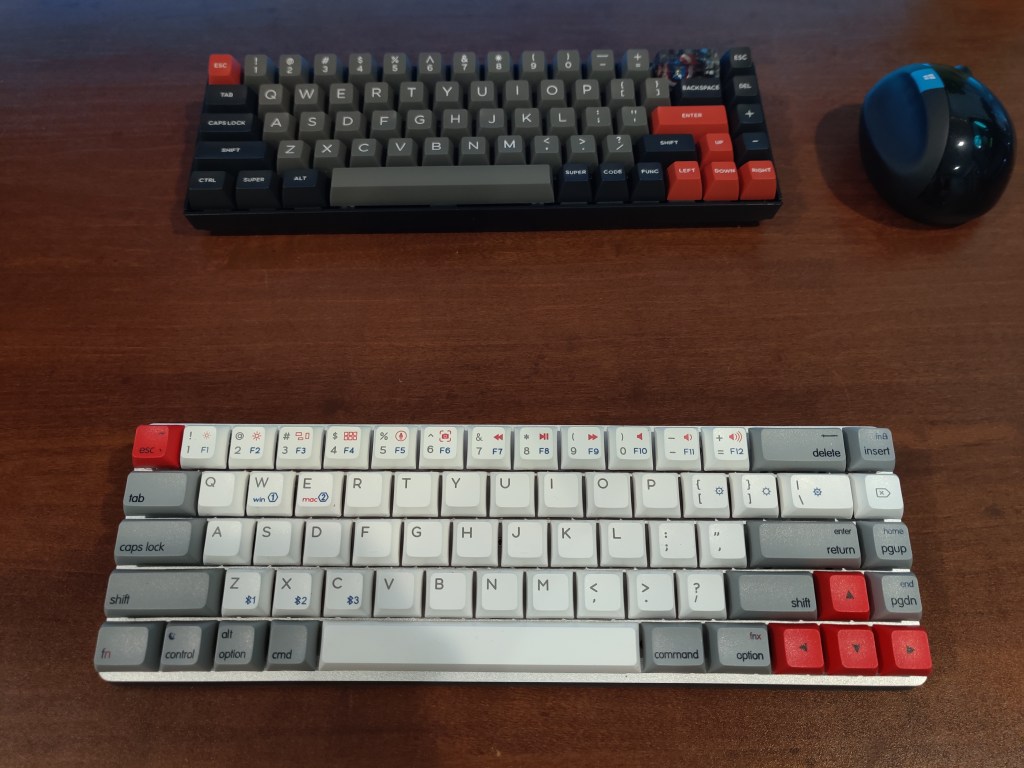
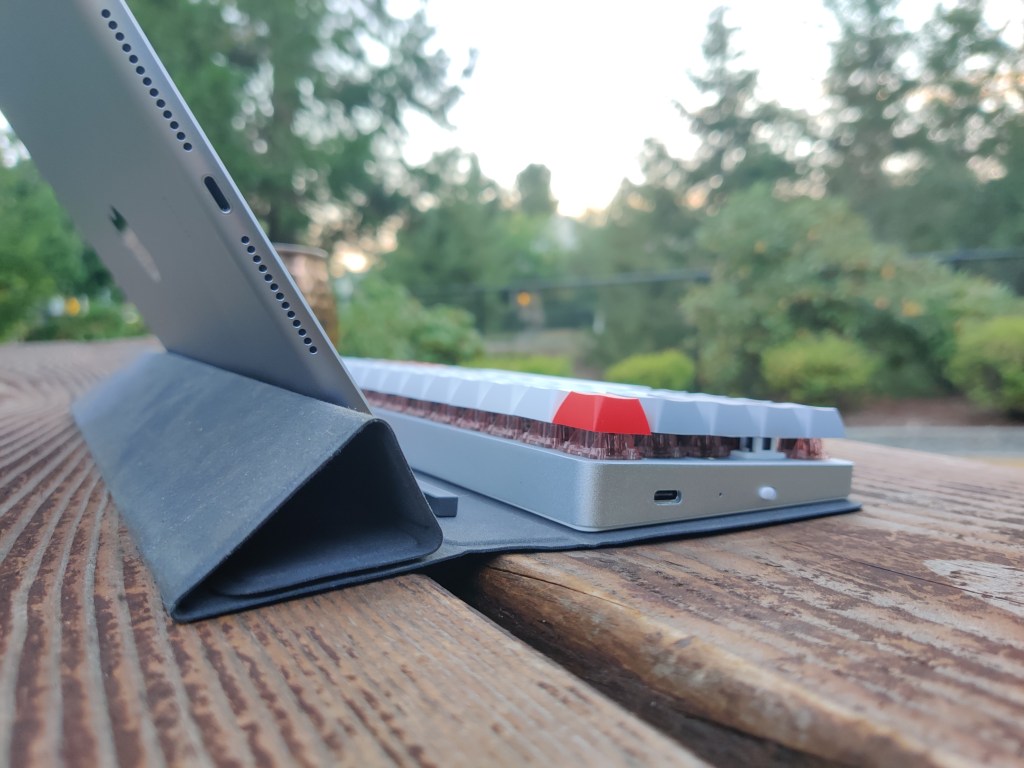
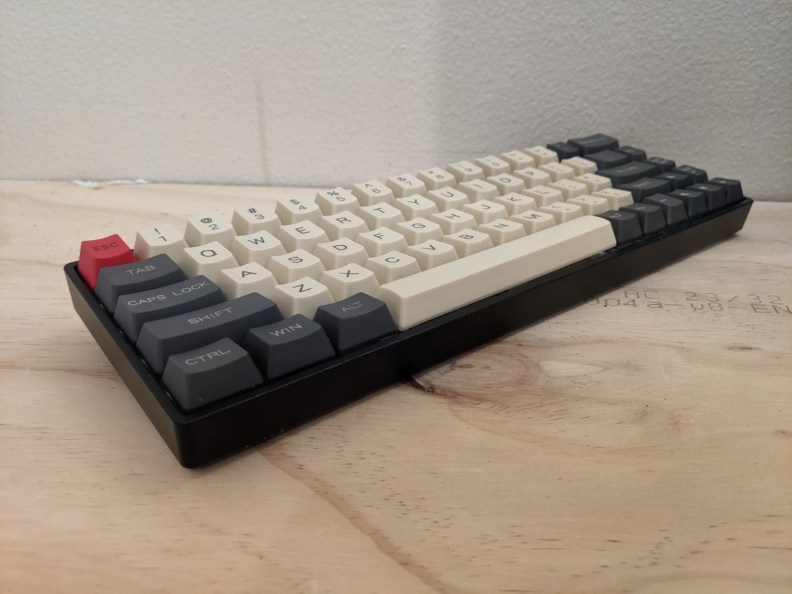
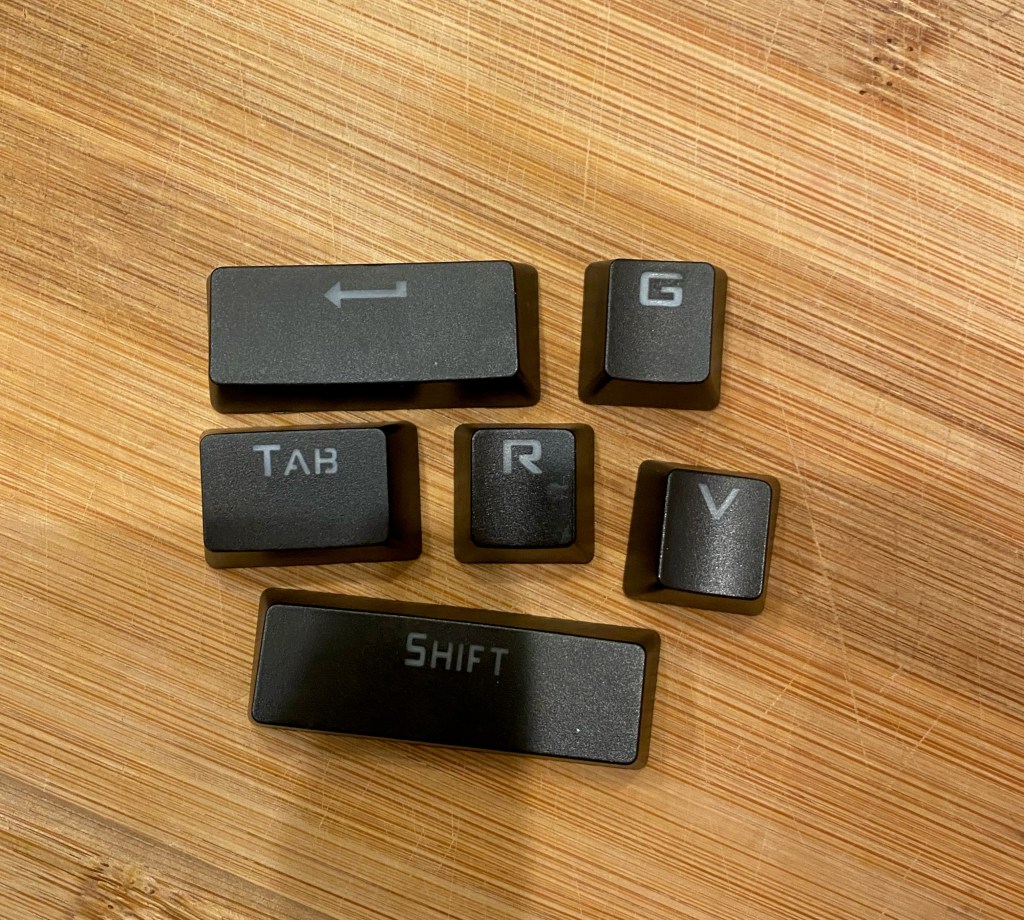
The biggest problem that faces north-facing switches is keycap interference when using Cherry profile keycaps. On some rows of the keyboard, Cherry profile keycaps will come into contact with the top of the switches before the switch is able to bottom out. This will change both the sound and feel of the typing experience.

Although using Cherry profile keycaps are still usable, interference can remove a lot of the satisfaction from typing on a mechanical keyboard. Part of what makes this issue annoying is also that it affects certain rows of keys more than others so the feel becomes inconsistent between keys too. Some don’t face the issue while other rows do.

This makes north-facing switch orientations quite unpopular among keyboard enthusiasts who often use Cherry profile keycaps from high-end manufacturers.

Problem With South-Facing Switches: RGB Shine Through

Mechanical keyboard on desk

Although south-facing PCBs are highly popular because they don’t face the issues of interference, they still have their own issues. South-facing switches have some issues for fans of RGB and shine through keycaps.

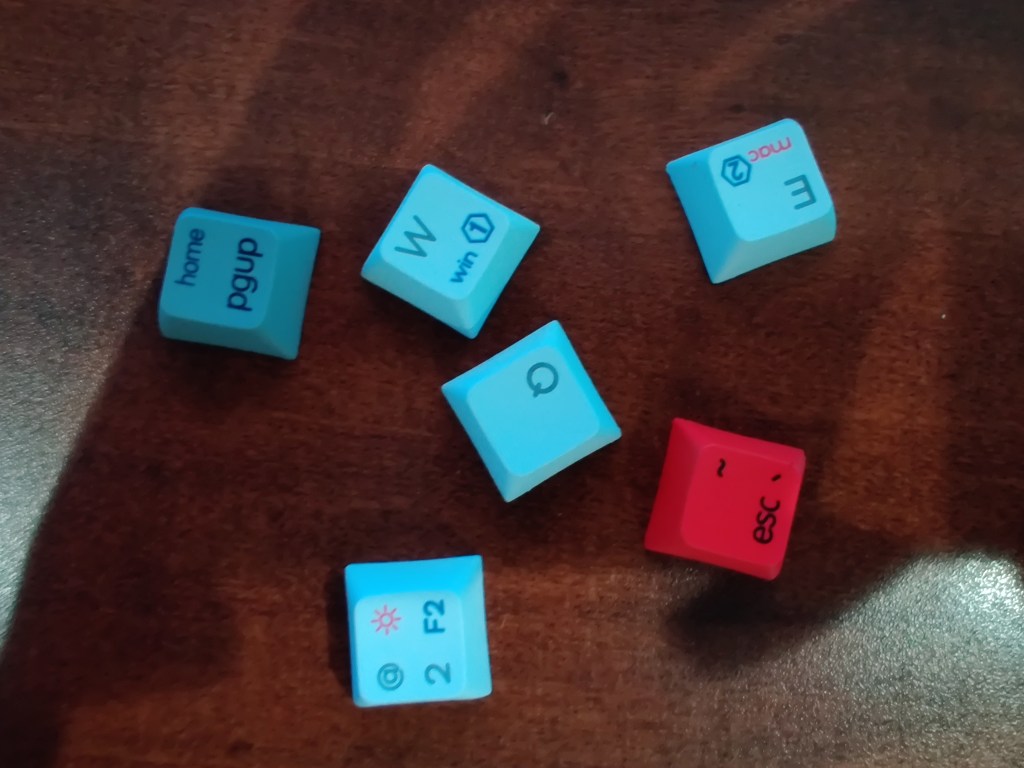
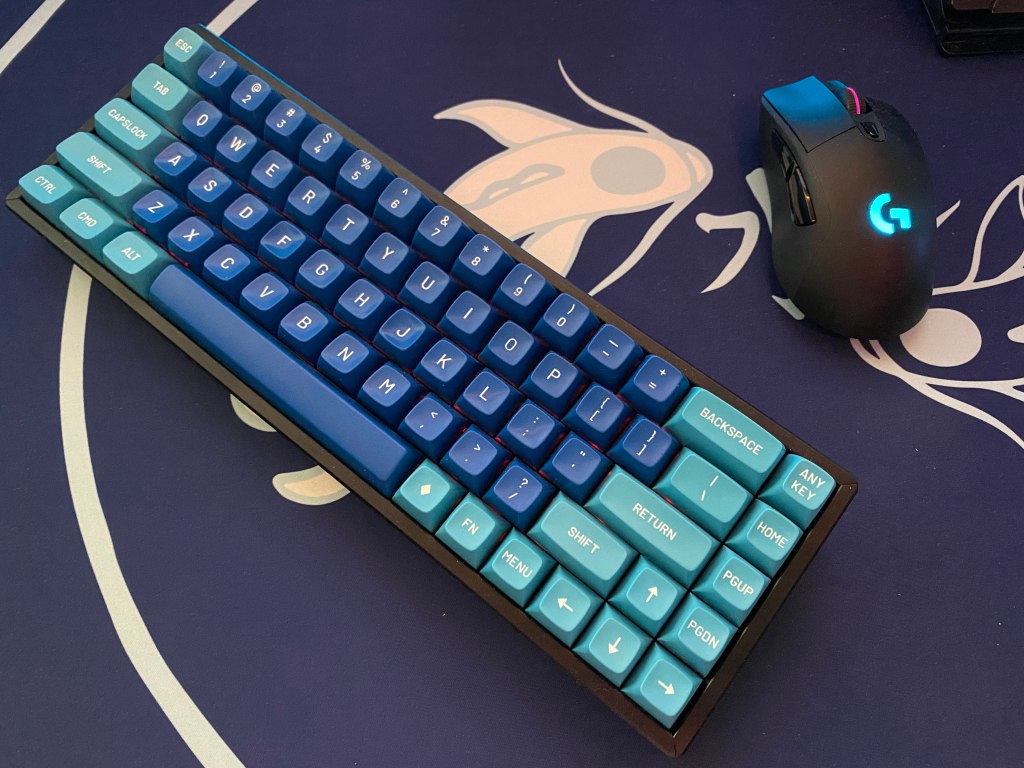
With north-facing PCBs the LEDs lie directly below the legends on the keycaps. This creates a brighter and more consistent look on the legend. With south-facing switches, the LEDs are on the bottom side of the keycaps. This means a lot of the light does not shine through the legend of shine through keycaps.

Note switch orientation has no effect on keyboard underglow or LEDs on the side of the keyboard.

This issue faces fewer enthusiasts because typically enthusiasts aren’t using shine through keycaps. On the other hand, because RGB is very popular for gaming keyboards we most likely will see large gaming brands continue to use north-facing switches in their keyboards.

Can You Change Switch Orientation On Your PCB?

Close up picture of a mechanical keyboard PCB.

So maybe you are really set on a keyboard or you have already bought a keyboard and now you want a different switch orientation to suit your preferences. The question becomes can you change switch orientation?

Unfortunately no, you cannot change the direction in which the switches are placed on the PCB. Holes were drilled in a specific way from the factory so the pins on the bottom of your switches only can fit in one direction.

There are a few solutions though. One thing you can do is get a totally new PCB. You can buy one that supports a different orientation and use that in your case instead. With this solution, not all cases accept all PCBs so you would need to research what PCBs your board supports. Some mechanical keyboards have a proprietary case design to the manufacturer or have such a unique design that it is very hard or even impossible to find a different PCB that fits the case. It is especially hard to find PCBs for high-end boards that feature north-facing sockets.

Buying a new PCB can also be very expensive so there are a few other options. If you are using a keyboard with north-facing switches but you would like to use Cherry profile keycaps you could get a few of the “box” switches that don’t face the issues of interference like Novelkey Box Cream switches. Another solution is to get special washers to raise up your keycaps so the keycaps don’t make contact with the top of the switches until the switch has been depressed all the way.

There are also switches advertised for having a long pole stem which may not have interference on some cherry profile keycaps. This is because the switches bottom out sooner so the keycap doesn’t come as close to the top of the switch. Some famous long pole stem switches include Drop Holy Pandas or Durock Pom Linears.

If you are looking for more light to shine through your keycaps and you have south-facing switches, then buying some transparent switches like some Aqua King V3 switches might give you a better experience.

Which One Is Better?

There is not necessarily a better option overall however depending on your situation, there is a better option for you.

In most cases, we would recommend keyboards with south-facing switches. The main instance that we would suggest a north-facing keyboard is if you plan to use shine-through keycaps. South-facing keycaps still allow RGB to pass through although just it doesn’t look as vibrant as it may look on a north-facing board.

If you start to get into custom keyboards odds are you will most likely use keycaps that are not shine through. There are also plenty of keyboards that have RGB underglow or on the side of the board and are south-facing.

In most cases, south-facing switches are better as they are more versatile but boards with north-facing switches still have a use case and north-facing switches aren’t the end of the world, especially if you don’t even plan to use Cherry profile keycaps.

Conclusion

Angled view of Wuque Ikki68 Keyboard on a desk.

There are two main types of switch orientation that can give you the best experience depending on what you are looking for. South-facing switches support more keycap profiles, especially ones that are popular among enthusiasts, while north-facing switches can provide the best experience for shine through keycaps.

Even if you have a keyboard where the switches are oriented in a way that doesn’t suit your preferences or inhibits your options, there are still some possible solutions like getting certain types of switches, changing your PCB, or adding washers that allow you to enjoy your keyboard as much as possible without needing to get a new keyboard.

As enthusiasts ourselves we would recommend buying a keyboard with south-facing switches unless you plan to use shine through keycaps.

If you enjoyed this guide, please check out our other keyboard guides, and if you have any more questions feel free to ask us on our Discord.

Epomaker B21 Review: Retro With A Twist

Epomaker has pioneered the budget side of mechanical keyboards making some fantastic value boards. This is no different with the Epomaker B21 mechanical keyboard that features a retro-style design. The B21 is a wireless, 65% mechanical keyboard with a few unique features to pair with its classic design.

Today we will take a look at Epomaker’s B21 to see if the retro board is the one for you.

The Verdict

Top view of Epomaker B21 mecahnical keyboard.

Rating: 4 out of 5.

The Epomaker B21 is a 65% budget wireless keyboard, perfect for those on a budget and want a retro-looking Bluetooth board. The things boasted on the B21 are dynamic backlighting, a 4000mAh battery, media keys, dials, and Mac & Windows support. Now I’ll be honest in this review, the looks definitely are not for me, but it will still attract the eye of those wanting a retro-looking board.

You get a few different switch options in the Cherry MX line, decent stabilizers, and a pretty nice keycap set for the price. The B21 is certainly a unique board and it stands out with a ton of features.

For anyone that wants a retro design, dials, and an overall solid prebuilt package, the Epomaker B21 is a great option.


In the Box

Inside the box, Epomaker gives you everything you need to enjoy the B21.

Keyboard: The keyboard comes wrapped and surrounded by protective foam to ensure that it is in perfect condition when it arrives.

USB-C Power Cable: You get a rubberized cable that seems well made and is detachable. It matches the color scheme of the board.

Manual: The manual will explain how to use the board as well as get it up and running.


Build Quality

Side view of the Epomaker B21 mechanical keyboard

With the B21, Epomaker elected to use strong plastic with this board with a smooth feel. The dials are made of metal and the media keys, although not mechanical, still feel pretty good.

The design is love or hate. The retro theme is something that definitely appeals to a certain audience but I think it is pretty decent. For some, they may really dislike the board. The use of glossy plastic, the combination of pink dials with green and off-white keycaps, and rounded edges make this board look a bit childish. This impression was confirmed when my friend’s first impression was that the board belongs in a nursery, which is quite unfortunate when you think of all the benefits it carries.

The top part of the B21 definitely makes this board taller than most 65% options on the market but the width is not any bigger than most 65%s so when for gaming you should still have plenty of mouse space. If you want something that is very portable, this board is still pretty good but there are a few other options that we may recommend like Epomaker’s GX68 XS.

The Epomaker B21 has a decent build for the price and your thoughts on the design depend highly on what you are looking for. If you are looking for a retro design, you may love this board, otherwise, you could see the board as more of a toy than a tool.

The Keycaps

Keycaps for the Epomaker B21 mechanical keyboard.

Epomaker ties in the retro theme with some off-white, grey, and green keycaps. The keycaps are made from PBT in the ASA profile. The ASA profile is a higher profile that is a bit taller than the standard OEM profile on gaming keyboards but slightly shorter than SA keycaps seen on some custom keyboards.

The keycaps are rounded and sculpted for comfort but the higher profile could take some time to get used to for those who have never experienced something similar. The keycaps feel quite smooth but due to the concave shape, they still are able to hold your fingers and don’t feel too slippery.

The legends are big and centered. Epomaker uses double-shot legends for peak quality and they don’t seem to have any major issues.

Overall the keycaps feel quite good and seem to be a pretty good profile. I do like how they tie in with the theme of the B21.

The Switches and Stabilizers

Epomaker B21 keyboard with keycaps taken off.

You can order the Epomaker B21 with a few options from Cherry. You get linear, tactile, and clicky options.

Cherry MX RedA light linear switch with a smooth travel.
Actuation force: 45 g         
Travel distance: 2 mm
Cherry MX BrownA medium-weight tactile switch with a light tactile bump.
Actuation force: 55 g         
Travel distance: 2 mm
Cherry MX BlueA medium-weight clicky switch. It has a loud sound and sharp tactility.
Actuation force: 60 g         
Travel distance: 2 mm

Cherry is known for providing some of the best switches for pre-built keyboards, especially in terms of reliability. The linear switches are not the smoothest in the world but they get the job done and are perfectly fine for those who do not have an interest in modding your keyboard. The tactile and clicky switches are great alternatives for those who want a bump in their keypress.

The stabilizers are cherry-style plate mount stabs. They were alright. They definitely stood out as being better than the stabilizers of gaming keyboards from brands like Logitech or Razer with some factory lubing applied to the stabs. The stabs won’t make this board sound amazing but are quite good for a prebuilt keyboard.

One of my biggest disappointments with the board is that it is not hotswap. This means that the user will need to manually desolder each and every switch to replace or modify switches and stabilizers. If you want to buy a keyboard and play around with it, the B21 is not the best option for that. For those that want a keyboard that does the job and does it quite well, the B21 does deliver quite a good stock experience.

Back Lighting and RGB

RGB Led lighting on the Epomaker B21 mechanical keyboard.

As of right now, there is only one color offered on the B21. The board is backlit with white lighting rather than multicolor RGB lighting. The lights are decently bright but because the keycaps are not shine-through the lighting is not that big of a deal.

A nice thing with the lights on the B21 is that you can change the brightness of the lights via the dials on top. Epomaker has not released any information yet on what, if any, software will be available for this board.

Wireless Connectivity

The Bluetooth on the Epomaker B21 is my favorite part of this board. The convenience of switching between three different devices is an amenity that is so useful and easy to use.

So let’s talk about connecting it to just one device first, and the B21 handles that perfectly, so seamlessly. It took me less time to connect the keyboard than it did to plug my charger into my phone the other day. Bluetooth can be easily controlled by the dedicated buttons at the top of the keyboard.

The B21 carries a 4000mAH battery which can get you a few weeks of use with the lighting on and if you opt to turn it off you can use it for over a month. To charge the board, there is a USB-C port, which is pretty standard. On the B21 users can opt to toggle between wireless and wired connectivity modes.

Media Keys and Dials

Arguably one of the most defining features of the B21 is the media keycaps and dials. The dials are quite a unique feature and allow you to control volume and change the brightness of the lighting.

The media keys are helpful if you are in the middle of working on something and you want to quickly change background music or stop it to focus better. I also am a fan of multimedia keys while gaming so I don’t have to tab out just to change the song.

A nice little quick feature is the ability to open the calculator with a push of a button.

Overall I think the dials and multimedia keys on the Epomaker B21 are quite useful. My only disappointment is the fact that the pink of the dials kind of takes away from this retro theme and feels a little off.

Conclusion

Angled view of the Epomaker B21 mechanical keyboard.

If you want a retro look and a solid prebuilt all at a good price the Epomaker B21 is an excellent option. It delivers good performance and packs quite a few features making it sound out in the market.

The B21 gives you dials, multimedia keys, Bluetooth, and very long battery life. The board also features pretty decent switches, keycaps, and stabilizers.

The only main downsides were the lack of hotswap sockets and the design. Although the design is very subjective I felt like it was a bit childish but if you do love that retro look then it certainly is a nice theme. As a keyboard enthusiast, I would like to see hotswap sockets at this price to allow users to change keys or modify different parts of the board to personalize the feel to their liking if they choose.

All that being said I have enjoyed my experience with the B21 and love to see unique designs like this hit the market.

Thanks for reading this article! If you want updates on our articles, and more information about tech, make sure to join our discord.

Epomaker NT68: Revolutionizing Portability

Epomaker NT68 keyboard with an iPad and mug.

Epomaker has pioneered the budget side of mechanical keyboards making some of the most well-priced and well-built keyboards ever. Epomaker are responsible for the widely popular GK61 and GK68, many other starter keyboards, and even some more higher end keyboards.

One of their upcoming releases is the NT68. The NT68 is a wireless, 65%, hotswap keyboard with a few tricks up its sleeve to separate it from the other 65% keyboards.

For transparency Epomaker did send this to us for review, that being said I will try my best to not let that influence my review. Let this just be a reminder to take all subjective things I have said (like switch feel, sound, etc.) with a grain of salt.

Our Verdict

Rating: 4 out of 5.

The Epomaker NT68 is a budget hotswap keyboard with wireless, it also features a kickstand making it ideal for laptop and tablet use. Some subjective problems like the unstandardized layout set it back a bit for me but your mileage may vary. Overall, a fun and good buy if you’re a laptop user and primarily work on the go.

Sign up for the NT68 by clicking here!


In The Box

The unboxing was very textbook; the keyboard was there wrapped in its kickstand with all the other goods in a separate divided compartment.

It came with:

  • Keyboard
  • Documentation
  • Cables – They are kind of small
  • Keycap and Switch Pullers
  • Extra Keycaps
  • Some kickstand Stuff
  • Replacement Switches

Overall, pretty good stuff. The one catch is that the cables the NT68 comes with are 3 inches long, prompting me to believe this keyboard is meant to be used wirelessly most of the time.

Cables for the Epomaker NT68.
A bit small

The Case

Side view of the Epomaker NT68 keyboard.

Starting from the bottom of the keyboard, the NT68 features a minimalistic CNCd aluminum case, which is quite nice. The quality of the aluminum is that off the Drop ALT and its brethren, like the CTRL. That being said its quite light for aluminum weighing in at 572 grams. For comparison my acrylic GK61 weighs in at about 715 grams.

The entire assembly is made from one giant aluminum block sans a removable plate at the bottom made from ABS plastic.

The mounting mechanism is integrated plate which provides for a stiffer typing experience and pingy sound. Although with how thin the top part of the aluminum is, the ping is not nearly as noticeable as other keyboards that use an integrated plate mount method.

The Keycaps

Keycaps for the Epomaker NT68 keyboard.

The unit we received came with white keycaps with gray keycaps on the modifiers and some dark red accents on the arrow keys and the escape key. Stock they have MAC modifiers but you can add windows modifiers as they are included in the packaging.

Epomaker uses PBT plastic that is semi-textured compared to other PBT keycaps. Overall, they feel quite nice and definitely will not shine up after a while.

The legends are pretty clean. They look a bit more rounded than the standard GMK font which I like since it really adds to the simplistic and modern aesthetic of the keyboard.

The keyboard features flat profile keycaps, similar to XDA except slightly shorter. It is known as GSA and is on a lot of Epomaker’s keyboards. I personally don’t really like flat profile keycaps but you may like it.

Wireless Connectivity

Be gone tangling wires, this keyboard features Bluetooth 5.1, and it’s awesome. It’s easy to connect, pretty fast, and has 6 key roll-over, meaning you can press up to 6 keys at a time.

The NT68 only randomly disconnected for me once which is pretty good compared to keychron just not connecting at all for me until I gave it a full charge.

It connects up to three devices so you can use the NT68 seamlessly between your devices as changing between the devices can be done in a matter of seconds.

To charge the keyboard there is a USB-C connector on the left-hand side of the keyboard along with an on-off switch. I am not too big on the connector being on the side but since this is designed to be primarily a take it and go keeb for laptops and tablets, it makes sense. You can also use this keyboard wired if your heart desires but I would not recommend it considering how short the cables they offer are.

The Layout

Epomaker NT68 below a Keychron K6 keyboard.
Unstandard bottom row of the NT68 (bottom) vs fully standard Keychron K6 (top)

The layout of this keyboard might make it or break it for you. I’ll say right off the bat that it unfortunately is not standard. But it, fortunately, is not too unstandard. And most 65% keycap sets will fit this keyboard.

Now what makes the NT68 unstandard is that there is an extra function key at the left-hand bottom row of the keyboard. It is a 1.25u sized key alongside 3 other 1u keycaps with the standard control, alt, and windows keys but these are 1u. And for those who are wondering, the spacebar is 6.25u so you don’t have to worry about having weirdly sized spacebars if you want to use an aftermarket keycap set.

Now, when designing really anything, there’s a reason behind all design choices. I personally think the reason for this layout change is to match most laptop keyboards. In a lot of laptops, the function key is where it is on the NT68. This is one of the primary reasons why I believe that this keyboard is designed for laptops and why it is supposed to be used on the go.

Of course, if you don’t like this change and find it unnecessary you can always use the software to change the key mappings, mapping the fn key to control, and so on.

Switches & Stabilizers

Close up of Epomaker Chocolate Brown keyboard switches on a desk.

As far as stock switches go this keyboard comes with the standard Gateron Black, Red, Blue, and Brown switches but it also comes with Epomaker’s custom “chocolate” switches. We got chocolate brown switches which are a tactile switch with similar weighting to Gateron Brown switches. They are pre-lubed with quite good acoustics and feel. Overall, a nice stock switch experience.

Of course, if you don’t like the switches then you can replace them easily with the hotswap mechanic. Thankfully it’s good old hotswap, accepts all switches unlike the Outemu sockets of the K530 and K522 from Redragon.

The stabilizers were hit or miss. Like a lot of prebuilt the pre-lube job was alright. Your mileage definitely may vary but since this is a hotswap board, modding the plate mount stabilizers is very easy.

Backlighting & RGB

The NT68 features per-key RGB which is quite bright and visible despite the keycaps not being shine through. The keyboard has a plethora of RGB modes saved on board but can all be changed via the software Ppomaker provides.

For now, a software has not been provided but when the keyboard does get launched there will be a software as said on Epomaker’s website.

The Invisible Kickstand

Epomarke NT68 being used as a keyboard for an Apple iPad.

This is the why of the keyboard. The reason you should buy it, its main attraction. It is a foldable kickstand that can hold tablets of many sorts, including phones. It can also prop up a laptop and your keyboard sits on the laptop while the laptop is raised with a bit of an angle.

Another good feature is it covers the keyboard when not in use which will more or less protect your keyboard if it’s stored in your backpack or something like that.

Overall, the feature is pretty cool. I used this keyboard at my desk mostly so I used the stand to prop the board up a bit since the stock typing angle was a bit too low for me. While I was using it on my laptop I used the stand for the same reason and not to prop the laptop up, I tried it but did not work out for me. Wasn’t my chalice of tea but might be yours.


Conclusion

Epomaker NT68 being hidden by its cover.
Stealthy

If you enjoyed this article and you want to talk more about tech then consider joining our Discord and as always thanks for reading!

Sign up for the NT68 Kickstarter by clicking here!

Are Ergonomic Keyboards Worth It?

Arisu ergonomic keyboard sitting on a wall.

If you spend a lot of time typing at your setup you may be looking to improve the ergonomics and comfort of your setup. One of the best ways to improve long-term comfort is by using an ergonomic keyboard.

Ergonomic keyboards position your hands and wrists better for a more comfortable experience and potentially better posture.

Many people consider ergonomic keyboards but understanding if getting one is worth it for you depends on your situation. Having good ergonomics is always a good thing but if you don’t spend much time typing or you spend most of your time gaming, investing in an ergonomic keyboard may not be the right option for you. In contrast, those that are at a computer typing throughout the day could definitely see comfort and even health benefits by using an ergonomic board.

So if you want to find out more and see if you could benefit from an ergonomic keyboard, keep reading to see if they are worth the investment.

Ergonomic vs Normal Keyboards

Ergonomic keyboard next to a regular mechanical keyboard.

Ergonomic and normal keyboards definitely have their differences but both have their benefits. One isn’t better than another as it truly depends on your situation.

Size and Form Factors

There are a variety of sizes and form factors with keyboards. Normal keyboards have more layouts to choose from including 40%, 60%, 65%, 75%, TKL, and full-size boards. With ergonomic keyboards, it is a little more complicated.

It is important to note that there are two types of ergonomic keyboards, unibody and split. Unibody keyboards are an ergonomic keyboard in a single case. Split keyboards usually have two parts for each side of the keyboard. This allows you to use only one have of the split board for things like gaming to safe as much space as possible.

With split style boards, you can have any layout of a regular keyboard but with unibody style boards there are 2 popular layouts. The Arisu and Alice layouts. The Alice layout is most similar to a 60% keyboard with some macros on the left-hand side while the Arisu layout is most similar to a 65% keyboard.

In general normal keyboards are smaller for the same amount of functions and there are more layouts available for them but ergonomic boards also have some very unique layouts.

Comfort Level

The biggest benefit of ergonomic keyboards is their improved comfort over regular boards. They were specifically designed to help you type over long periods.

While you are typing you won’t get pains or cramps in your hands, wrists, and arms.

Also, you may find that you have better posture or it is easier to keep good posture. This is because ergonomic keyboards support better hand and arm positioning to promote better posture. As a result, you will be more comfortable throughout your body and this is actually more healthy for you.

If you find that you game most of the time then this is one case where a regular keyboard may help you to be more comfortable. Since many gamers tilt their keyboards and you are interacting with both a mouse and a keyboard there are some reasons to go with a regular keyboard. A regular board will save space and will be just as comfortable as an ergonomic keyboard but will allow you to have more comfort with your hand using the mouse.

If you are looking for comfort but you don’t have the budget for a new keyboard then switching to a new keyboard layout could also help provide better comfort with no cost except the time to switch.

Arm and Wrist Pain

A problem that you may encounter when typing for long periods is that you may suffer from arm and wrist pains. Ergonomic keyboards are great for fixing these issues.

Since ergonomic keyboards are designed for optimal comfort and as a result they greatly reduce the effects of pains or the chance of getting them.

When talking about ergonomic keyboards RSI (Repetitive Strain Injuries) and carpal tunnel are two common topics. Ergonomic keyboards greatly reduce the chance of getting RSI and carpal tunnel by reducing the strain on your wrists.

It is important to note that if you are considering an ergonomic board because you have some sort of arm, wrist, or hand problem then a new keyboard will not be a magical fix for you. You should notice benefits to all your problems won’t necessarily go away depending on the severity of the condition.

Typing Speed

Ideally, your fastest typing speed should be similar between an ergonomic keyboard and a normal keyboard if you’re used to both types of keyboards.

This isn’t always the case. In my experience, I found that I can type fastest with a regular keyboard but I type faster for longer with my ergonomic board. Between ergonomic keyboards, you will typically type faster with a unibody board than a split alternative.

The fastest typists in the world still use regular mechanical keyboards as their primary boards. Ultimately if you just are looking for that fastest peak time a regular board still may be the option for you but if you want to have a consistently fast speed all day then an ergonomic board is something you should consider.

Price

So ergonomic keyboards have all these benefits but do they cost more as a result? For the same construction, sound, and feel, ergonomic keyboards are often priced quite well.

Ergonomic keyboards often are more expensive but that is because they are often higher-end keyboards. This is because many ergonomic keyboards are made by creators who also want premium build materials, a nice design, and a thoccy sound.

Although you can find some good value ergonomic boards, the cheapest boards that you will find are normal keyboards. Often you will pay a bit more for an ergo design compared to the regular designed counterparts, especially if looking at a membrane keyboard.

Modding and Accessories

One important factor for those building ergonomic mechanical keyboards, especially enthusiasts, is how easy ergonomic keyboards are to build, mod, and get parts for.

The difficulty of all keyboards vary but building an ergonomic keyboard should be no harder to build than a regular keyboard. Finding parts for modding ergo keyboards or parts may be harder because typically smaller manufactures make ergonomic keyboards but this is common across all limited run and high-end keyboards.

The main issue that you will run into if you are considering an ergonomic mechanical keyboard is access to compatible keycap sets.

All ergonomic keyboards have split spacebars. This means that if you are buying a keycap set you need to make sure that it supports the needed spacebars. Additionally some ergo boards also have an additional ‘B’ key or have macros on the left-hand side.

Overall it isn’t hard to find keycaps but it is an important thing to keep in mind.

Is An Ergonomic Keyboard Right For You?

Gaming keyboard next to a gaming mouse.

Understanding how you use your computer will best help you understand if an ergonomic or regular keyboard is best for you.

Developers, writers, managers, and other people who spend some if not the whole workday typing can definitively benefit from an ergonomic keyboard. An ergonomic keyboard can reduce wrist problems in the future and provide better comfort throughout the day.

If you don’t really use a computer much or don’t use your computer for work then an ergonomic keyboard may not be the best for you. Taking the time to switch to an ergonomic keyboard is especially not worth it if you find that you game more than you work.

Ergonomic keyboards are bigger than regular size keyboards for having the same layout or amount of keys. Since having more mouse space is very important for gaming using a regular board that will help give you more mouse space.

The thing is this concept doesn’t apply to all ergonomic keyboards. Split ergonomic boards can be an interesting option to consider for some gamers. Since split keyboards have two parts of the board if you play FPS games you can use only one of the two parts and have a lot more mouse room. The extra investment is most likely not worth it but it can be an interesting option to consider.

Generally, ergonomic keyboards are better for productivity and regular boards are better for gaming or those who don’t use their computer that much.

Is It Difficult To Transition?

Time

Depending on if you can get a split or unibody board it can take more or less time but will a unibody board will generally take less time. With split keyboards you not only need to get used to this new format but it may also take time to find the right placement for both halves of the board.

With a unibody board, it could take a few days to a couple of weeks while a split keyboard could take you a few weeks to even a month to get used to.

Difficulty

Since ergonomic boards have different hand placements it will feel like you are using a slightly different layout. Switching to an ergonomic keyboard isn’t very hard to get used to but time is the main issue with the transition process.

In general, you should not be worried about the difficulty in transitioning to an ergonomic keyboard as the end result will be well worth it.

Different Types Of Ergonomic Keyboards

If you are looking for an ergonomic keyboard, there are two options to consider. Unibody and split.

Unibody

Angled view of a unibody ergonomic keyboard.

The first type of ergonomic keyboard is the Unibody style. Unibody boards are the easiest to get used to and typically the cheapest options.

A Unibody style board is just one board that is together, as the name suggests. This means that you can get an ergonomic experience without the complexity of a split keyboard. The ergonomics may not be as great as a split keyboard but they will still be superior to the comfort of just a standard keyboard.

If you want something clean and simple while still getting a comfortable experience then a unibody board is the option for you. Unibody boards are all in one package which means you don’t have to worry about cables between different parts.

Split

Top view of a split ergonomic keyboard.

The other style of ergonomic keyboards is the split layout. A split style keyboard has more customizability in the sense that you can move each side around but this comes at a cost. Typically split keyboards have another set of wires that you have to deal with between both halves. Also, split keyboards are often harder to get used to.

Some split-style keyboards can be combined back into one regular board but these often sacrifice on looks for this extra function.

In general, a split keyboard will sacrifice looks but will give maximum comfort. Since you can adjust a split keyboard to your liking, if you are looking for the best comfort then a split board will best suit you.

Conclusion

Side view of an ergonomic keyboard.

Switching to an ergonomic keyboard is a fantastic way to improve your comfort while working. They can solve pains, reduce the chance of long-term problems, and promote better posture. Problems such as carpal tunnel or RSI can be greatly reduced.

While ergonomic keyboards have these benefits, normal keyboards still allow for slightly faster typing speeds, are more available, support many more sizes and layouts.

There are a few different styles for ergonomic keyboards to choose from depending on what you do daily. With Unibody and Split keyboards and a few different layouts for each type of board, there is something that will suit you.

For additional ergonomics, tips check outย some home office tips from the University of Washington.

Are Colemak or Dvorak Worth It?

Mechanical keyboard with Colemak layout next to keyboard with QWERTY layout.

QWERTY, the common keyboard layout that everyone is used to. If you have grown an interest in keyboards then you may have heard about some other keyboard layouts such as Colemak or Dvorak.

Using any of these alternative keyboard layouts has a variety of upsides but is switching to something like Colemak, Dvorak, or any other layout worth taking the time and the struggle to rewrite your muscle memory?

Using an alternative layout can provide many benefits. By switching you could notice an increase in typing efficiency, comfort, and ergonomics. The time that it takes to switch can be especially beneficial if you spend a lot of time at a computer.

Today I will answer the question if alternative keyboard layouts are indeed worth it and add in a bit of my own personal experience trying one of these different keyboard layouts.

The History of QWERTY

When typewriters were created, the people designing them realized a problem. Typewriters would jam if the keys were in alphabetical order. The designer of the QWERTY layout, Christopher Sholes fixed this problem by splitting commonly used letter pairings, for example, ‘S’ and ‘T’.

This layout became the new standard and even as computers started to become popular, nobody questioned the layout that was in place. Everyone was already used to the layout and it wasn’t causing enough problems to make large corporations change their designs.

Some people tried different designed different keyboards but they never caught any traction.

Colemak, Dvorak, etc.

Picture of the Colemak Layout for keyboards.
Colemak Layout

Although different variations of QWERTY were created for different languages like French or German, those edited layouts were still relatively the same.

Next comes the most popular alternative layouts being Dvorak, Colemak, and then Workman. There are many other layouts besides these three but these layouts have the biggest communities and are significantly more popular than many of the other layouts out there.

All three of these layouts were created to be more efficient, ergonomic, and comfortable to type on than QWERTY. Many people switch to these layouts for these benefits and can especially appreciate the comfort over the long term. Additionally, because these layouts are more efficient they should make it easier to type faster for longer. This isn’t necessarily true because most of the fastest typers still use QWERTY.

The Dvorak and Colemak were designed to make your fingers use the home row as much as possible and as a result, this means that your fingers do not need to dance around the keyboard as much. Workman takes a different approach as it works to balance the amount of use between both of your hands.

The goal of these layouts is to make your fingers only move as much as they need to and to minimize the time of travel from one keycap to the next. Theoretically using any of these layouts should be faster than typing on QWERTY with the same amount of experience but it is difficult to truly test this.

Is It Worth It To Switch?

Making the decision to switch from QWERTY entirely depends on you and your situation. For most people, you may find that you have no problems with typing and you see no need to make any changes. Others may be enticed by the improved efficiency and comfort. Trying out a different layout also makes for an interesting test.

Switching to something like Colemak could improve long-term comfort throughout the day and could help with faster-sustained typing speeds. This benefit could be worth it for those who spend a lot of time at a computer or typing but for the everyday person who only uses a computer for basic internet browsing, emails, or gaming changing will not be very beneficial.

All in all, you should do what is most comfortable for you and those who use their computers a lot will see the benefits over the long term.

Which One Is Right For You?

Dvorak, Colemak, and Workman all have the same objectives but some differentiating factors may help your decision.

Dvorak is often considered to be the most efficient of these layouts. Also because Dvorak is the most popular alternative to QWERTY it has built-in support in major operating systems like Windows and macOS.

With Colemak and Workman, you may still need to download them. If you use Windows for example you will need to download Colemak here and Workman here on their respective pages.

Colemak functions similarly to Dvorak by focusing on home row usage but is arguably the easiest to learn out of the three. Colemak is the most similar to QWERTY with a bottom row that is almost exactly the same. Additionally Colemak is great if you use functions like Ctrl + C and Ctrl + V. While Dvorak and Workman support these functions, the keys will be in different places and may feel less natural.

Finally, Workman focuses on evening usage by both hands. Workman fixes problems that even Colemak and Dvorak have of placing commonly used keys close together. Workman sacrifices a bit on efficiency to maximize comfort.

Ultimately all these layouts are good and there isn’t really a wrong decision.

What Do I Use?

In December of 2020, I decided to try using Colemak and I eventually made it my primary layout a few months later. Since then I have still continued to use QWERTY in some situations and I have experience using both layouts on all types of keyboards.

So why did I decide Colemak? Well, Colemak does provide some unique benefits over Workman and Dvorak. While all these layouts are more efficient and comfortable to use than QWERTY, Colemak keeps key functionality. With Colemak you are able to keep macros like Ctrl + C and Ctrl + V to copy and paste in the same place on your keyboard.

Additionally Colemak is most similar to QWERTY out of the three while still providing noticeable improvements. While switching to Colemak was difficult initially, I am very happy with my choice and it is a great option for those who use layered functions on their keyboards or want something that is a bit easier to transition to.

Transitioning

Typing test picture from monkey type with typing speed of 91 WPM.
Typing test on Monkeytype

The biggest issue about switching your layout is the time and difficulty to transition. I found that transitioning personally was very difficult for the first month or two so I only used Colemak during typing tests and times when I could type slower.

If you aren’t someone with much free time and are completely fine using QWERTY then there isn’t a very important need to switch. Otherwise trying out a new layout can not only be a fun test but you may actually find that you prefer it over QWERTY.

In my experience, I was able to switch to Colemak as my main layout after about three months but it took a bit more time to reach my previous typing speed.

The transition may take longer or shorter depending on how much you are willing to spend learning the layout and practicing. While learning the layout you may also not like the fact that the keys on your keyboard will not match your new layout. If you use a mechanical keyboard there are some keycap sets that you can buy that support Dvorak, Colemak, Workman, and a few other alternative layouts if this is a deal-breaker for you though.

Learning the layout without being able look at your keyboard is actually a good habit to start because you will learn touch typing and will be able to type faster in the long run.

End Result

A typing test on monkeytype being taken.

After taking time to transition you will continue to build up muscle memory and confidence. Typing with the new layout will be totally normal and you may even be able to type with the layout without ever needing to look at your keyboard.

After about 6 months I was able to match my old typing speed with QWERTY (120-140WPM). I was able to type faster, for longer too, as my fingers would not get tired as quickly.

This actually more efficient because you are able to type faster for longer. I also noticed that using Colemak all day led me to know problems but using QWERTY all day would leave me typing a lot slower later in the day and some people may experience fatigue too.

Conclusion

Mechanical keyboard with the Colemak layout.

Although it isn’t a must, switching to a new keyboard layout can have many benefits. While the change was not life-changing for me it has still allowed me to type faster for longer periods and has improved comfort over the day.

Trying out a new layout like Colemak or Dvorak can be a very interesting test and you may find that you like it for QWERTY. For those who are interested in keyboards or spend a lot of time typing, trying one out could definitely benefit you. Otherwise, for those who mostly game, check emails, or browse the web the QWERTY layout works perfectly fine, and transitioning may not be worth it.

I have never felt the need to go back to QWERTY. Even when I needed to go back to it at times, like when using different keyboards or computers, I found that I noticed a lot more flaws in the layout than before using Colemak.

I hope this article was beneficial to you and if you want to see more keyboard content, check outย our keyboard page.

Is Ray Tracing Worth It?

As new hardware comes out, new graphics technologies develop. The newest leap is ray tracing, made mainstream by Nvidia’s RTX graphics cards.

Now that most modern GPUs are integrating the technology and games are starting to add support, let’s see if Ray Tracing is actually worth it.

Ray Tracing vs Rasterization

CC: Nvidia

Ray tracing may be new and exciting but what came before it? Rasterization is the current norm for graphics in video games.

Rasterization creates a 3D environment by processing polygons. The polygons are then processed by a shader to make up a specific color and shade. These polygons get turned into pixels. All the colors and shades are decided by parameters that the game developer has set up.

Ray tracing on the other hand directs lines from the light source in the game and calculates how light bounces off objects or gets impedes by them to show where the lighting would go. This makes effects a lot more realistic.

While rasterization can look very good, there is a lot less potential. Ray tracing can portray how different objects affect lighting around a room but rasterization cannot. For example, with ray tracing, if you have a very reflective material, then the light will bounce off that material onto other things. In contrast with rasterization that material may look metallic but still will not have any effect on anything else in the environment.

Additionally, ray tracing requires fewer initial parameters to be set up by game developers. Ray tracing uses realistic lighting physics which means developers do not need to make many calculations to suit their specific game environment and physics can be more consistent across games.

Does Ray Tracing Improve Your Gaming Experience?

Screenshot of Call of Duty Warzone with ray tracing enabled

Although ray tracing does provide some eye candy, how much does it improve the gaming experience and will enabling it make you a better gamer?

The main takeaway about ray tracing is that it most likely will not make you a better gamer. The whole point of ray tracing is the improvement in graphics.

Real-time ray tracing provides no improvements in games like competitive shooters but in some games, the improvement in shadows and reflections may help you to see things that are off your screen.

Where ray tracing improves your experience is in the actual looks and immersion. Better graphics can help you get sucked into the game, especially when you are in a campaign or story game that gives you time to enjoy eye candy. You are able to appreciate your environment more as ray tracing makes games look more realistic.

A graphic increase is often able to transfer a game like Minecraft with RTX which keeps the same core concept and physics but the gameplay is altered.

If you do not care about graphics or only play online competitive shooters such as CS:GO or Valorant then ray tracing wont benefit you.

Too Early To Invest?

Steam survey from april 2021
Steam Survey April 2021

One of the biggest criticisms about ray tracing is the lack of games that support the feature. Currently, there are around 40 titles with 10 to 20 more that are said to release in 2021. All these titles fully support ray tracing with Nvidia’s RTX GPUs but the same cannot be said about AMD. AMD supports a decent amount of these games but the performance is not that good on most of them or the creators worked on DXR for AMD as an afterthought.

Some games that feature ray tracing are Battlefield V, Cyberpunk 2077, Fortnite, and Metro Exodus. If you want more information about different games that support ray tracing, check out this list from Wikipedia.

The experience with Nvidia’s graphics cards is pretty good, especially with their DLSS technology, which optimizes the onscreen image to look the same while putting less load on the GPU. You can get 60 fps at 1080p on any of Nvidia’s RTX cards but if you want to play at a higher resolution then you have to pay for a better RTX card.

The issue is that to get a quality high refresh experience, you still need to pay quite a bit of money if you want to play at any resolution higher than 1080p. This also assumes that you are able to even get a graphics card in this current climate.

We would not recommend waiting to get a graphics card just because you want an RTX card from Nvidia but in the coming years, many of the most popular games will support ray tracing. Getting a system with the hardware to support ray tracing is not necessary yet and we would not say that it is too early to invest, especially if some of your favorite titles do or will not gain support soon.

Ray tracing is a great feature for those who care about graphics. If you want to future proof then getting an RTX card or a next-gen console is your best bet.

Ray Tracing Beyond Gaming

Unreal engine logo

Ray tracing is not just for gaming. Ray tracing has been used for years in professional situations. For example, many animated movies use ray tracing. It has especially gotten popular for 3D modeling, rendering, and movie animation in recent years.

As ray tracing has become more popular smaller creators and studios have been able to use ray tracing. This is causing it to continue to grow in the professional space. Not only will games start to look more realistic in forms of lighting and reflections but the same will also apply to animated movies and renders.

Additionally, ray tracing has grown very popular in the world of game development. Game engines like Unity or Unreal Engine are making it easier for smaller game developers to make games that have better-looking graphics.

Overall this all helps movie and game developing industries forward as smaller creators are starting to be able to work with ray tracing.

Different Implementations

Inside of gaming PC with an RTX graphics card

Although Nvidia started the movement towards real-time ray tracing, they now have other competitors. Aside from Nvidia’s 20 and 30 series GPUs, AMD has their 6000 series GPUs, and then the next-gen consoles from Sony and Microsoft also have their own implementations.

Nvidia has their RTX implementation that works with DLSS rather than AMD that uses the universal standard DXR. While both can look the same, Nvidia’s system works with more games and runs faster. This is partially due to the fact that DLSS improves the framerate of games.

Sony’s PS5 and Microsoft’s Xbox Series X also support ray tracing and due to great optimizations, the performance is pretty good for the price.

Overall Nvidia still does ray tracing the best.

Conclusion: Is Ray Tracing The Future?

Top view of PC with RGB fans

To put it shortly, ray tracing is the future.

This is just the beginning of a new wave. The benefits to graphics are great for the consumer and with all this tech going mainstream it will only push forward innovation. Games will look a lot better in the future and with the easy access to enable it in game engines now, many indie games or titles may be able to have ray tracing.

It is important to understand that the tech is not perfect right now and it is not everywhere. Many games do not have all the elements of ray tracing as they may only support ray-traced shadows or reflections for example. Ray tracing is constantly improving to look and run better.

Over the next, five to ten years is when we could start to see ray tracing properly replace rasterization. During this time hardware will also improve greatly as companies like Nvidia have made large strides towards their RTX tech.

If you enjoyed this article and you want to talk more about tech then consider joining our Discord and as always thanks for reading!

Epomaker GK68XS Review: Features, Performance, and A Great Price

Are you looking for a keyboard with a ton features and a great value. Epomaker’s GK68XS is a 65% mechanical keyboard that is packed with features like Bluetooth connectivity and a hotswappable PCB.

Today we will take a deep look at Epomaker’s GK68XS and see if it is right for you.

The Verdict

Top view of the Epomaker GK68XS mechanical keyboard
GK68XS with a custom keycap set

Rating: 4 out of 5.

The Epomaker GK68XS is a great value keyboard for those wanting to join the custom mechanical scene without spending their life savings. For the price, it is one of the better 65% keyboards you can get coming with a whole host of features such as Bluetooth and a hotswapable PCB.

You also get a variety of switch choices, pretty decent stabilizers, and a decent keycap set.

For anyone wanting to start modding their keyboard but don’t want to give up the arrow keys with a 60% board, Epomaker’s GK68XS is a great option.


In The Box

The Epomaker GK68XS is packed with things in the box. Besides the keyboard, inside you will see:

USB-C Power Cable: You get a braided cable that is well made and is detachable. The cable does the job and looks pretty decent.

Split Spacebar Module: This can be swapped with the big spacebar to allow 3 buttons rather than just one. Changing it in and out is as simple as removing 3 screws.

Extra Keycaps: In addition to the keycaps already on the board there are a few extra keycaps for things like a split spacebar, mac specific keys, and for alternate modifier keys.

Extra Switches: If you use the split spacebar there are some extra included switches. They will be the same kind of switch as the rest of your switches.

Keycap and Switch Puller: A wired keycap puller is included. It is better than the cheap plastic one that many companies throw in the box. The wire puller won’t scratch your keycaps. The keycap puller also functions as a switch puller on the other side so you can swap out the stock switches for anything of your choice.

Manual: The manual will explain how to control the RGB lighting, where to download the software, and how to control the secondary functions and shortcuts on the board.

The board has tons of features and it gives you everything that you need to make the most of them. It is very nice to see at a board at such a good price.

Build Quality

Side view of the Epomaker GK68XS mechanical keyboard

The build quality is adequate for the price with a plastic case with a tilt for more comfort. It is quite simple which I appreciate and has a nice angular design to the case where it tapers down. There are also acrylic and aluminum versions of this case albeit at a much higher cost.

In my opinion, it looks nice however, it has a hollow sound. This is especially bad when you press the space bar since there is some reverb in the sound. If you get this board I’d highly encourage you to put some foam. It is a quick mod that takes about five minutes and makes it sound so much better.

At the back of the case, it has an indented USB-C port. This is quite nice to see because many budget boards still have not switched to USB-C or allow a detachable cable at all.

On the bottom, four rubber feet keep the board from sliding around too much however there are no flip-up feet so you cannot adjust the height. This is not too much of an issue because the case is already at a comfortable height.

The Keycaps

PBT DSA keycaps for the Epomaker GK68XS mechanical keyboard

Epomaker’s GK68XS comes with a pretty nice set of PBT keycaps in the GSA keycaps profile. The legends are dye-sublimated for long-lasting quality. There are also a few extra keycaps in case you want legends for mac or you want to use the split spacebar.

PBT material means that the keycaps will not develop a shine over time. They have a slight texture to them so they are easier to grip onto.

The GSA profile has a uniform height among the keys and is a pretty low profile. There is a slight curvature in the center of each keycap so they mold to the shape of your finger. These keycaps are quite comfortable to use but may take a couple of days to get accustomed to.

The Switches

Gateron Black mechanical keyboard switch

You can order the GK 68 XS with a variety of Gateron switches. You get linear, tactile, and clicky options.

Gateron Red
A light linear switch with a smooth travel.
Actuation force: 45 g         
Travel distance: 2 mm
Gateron BlackA heavy linear switch with a smooth travel.
Actuation force: 60 g         
Travel distance: 2 mm
Gateron BrownA medium weight tactile switch with a light tactile bump.
Actuation force: 55 g         
Travel distance: 2 mm
Gateron BlueA medium weight clicky switch. It has a loud sound and sharp tactility.
Actuation force: 60 g         
Travel distance: 2 mm

Gateron provides some of the best switches for pre-built keyboards. Their linear switches are often smoother than the competition and their tactile switches have a slightly more noticeable bump than Cherry options. Also since this board is hotswap, you can just change out the switches if you want to.

The Stabilizers

Stabilizers from the Epomaker GK68XS mechanical keyboard

With the GK68XS you will find minimally lubed plate mount stabs. Stock they sound rattly and are a bit scratchy but they have quite a bit of potential if you are willing to mod them.

Stabilizers are very important to how a board sounds and in this case, the GK68’s stabilizers are much better than boards from bigger gaming brands such as Logitech or Corsair.

We found that after making some mods to the board by lubing the stabilizers and adding foam to the bottom of the board helped the stabilizers feel quite smooth and not sound nearly as rattly. If you want that perfect sound for your stabs we would recommend going with some better plate amount stabs from either Durock or Novelkeys for a better experience.

The Software

Although the GK68 does have software support, it is one of the weaker areas of the board. The software does provide useful functionality but it is complicated to use. It took us some time to understand the software. We found that the interface is not that easy to work with or nice to look at.

While the software does have some issues, it provides a ton of functionality. If you want to remap buttons or have more in-depth lighting then this is the way for you.

In our experience, we found that we did not need it that much as most functions like changing lighting or using a macro can be enabled with a simple key combination but having dedicated software is very nice to see.

RGB Backlighting

Top view of the Epomaker GK68XS mechanical keyboard with RGB lighting on

The GK68 XS features per-key RGB backlighting with a variety of onboard presets. You can change them using different key combinations or via the software.

The onboard solution is a quick way to change lighting but if you want more control the software provides tons of options. It is important to mention that using the software will take some time to understand.

The only issue I faced was that there is seemingly no combination to make a static color unless you want a simple white backlight. I figured you can change to the color-changing mode and just pause it on the color you like but I would have still liked a dedicated key combination.

Hotswap PCB

One of the most exciting features about this board is the fact that it features a hotswappable PCB. This means that you can change out the switches without needing to solder any switches. It takes just a few seconds to replace a switch.

The PCB supports both 3 and 5 pin switches and it is north-facing. This means that the keyboard supports switches from most switch manufactures including Kailh, Cherry, and more. The fact that the sockets are north-facing means that there could be interference with Cherry Profile keycaps.

A hotswap PCB is great for those who want to mod their keyboard to make it sound or feel better. They are also great for those who may want to try different switches.

Bluetooth Connectivity

Another exciting feature of the GK68 XS is Bluetooth 5.1. You can connect up to three devices. With the 1900mAH battery, you can get a day or two of use out of it depending on if the lighting is on and how much you use the keyboard.

The latency is quite good but I did sometimes notice a delay when playing video games or typing very quickly. In most cases, this is not an issue and I found the connectivity to be quite good.


Conclusion: Should You Get The GK68XS?

Angled view of the Epomaker GK68XS mechanical keyboard

If you heavily rely on arrow keys and want a good value board the Epomaker GK68XS is an excellent option. It delivers excellent performance and tons of features.

For the price, it comes with some good options such as Bluetooth and hotswap sockets which just makes modding and using the board a lot more convenient. The board also has great switches, keycaps, and stabilizers considering the price and the competition.

The main downsides are the plastic case which, unfoamed, sounds quite hollow, and the north-facing switches, causing interference with cherry profile keycaps. There are other boards that may address these issues but if you want a board now and do not want to wait months for a board to arrive or you prioritize Bluetooth, this is a fantastic option.

If you are interested in the Epomaker GK68XS, consider checking it out on Amazon for a great price.

As always thanks for reading and if you are interested in more keyboard content check out our keyboard page.

Please join our Discord if you have any more questions.

Are Headphone Amps Worth It?

If you have started learning more about audio and if you want to invest in a more premium audio setup, one of the things you have come across is headphone amps.

Headphone amps are one of the best ways to improve sound quality. In many cases, amps are required for specific headphones or speakers. Amps deliver extra power to your headphones or speaker, often helping to bring out sounds that were recessed and lacking before.

Let’s explore how amps benefit an audio setup and if getting one is a worthy investment for your headphones.

Do Headphone Amps Improve Sound Quality?

Headphone amp with open back headphones

A headphone amp is a device that amplifies the volume of sound coming from a DAC, a component in all devices that processes the digital signal from a computer and converts it into an analog signal that headphones can use. An amp can take the form of either an external device or a part integrated into your computer. The addition of power that is also cleaner can improve the sound quality of your headphones.

Compared to an integrated solution, a dedicated amp provides more power so your headphones are able to work the best they can. Additionally, if you find that you are using most of the volume scale when listening to things then an amp will give you much more headroom, fixing this issue.

Amps do not do much to improve the clarity or accuracy of the sound but the additional power improves the quality of the sound in other ways. The extra power that an amp provides could help sounds that were once muffled or recessed to be able to reach their full potential.

Another issue that amps fix is distortion. The integrated audio solutions in computers or phones can cause distortion at high volumes. Since amps process sound better this is less of an issue.

It is important to understand that an amp will not always improve audio. If you are using a cheap pair of headphones then you will notice no improvement. On the flip side, some headphones need an amp to function properly. There are many headphones, often in the $100 to $300 range, that are efficient enough that they do not require an amp but could still see some gains.

An amp should not change the sound signature of your headphones but give them the power to have their correct sound signature. Tube amps or amps with EQing built in can make changes to the sound.

Overall amps do improve sound quality.

Is An Amp Necessary?

Headphones on branch outside

Headphone amps can improve your audio but in some situations, they are not a worthy investment. If you use headphones that do not need more power or cleaner power then an amp would just be a waste of money.

Something like a pair of cheap earbuds or bluetooth headphones will not see a benefit from the extra power. In contrast, if you use high-fidelity headphones, often costing anywhere from $200 to upwards of $1000, then you often need or will heavily benefit from an amp.

Some headphones do not need an amp but could see a slight benefit from one. In this case, we wouldn’t recommend getting an amp if you are on a tight budget although it could give you a slightly better experience.

To understand how efficient your headphones are there are two things you need to look at. First sensitivity, which shows how loud headphones can get with a certain amount of power. This is usually measured in dB/mW. Second impedance, which shows how much power the headphones need. It is typically measured in ohms.

Headphones with an impedance of 32 ohms or less and sensitivity of 100 dB or more usually do not need an amp. As you get to headphones that use 60-80 ohms or more and sensitivities of 95dB or less, you will notice that many of these headphones need an amp. It is important to look at both factors and read reviews as the necessity for an amp depends.

Another factor is about how much of your volume range you are using. If you need to turn up your volume to 70 to 100% volume, then an amp may benefit you. You will get more headroom for volume and an amp will take away most distortion that integrated audio solutions create at high volumes.

Most modern computers have a decent integrated sound card with an amp so getting a dedicated amp is only important if you are investing in premium headphones. If your current headphones will not see a benefit from getting an amp, then getting new headphones is usually the recommended option. A dedicated amp is just a recommended option if you need or want more power for your headphones.

How Does A Headphone Amp Work ?

Headphone amp with some IEMs on top

An amp’s purpose is to take a very quiet, low-power audio signal from a DAC, and increase the volume of that signal. Then the headphones or speakers will be able to turn this information into sound waves.

Without an amp, either integrated into a computer or as an external device, your headphones would not be able to create any sound for you.

A dedicated amp will provide more power and volume for your headphones than integrated solutions. The better an amp the more power it will be able to provide. Additionally, better amps will give cleaner power to your headphones resulting in a cleaner sound. Cheap amps often have distortion in the sound at higher volumes.

Amps have three core parts to how they work. There is the input, the amplification components themselves, and finally the output. There are two ways that the amplification process works work.

  • Solid State/Transistor Amps: These amps use, as the name implies, transistors to amplify the signal given to them. Inside there will be multiple positively or negatively charged transistors that are calibrated to boost the sound in a way that is as clean and efficient as possible.
  • Tube Amps: Tube amps instead use vacuum tubes surrounded by glass. They function similarly to lightbulbs by burning electrons from a filament to instead of creating light, amplify sound. Tube amps can be compared to record players that provide a more fun sound that modern tracks on software or CDs replace with a very clean sound. There is a sort of warmth adding to the bass. As a downside sometimes the glass of the tubes can cause some negative effects on the sound if you are using more sensitive headphones with a less premium tube amp.

In the end, the function of an amp is to increase the volume of the information coming from your audio source, for example, an external DAC or your PC. It does not matter if it is a tube amp or solid-state amp, the end goal is the same.

Different Kinds Of Amps

Top view of GSX 1000 DAC

Although amps can control the power in different ways, transistors or tubes, there are different kinds of amps to look at depending on your situation.

  • Regular Headphone Amp: This is the standard type of headphone amp.
  • Gaming Amp: Gaming amps function similarly to regular headphone amps but usually prioritize features that gamers would appreciate like a mic input and virtual surround sound.
  • Portable Amp: These are great for situations where you want to drive high-quality headphones on the go or if you want a powerful amp in a small package. Portable amps are often designed to fit in your pocket and are a great option for those who want to use premium IEMs while out or if you want an amp between your office and home.

Finding what is right for you is the most important thing in this case. For most people, a regular headphone amp will do the job. There are some cases where a gaming amp or portable option may suit your general needs more.

Conclusion

Front view of Topping DX3 Pro amp and DAC combo

Amps are beneficial with trying to improve the sound quality of your headphones, IEMs, or speakers and in many cases, they are even necessary for them to run properly. Sounds that were previously recessed, distorted, or not even present will be more significant and apparent.

You should also consider if an amp is worth it in your situation. You will not notice a difference with an amp with a sub $100 pair of headphones or the cheap earbuds that came with your phone.

It is also important to note that most people will not notice a substantial difference by getting an amp. This is because most people do not use power-hungry headphones or are not very bothered by worse audio quality.

For those who want a more premium sound and may be using more powerful headphones, an amp is a more worthy investment for them.

You also do not need to spend alot of money on an amp. You can find options for about $100 that give great performance up until you are spending upwards of $500 on headphones. Just note that you should always prioritize the headphones in your budget but always consider an amp if your headphones need that extra kick.

Additionally, if you are creating a setup with high-quality headphones and you are getting a headphone amp, you may want to consider a DAC to provide a cleaner, more accurate sound that could also benefit your sound experience.

I hope you enjoyed and as always thanks for reading!

If you have any questions please join our discord and feel free to ask anything.

Redragon K552 Review: The Best Budget Mechanical Keyboard

So you want a mechanical keyboard, but the market is littered with options that either break your wallet or just seem too good to be true.

The Redragon K552 is a gaming mechanical keyboard that is great for the budget buyer who wants the satisfaction and performance of a mechanical keyboard without breaking the bank.

By the end of this article, you will get full clarity on one of the most popular budget mechanical keyboards, and if its low price point is the only benefit of the K552.

The Verdict

Top view of Redragon K552 mechanical keyboard

Rating: 3.5 out of 5.

The Redragon K552 is a TKL sized board. That means it is basically a full-sized keyboard, but it does not have a numpad. Redragon gives you a mechanical experience for a very cheap price. You do not get the nicest keycaps, stabilizers, or build but the raw performance is what makes this board a compelling offer.

When buying the K552, you have two switch options. You can either get linear Outemu Reds or clicky Outemu Blues giving the buyer a couple of different options to suit their preference.

Now we knew coming into this review that for such a low price point, sacrifices were going to be made, but is that enough to overlook those many faults in the keyboard?

The fact that you get this for such a low price is great and for those who want to get into the world of mechanical keyboards or just want to upgrade their gaming setup then this is a great option for you.


In The Box

In the box, you do not get very much. You just get the keyboard along with some documentation. The board comes with a keycap puller, but unfortunately, no switch puller to help users take advantage of the Outemu hotswap. No extra keycaps or stickers, just everything that you need.

It might seem pretty bland, but at the price point, it is expected.

Build Quality

Angled view of Redragon K552 mechanical keyboard

So the K552 has a bit of a cheap feel to it. It sports a plastic, rectangular case, but does have an aluminum plate. The bezels are quite thin and the paint job feels a bit cheap. Unfortunately, the board does not come with an aluminum build.

Arguably the worst thing about the build is the logo. The logo is on a riser piece that looks quite obtrusive in my opinion. If it bothers you many people have erased it with a regular pencil eraser but it can take upwards of ten minutes to fully get rid of it.

The case does have two kick-up feet for one level of height adjustment.

The board does not have anything else to it, like a USB-C input, a Bluetooth toggle, or a robust aluminum build. If these features are important to you, perhaps you may be interested in the more expensive Redragon K530, which has a USB-C connection and Bluetooth.

The K552 is only sold in the tenkeyless (TKL) size, but if you are interested in a smaller board with less functionality then the Keychron K6 in the 65% form factor is a great option albeit at a much higher price.

The Keycaps

Keycaps of Redragon K552 mechanical keyboard

The K552 features OEM profile keycaps made from ABS plastic. The keycaps develop shine from body oils very quickly. This is because of the use of low-quality ABS plastic. Additionally, the keycaps are very thin.

The OEM profile is the standard among pre-built mechanical keyboards. The keycaps are contoured to match the shape of your hands. Since this is similar to most pre-built mechanical keyboards, if you have used another in the past then there should not be a transition period.

The legends are quite thick and are shine through allowing a lot of the lighting to go through. There are also many inconsistencies in the legends that once you see, you cannot unsee.

The keycaps are one of the weak points of the board. It would have been nice to see PBT keycaps or slightly better legends but for the price, this is expected.

The Switches

Outemu Blue switches for mechanical keyboard

The K552 is sold with an option of two different switches, linear Outemu Reds and clicky Outemu Blues. The Reds will have a smooth travel all the way down and the Blues will have a slight tactile bump along with an audible click when the switch activates.

This is all preference so if you do like the blues then there is nothing wrong with that or you can go with the red switch option.

On my board, I have the blues. They feel a bit worse than Cherry switches. It is also worth noting that in an older version of the board we did have problems with one of the switches sometimes not working but this was after it a couple of years of extensive use of the board. Although this is all true mechanical switches are typically more reliable than your standard membrane keyboard.

In my opinion, the blues are not very good. They are very very loud, pingy, and scratchy. However, on the plus side, the board has Outemu hotswap. So what this means is that you can remove all your switches with a switch puller, and replace them with other Outemu switches. If you want to put in any other switches, you will have to disassemble the board and desolder the switches from the board.

I put some new, better switches into the board and although it took some time, it totally transformed the board. Opting to go with the stock switches will be fine for most and what you are getting is good considering the price. Most keyboards at this price are not even mechanical so they will have a worse feel and performance.

The Stabilizers

2u stabilizers for a mechanical keyboard

Stabilizers often have a big effect on how a keyboard sounds and the K552’s stabilizers are pretty mediocre for a prebuilt keyboard. Redragon has opted to use Cherry Style plate mount stabs that are not factory lubed, which disappointingly gives the keys a rattly sound upon pressing and of the big keys like space or shift.

The sound and feel will also change based on what switches you use. Clicky switches will block out a lot of the rattle from the stabilizers while linear switches could make rattle or ping more obvious.

The stabilizers are what you would expect for this price but there are ways you can improve them. If you are willing to take some extra time and spend about five to ten dollars you can make your stabs sound a lot better if that is a concern for you.

The Backlighting

Top view of Redragon K522 mechanical keyboard with red backlighting

The K552 comes with onboard RGB which can be customized through different presets on the board itself with Redragon’s software. By using different function commands, users can make quick changes to their preference of lighting. The LED’s are quite bright, but maybe not as vibrant as Corsair or Razer gaming keyboards.

The dedicated software given to the user is not very good. You cannot do much with it, such as custom lighting presets like you can with Corsair’s boards, but it gets the job done.

Personally, I think it is nice to use the onboard presets because it is quicker and easier than using the software.


Conclusion: Should You Get The K552?

Angled view of Redragon K552 mechanical keyboard

Should you get the K552? Well like all things, it depends. If you are looking for a mechanical keyboard but do not want to break the bank then this is a fantastic option. 

With mechanical switches, an aluminum plate, and an affordable price, the Redragon K552 definitely has a lot of positives going for it. But at the same time, the terrible keycaps, difficult upgrade path, and no detachability also give the K552 a lot of cons.

The important thing for you as a buyer is to answer the question “is it worth it?” Is it worth having poor keycaps, subpar software, rattly stabilizers, and a weak case for around 30 to 50 dollars?

I would say for a first mechanical board, it is worth it. This is a great way to get a mechanical experience for cheap and if you want something more you can always upgrade if your budget gets bigger. This is a great way to try a mechanical board or improve your setup while not spending money and it is why this board is still one of the most popular keyboards on Amazon.

Overall this board will be good enough for the majority of people that get it but for some, it may pique your interest into something better and more personal like a custom keyboard.

I hope you enjoyed and if you want to learn more about mechanical keyboards, check out some of our other keyboard content.

Logitech G703 Hero Mouse Review: Wireless For A Fair Price

When looking for a new gaming mouse you may have been considering switching to a new wireless gaming mouse. The Logitech G703 Hero adds to Logitech’s extensive line of wireless gaming mice, providing performance striking above its price point.

Let’s dig in and see if the Logitech G703 Hero is the mouse for you.

The Verdict

Logitech G703 Hero with a laptop and keyboard.

Rating: 4 out of 5.

The Logitech G703 Hero is a wireless gaming mouse with excellent performance.

It improves over the previous version with the use of the accurate HERO sensor and it supports Logitech’s Lightspeed connectivity.

The G703 has an ergonomic shape with large buttons and comfortable rubber side grips. The mouse supports tons of grip styles and is very comfortable over long periods of use.

You also get a lot of in-depth functionality with the software. The G703 also supports a lot of different features like an adjustable weight, Powerplay compatibility, and onboard memory.

The only major downsides of the mouse are the outdated micro-USB connection and the software that could be a bit confusing to use at first. Additionally, the shape of the mouse applies to a specific niche but I found it quite easy to adjust to.

So if you are looking for a wireless mouse with a great sensor, decent lightweight, and solid build then the G703 is a fantastic option to consider.


Specifications

Length~124 mm
~ 4.88 in
Width~68 mm
~ 2.67 in
Height~43 mm
~1.69 in
Weight ~95g (+10 with weight)
Sensor TypeOptical (100 – 25.6K DPI)
Polling Rate125 – 1000Hz
Cable Length 1.8m (6ft) Braided Cable

In The Box

Logitech G703 unboxed

In the box, you will find the mouse with all the essentials and some accessories.

  • Manual: There is a quick start guide to walk you through basic things like using and charging the mouse.
  • Cable: Logitech includes a braided USB-A (regular USB) to micro-USB cable to both charge the mouse or use the extender.
  • Dongle: This dongle allows for the mouse’s lightspeed wireless connection for very low latency.
  • Extender: If your mouse is far away from your computer or you are experiencing connection issues, an extender is included as a great solution to the issue.
  • Powerplay Puck: The puck is attached to the bottom of the mouse with magnets and is necessary for using the Powerplay feature.
  • Weight: Included is a 10g weight if you feel the mouse is too light.
  • Sticker: Logitech always throws in a sticker showing their blue G logo with their gaming products. It’s a nice touch.

Build Quality

Angled view of Logitech G703

The Logitech G703 is made from a mix of strong plastic and rubber. Rubber is used on the scroll wheel and on the sides for extra comfort and grip. Even at 95g, the G703 is quite robust.

The mouse looks all black with a translucent section for the G logo. The style obviously belongs to a gaming mouse but is not overly gamery.

The mouse feet on the bottom provide a smooth glide, allowing quick flicks and consistent travel. In my testing, they were not as good as the most premium mice like the Logitech G Pro Superlight or Razer Viper but they are better than many popular mice like the Logitech G203 or G502.

Overall the G703 has a fantastic build, especially for the price. My only disappointment with the design of the mouse is the use of micro-USB over USB-C. While this doesn’t affect the functionality, it’s nice to have.

Style and Comfort

Side view of Logitech G703

Logitech’s G703 has an ergonomic design but is not super sculpted. The mouse is great for those who are right-handed but it doesn’t lock you into any position so it is comfortable with all mouse grip styles.

I had no issues using the G703 with a fingertip, claw, and palm grip. Some mice lock you into a palm grip or claw grip but the G703 provides flexibility in this field.

Many people don’t like the design but I found it very easy to get used to and very comfortable, even during multiple-hour gaming sessions. The rubber helps a lot over time and it makes the mouse very easy to grip and hold.

Additionally, the buttons are quite large so they are easy to find. Typically buttons are quite small on the side of the mouse but the G703 has the biggest side buttons on any mouse so you can easily rest your fingers on the side buttons.

Switches and Scroll Wheel

The Logitech G703 has 6 buttons in total. They all have satisfying clicks and are very responsive. The switches are from Omron and have eliminated the double-clicking issues that Logitech used to face. These switches are some of the best ones that I have used in any gaming mouse.

On the left side of the mouse are two side buttons. They are some of the biggest side buttons that I have seen on the mouse making them very easy to find. Additionally, the scroll wheel has nice tactile steps and feels very solid.

Sensor and Polling Rate

Logitech’s Hero sensor uses optical technology, which is the norm among modern gaming mice. It is one of the most accurate and efficient sensors in any mouse. Additionally, the sensor itself is quite lightweight which is why Logitech makes some of the lightest mice on the market.

The sensor goes up to 25.6K DPI and can be adjusted through the software in increments of 50. Most people opt for a DPI between 200 and 1200, but the high range shows the accuracy of this mouse.

This fantastic sensor goes along with the industry-standard 1000Hz polling rate.

Powerplay Compatibility

If you want a wireless peripheral but the requirement to charge it is an issue for you, Logitech’s Powerplay could be the solution for you.

For this to work with the G703 you must purchase their Powerplay mousemat. This is an additional investment, but the mousemat will charge the mouse resulting in endless battery life.

Adjustable Weight

Weight and underside of Logitech G703

If you want a slightly heavier mouse, you can utilize the 10g weight. Adding the weight will increase the overall weight to 105g. You can easily add the weight by pressing it into the slot on the bottom of the mouse.

Using the mouse with its stock weight was the best for me. The G703 felt balanced and it made me more consistent in shooters. I was able to land headshots more frequently, manage recoil more easily, and make more accurate flicks.

If you want to further lower the weight, taking off the Powerplay puck on the bottom is an easy way to shave off a few grams making the mouse about 92g. The difference isn’t huge but still noticeable.

Vibrant RGB Lighting

Top view of Logitech G703 with RGB lighting

The Logitech G703 supports bright RGB lighting on the logo and scroll wheel. The lighting looks good at night and throughout the day. If RGB isn’t for you you can always turn it off or dim it.

You can control all the lighting with the G Hub software and you get a lot of functionality. You can have separate or synced lighting between the logo and wheel. Also, there are tons of colors and present affect to choose from.

You can also sync the lighting with a game or movie you are watching. For, example the color of your mouse will change because of the team you are on. This isn’t too crazy just on the mouse because you probably will be more focused on the game but if you have other Logitech products then you can sync this with them and the experience is quite unique.

Wireless Connectivity

Angled view of Logitech G703 with wireless adapter

Apart from the standard wired connection, the G703 also supports wireless connectivity via Logitech’s low latency Lightspeed technology.

The lightspeed connection via a dongle is about as fast as a wired connection. It is incredibly fast and reliable. If you ever have any issues like interference or you are just very far from your device you can also use the included extender. Without the extender, I was able to use my mouse over 20 feet away from my computer with no issues.

With wireless mice, battery life is always an important consideration. The battery is quite strong considering the mouse supports RGB lighting. You can get 35-60 hours of use off a single charge depending on how bright the lighting is and the polling rate. When you need more battery, you can completely charge the mouse in about 2 hours.

The mouse also has battery-saving methods. The lighting will dim after a minute of inactivity and the G703 goes to sleep after 5 minutes. Waking from sleep is essentially instant. Additionally, the lighting on the mouse will turn red if the battery goes below 15%. Overall the battery life is pretty good and the power-saving measures make it not a concern.

In-Depth G Hub Software

Logitech G Hub software used with the G703 mouse

The Logitech G703 works with the G Hub software to control it. You can do basic things like change the lighting, sensitivity, remap buttons or do more complex things like control game integration.

Setting everything up isn’t too difficult once you have gotten used to the software. As soon as you open the Software you will be able to see the estimated battery life.

Although G Hub is very functional, it can be very confusing to those who are new to it. Pages like game integration are not the easiest to find and saving profiles and presets can be confusing.

Additionally, I have run into occasional bugs. Sometimes a different DPI than I wanted would become my default DPI for the onboard profile or not all my lighting presets would save. Logitech has fixed most of the bugs that I have faced but I still think the software has its issues.

Onboard Memory

Logitech’s G703 stores up to five onboard profiles. You can save your preferred sensitivity, button mappings, and lighting all to the mouse.

Onboard memory is helpful if use your mouse with different devices. Additionally, if you donโ€™t like Logitech G Hub this is nice because you can quickly save your profiles, and then you won’t need the software anymore.


Conclusion: Is The Logitech G703 Hero Good For Gaming?

Logitech G703 Hero on a mousepad.

The Logitech G703 Hero delivers a great experience for gamers, even for pros, at a great value.

The G703 supports the Lightspeed connection that has equal latency to a wired connection but the lack of a wire means you don’t have to worry about your mouse getting caught on anything or drag. The need for a mouse bungee is not existent.

Inside the mouse, you get high-quality Omron switches and Logitech’s famous HERO sensor that is among the best on the market.

The shape may not be for everyone but most people can get used to it and the mouse supports a wide variety of grips. It also has a solid build while still maintaining a decently low weight.

If you think this mouse is a good fit for you then consider checking it out on Amazon.

Thanks for reading and if you have any more questions check out our Instagram and Discord.

Create a website or blog at WordPress.com

Up ↑