Best Tactile Switches [2021]

A variety of switches on a desk.

There are a plethora of tactile switches on the market, but which one is the best?

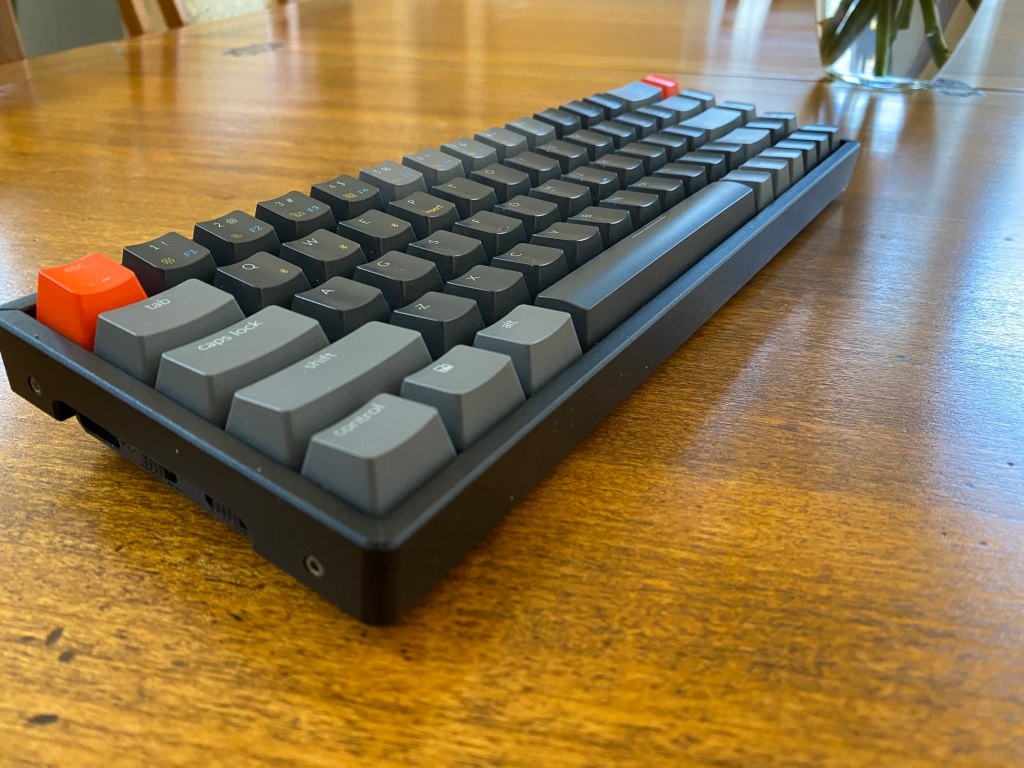
A tactile switch is a keyboard switch that produces a bump somewhere in the travel while still retaining its quietness compared to clicky switches. In theory the perfect blend between the sweet sound of linears and the lovely click of clickies. Tactile switches are perfect if you prefer a feedback when typing, most membrane keyboards will have a small and round feedback when typing, so tactiles are most similar to membranes in that way.

Terminology

To get started, when talking about tactile switches many people will refer to types of bump and cool sciency terms like pre-travel, post-travel, actuation, and much more. Well, don’t let these big words intimidate you because I will explain them all.

Tactile Event: The bump in the switches travel.

Pre-Travel: Any linear or smooth uninterrupted travel before the tactile event.

Post-Travel: Post-travel is the linear travel after the tactile event.

Actuation: Actuation is when the switch actually activates and outputs to the device.

Bottom out: When the switch finishes traveling and hits the bottom housing.

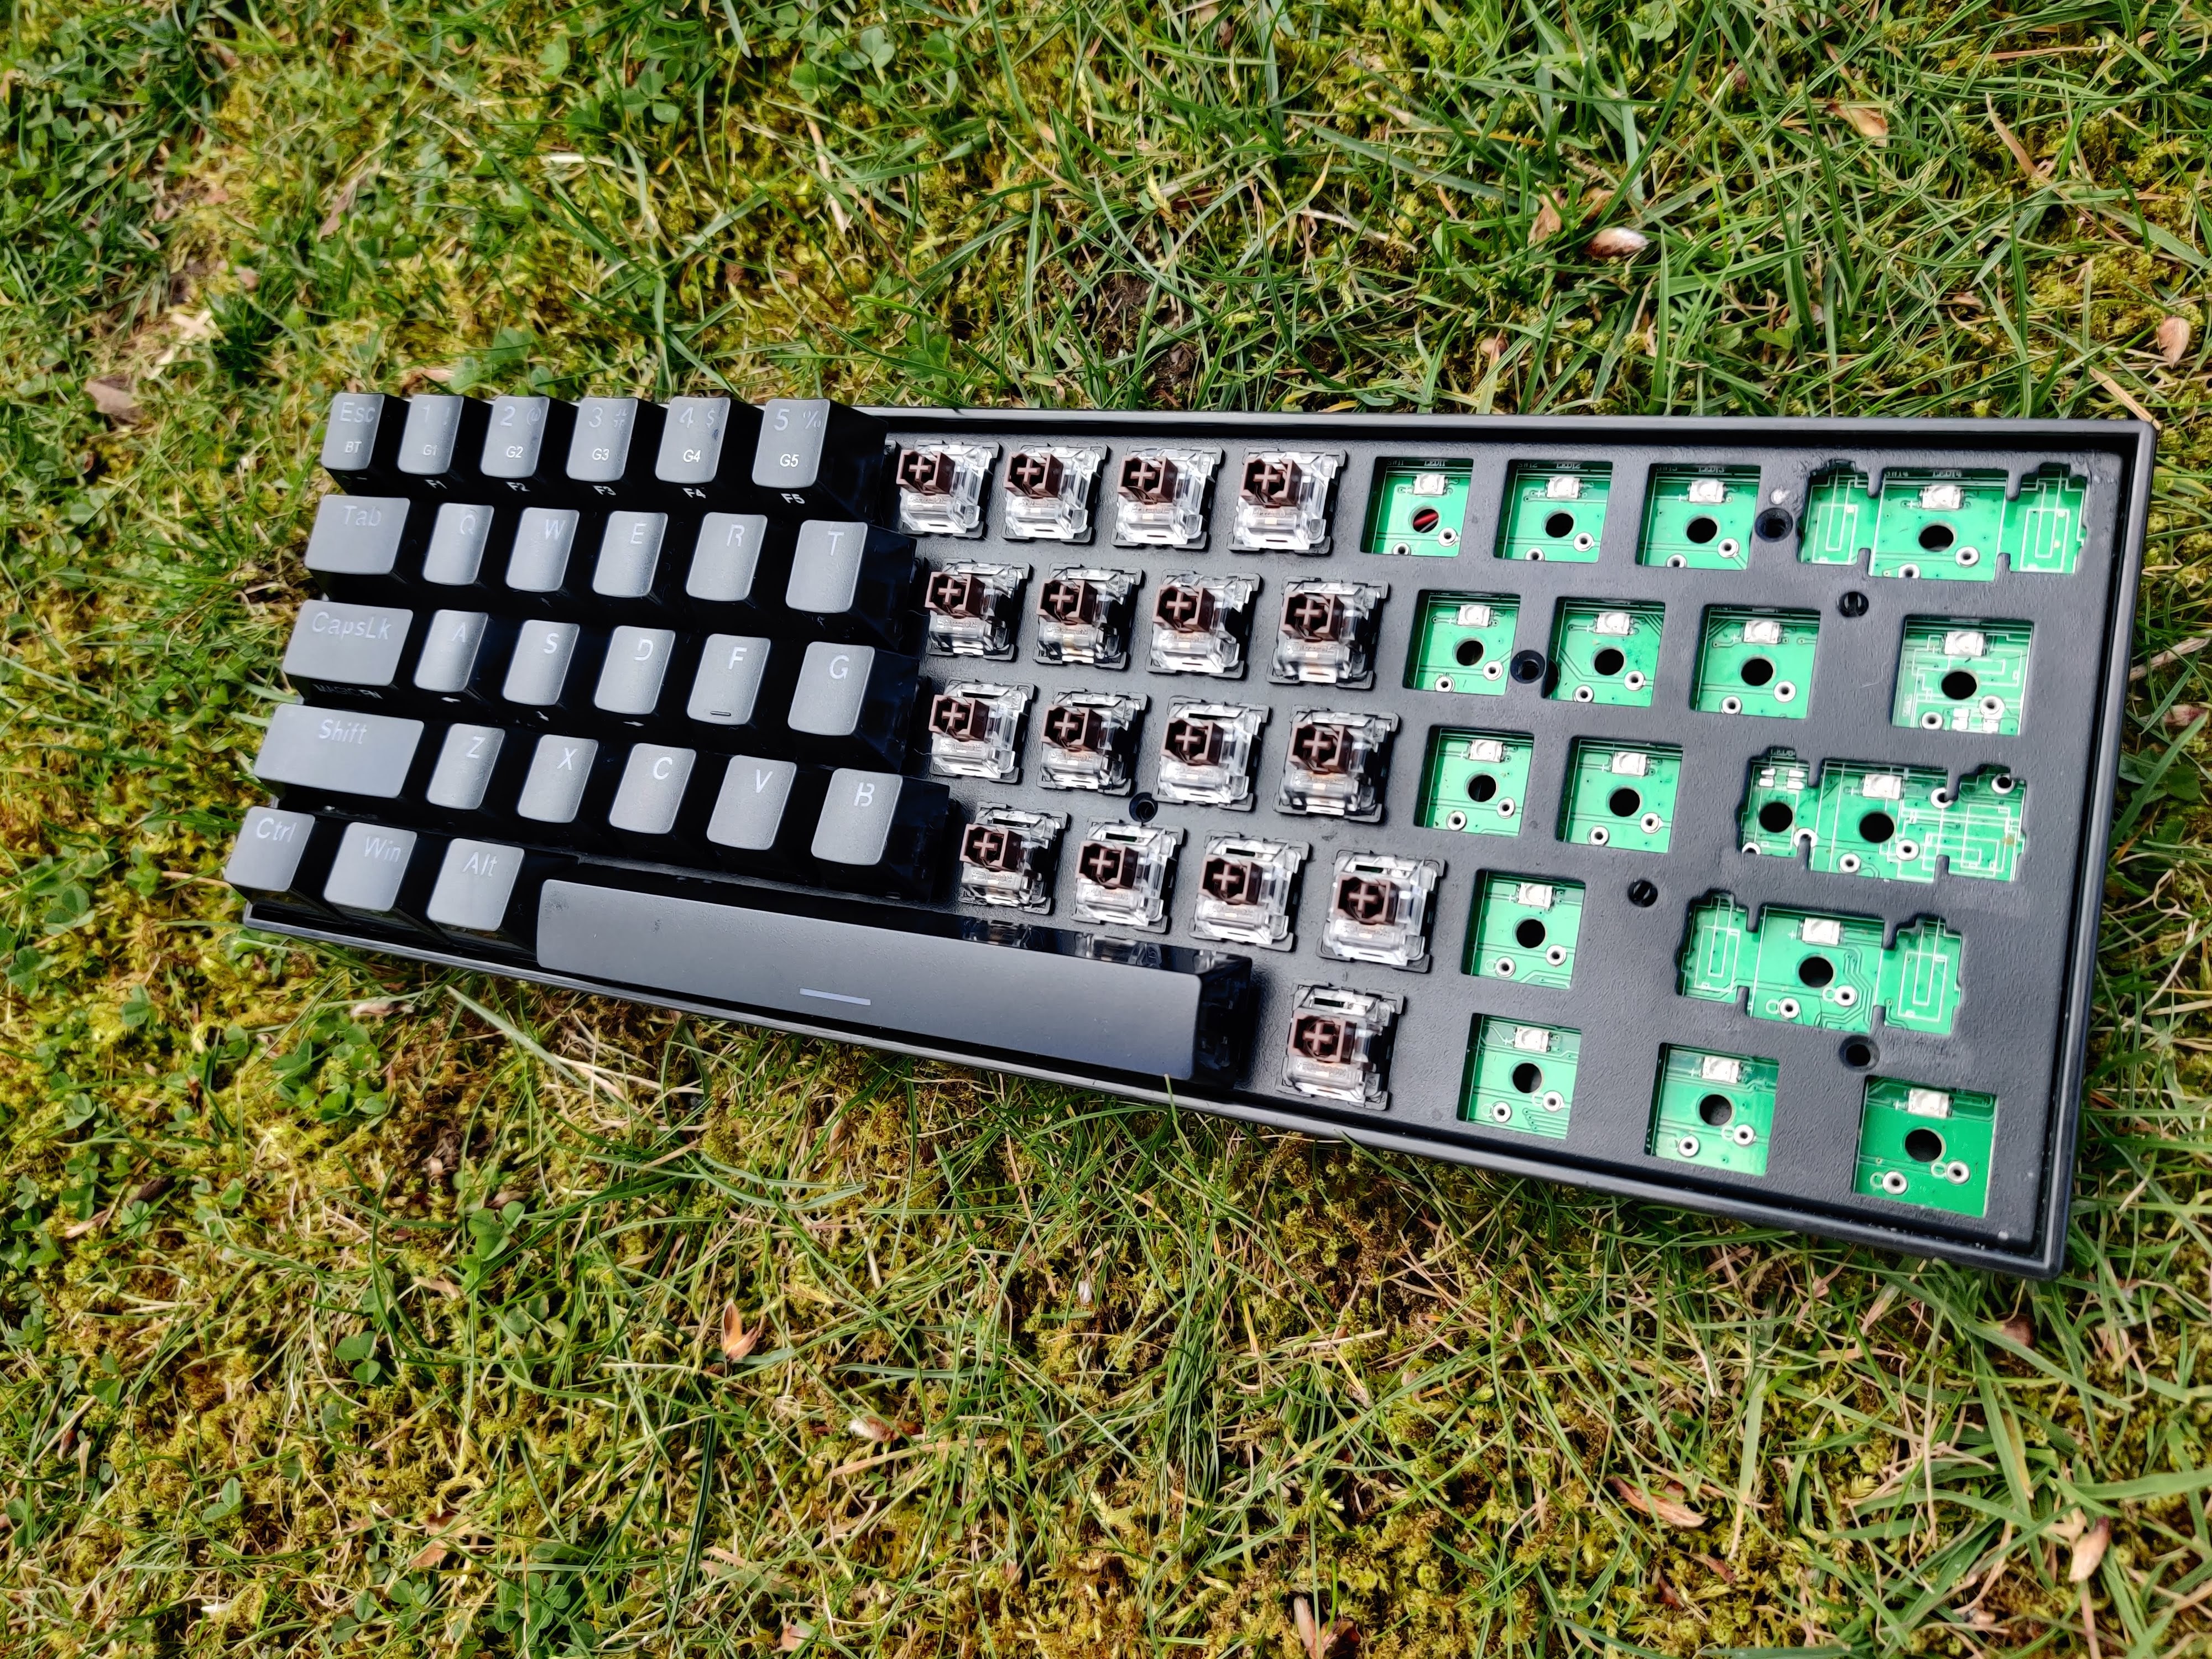
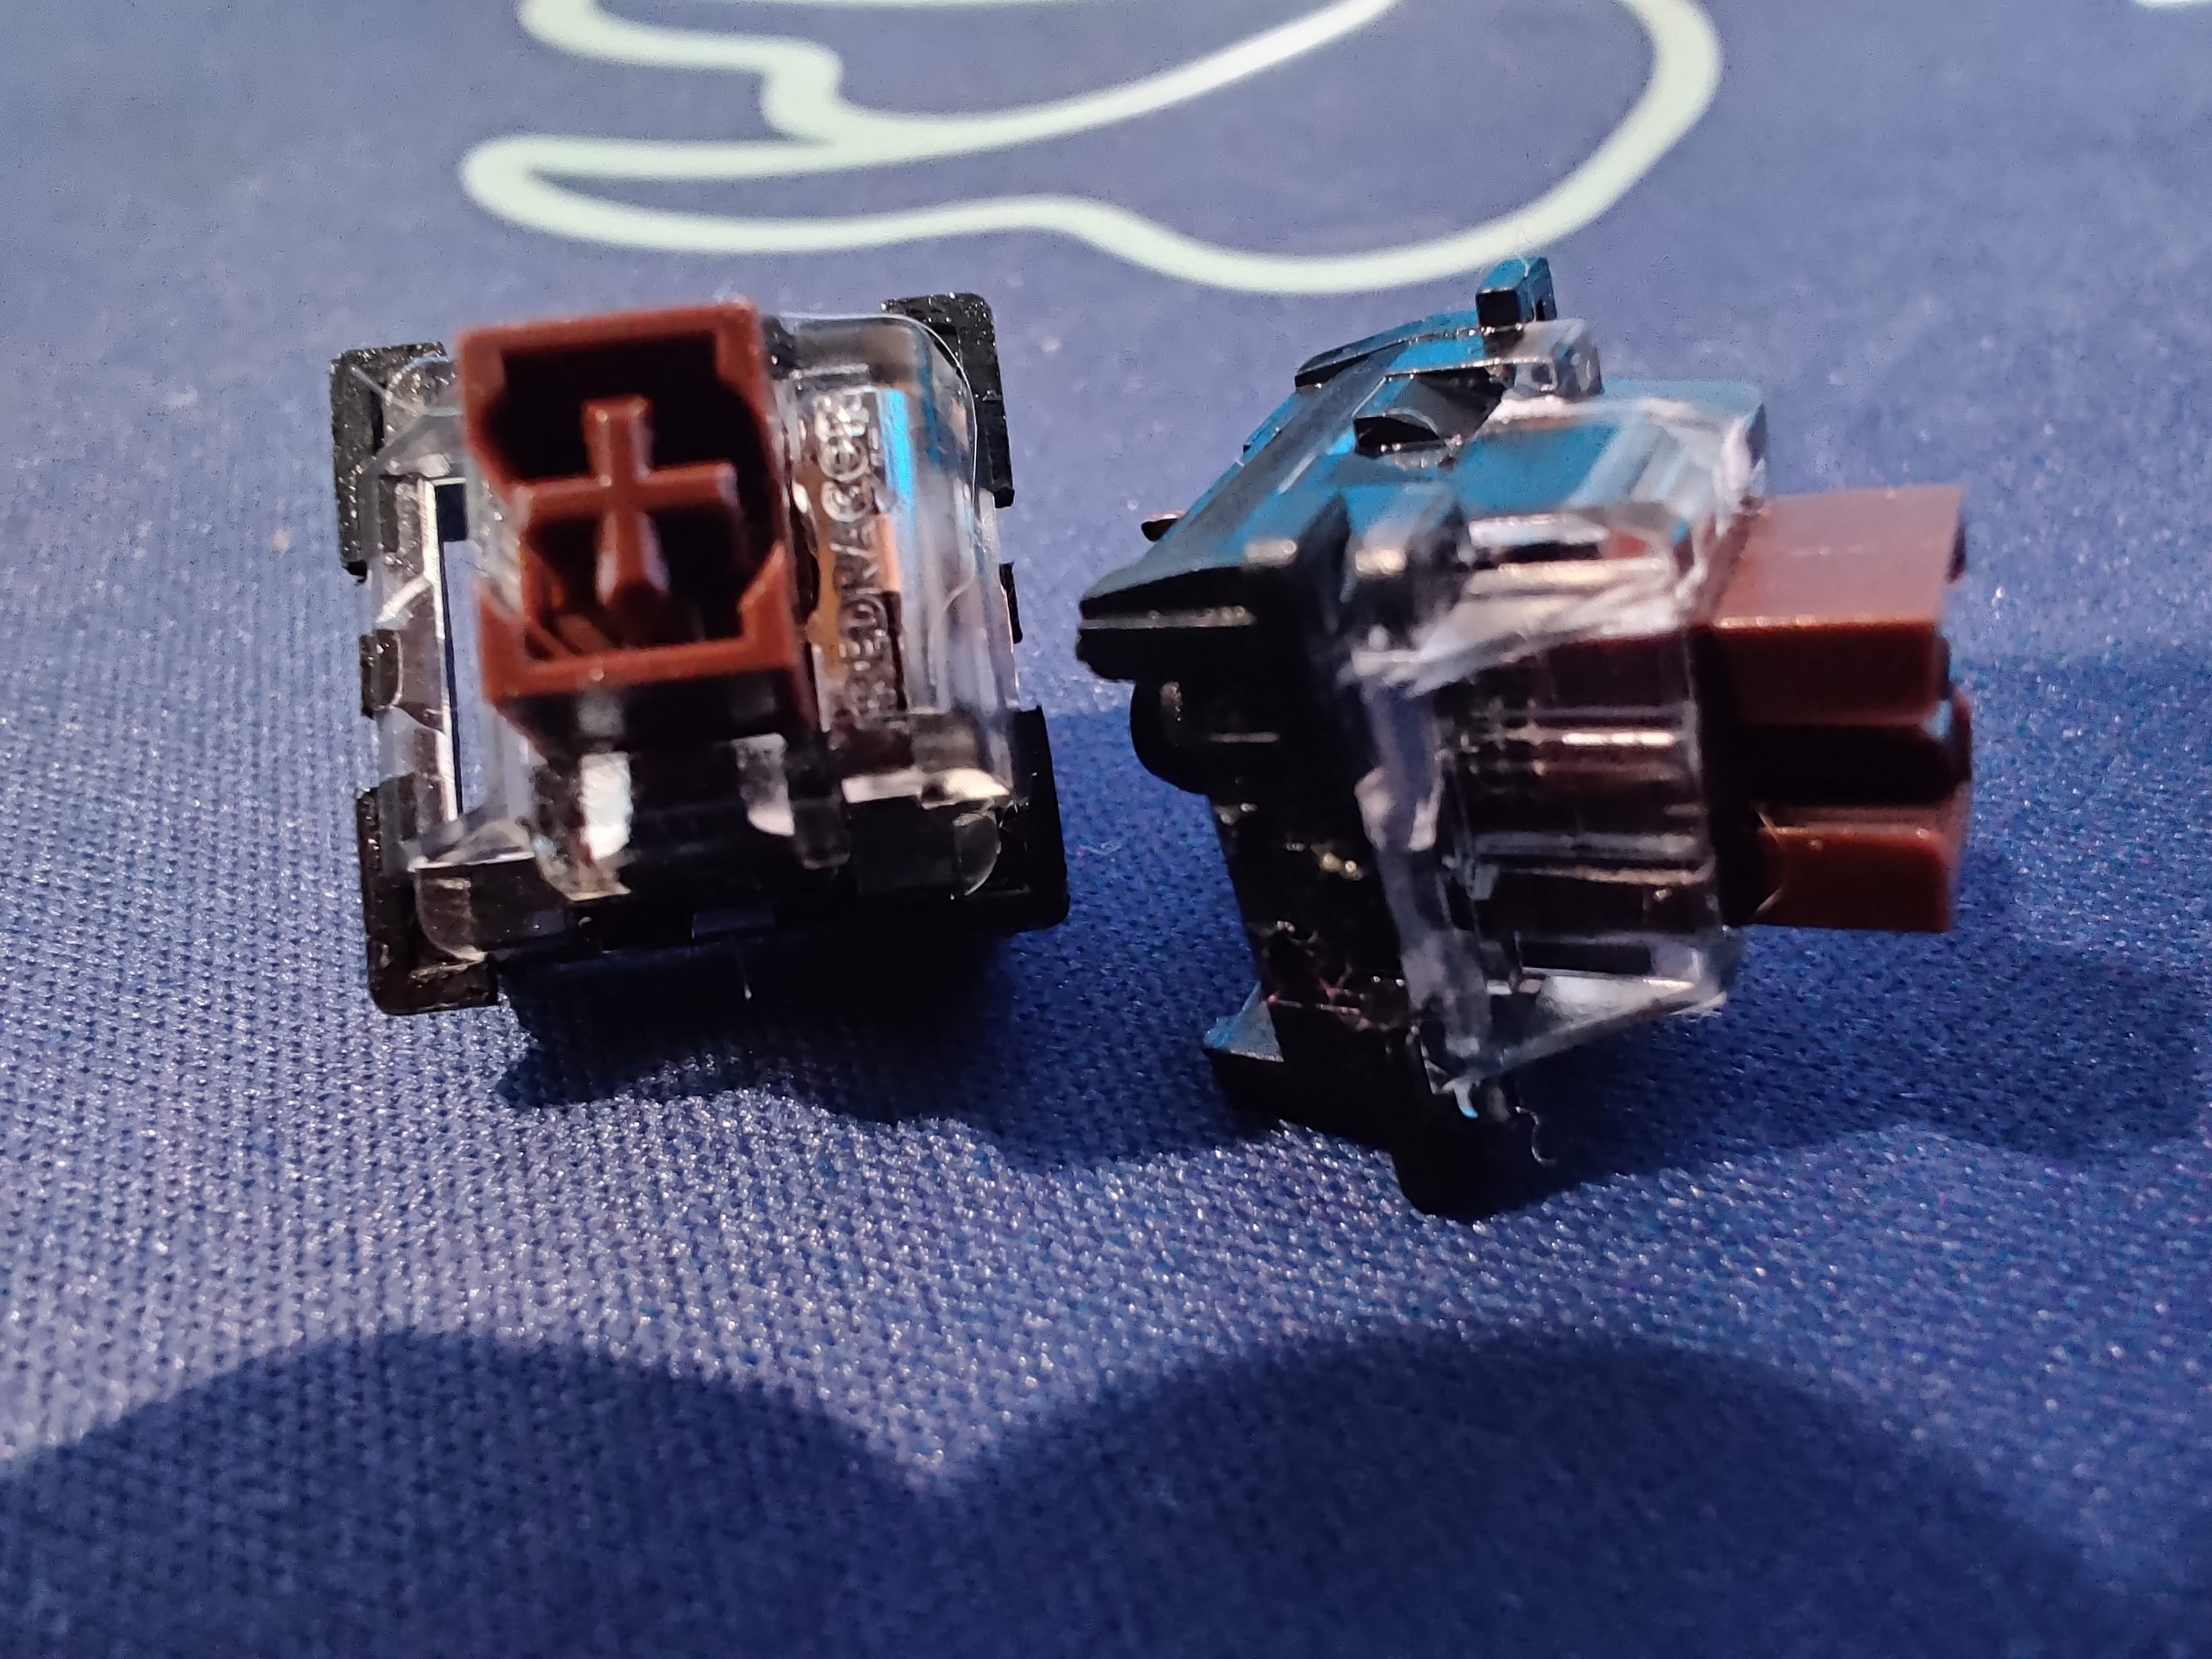
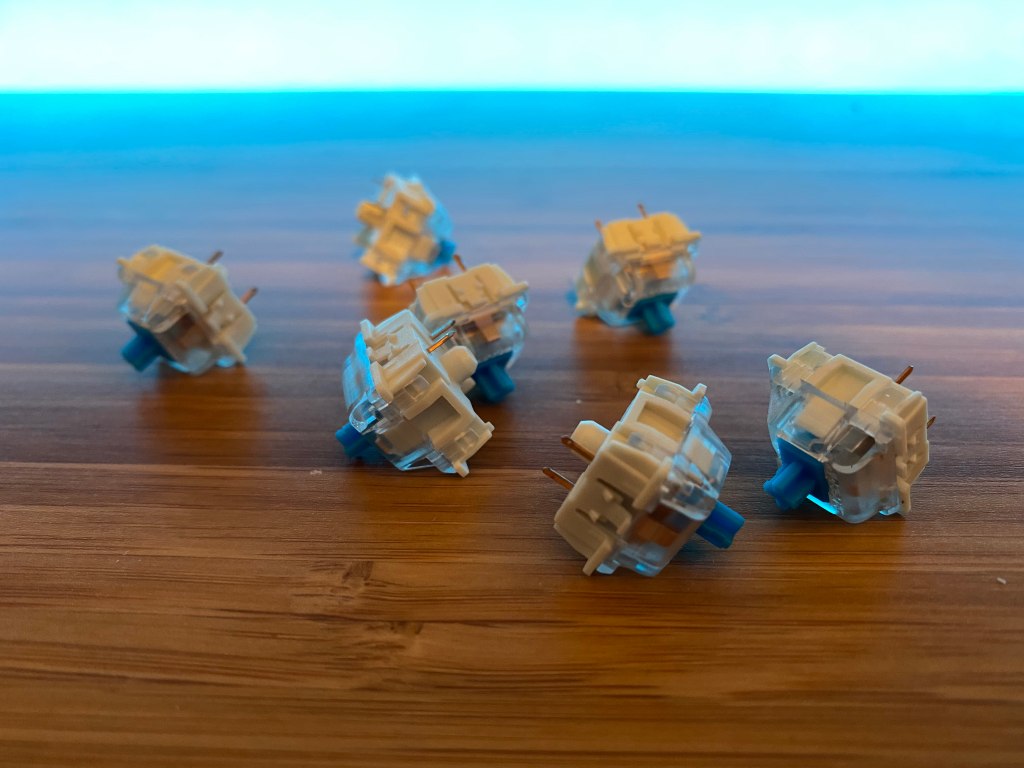
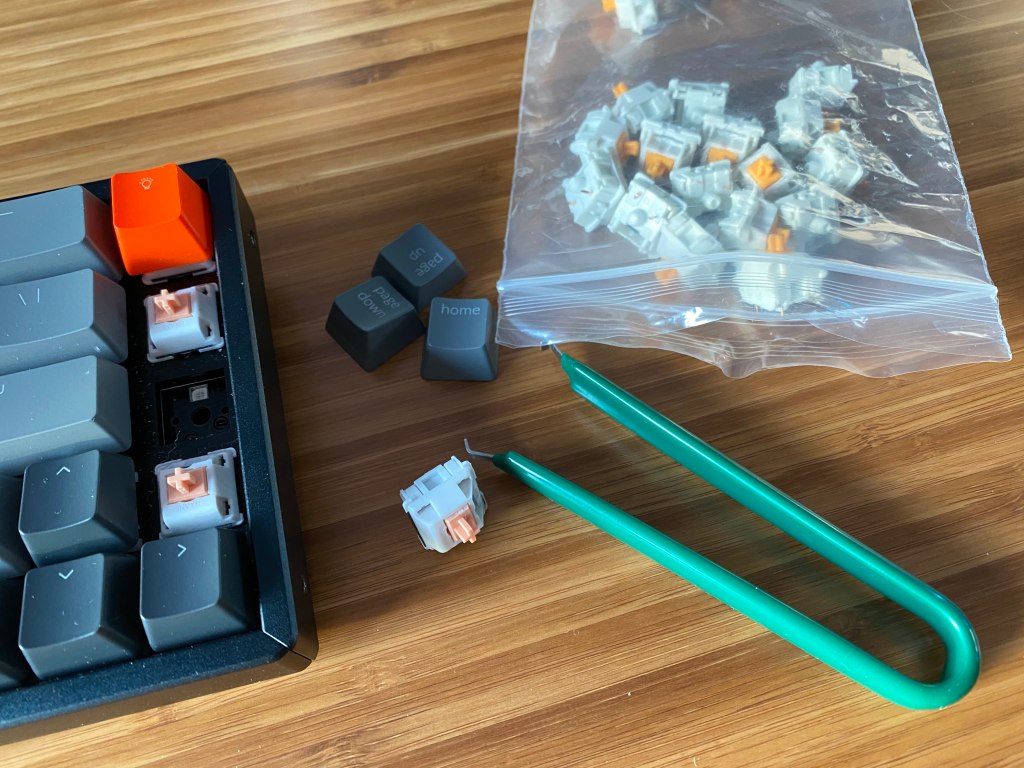
Leaf: The metallic contacts in a switch, these themselves actually actuate the switch. The leaf is in the bottom housing as the picture shows.

Diagram pointing to the leaf of a mechanical keyboard switch.

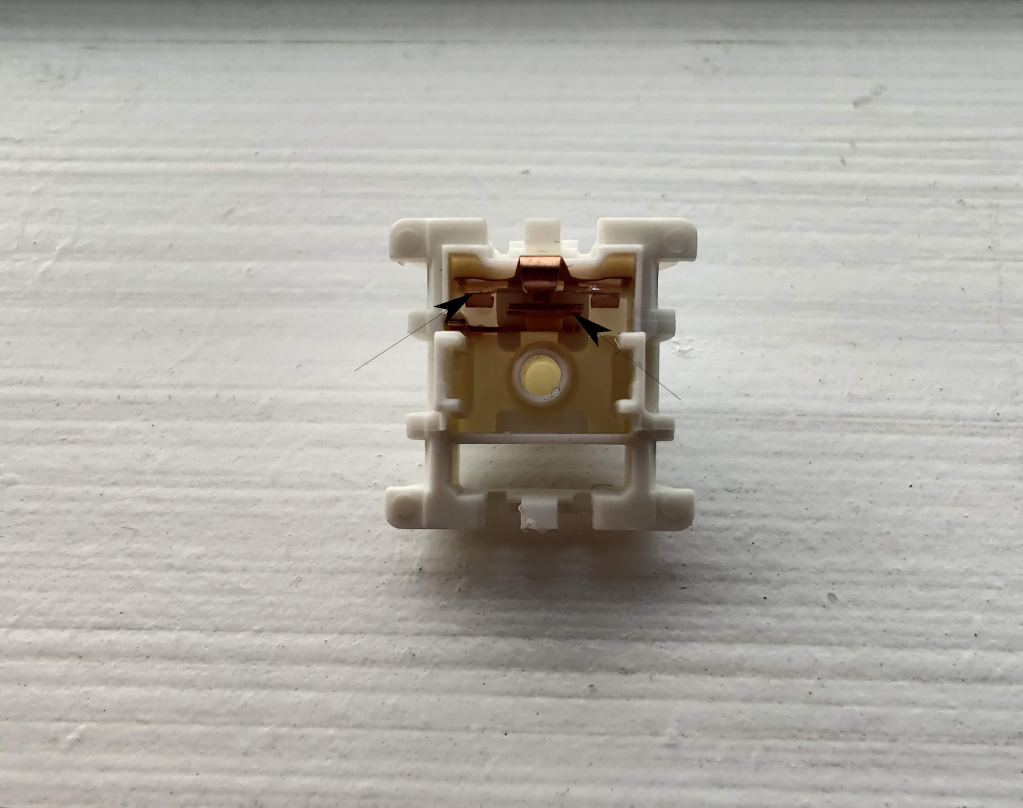
Ping / Spring Ping / Leaf Ping: This is a metallic reverb produced by the sound of the spring, leaf, or both. In most cases it can be fixed by lube.

Disclaimer… Please Read!

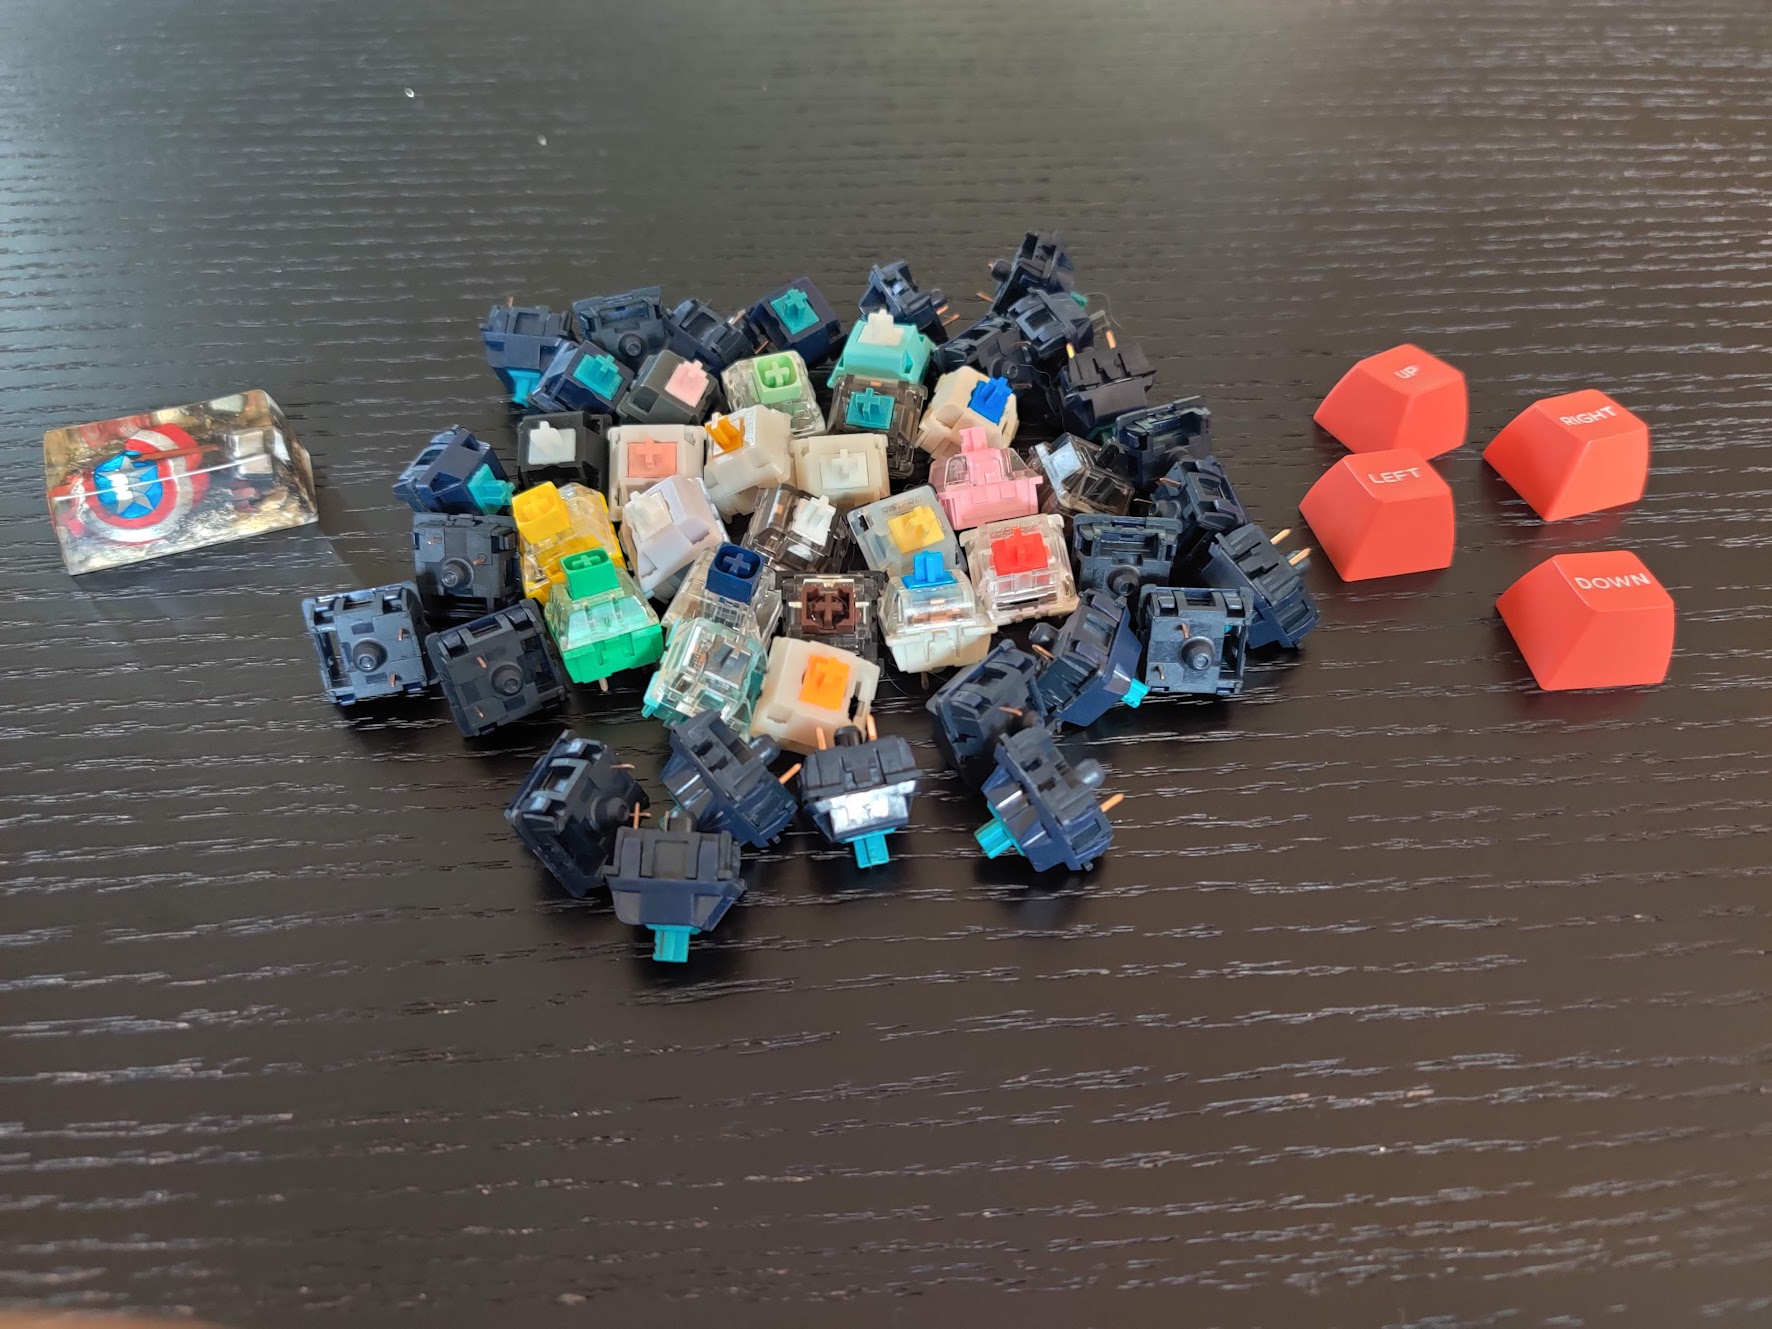
This review is largely preference, my rankings will likely be very different from yours. Do not base your opinions based of mine, the best way to get opinions on a switch is to just try them yourself, guides like this, sound tests, and keyboard senpais like Taeha Types is not a good way to understand how switches feel. Just hit up your local vendor and buy a pack of whatever switch your fingers and ears desire to try them out. Use this guide to gain a general understanding on the switch and where enthusiasts like me stand on these switches.

1. Boba U4t: Fantastic Acoustics and Hefty Tactility

U4T switch with plant.

Boba U4T is a tactile switch designed by gazzew and manufactured by outemu. It’s the sister switch of the Boba U4 which is a silent switch and is mentioned below. It produces a relatively sharp bump which is quite prominent throughout the switch. It comes in both 62g and 68g bottom out.

We recommend lubing this switch but not filming as the housings are extremely tight and well built and may not close with film.

The reason Boba U4t earn such a high position on this list is because of the sound and at what price it comes at. The T in U4T stands for thocc and it definitely lives up to its name as this may be one of the thocciest tactiles I have heard.

2. Durock T1s: Bumpy and Smooth

T1 switch with plant.

Durock T1s are a tactile switch designed by Durock and manufactured by JWK. It features a roundish bump at the top of the switch with no pre-travel. It features a few weighting options ranging from 62 to 67 grams.

These are so high up because of the tactility and how it closely resembles the wildly sought after Holy Pandas at a very affordable price. They also have unrivaled smoothness since they do copy the material of Gateron Ink switches which are among the smoothest linears.

These aren’t number 1 since they don’t have the best sound and they have very loose housings. This can, of course, be fixed by film. These switches are pre-lubed with a thin coating of oil which makes lubing not required.

3. Glorious Pandas: Budget Snappiness… Relatively

Glorious Panda switch with plant.

Glorious Pandas are Glorious PC Masterrace’s attempt at recreating the wildly popular Holy Panda frankenswitch. It features a sharp P bump with a quick and sharp bump at the top.

These switches recreate the feel of the sought after holy pandas without the price and pain of having to frankenswitch. Although this switch is far from perfect, it has immense spring and leaf ping. Although the springs can be fixed with a spring swap the leaf ping is still there and still plays a large part in the acoustics of the switch.

Even though these have a similar feel to the Holy Pandas which are a staple in the keyboard world its spring and leaf ping bring it down to number 3.

4. TKC x C^3 Equalz Kiwis: Ideal if You Don’t Like Heavy Tactility

Kiwi switches on a desk.
Picture Creds: Caughtquick, check him out at https://www.caughtquick.tech

Kiwis are the 2nd installment in the fruit switches by TKC in collaboration with C^3, and it does not disappoint. They feature medium-level tactility which is a nice breath of fresh air with all the high tactility switches on the market. With around a 67g bottom out the switch has a prominent P Bump with smooth pre-travel after a quick bump at the top. This switch does feature light lubing which makes it very smooth.

Personally, I think these switches are great if you don’t like heavy tactility and do benefit from gasket films and lubing.

These are number 4 because I prefer a heavier tactility and recently TKC has been having quality control issues where their fruit switches have been having actuation inconsistencies due to problems with the switch molds.

5. Invyr Holy Pandas: Tactile Switch Royalty Sharp and Quick

Holy Panda switch with plant.

For years Holy Pandas have been the pinnacle of tactile switches, since then companies like glorious and in this case, Invyr has tried to replicate these switches. Similar to glorious pandas these switches have a sharp p bump at the top followed by smooth linear travel.

These switches benefit from both lube and film. Although the housings are quite tight the acoustics won’t be negatively affected by film. From my testing lubing these switches is a must as they are quite scratchy on the linear travel and there is quite a bit of spring ping, so lubing them is a must.

These aren’t number 1 because they have quite the hefty price tag at above 1 dollar per switch. This is quite expensive especially with the problems these switches are known for like spring and leaf ping. While you can’t go wrong with these switches they can be a bit disappointing especially with how much you are paying for them.

6. NovelKeys x Kailh Blueberries: Heavy Weight with Heavy Tactility

 NovelKeys x Kailh Blueberry switch with plant.

Blueberries are Novelkeys and Kailhs take at a tactile switch after the critical reception of Novelkey Creams. They feature a D-Bump with about 1 mm of post-travel and little pre-travel. The bump on these things is massive in duration but very round.

While filming these is optional lubing is necessary otherwise the switch will be very scratchy and pingy. These switches have the exact same material composition as Novelkey Creams which means they are quite scratchy before break in.

These switches are sixth on the list because they are very scratchy and the bump is frankly nothing special compared to the other switches on this list although it does get points for being a very long bump. Acoustics are also not very pleasant as they sound quite scratchy.

7. Zealios V2: Sharp Cheddar Cheese… Except in Switches

Zealios V2 switch on a mousepad.

These switches are like the bigger stronger and older brother too Holy Pandas, the tactility is as sharp as a knife and maybe even sharper. They boast a P-Bump with no pre-travel and about 3 millimeters of post-travel which is quite smooth out of the box. Zealios V2s are the product of a collaboration between ZealPC and Gateron.

Filming these is optional and same with lubing. From my research even lubing the stems of legs, which is not normally done in tactile switches but is common in these because of how sharp and harsh the tactility in the switch is.

These are seventh because of the price of these switches at about a dollar per switch they have mediocre sound as the tactility is so sharp you can hear the reverb from the leaf flicking back into place after the tactile event.

8. Boba U4: Best Silent Tactile

Boba U4 switch with plant

This switch designed by gazzew is a silenced version of the U4t. These switches definitely take the cake when talking about silenced switches, they feature a nice round bump which takes up most of the switch and they have very little pre-travel. The stem wobble control is excellent with very tight housings.

Filming and lubing these is optional as they have very tight housings and quite a smooth switch. If you are lubing these to improve acoustics no need because it produces a mush sound which cant be improved much. Filming is not necessary, in fact recommended against, since they have a nice and tight housing.

These are eight because silent switches really aren’t my thing unless I’m at a public place. When you think of mechanical you think of clickity calckity and thoccity thaccity not mush mush, for that reason silent switches just got boring after a couple days of daily use. They made this list because they have quite an amazing tactile event and are a great experience for when I want to use a mechanical keyboard without disturbing others.

9. Cherry MX Clears: Solid Potential

 Cherry MX Clear switch on a rock.

This is one of three tactile switches by cherry, the others being the MX Browns and the MX Gray. These are considered to be the best out of those two. They feature a medium-sized bump with 2 millimeters of pre-travel and about 1 millimeter of post-travel. While they aren’t the greatest stock they still quite nice. Many people do swap the springs on them to something a bit lighter as the stock ones are quite heavy with around an 80 gram bottom-out force.

While filming these aren’t required they will still benefit from filming. Lubing these switches is definitely recommended since the nylon cherry housings are quite scratchy stock. As I was saying previously the springs on these switches are quite heavy and do benefit from a spring swap.

These switches don’t have the greatest stock form nor do they have very good acoustics and feel. For that reason, they ended up at number 9.

10. Cherry MX Browns: Mainstream

Cherry MX Brown switch surrounded by keycaps.

Cherry MX Browns are super common and what most people think off when tactile switches are mentioned. They are featured on almost every gaming board as the tactile option. Well, you may be asking since there on practically every mainstream prebuilt then why isn’t it number 1 on this list? It’s because these switches are not very tactile after all, especially in comparison to many other switches on this list. Wildly popular YouTubers like Glarses have dedicated their existence to hating these switches but he along with many others are joking about this, no functional switch is objectively bad and nearly everything in this hobby is up to your preference.

That being said this switch has quite a small bump and does not feel as tactile nor as smooth as other switches on this list. And I prefer more pronounced tactility over light tactility, but everybody is different and has their own preferences. These switches start out at about 45 grams of actuation and bottom out at 55 grams making it quite light especially considering how light the tactility is.

While filming this switch isn’t necessary lubing this switch is advisable since it has quite a scratchy and pingy housing. Filming this switch isn’t necessary but won’t hurt the sound nor the feel of the switch.

This switch is number 10 because the tactility is light which is not my preference but, it may be yours.

Where To Start?

If you wanna try these or any switches check out your local vendor! Who are those you may ask? Take a look at our vendor list. It’s a great compilation of all the keyboard related vendors sorted by region.

As always thank you for reading and please check out our discord and chat a little. We will happily answer any questions you have!

Do You Need A Sound Card For Your PC?

Gaming PC on a desk.

Building a computer can be confusing, especially if you need to work out what parts you need to get. One component that you may be unsure about is a sound card.

In the past, dedicated sound cards were essential when building a computer because motherboards did not have any onboard audio solution. As motherboards started to get onboard sound cards people often still opted to get sound cards as it would give them more performance and onboard solutions at the time did not sound very good.

The main issue is if a sound card is still necessary today if you are building a computer.

In short, the answer is no, you do not need to purchase a dedicated sound card if you are building a computer. Almost all modern computers, motherboards, and other electronics will have an integrated sound card and most sound good enough for the vast majority of people. 

If you want to learn more about sound cards, see how one could benefit you, or you want some recommendations, then we will cover it all here.

Dedicated Sound Card vs Integrated Sound Card

A sound card.

There are two different implementations of sound cards, integrated and dedicated solutions.

A dedicated sound card is a component that can be connected to the motherboard of a computer or can be plugged in via PCB. Many may add one while building a computer or upgrading the audio of an old motherboard if it doesn’t sound very good.

An integrated sound card is one that is built into a specific device, in this case, a computer. Most motherboards will have an integrated sound card built-in. You will find integrated solutions in phones, tablets, and most computers.

Integrated solutions provide a convenience factor as it is one less thing that people have to consider. In fact, the vast majority of people don’t even think about sound cards are even know what they are while buying electronics. This is due to dedicated solutions being so popular.

A dedicated sound card typically requires a PCIe slot on your motherboard. This could be an issue with ITX-specific motherboards since they have one PCIe slot. If you have a graphics card taking up the slot then you won’t be able to use a sound card.

USB sound cards also exist but often do not sound as good. They are commonly included with gaming headsets and they are great if you need a sound card but you don’t have space or don’t want to add a component to your computer.

Integrated sound cards may not have as good quality as dedicated cards, but they take up less space, are more convenient, and the sound quality is good enough for most people.

Benefits of A Sound Card

Philips X2HR headphones.

In the past, getting a dedicated card was essential. Computer processors werenโ€™t powerful enough for integrated solutions at the time.

As processors became more powerful, integrated solutions came about, but they still werenโ€™t that great. For users who used their PC for more than just browsing the web and emails, a sound card was necessary.

Integrated solutions have constantly been improving but haven’t been that great until the past 10 to 5 years. Motherboard audio now suits the needs of most people. The main reason to get a sound card now is if you are creating with a premium audio setup or you are upgrading an older system.

Regular headphones most likely won’t see a sound benefit from a sound card but higher-quality headphones could see a sound improvement in clarity and quality.

Some sound cards support both virtual and true surround setups. Some models support 5.1 surround sound and there are some gaming options that support 7.1 surround sound. They are great for those who are looking for an immersive speaker or headphone setup for music listening, gaming, or movie watching.

It is also worth noting that a sound card may give you a bit better PC performance by taking some of the load off of your processor but if that is your own priority it is better to just invest that money into a better processor.

Consider Getting An Amp & DAC Instead

Topping DX3 Pro DAC and amp combo.

Many people consider a sound card to not be a worthy investment when instead you can get an amp and DAC setup with better performance for the price. Creating a setup with both or just an amp is a great way to improve your setup and you can get past some of the issues that sound cards face.

Another way an amp and DAC setup can be better than a sound card is the space and looks. Sound cards will take up a slot on your computer’s motherboard and they often don’t look that great but amps and DACs often look a lot better and instead only take up space on your desk rather than in your PC.

Arguably the worst thing about sound cards and onboard audio is interference. Interference will negatively affect the sound that is outputted by your audio device and is caused by other electrical components. This issue is especially apparent with IEMs as they are very sensitive but can also affect headphones and speakers. Interference can be better or worse depending on the card but it is on all models.

With amps and DACs, you will find not only better audio performance but also more features. You can find gaming DACs such as the Sennheiser GSX 1000 that features virtual surround sound, a mic input, and much more. While there are sound cards with similar features you will find more interesting and useful features in the amp and DAC market.

Like sound cards, amps and DACs are only really needed for more powerful, high-performing headphones but an amp and DAC setup has more potential as there are many more options, especially at higher price ranges. Often an amp and DAC is the better way to go over a sound card.

Value Sound Card Recommendation

If you are on a budget but still need to upgrade your audio setup, the Creative Sound Blaster Audigy FX 5.1 is the best option for under $50. The Audigy FX supports 5.1 surround sound but if you want more inputs for 7.1 surround sound and slightly improved sound you can also upgrade for a bit more to the Creative Sound Blaster Audigy RX 7.1.

Both are a step up from motherboard audio and provide plenty of outputs. Additionally, both these options have enough power for many high-quality speakers and headphones as they are able to supply up to 600 ohms of power.

Best Sound Card Recommendation

If you want a surround sound setup, especially for speakers, the Creative Sound Blaster AE-5 is fantastic. The AE-5 delivers excellent sound performance and is considered one of the best sound cards regardless of the price. It supports virtual 7.1 surround sound that is very accurate, providing great immersion in games.

This sound card not only has solid sound quality but also great looks. The card has a sleek black or white casing with RGB lighting.

This card is a great way to improve the looks of your PC. It delivers enough power and lots of clarity for all kinds of music and premium headphones.

Conclusion

Overhead view of a DAC and some IEMs.

Today you will not need a sound card if you are building a PC but if you plan to build a setup that will run premium audio equipment or you are upgrading an older setup then you could notice a benefit.

Although they aren’t necessary they do provide specific benefits for those who those who want to run a high-quality audio setup or want an audio setup that could provide a more immersive gaming experience.

If you are looking at a higher quality setup then you should definitely consider getting a DAC and amp. They share many of the benefits that you can get with a sound card but don’t face some issues that they have like audio interference from other components.

Overall there are many ways to improve your audio experience but most people will be perfectly fine with the audio performance of modern motherboards.

As always thanks for reading and happy listening!

Are Mouse Bungees Worth It?

Gaming mouse with a mouse bungee

If you use a wired mouse one of the issues that you may face is your wire dragging on your desk, getting caught on something, or ruining your flicks while gaming. This can get very annoying and even cost you a game if it happens in the midst of a final gunfight.

Luckily there is a solution to fix this issue with wired gaming mice, mouse bungees. Mouse bungees are very useful and are commonly used among competitive gamers. If you want to learn more about mouse bungees and how one could improve your gaming experience, keep reading to find out.

Their Purpose

Mouse bungees are supposed to mitigate the snagging and dragging of a mouse cable on the desk. They achieve this by lifting the cable using an arm made from a spring. This reduces the friction and therefore drag from the cable on the surface of a desk. It can also mitigate problems like your cable feeling inconsistent because it hits things on your desk.

Mouse bungees help you almost forget about the cable and if set up well can make the mouse feel almost wireless. However, this depends on the type of cable your mouse has. If it has a nice flexible cable like most of the high-end mice, it feels great, however, a more traditional one feels better but not as good.

Additionally, if you have anything on your desk it would help it getting stuck or help the cable from falling behind the desk. For example, I used to have a monitor stand which was quite intrusive and a mouse bungee helped a lot with the cable getting stuck.

Overall a mouse bungee should help improve the experience of using a wired gaming mouse. It should make the gaming experience more consistent and make sure that you have to worry less about the mouse and more about the game.

How To Set One Up

Side view of a mouse bungee

Setting up a mouse bungee is pretty simple. You just need to route a part of the cable through the bungee. The confusing part is finding what is right for your setup.

Generally, I put my mouse bungee a couple of inches above my mousepad and fully extend the arm. Then pull the cable through the arm so that I am able to move the mouse all around my intended mouse area. I would then pull the cable a little more so that there was some wiggle room.

You really just have to play around with it until it feels good. However, make sure not to use too little of the cable, or else the mouse bungee could pull on the cable. Just play around with the positioning until it works well for you.

Do You Need A Mouse Bungee

Needing a mouse bungee really depends on your situation and your priorities. Ultimately it is up to you and how much the wire bothers you. If you find that the cable is snagging or dragging too much then definitely consider one. However, if it doesn’t annoy you, it might be better to save money.

A mouse bungee could help you while gaming to play better and more consistently. I’ve found that when using different setups, having a mouse bungee makes me more consistent. If you game on different setups then a mouse bungee could be very useful.

If you have a very messy setup and you find that your wire gets caught on things often, then a mouse bungee could be very useful for you.

Who Uses Mouse Bungees

Many people who want the best out of their mice use a bungee, such as pros. Mouse bungees are very common among competitive gamers that use wired mice. Although wireless mice have become very popular recently in the gaming scene, they still are very expensive.

Professional gamers need a smooth experience so they use bungees. Also, when they go from tournament to tournament they need to play consistently and a mouse bungee allows them to do so.

Many competitive gamers that are not even pros still use mouse bungees because of the benefits they can provide. Those who play games where sudden flicks of the mouse are common often utilize mouse bungees and benefit from them.

Buying one won’t make you a pro but it could help depending on your setup.

Solid Options

There are many great options for mouse bungees on the market that all compete with each other. Since there aren’t really features in bungees getting one that works properly and reliably is the main goal.

Some good options are the mouse bungees from Razor, Zowie, and Glorious. All of these are great, more traditional options, with hefty bases to avoid them from moving about. There are cheaper options that still provide the same experience but may not have as nice of a build.

Our Favorite

Zowie has been known for making some of the best equipment for esports and competitive gamers. Their CAMADE II gaming mouse bungee is no different.

The CAMADE II is well built with good materials, it supports most mice, and features two height options. You can’t go wrong with this bungee because it is tried and tested by many streamers and pros. Personally, this is the mouse bungee that I use and I have no complaints about it.

RGB Option

If you love RGB then Razer has you covered with their Gaming Mouse Bungee V3 Chroma. Like the Zowie option, it uses strong materials and it is also a great option that you can’t go wrong with. RGB peripherals are often a great way to add more to the look of your setup and its theme. The lighting works with Razer’s Synapse software.

This bungee is exactly like the non-chroma version of Razer’s Mouse Bungee V3 but adds vibrant RGB lighting. If you still want the great performance of this bungee but you don’t want RGB then you can save money and go with the non-RGB version.

White Option

If you want a white mouse bungee that matches your setup then Glorious’ Gaming Mouse Bungee is the one for you. Like the other two options, it delivers great performance and you should have no complaints about it.

Glorious gives you basically everything you could want is a mouse bungee with the option to get it in white in addition to black.

Alternatives

Tape Mod

Mouse wire tied to a monitor

If you don’t have to money to buy one but still get bothered by the cable getting dragged there is still an option. You can tape the cable up to your monitor which lifts the cable over the desk.

This would reduce the drag however is, of course, less effective. This method also won’t look as nice as using a bungee with it is an easy way to save $10 to $20.

Wireless Mice

A wireless gaming mouse

Additionally, if a cable really bothers you, and your budget permits, it is possible to buy a wireless mouse. This completely gets rid of the cable and makes a mouse bungee obsolete, however, it is not a cheap alternative.

We wouldn’t recommend getting a wireless mouse over a wired mouse and a bungee if all you care about is performance. If you also care about the looks of your setup and you want a clean, simple solution then a wireless mouse is great, assuming your budget permits.

Conclusion

Side view of a mouse bungee

Mouse bungees are very useful if you have a wired mouse since they prevent the cable from snagging and dragging across the desk. They lift up the cable above the desk preventing it from touching the desk causing unnecessary friction. This should hopefully improve your gaming experience.

A mouse bungee won’t instantaneously make you a pro but it could help you play better, more consistently, and also improve the overall experience. They are a great way to improve the experience of a wired mouse without paying the premium for a wireless mouse.

Thanks for reading and if you enjoyed this article then consider checking out some of our other mouse content.

AirPods Pro vs PowerBeats Pro: Which One Is Better?

Ever since Apple released their AirPods, in-ear headphones have taken over the audio market.

In-ear headphones, commonly known as earbuds, are the new wave and for good reason. Having your headphones fit into your pockets without needing to deal with the tangled mess of wires, is very convenient.

Today we are going to be taking a closer look at two earbuds that have broken the audio game since their release to see which one is better. The AirPods Pro and PowerBeats Pro, sold by the same company, Apple.

PowerBeats Pro case next to Apple Airpods Pro case on a desk

The Main Differences

While being sold by the same company for similar prices, you would be shocked by the number of differences the AirPods Pro and PowerBeats Pro have.

In this article, we are going to split them up into separate sections, including battery life, design, comfort, features, audio quality, and more.


Whats In The Box?

Unboxing experience of PowerBeats Pro and AirPods Pro

Let’s talk about what we are getting in the box from each of these products.

With the AirPods, we get the actual AirPods and charging case (obviously), two sets of different ear tip replacements, and a USB-C to lightning charging cable. Unfortunately, you do not get a USB-C power adapter or any power adapter. So to charge your earphones, you’re going to need to already own a wall adapter, or buy one.

Let’s move on to the Beats. The Beats packaging is almost identical to that of the Airpods. You get the case, and the earphones, three sets of replacement ear tips, and a USB-A to Lighting charging cable. Now once again, Apple does not supply the user with a power adapter, so you are going to need to buy one, or already own one.

Now obviously, like with any tech product, both of these include manuals in the box. They just weren’t really exciting enough to put in the picture.

Let’s keep track of the score for this showdown. So far it’s PowerBeats Pro: 1 and AirPods Pro: 1.

Design and Comfort

Airpod Pros next to PowerBeat Pros

Let’s first talk about the design of the two different cases. Now obviously the PowerBeats Pro have a much larger case in comparison to the AirPods Pro. This can either be a good thing or a bad thing for you. If you are someone who constantly loses things, and can’t seem to be able to keep track of where your stuff is, maybe the Powerbeats are a better option for you. Being so much larger, they would be much harder to lose than the Airpods Pro.

That being said, if you are someone who has grown to love the minimalistic form factor of most wireless earbuds, small and slim, then you are probably going to like the AirPods Pro more than the Powerbeats.
About the earbuds themselves, the AirPods have a much smaller design. Unlike their predecessor, the Airpods, the AirPods Pro actually have silicone tips that make sure that no matter how hard you shake your head, they won’t fall out. They also greatly improve comfort and help support compatibility with many more ears.

The Powerbeats Pro have a sort of double protection from falling out. They have the ear tips that the Airpods Pro have, as well as wingtips to guarantee that no matter how hard you are working out, the earbuds stay in your ear. The wingtip might not be favored by all, however, as they stick out a bit more than the AirPods Pro.

For this round, it looks like a tie between the Powerbeats Pro and Airpods Pro. Let’s give them each a point. After this round, its PowerBeats Pro: 2, AirPods Pro: 2.

Sound Quality

Now, this is where it gets a bit more complicated in the comparison. Sound quality is obviously a really important aspect of any audio device. But if you are buying these as an audiophile and need the absolute best sound quality, I’m sorry to tell you, but you’re in the wrong spot.

Ok so let’s get one thing straight, these two pairs of earbuds are not to be bought if you are strictly looking for the best sound quality. These are two great pairs of earbuds when it comes to design, convenience, but not for the optimal sound quality.

Also in this comparison, we won’t use the special audio features that the Airpods pro have in mind, just to make it fair. But do remember when you’re buying either one to remember the features when you click to check out.

The PowerBeats Pro have the typical emphasis on the low-end frequencies, giving users a higher bass while exercising. The mids are more recessed, but if you listen to bass-heavy music primarily, that may be what you are looking for. The highs are nothing too special and being much more predictable with a sharp dropoff, to avoid users from experiencing ear pain while listening to their music.

Now for the AirPods Pro, they have a much more consistent sound profile but still have that fun V-Curve among Bluetooth earbuds. Now the only thing that can possibly edge the AirPods pro over the Powerbeats Pro is the ANC isolation system. Asides from that, it’s mostly subjective.

Overall the main takeaways are that the AirPods Pro have a bit cleaner sound but it is not a huge improvement. Both have similar sound signatures too and will sound great with Pop, Rap, or EDM genres.

At the end here the AirPods Pro come out ahead at 3 to 2.

Battery Life

AirPods Pro and PowerBeats Pro cases being charged

Battery life can be one of the most important aspects of any sort of technology, but you definitely don’t want your headphones dying on you as you are only halfway through your commute to work.

The PowerBeats Pro supply 9 hours of playback on a full charge. With the charging case, however, users can enjoy another 24 hours of playback. If by somehow, you managed to completely discharge your charging case, don’t despair, as just 5 minutes of charge gives the earbuds 1.5 hours of playback.

The AirPods Pro are a bit of a different story. On a full charge, you can only expect 4.5 hours of playback on each pod. Just like the Beats Pro, users can expect 24 hours with the Airpods pro charging case. When it comes to fast charging, a quick 5-minute plug-in can give you another hour of playback.

Apple users also have the luxury of checking the battery status of their device through the use of the batteries widget, which was introduced in the release of IOS 14.0.

So at the end of this round, I felt that PowerBeats had a minor step up just taking the lead. At this point, its PowerBeats Pro: 3, AirPods Pro: 3.

The Features

Even though the Powerbeats are sold for about $30 less, you would think that two products sold by the same company would have a similar caliber of features right? Well, you would be wrong. The Airpods Pro absolutely blow the PowerBeats Pro out of the water in this aspect.

On the Airpods Pro, you have ANC (Active Noise Cancellation), Transparency mode, and Spatial Audio. ANC is pretty self-explanatory, activate it to block out noise from the outside. Transparency does the opposite, it allows noise in so you can hear your surroundings. Spacial audio essentially provides users with 3D audio when watching supported TV shows or movies. Not only that, but the Airpods Pro have tests to ensure that the ear tip that you have chosen makes a proper seal in your ear. Another great feature the Airpods have is the ability to activate Siri or toggle ANC and Transparency mode, by holding the end of the earbud.

Let’s move on to the PowerBeats Pro. They basically have none of the cool audio settings the AirPods Pro have. With the PowerBeats, you can activate Siri by holding the button on the side. Aside from that, the only better thing about the PowerBeats over the AirPods is the ability to change the volume of the media with a button on the actual earbud.

I think it’s obvious that the AirPods Pro took that round with ease, so the score is now PowerBeats Pro: 3, AirPods Pro: 4.


Conclusion: Which Is Better?

PowerBeats Pro case next to Apple Airpods Pro case on a desk

So what is the final verdict? Well, each of these products have their separate pros and cons, and it really depends what you want out of an audio device. Are you looking for the ideal workout device, or something more low-key?

Well, let’s answer these questions. The only thing that the Powerbeats pro have that is objectively advantageous in comparison to the Airpods Pro is the greater battery life, and the only thing the Airpods Pro have that is objectively advantageous to the Powerbeats Pro is the onboard features. They both have different designs and comforts, one isn’t completely better than the other, and they both have virtually the same components in the box.

Now all of this comes at a price, obviously, and the PowerBeats Pro can often be found for a bit cheaper. The PowerBeats are often found for a bit under 200 while the AirPods Pro are often 200 or more. Now which one is better, well we can’t make that decision for you as the best option depends on your situation. If you mostly work out then the PowerBeats may be the best option for you but if you want an all-rounder the AirPods Pro may be the one for you.

Logitech MX Master 3 Review: Make Your Workflow Efficient

The Logitech MX Master 3 is a productivity mouse that is packed with features. The MX Master 3 comes with all the essentials that you will want like wireless connectivity along with other features that can optimize your workflow.

Let’s take a close look at the MX Master 3 and decide if Logitech’s third iteration is the right one for you.

The Verdict

Angled view of the Logitech MX Master 3

Rating: 5 out of 5.

Logitechโ€™s MX Master 3 is a productivity mouse, packed with many features making it a great option for productivity and creative work. Its various features could improve the efficiency of your workflow.

The MX Master 3 packs great performance with a high-quality sensor and a fantastic build. It delivers innovative features such as a horizontal scroll wheel, the MagSpeed scroll wheel, app presets, and much more to help you get more done, faster.

Things like the in-depth software help you get much more out of the mouse. Wireless connectivity, a USB-C port, and fast charging provide a nice user experience too.

Unless you are on a budget or game the majority of the time this mouse is a great option, especially if you do creative work. Its price is a bit hefty at around the $100 mark but it definitely is worth it.

If you think the MX Master 3 is for you, check it out on Amazon.


In The Box

Unboxing of the Logitech MX Master 3

Inside the box, Logitech gives you everything that you need to use the mouse.

  • Cable: You get a high-quality rubber USB-A to USB-C cable. It supports fast charging and also allows you to use the mouse wired.
  • Wireless Dongle: The mouse does support Bluetooth but if you want a more stable connection that is also a bit faster, Logitech gives you a 2.4ghz dongle that is plug and play.
  • Paperwork: There is some paperwork inside the box but all the useful instructions are on Logitech’s product page.

Build Quality

Front view of the Logitech MX Master 3

The MX Master 3 has fantastic build quality.

The mouse is definitely one of the heaviest mice I have used at 141g. Although the weight may not be ideal for gaming, it feels quite hefty and it is not an issue because this mouse is not designed for gaming.

The MX Master is made of plastic, rubber, and metal. The core build is made from sturdy plastic with metal scroll wheels, and rubber where your palm and thumb rest.

The scroll wheels have no wobble and provide a texturized grip. The main scroll wheel has sharp, tactile steps while the secondary wheel is buttery smooth. All the buttons on the MX Master feel snappy and sound quite good. Omron switches are used for peak reliability, especially in the long term.

You can find the mouse in both a graphite gray color and a black color too. The cable is a dark gray for both versions.

Overall, the MX Master 3 has a nice feel and the materials used give you confidence in the product.

Shape and Comfort

Side view of the Logitech MX Master 3

The MX Master 3 has an ergonomic shape. It fits the mold of your hand and the buttons are perfectly in reach. This makes the mouse very comfortable to hold, especially for long periods.

Besides the 2 main buttons, the buttons that you will be pressing the most are all controlled with your thumb which maintains the user’s comfort.

If you use a palm grip with your mice then this mouse will be fantastic for you. Using the mouse with other grips is possible but it is not nearly as comfortable. The mouse is fairly large but if you have small or big hands then this mouse will be comfortable for you so that is not a concern.

On top of the ergonomic design, the fact that they use rubber where the pam and thumb rest makes the mouse a lot more comfortable.

Overall this is one of the best mice that I have ever used for comfort and it is obvious that Logitech put a lot of work into the design of this mouse. The MX Master 3 is comfortable and does not look out of place compared to other ergonomic mice.

Buttons and Scroll Wheels

On the MX Master 3, you get physical buttons. All have a solid, tactile feel with a pleasant sound. All these buttons can be remapped.

Along with the buttons, you get aluminum scroll wheels. Both have a texture to them to make them easier to find.

MagSpeed Wheel

The main scroll wheel supports a very unique feature that is one of the main changes from the previous from previous versions of the mouse. It functions similarly to Logitech’s Hyperscroll.

You can scroll through 1000 lines of code or over 100 pages in a PDF in just a second. This makes this mouse very useful when scrolling between different parts of a project. I also found it very useful in daily tasks like scrolling back to the top of a news article or quickly scrolling to a different part of a music playlist.

Initially, the scroll wheel will function like a regular mouse wheel with tactile steps. As you try to spin the scroll wheel faster, it will automatically move into a freespin mode. In this mode, the wheel will glide smoothly and quietly.

This system uniquely utilizes electromagnets. The wheel is electronically powered, allowing the user to have more accuracy and control.

Horizontal Scroll Wheel

One of the most unique features about the MX Master is its second scroll wheel that is horizontal.

Most mice only have a vertical scroll wheel to move up and down but with a horizontal scroll wheel, you can maneuver from side to side.

Logitech supports many app presets that make the horizontal wheel have different functions. In editing apps you can use the wheel to scroll through a timeline, drawing apps will change the size of the brush, and in zoom or teams, it will change the volume.

A horizontal wheel is a great way to improve the speed and efficiency of your workflow.

The Sensor and Buttons

Logitech’s MX Master 3 uses their Darkfield laser sensor. Logitech is renowned for making some of the best performing sensors and the Darkfield is no different.

The Darkfield laser sensor can track on almost any surface, including glass. This means that you don’t need a mousepad for good accuracy.

This sensor goes up to 4,000 DPI, which can be adjusted through the software. This sensor may not be suitable for gaming but from my testing, it performed quite well.

Wireless Connectivity

Logitech MX Master 3 mouse next to wireless dongle

In addition to a wired connection, you can also connect the MX Master 3 either with a 2.4ghz USB dongle or via Bluetooth.

The dongle will have less latency than Bluetooth and it is plug and play. If you wish to use the mouse with multiple devices then Bluetooth will be needed though.

You can connect to up to 3 devices via Bluetooth and then 1 with the dongle. This great if you want to use the mouse with multiple devices and it enables the Logitech Flow feature to work.

To change between the devices there is a button on the bottom of the mouse that you can press to change between any of the three devices.

Battery Life and Quick Charge

The battery one of the best things about this mouse. It lasts for up to 70 days, supports fast charging, and has battery-saving measures.

I rarely need to charge the mouse and when it reaches low battery the light on the side of the mouse will light up red. That means that I need to plug it in at the end of the day and then I will have battery for another 2-3 months.

After owning the mouse for almost 6 months I have only needed to charge it twice.

If you are out of charge, a single minute will give you a couple hours of use and 3 minutes can get you through the day.

When you stop using the mouse it will go into a power-saving mode but will automatically wake up when you need to use it again.

In-depth Logitech Options Software

The MX Master 3 is supported by the Logitech Options software. It gives you a lot of in-depth control over different parts of the mouse so you can be more productive and efficient with your workflow.

You have control over basic things like changing the mouse sensitivity, checking mouse battery, remapping buttons, and much more.

You can also control more specific things like gestures or control button mappings for specific apps.

App Specific Presets

You have the option to enable or disable different preset options for some popular apps with the MX Master 3. These presets can also be edited. This allows the buttons on your mouse to have specific functions only in specific apps.

There are presets for Microsoft Teams, Zoom, the Microsoft Office Suite, the Adobe Suite, different web browsers, and more.

For example, in Microsoft Word, the horizontal wheel will be used to zoom in and the side buttons are used for undo and redo.

Gestures

Where you rest your thumb there is a gesture button. In total, you can make up to 5 gestures.

You enact these gestures by either pressing down the button or pressing down the button and then moving the mouse up, down, left, or right. With each of these movements, you can apply custom presets to execute functions more quickly.

One very useful gesture is after pressing the gesture button you can move the mouse left or right to skip or go back to a previous song.

Logitech Flow

Logitech Flow is arguably one of the coolest features of this mouse.

Logitech Flow is unique because it allows you to use one mouse with multiple systems easily. You can work on two devices at once or you can even transfer files between the two systems.

For this to function, you need to connect to devices via Bluetooth connectivity on this mouse, and then connect to the computers in your network. This allows you to use multiple systems and even transfer files between them over the air.

The ability to transfer files quickly and easily between two systems can be very helpful. This removes the need for a flash drive and the process is also much faster.


Conclusion: Is It A Good Workstation Mouse?

Angled view of Logitech MX Master 3

Logitech’s MX Master 3 is a great mouse. It delivers tons of features, has a comfortable design, and gives you functionality for some of the most popular professional apps.

The MX Master 3 may not be the best mouse for gaming but if you do creative work or you are a power user then this mouse will give you a lot more functionality at your fingertips than most mice.

If price isn’t a factor this is probably the best mouse you can get for productivity. Overall it is a fantastic workhorse mouse and you can’t go wrong with it.

So if you think that you will benefit from the MX Master 3, check it out on Amazon for around 100 dollars at the time of writing.

Razer DeathAdder Essential Review: Is It Worth It?

Have you been scouring the internet for a good gaming mouse, but everything you find is way out of your budget?

 If so, the Razer DeathAdder Essential might just be the answer to your problem, supplying great performance, without taking a huge toll on your bank account.

Let’s dive into the specs, and see if the Razer DeathAdder Essential works for you.

The Verdict

Rear view of Razer DeathAdder Essential mouse

Rating: 4 out of 5.

The Razer DeathAdder Essential is well built for its affordable price, and is partnered with a high caliber sensor.

If you are a gamer with a low budget, this mouse was practically manufactured just for you. The DeathAdder comes in two colors, black and white, both costing the same, affordable price, of about $30.

The DeathAdder Essential has a very sleek and comfortable design. The mouse boasts a very ergonomic shape, making it a great option for people who prefer the fingertip grip or the claw grip. Another positive aspect of the DeathAdder is that it is very lightweight, meaning after long gaming sessions, your wrists feel no strain.

Being a Razer product, the DeathAdder Essential comes with the inclusion of the Razer Synapse software, allowing users to adjust the LED brightness, adjust the sensitivity, and customize the functions for each of the 5 buttons on the mouse.

The main drawback of the mouse is that the only option for color customization is adjusting the brightness of the preset LED, meaning users cannot change the colors of the LED for their mouse, unlike the Logitech G203, which is priced at a similar mark.

If, by these descriptions, you think the Razer DeathAdder Essential fits your needs, check the price on Amazon.


Razer DeathAdder Essential Specifications

Length~12 mm
~12.7 cm
~5.01 in
Width~73 mm
~7.3 cm
~2.86 in
Height~43 mm
~4.3 cm
~1.69 in
Weight~96g
~0.1kg
~0.21 lbs
Sensor TypeOptical (200-6400 DPI)
Polling Rate500 or 1000Hz
Cable Length1.8m (5.9ft) Paracord cable

In The Box

At such a low price, you wont find any extra things in the box besides the mouse and manual. At higher price points, you tend to find amenities such as charging cables for Bluetooth mice, and maybe even weights for the most top tier of mice.

With the DeathAdder Essential, you don’t get anything other than a Razer sticker, some documentation, and the actual mouse.

The Build

Angled view of Razer DeathAdder Essential mouse

Mice can be the most subjective item when someone is talking peripherals, but when talking about the build quality, sensor, and switches, it can be easy to form an opinion.

Being the reputable brand they are, we all knew that Razer was going to knock it out of the park with the build quality on the DeathAdder Essential. Don’t get me wrong, it definitely does not feel like their more expensive mice, but for around $30, you can be assured that you are paying for something good quality. The main issue that I have found with the overall quality of the mouse is that the scroll wheel can start to make unpleasant squeaking noises occasionally.

Razer gives you a mouse with a plastic build and some rubber. The plastic feels high quality and does not raise any concerns. On the sides of the mouse and on the scroll wheel are rubber pieces that allow the mouse to be more comfortable as it is easier to hold the mouse.

The cable is a nice braided cable and I have no faced any issues. It isn’t a super heavy like many other gaming mice.

The Razer DeathAdder Essential has 5 re-programmable buttons. What does this mean? It means that out of the box, each button has its own function. But through the software, users can change the function for each button.

Shape and Comfort

Side view of Razer DeathAdder Essential  mouse

The Razer DeathAdder Essential is a very comfortable mouse. With some gaming mice, they are almost specifically designed for gaming, giving users a feeling of discomfort after using the mouse for a while. The DeathAdder Essential has an ergonomic shape, making it an excellent choice for those who suffer from pain in their wrists, or in their hand.

You can use this mouse with a palm, fingertip, or claw grip. All work quite well even though it is an ergonomic mouse. The mouse is also compatible with hands of all sizes.

The most important thing about the actual shape is that this mouse is specifically designed for right-handed people. If you are left-handed and in the market for a low-cost mouse, the DeathAdder is not a very good option for you.

Switches and Scroll Wheel

The DeathAdder Essential has mechanical switches with approximately a 10 million click life span. On the mouse, the switches are nothing special. They work and certainly aren’t bad, but the frustrating part is that they could be so much better.

Razer released the optical switches a few years back, that deliver faster clicks and minimal latency. The fact that Razer has implemented this switch on 10 of their other mice, but not this one is definitely a bit upsetting.

The scroll wheel itself is nice with some grippyness and nice tactile steps.

Sensor and Polling Rate

The sensor on the Razer DeathAdder Essential has a range of 200-6400 DPI. For those of you reading the article and wondering what DPI is, it stands for dots-per-inch. You can basically say that DPI is another way of saying mouse sensitivity. The higher the DPI, the higher the sensitivity. Disappointingly, you cannot change the DPI on the mouse through a DPI button, but you have to access the DPI controls through Razer Synapse.

The Polling Rate on the DeathAdder Essential can be toggled from 500 or 1000 MHz. The Polling Rate basically sends an update of the mouse’s position to the computer. 500 MHz means an update is sent every 2 milliseconds, 1000 Mhz means an update is sent every millisecond. The difference between 500 and 1000 is hardly noticeable, but the option is there for those who prefer either of the two.

Razer Synapse

Synapse Software for Razer DeathAdder Essential mouse

In order to utilize the full potential and features of the DeathAdder Essential, users must install Razer Synapse.

Within the software, three major changes can be made to the mouse. The lighting can be adjusted, the DPI and Polling rate can be changed, and the mouse buttons can be re-programmed.

The customize feature is great for people who like playing around with all sorts of settings and seeing what works best for them. With this feature, users can choose the DPI, change the mouse function, create windows shortcuts, activate multimedia settings such as play, pause, the ability to launch programs or disable each button on the mouse. Suffice to say, if you want a mouse that is jam-packed with features, the Razer DeathAdder Essential is looking pretty good for you right about now.

The DPI changes in increments of 100. In the program, users can set different sensitivity stages, which are effectively different presets for different uses. For instance, while gaming, if you prefer a higher sensitivity, you can make a sensitivity stage of an x amount of DPI, and you can make another one for work/web browsing.

Adjusting the lighting is another feature that Razer has included with the DeathAdder Essential. Although this feature is quite underwhelming and may be a bit of a letdown for the RGB fans out there who were enjoying the features of the mouse so far, you can’t really complain after you see the price of the mouse. You can only change the brightness, toggle between static light and breathing light, and choose if you want the lighting to switch off after a certain amount of minutes (up to 15 minutes).


Conclusion: Is The Razer DeathAdder Essential A Good Fit For You?

Front view of Razer DeathAdder Essential mouse

All in all, the Razer DeathAdder Essential is a great buy for people who are getting into the PC gaming world and are just playing casually with friends. While the mouse has a plethora of positives, I just want to mention the negatives right now to establish any deal breakers for you guys.

The DeathAdder Essential is designed for righties, if you are left-handed, this mouse won’t work for you. The only lighting available is the preset white or green (depending on which color mouse you purchase), so to all of our RGB fans, you might not be satisfied with the DeathAdder Essential.

Now while the DeathAdder Essential is a great buy for those with a budget of about $30, if you do have the extra price, Razer has many other products. The direct level above the DeathAdder Essential is the DeathAdder V2. The V2 has all the great features of the Essential, and more. The ability for full RGB customization, the world-class Razer Optical switches, up to 20k DPI, and 8 programmable buttons are all present. However, all of these extra features have to come at a raised price, and the V2 comes in at about $60.

The DeathAdder V2 Mini is another great option, but those with bigger hands might not prefer it. The V2 Mini has similar features, with full RGB customization, 8.5k DPI, and 6 programmable buttons. The V2Mini seems like a great pick, but keep in mind that it will come in a significantly smaller size.

Overall the Razer DeathAdder Essential is great for gaming, especially if you are on a budget and it is a great option to consider.

Thanks for reading!

Redragon K530 Review: Too Good To Be True?

When I was looking for a cheap and decent 60% board with hotswap capabilities, the Redragon K530 caught my eye. But when I received the K530 in the mail I was very disappointed for two reasons.

The Verdict

Redrapon K530 mechanical keyboard on grass

Rating: 3 out of 5.

The Redragon K530 is an entry-level budget mechanical keyboard with a 60% layout. It’s Redragon’s first attempt at a 60% keyboard dating back to January of 2020. It delivers shockingly good Bluetooth and hotswap at a decent price with some caveats.

You get a nice simple, solid plastic case in either black or white. It also features one level of height adjustment with some rubber-tipped flip-out feet.

Unfortunately, it only comes with 2 switch options. Either linear reds or tactile browns, more on this later. Lastly, and one of the more important and eye-catching features is the hotswap capabilities or lack thereof.

If you want awesome Bluetooth capabilities and a decent case then this board is perfect for you.


In The Box

In the box you receive quite a bit especially at this price point.

  • The Keyboard: Obviously.
  • Plastic Keycap Puller: Its a standard red puller you will get with most prebuilts. It’s not very good and will scratch up your keycaps. We recommend getting a metal one from amazon.
  • Tiny Metal Switch Puller: If you do choose to remove the switches use this. It’s not very good for ergonomics but it gets the job done. By the time you’re finished with all the switches you will question why you even started taking the switches out because of how painful it is.
  • USB Cable: Right angle on the keyboard side to incorporate the USB connector on the side of the keyboard. Not braided but doesn’t develop any kinks, not the greatest cable either.
  • Extra Switches: This is pretty cool, it comes with an extra brown switch, but also comes with an extra Red (Linear but quite light), Black (Linear but heavier then red), and Blue (Clicky with the same weighting as browns.) This is pretty cool if you wanna try out different switches and how they feel.
  • Redragon Sticker: Tacky little sticker with the Redragon logo for people who want to rep the Redragon brand.
  • Documentation: Boring boring boring, except for the manual with all the key bindings and layers, that’s quite useful.

Build Quality

K530 features a fully rectangular case. No weird shapes like the Keychron K6 or slots for aluminum panels. The case is solid and has barely any flex. On the back, there is a pair of kick-up feet with only 1 level of elevation and a label with some information and branding. Personally, I like it using it without the kick-up feet which makes it has about a 5-degree typing angle but with the feet, it will get up to about 8 degrees.

On the left side, there is a switch for Bluetooth on and off and a 3-way switch to change between Bluetooth modes with an RGB led next to it so show what mode you are on. Another LED is also there to show the battery and when you enter pairing mode.

Buttons on Redragon K530 keyboard

The USB port is on the side, which is a downside for many people. It basically cuts the use of any custom cables and can be negative towards cable management depending on how your setup looks.

Stock Keycaps

The K530 comes with a set of ABS, double-shot keycaps. These keycaps don’t look very good with a significant and undesirable gamerey font. Speaking of the font it is also very inconsistent where the same letters look different on keys. While this may not be a bad thing the stock keycaps also have shiny and smooth sides which can be prone to scratching and fingerprints.

They are low-quality ABS which means they will shine up very easily and don’t feel very good when typing. Depending on how much you sweat and how much use the keyboard it will shine up in a couple months due to the natural oils and greases produced by your hands.

The keycaps are OEM profile which is common throughout prebuilt keyboards as such. The keycaps are sculpted in a way to hold your hands in place. Refer to the infographic below to see various keycap profiles and their height.

Comparison of different keycap profiles
Via Reddit: u/gtderEvan

The keycaps are either full black or full white. No accents or MAC extras. The sub legends are printed on the side of the keycaps that face you for ease of access.

The Stabilizers

This board features cherry-style plate mount stabilizers that could use some work. They are neither pre-clipped nor pre-lubed but since this keyboard is hotswap both can be done very easily.

Generally, every stabilizer set needs to be lubed for a good experience so if you would like to lube your stabilizers check out this guide by keyboard enthusiast Taeha Types.

Hotswap

PCB of Redragon K530 keyboard

One of the defining factors of this board is that it is hotswap, meaning that you can change the switches without soldering. While this is a welcome feature in most keyboards it is most welcome if it is done correctly.

Most hotswap boards use sockets from Gateron, Kailh, and Outemu. Some higher-end boards will use millmax sockets but usually, those are the only boards that you have to build and solder yourself. This keyboard uses Outemu hotswap sockets which is a huge problem with this board and is the main reason I haven’t recommended it to many people. Outemu hotswap sockets mean that only outemu switches can be used with the PCB since outemu switches have pins that are slightly less thick compared to other switches like Gateron and JWK.

Furthermore, its only 3 pin hotswap. Meaning PCB mount switches like Boba U4 or U4ts wont work without clipping the legs. This is an easy mod that can be done with a nail cutter but is still not favored by many people since its permanently modifying your switches.

Another problem that directly affects the hotswap is the way the LEDs are mounted. Instead of being mounted flush with the PCB, the LEDs protrude a bit as shown.

This can cause switches that don’t have a SMD cutout to not fit properly. Some examples would be Cherry MX Switches with the black housings and most JWK switches.

To conclude, this keyboard has hotswap capabilities but is limited by the fact it only accepts Outemu switches. Outemu switches aren’t the greatest but they definitely aren’t the worst and Outemu manufacturers many switches that are very good like Boba U4 and U4T. Lastly, the SMD issue limits use with even more switches. For this reason, we can’t recommend this keyboard for people looking for hotswap capabilities.

Wireless

Wireless is where this board shines, it sports Bluetooth 5.0 flawless connecting, a giant battery, and its super easy to connect. It has 2 switches on the side to manage Bluetooth. One for turning the board of and on, and one for changing what device the Bluetooth connects to, and lastly it has a layered button on the keyboard to turn on pairing mode.

Wireless capabilities is definitely where this board shines as it has everything you could possibly need for connecting via bluetooth

Switches

Outemu brown switches

The version of the K530 that we have on hand is the black one with brown switches. These switches are meant to be tactile switches, tactile switches are a mix between linear and clicky; they have the bump of a clicky switch but also aren’t as loud as clickies.

Most brown switches in the keyboard community are known to not have the best tactility. But when I tried these switches I was pleasantly surprised with the amount of tactility they carried.

Redragon K530 with Brown Switches

While the tactility is pretty decent, the spring ping is terrible. The scratchiness and housing and stem wobble is also considerable. The switch uses the Kailh style latches that are quite difficult to open compared to genuine Kailh switches like Box Jades or Box Blacks.

While these do feel better than your average brown switch in terms of tactility, they lose some points in the lack of smoothness and spring ping.

Software

The Redragon software isn’t great but it is something. It is straightforward in terms of lighting and keybinds but if you want to experiment with more layers it will be tough.

Redragon Draconic Software

RGB control is quite extensive and there are a plethora of effects. The RGB is quite bright and vibrant with very good color accuracy. While the RGB is quite bright it is not as bright as the Drop ALT but not as dim as the Keychron K6. If you are looking for a board for the main purpose of RGB i would recommend something like the Womier/GamaKay K66 or K61 since they are at a similar price point and are very RGB-centric boards.

Lighting controls on Redragon Draconic software

Conclusion

Birds eye view of the Redragon K530
How my K530 looked after thorough modding

Looks can be deceiving and that is the case with the K530. While it is a keyboard that works you won’t be very happy with what you get. The hotswap incompatibilities and the led issues are just too much and outshine anything good with this keyboard.

All in all, I do not recommend this keyboard because of the hotswap and how it does not accept most traditional keyboard switches like Cherry and Gateron switches. The only time I would truly recommend this board is to someone looking for very good Bluetooth, wants a decent tactile experience out of the box, and does not care about hotswap.

Thanks for reading!

Keychron K6 Review: The Best Board For 100?

The Keychron K6 is a mechanical keyboard that is absolutely packed with features such as Bluetooth connectivity and RGB lighting.

In a compact and efficient 65% layout, the K6 delivers many features that make it a great option for anyone who needs a solid keyboard for a good price.

Let’s dive in and take a deeper look at the Keychron K6.

The Verdict

Top view of Keychron K6 mechanical keyboard.

Rating: 4.5 out of 5.

The Keychron K6 is 65% that delivers backlighting, macOS support, and the option to get a hotswappable PCB.

In addition to that, the board features wireless connectivity with Bluetooth 5.1 with an 80-hour battery life.

You get a solid case with an adjustable height and if you are willing to pay about 10 dollars more you can get aluminum bezels.

Keychron gives you a ton of customization on what features you want, obviously at an increased cost, to get an aluminum case, hotswap PCB, and RGB lighting. You are also given the option to choose the three main kinds of switch, clicky, tactile, and linear.

If you want a board with a ton of features and great value all with a compact layout, the Keychron K6 is a great option. It’s not only a great value offering but the K6 also makes for a great travel board.


In The Box

Unboxing of Keychron K6 mechanical keyboard

In the box, the K6 comes with several items that will help you get up and running as well as some extras to improve your experience with the board. In the box you will find:

  • USB-C Power Cable: You get a nice braided cable that is USB-C and has a 90-degree angle because the port is on the side. No kinks developed after months of use.
  • Warranty and Information: Keychron gives you all the essential information on how to use the board with clear instructions along with a pamphlet for warranty information.
  • Extra Keycaps: You get additional keycaps to add orange accents and for better support for both Windows and macOS. There are modifier keys for Windows and macOS-specific keys.
  • Keycap Puller: A wire puller is included which makes the process of taking off keycaps very easy while not scratching your keycaps like with cheaper plastic pullers.
  • Key Switch Puller: If you get the hotswap version of the board then a metal switch puller is included. It is not amazing but it does the job.

Overall it is great that you get so many things in the box and the extras really tie in the experience.


Build Quality

Angled view of Keychron K6 mechanical keyboard

The Keychron K6 has two case designs. Plastic and aluminum. The majority of the case is made from plastic aside from the aluminum top plate. If you do opt for the aluminum version there will be aluminum bezels around the sides for a more hefty feel and premium look.

There is little flex to the board and it feels quite sturdy, especially if you get the aluminum version.

There are 3 levels of height adjustment to the board with a flat typing angle, 6-degree angle, and 10-degree angle. On the bottom of the board, you will also find for moderately size rubber feet to keep the board from sliding around.

The front height was a common complaint with older Keychron boards but while it is still not ideal it is a bit better with the K6. I am able to comfortably type without my wrist rest.

On the left side of the board, you will find a USB-C port along with two buttons. The first button allows you to switch between Windows/Android and macOS/iOS. The other button allows you to switch between Bluetooth, wired, and off.

This is quite a convenient spot for the buttons as it is not in the way and easy to reach but it is not the nicest spot for the cable. It makes cable managing your keyboard cable a lot harder if you are using it in wired and removes the possibility to use custom cables.

For most people, this won’t be too much of an issue, especially if you plan to use the board with Bluetooth.

The Keycaps

Keycaps for Keychron K6 mechanical keyboard

The K6 comes with a set of ABS keycaps in the OEM profile with doubleshot, shine-through legends. Included are some alternate keycaps including some mac keys and accent keys if you want to add an orange accent to the light or escape keys.

Since the keycaps are made of ABS they will develop shine over time but since the set is pretty good quality for a prebuilt board, it will take at least a month for it to show up. This shine will come from the natural greases and oils from your hands.

The OEM profile is the standard among pre-built mechanical keyboards. The keycaps are contoured to match the shape of your hands. Since this is similar to most pre-built mechanical keyboards, if you have used another in the past it will be very easy to get used to.

Since the keycaps use the doubleshot method for the main legends this means that the legends are reliable and won’t fade away. Although the main legends are shine through there are some printed sub legends to show extra functions that work with the fn1 and fn2 keys.

The keycaps, aside from the orange accent keys, have a gray theme with the use of both light and dark gray. They have a very smooth feel too. The legends on the modifiers look modern and simplistic which is very nice in comparison to other pre-built boards that have aggressive-looking legends.

The Switches

Switches for Keychron K6 mechanical keyboard

Underneath the keycaps, Keychron gives you 3 switch options. You get a clicky, tactile, and linear switch from Gateron.

Gateron RedA light linear switch with a smooth travel
Gateron BrownA medium weight tactile switch with a light tactile bump
Gateron BlueA medium weight clicky switch. It has a loud sound and sharp tactility

Gateron provides some great switches for pre-built boards. All these switches are good options but if you get the hotswappable version of the board, you can replace the stock switches with any option of your choosing.

Gateron’s switches have a durability of 50 million keystrokes which just means that these switches will last a very long time and will probably last longer than the majority of other components on the board.

The Stabilizers

Stabilizers often have a big effect on how a keyboard sounds and Keychron’s stabilizers are some of the better ones that I have tried on a prebuilt keyboard. Keychron has opted to use Cherry Style plate mount stabs that are factory lubed for a better sound and feel.

The sound and feel will also change based on what switches you use. Clicky switches will block out any rattle from the stabilizers while linear switches could make rattle or ping more obvious.

Overall the stabs are not perfect but they are much better than the stabilizers on most gaming keyboards. If you are coming from a Corsair, Razer, or similar keyboards these stabilizers will be an upgrade. If you get hotswap version of the board then you can easily mod the spacebar to sound and feel even better by lubing it and clipping it yourself.

Software (or Lack Thereof)

Sharpkeys Software for Keychron K6

Unfortunately, Keychron has no official software or firmware for any of their keyboards.

Keychron has rumored that they are making a software of some sort but little details are known about it and its release date.

Luckily there are some options that Keychron suggests for you to use. On Windows, they recommend that you use Sharpkeys and Karabiner for MacOS (Note: Karabiner won’t work on Linux and GNU based systems). Both softwares work by remapping the buttons of the keyboard input at a low level in the operating system.

This means that all these changes will not actually save to the board so if you move the board to another device none of your mappings will be there. This also means that if you plan to use any other board with your computer that the mappings will be changed because of these softwares.

Hotswap PCB

Keychron K6 with switches, keycaps, and switch puller

If you choose to pay extra, you can get a K6 with a hotswappable PCB. This means that you can change the switches without needing to desolder anything. This process takes a few seconds just to take out or put in a switch.

The board supports both 3 and 5 pin switches and it is north-facing. This means that the keyboard supports switches from most switch manufactures including Kailh, Cherry, Drop, and much more. The fact that the sockets are north-facing means that there could be interference between the switch and the keycap with high-end GMK keycap sets but it does allow more of the lighting to get through. This will not be an issue for most people that are in the market for this board though.

A PCB with hotswap sockets is a very useful feature and it makes this board great for those who want to get into the mechanical keyboard hobby but if you just want a keyboard to type on then there is no need to spend the extra money.

Bluetooth Connectivity

One feature that makes the Keychron K6 such a great option is the fact that you can connect the board to three devices with Bluetooth 5.1. This is very useful for those who may use multiple devices or want to travel with the keyboard.

The Bluetooth works with Windows, MacOS, iOS, and Android.

The board supports a 4000maH rechargeable lithium-ion battery. The battery is rated for 80 hours or 10 days with 8 hours of usage, while backlighting is on. This was consistent with my testing. After about 5 minutes of inactivity, the board will go into a low power mode turning off the LEDs. The only complaint you may have is that it takes a few seconds for the board to turn back on.

The latency with Bluetooth actually is not bad. Although I would not recommend it for gaming it is not a terrible experience. Depending on the game, it was not even noticeable that I was still on Bluetooth.

It is worth mentioning that I did have some connectivity issues when I first got the board. At first, the board would not go into pairing mode. I fixed this issue by leaving the board to charge for a few hours and then it worked. Ever since I have never had any issues with Bluetooth.

Mac Support

Angled view of Keychron K6

A very nice feature about all Keychron boards is MacOS support. Many boards only officially support Windows so some boards either won’t work or some of the modifier keys may have no functionality.

On the side of the K6 is a button to change between Windows/Android or Mac/IOS. This is complemented nicely by the Apple-specific keycaps.

This feature is very nice because it means you can use this keyboard no matter what operating system you plan to use. If you are primarily a Mac user then this is one of the best boards that you can get.

Back Lighting

RGB lighting on Keychron K6 mechanical keyboard

The Keychron K6 features either white or RGB backlighting the RGB option will cost a bit more. The RGB lighting is not as bright as gaming keyboards that I have tried from Corsair, Logitech, or Razer. It is not very bright but is still noticeable.

RGB lighting is always nice to have to add to a desk theme and the white blends well in an office environment.

The LEDs along with the modern font of the keycaps are not obtrusive and don’t make the board look overly gamery. The LEDs are versatile for any situation.

Due to the keyboard having no dedicated software currently, all the effects are on the board. There are a variety of effects from static colors to type lighting. With the white LED models you won’t have nearly as many lighting effects.

You can also easily turn on and off the LEDs by pressing either fn1 or fn2 and the light button.

Conclusion: Should You Get The K6?

Side view of Keychron K6 mechanical keyboard

The sub $100 price range is very competitive but the Keychron K6 emerges as a great option with great performance and features.

It delivers tons of utility with a nice-looking case. You get Bluetooth, macOS support, backlighting, and the chance to get a hotswappable PCB. You get all the utility that you need while in a compact 65% layout.

The wireless connectivity helps this board be very portable and it allows you to have a clean setup.

The board is quite sturdy with minimal flex and a decent weight for its size.

The only major drawbacks of the board are the fact that the USB-C port is on the side limiting your options for custom cables and cable management options as well as potential Bluetooth connectivity issues. Luckily the connection issue that I faced had a simple fix but, unfortunately, these issues are common.

If you are interested in checking out this board then you can see the Keychron K6 on Amazon.

Also if you enjoyed this article consider checking out some of our other keyboard reviews.

Microsoft Surface Headphones 2 Review: ANC, Bluetooth, Style

The Surface Headphones 2 are a pair of headphones for enjoying music especially while on the go.

Microsoft positions the pair in a highly competitive market of Bluetooth, ANC headphones with an interesting twist on having a more unique interface and look.

Let’s dive in and take a look and see how they compete.

Angled view of Microsoft Surface Headphones 2

The Verdict

Rating: 5 out of 5.

If you want an excellent pair of headphones that has Bluetooth, ANC, and a solid build, the Microsoft Surface Headphones are a great option to consider. They are a great option for music listening at home or on the go.

If you want everything that the top Bluetooth headphones deliver at a slightly cheaper price this is a great option. Microsoft’s Surface Headphones 2 are still very competitive but have a better value over some of the more expensive offerings on the market.

The Surface Headphones 2 are often compared to more expensive options like Sony’s XM4s or Bose NC700s. Although the Surface Headphones are 100 or more dollars less expensive, they compete very closely with these options and are often compared to both.

The build is strong along with a comfortable design that makes these a great option no matter where you are. You can use them throughout the day. Along with this, you get similar sound quality as other premium Bluetooth headphones.

The interface is one of the most unique things about this pair and the inclusion of dials makes interacting with the device very easy while still having a lot of functionality.

Additionally, there is support from many other features like a carrying case, software support, fast charging, ANC, and ambient sound.

If your main priority is having the best sound quality then there are other options to consider but for a Bluetooth pair, this is excellent.

You can find the Surface Headphones 2 on Amazon for a great price.


In The Box

Unboxing of Surface Headphones 2

Everything is packaged very nicely. In the box you will find the headphones and some accessories.

  • Carrying Case: A carrying case holds almost everything that you will need to use the headphones, including the pair themselves. It is a well-made, hard case with fabric.
  • Headphones: Inside the carrying case are the headphones with some protective paper that you can peel off.
  • USB-A to USB-C: You get a rubberized cable for fast charging the device at 4.1ft (1.5m) .
  • 3.5mm to 3.5mm adapter: If you want to use the pair wired, you get a 3.1 ft (1.2m) long cable.
  • Instructions: In the case, by the cables, you will find the instructions on how to use the buttons and gestures.
  • Manual: You will also get a manual that covers everything that you may need to know like contacts and support.

Technical Details

  • Drivers: 40mm Dynamic Drivers
  • Frequency Response: 20Hz to 20kHz
  • Sensitivity (Sound output): 115dB with cable or Bluetooth
  • Noise cancellation: Up to 30dB for active, up to 40dB for passive
  • Inputs: USB-C, 3.5mm
  • Weight: 0.64lbs (290g)

The Build

Top view of Microsoft Surface Headphones 2

The build of the Surface Headphones is quite good. You have good use of aluminum, plastic, fabric, and pleather. Plastic is used for most of the design with aluminum for the frame. You can also see aluminum connecting the earcups to the headband. The earcups and top of the headband use pleather with fabric inside the earcups.

I have accidentally dropped the pair and they have been fine. Through regular use, you should have no issues. You get the standard build with other headphones premium ANC headphones.

There is no sweat rating on the Surface Headphones but I had no issues with regular use or exercise. I wouldn’t want to risk anything with more premium headphones but I have taken the pair on runs and to the gym and had zero problems. They are fine from my testing but there is no official rating to back it up. I would also not recommend using the pair in the rain as there is a high risk of damage.

After using the pair for about a year, there are some sweat stains on the inside but it is nothing too bad and there is no effect on the performance of the device.

To back up the build of the device is a 1 year warranty.

The pair feels well build and nice to the touch. I have no complaints.

Style and Comfort

You have two color options with the Surface Headphones 2. You can get a matte black or a light gray. Both look quite nice and are resistant to scratches and other cosmetic issues.

There Microsoft logo is on the lower part of the headband on both sides. It is a reflective material that is consistent with the logos on the other Surface line’s products. Overall this style looks quite nice, especially if you own other Surface products.

The comfort of the Surface Headphones 2 is pretty good and it is among the best for Bluetooth headphones. There is a decent amount of cushioning on both the headband and earcups so there are never pressure points. I only found that there would be too much pressure if you are using the headphones for extended periods of time of two or more hours.

Using glasses with this pair is not as good as some other headphones that I have tried but it is pretty good.

Although there isn’t too much pressure, the Surface Headphones stay on your head really well even if you are running or jumping. The Surface headphones are a decent option for working out but they don’t support any official sweat rating so use them at your own risk. I have not had any issues with my pair and I have had them since they came out, using them for everything from working to going to the gym.

The earpads use of pleather makes them very comfortable but if your ears get hot easily then you could run to comfort issues. My ears get hot no matter what headphones I use. With the Surface Headphones, my ears get uncomfortably hot after about 45 minutes of usage. For most people, you could probably use the pair for upwards of two hours.

Another potential issue you may encounter with the Surface Headphones is that your ears may touch the drivers. The material on the inside is some sort of soft fabric so it doesn’t get uncomfortable.

Most people will not have an issue with the size of these headphones unless you have a very small head. Most small heads will fit well but children may encounter problems.

The headphones are quite light at 290g or 0.64lbs. This helps them not feel heavy on your head even after long periods of time. The low weight also makes the headphones very portable.

Sound Quality

Frequency Response of Microsoft Surface Headphones 2
Frequency Response Results From Sonarworks

The Surface Headphones have a more “appealing” and “fun” sound signature that is mainstream among Bluetooth headphones. There is more of a V curve meaning there is more of a boost in bass and some of the vocals.

The bass hits quite nicely and vocals don’t sound harsh but unfortunately, the mid-range controlling most instruments is a bit recessed.

Although these headphones have the same sound profile as many consumer headphones there are some other factors considered like the clarity of the sound and separation between different sounds.

I would say that you get what you pay for. The sound quality is better than most of the cheaper offerings and even options at the same price range. The quality is quite good but not as good as maybe the Sony XM4s, although they are more expensive.

I noticed that the quality of the sound was the same between wired and Bluetooth. This is also due to the fact that most audio platforms, like Spotify or Apple music, only playback audio at a quality of 320kbps. The amount of information in the music would have to be much different to notice much of a difference between wired and wireless.

Overall the sound is quite good and unless you are used to very premium headphones or audiophile quality pairs the sound is amazing for most. The only issues I felt were that the mid-range instruments were not as present as I hoped and although there is quite a lot of bass and it is able to hit hard, it was not necessarily always clean. This is common among popular noise-canceling headphones.

That being said, this is a deep-level analysis from someone who has tried more premium sounding headphones so the sound signature and quality will be great for most people in the market for Bluetooth headphones.

The Interface

One of the most unique aspects of the Surface Headphones is the interface. Most high-end Bluetooth headphones will support gestures to skip songs or change the volume but Microsoft takes it a step further.

Microsoft uses two dials, two buttons, and both earcups are touch capacitive.

One button is used to turn on and off the device and the other button is used to activate either Cortana or your device’s virtual assistant. This makes communication with Google Assistant or Siri very easy, even if you don’t have your phone is in another room.

The controls on the earcups allow you to skip or go back to a track as well as pause and play. It doesn’t matter which earcup you use because the controls work on both.

Finally, arguably the most unique thing about the Surface Headphones, the dials. These dials are smooth and continuous. On the edge of the earcups are two dials. The left one controls the level of ANC as the dial on the right controls the volume.

The control that is given to you from the dials makes the Surface Headphones very easy to use and the interface is one of the best on any headphone. It is very easy to use and you have a lot of functionality without needing your phone.

Software

Software for Surface Headphones 2

Software is always a great thing to go alongside a pair of headphones. With the Surface Headphones, Microsoft has their Surface Audio app both on the PC and phone.

The software allows you to monitor important things like battery or volume and gives you access to in-depth functionality.

With the software you can change the name, edit EQs, change language, and update the device.

Over the air updates can improve things like battery life and even sound quality.

Cortana and Voice Assistants

One interesting feature of the Surface Headphones is the inclusion of a voice assistant, Cortana. You can use Cortana to do things like read emails to you or interact with any Microsoft app.

Ultimately I don’t find Cortana to be useful but you can still use the headphones with the virtual assistant of your device. To interact with the assistant of your device, simply long-press the side of either earcup.

Connectivity

The Surface Headphones support the industry standard Bluetooth 5.0.

I was able to go about 100 feet (30.5 meters) away from my computer or phone with obstacles in the way before the audio started to cut out. Without walls or other obstacles, you can probably be over 200 feet (61 meters) away from your device without it cutting out.

You could leave your device and walk anywhere around most apartments and even many homes without the audio cutting out. At the gym, you could potentially leave your phone in a locker if it is close enough to you.

Pairing the device is also easy. Simply press the power button and then press again and hold for about five seconds until you hear, “You’re ready to pair”. Whenever you turn on the device it will automatically connect to paired devices.

You can pair with multiple devices for seamless switching from a phone and computer with audio plays from a different device.

Overall this is standard Bluetooth performance with options from the likes of Sony and Bose but it is still quite good and works with few issues.

You can also use the Surface Headphones wired if you want via the 3.5mm cable.

Battery and Charging

The battery and charging are not as good as some of the industry leaders but the performance is still quite good, especially for the price.

Microsoft’s Surface headphones can charge to 100% in under two hours and get an hour of playtime after 5 minutes of charging. Sony has a charging speed with their XM3s of five hours in just 10 minutes.

As for the battery, you can get about 20 hours of music playback while using Bluetooth and ANC. I found that this was enough to last me over a week with two to three hours of daily usage. While using them at work, they can last me a few days if using them for the majority of the day.

Microphone

Close up of earcup for surface headphones 2

In order to have noise cancellation, the headphones need multiple mics. As a result, the Surface Headphones have a better mic than most headphones I have tried and on par with more premium Bluetooth Headphones.

They are better than the mics of AirPods but still worse than a dedicated microphone.

The sound is good enough for calling but I would not recommend using Surface Headphones for any recording.

ANC and Ambient Sound

One of the defining features of the Surface Headphones is ANC or active noise cancellation alongside an ambient sound mode.

In total, you have 13 levels of ANC adjustment from amplified ambient sound to full noise cancellation.

The ANC performance is not the best but it can block out the surroundings while in a bus and remove a lot of the sound of a plane or vacuum. It is pretty good and definitely one of the best options but still trails the likes of Bose and Sony with their flagships.

As for the ambient sound, it is quite clean sounding. It sounds as if you were hearing all the sounds around you with your own ears.

There is an amplified ambient sound mode. This makes everything louder than it actually is. I found it very useful to listen to people talking to me from another room and it helps you to hear your surroundings while still listening to music.

Alternatives

Many of the alternatives to the Surface Headphones are at higher price points but they are still able to compete in many areas.

Sony XM4

The Sony WH-1000XM4s is arguably one of the best headphones in this category of Bluetooth, ANC headphones. Compared to the Surface Headphones 2 they can’t compete with the dials and the build is very similar. They both share many features like being able to connect to different devices, fast charging, and more.

The XM4s do perform better in multiple fields though. Sound, ANC, and Battery are all a bit better with the Sonys. The performance is not huge but the XM4s deliver some of the best performance in these fields for Bluetooth headphones. You get 30 hours of battery life, a cleaner sound, and arguably the best ANC in any headphones.

It is important to mention that the XM4s are often $100 more than the Surface Headphones 2 and understanding if spending the extra money is worth it is essential to understanding which one is best for you.

Bose NC 700

The Bose NC 700s are another fantastic option that is positioned often at a higher price point than even the XM4s. They deliver a minimalistic look, a similar design concept to the clean look of the Surface Headphones.

They have similar build quality, comfort, Bluetooth performance, and battery life. Where the Bose NC 700s pull ahead is in cleaner sound and some of the best ANC. The ANC is better at blocking out consistent sounds like an airplane and sudden sounds like a door closing.

Again the Bose NC700s are also, usually, over $100 more than the Surface Headphones 2. They may have less value but then looks, and improved ANC and sound quality may make it worth it for them.


Conclusion

Angled view of surface headphones 2 on a desk

Competing with the best Bluetooth headphones, the Surface Headphones 2 delivers great value and performance competing heavily with the top options.

They are a great option to use both while you work and while you work out and they can get you through the day with long battery life. Microsoft delivers on giving a solid build with great sound quality and ANC.

All this is supported by the abundance of other features like fast charging, a carrying case, software support, and the interface with dials. The interface itself makes the headphones such a great option along with everything else.

The Surface Headphones 2 are well rounded and will deliver everything most people need at a price that is cheaper than its competitors

If you think these are a great option for you, then check out the Surface Headphones 2 on Amazon.

Open vs Closed-Back Headphones: What Is Right For You?

When looking at headphones, there are two kinds of headphones that you need to decide between. Open-back and closed-back headphones.

Open-back headphones can provide many benefits in sound and long-term comfort, while closed-back headphones can be friendly in more situations and can have a more “fun” sound signature. Both types are tailored for different situations with various pros and cons.

Let’s take an in depth look at the differences and see what is best for you.

Closed back headphones next to an open back pair

Open vs Closed Back: The Main Differences

Open BackClosed Back
LocationOnly good for private listeningGood for use anywhere
SoundHas best sound stage and midsHas best bass
Heat Buildup Can be an issue after a couple hoursCan become an issue after an hour
Bluetooth?Can’t work with BluetoothBluetooth compatible
Premium MarketMost of the high-end market is open backSome of the premium market

Open-Back: Open-back headphones are headphones with the driver being open or partially open. The earcups will often have grills to allow the sound out. This allows for a much more open sound, other benefits in treble and midrange, and improved long-term comfort. Heat build-up is less of an issue.

Closed-Back: Closed-back headphones are when the earcup is fully closed off. This traps in sound allowing the headphones to be more suitable in a public environment. Closed-back headphones also make it possible to have features such as Bluetooth connectivity. They typically have better bass response in comparison to closed-back headphones.

How Does Open-Back Affect Sound?

Side view of closed back headphones

The main reason why open-back headphones are so beneficial is the many benefits to sound that they can have. The open driver allows some of the sound to exit the earcup away from the ears. This can improve the accuracy, the soundstage, and many other elements of the sound.

The main downside of the open drivers is that they leak sound. This means that if you are listening to music or playing a video game someone in the same room as you may be able to hear what you are listening to or at least the fact that you are listening to something. This is not ideal for public music listening.

While the open-back design can make the sound feel wider and more open, it can also cause you to hear more of the environment around you. If you are in a very noisy environment this could ruin the listening experience but at the same time, music listening is never that great in a noisy environment with both types of headphones.

Soundstage and Imaging

The biggest and most noticeable difference that you will notice between open and closed-back headphones is the soundstage and imaging.

Soundstage is the space and environment of the sound that is created by headphones, IEMs, or similar devices. Imaging is related to the location and size of the instruments or objects in that sound environment.

If you are playing a game it is very easy to pick out the location as to where someone is. You can hear the specific room where someone is and due to a wider sound, there is a wider area for sound to come from. This means you can more accurately hear where someone is in an environment.

The overall sound can feel a lot more immersive in both games and while listening to music. Open-back headphones also allow you to pick out where a sound is coming from better which is very nice, especially for those who like to analyze the music that they are listening to.

Bass

Open-back headphones don’t necessarily change things like the high end and the mid-range but one area where they can cause change is the bass. Typically one of the downsides of open-back headphones is that they often have less bass in forms of quantity. Often the bass is still accurate and still sounds good but there may be less of it.

This isn’t true for all open-back headphones as there are some headphones like the Philips X2HRs that have a lot of bass or planars that have a very punchy sound.

This does not mean that the bass on open-back headphones is bad. In fact, many open-back headphones have a lot of bass, and the low-end sounds very clean and punchy. Many closed-back offerings can make the bass sound muddy.

In the case that you do want more bass, you can always use an equalizer.

Accuracy and Distortion

Another area where open-back headphones can improve the sound is in accuracy and distortion.

Open-back headphones often have improved sound accuracy, most notably in the mid and high range. This improvement over closed-back headphones is consistent in the area of sound distortion. Closed-back headphones often have distortion that can also affect sound accuracy because of echo from the wall on the outside of the driver. Sound can bounce off the closed ear cup causing distortion in the sounds. Open-back headphones are a lot better with this issue.

The levels of accuracy and amount of distortion can all depend on the headphone model regardless if they are open-back or not.

It is important to note that not all open-back headphones have perfect clarity and sound accuracy but they do help. As you spend more, the more premium options in the market will also perform better as well.

How Does Closed-Back Affect Sound?

Side view of open back headphones

Closed-back headphones may not have all the benefits of open-back headphones but they can still help to provide a very fun sound signature. There is often a sacrifice for sound quality for practicality to have features like Bluetooth and noise cancellation.

The closed-off driver blocks off sound from escaping. This allows you to not have a problem with sound leakage so you can use closed-back headphones in public. This also can result in an improvement in the bass.

Closed-back headphones may not provide all the sound benefits of open-back headphones but they can deliver a fun sound profile for bass heads and certainly are great for practicality. You can use closed-back headphones without bothering others and also without getting bothered by others.

Soundstage and Imaging

As mentioned previously, closed-back headphones usually have a lesser soundstage in comparison to open-back headphones. This does not mean that the soundstage is bad with closed-back headphones but the soundstage is more intimate and the imaging may be less specific and accurate.

While some open-back headphones may have what seems like an endless soundstage, closed-back headphones vary greatly in soundstage. Cheaper offerings often have minimal soundstage while more premium closed-back headphones can have a much wider soundstage.

Overall the level of soundstage depends greatly but won’t be as good as open-back headphones. The same goes for imaging.

Bass

One area where closed-back headphones have a potential improvement is in the bass. Open-back headphones often have clean sounding base but closed-back headphones will usually have more bass. Depending on the quality of the headphones the bass will sound more punchy and less muddy.

Often cheaper closed-back pair will have bass that is there but does not really have any impact and it may have a lot of distortion causing it to sound what is described as muddy. Although cheaper offerings may have a large quantity of bass, the quality is not that good.

On the flip side, more premium offerings can deliver clear, punchy bass in great quantities that can be very enjoyable, especially for bass heads.

The additional bass can allow for a more fun-sounding pair of headphones. This means that many-closed back pairs of headphones are great for just sitting back and listening to music rather than analyzing the sounds or listening to how different instruments interact with each other.

Accuracy and Distortion

One of the worst areas, in particular with budget offerings, that the closed-back headphones affect sound is by adding distortion and echo.

To most people, you will not notice this issue but if you have tried more premium headphones then the distortion in many closed-back headphones will become more of a noticeable issue. The distortion I am talking about is not from the driver itself but it is a result of sound bouncing off the wall of the earcup causing reverb in the sound, potentially distorting it.

You may not have perfect accuracy in vocals or mid-range with many closed-back options but more premium closed-back headphones will have a very accurate sound with minimal distortion and no audible distortion for most.

This is more of a nitpick and this issue is something that you will only notice if you are using a budget option or if you are accustomed to better options.

Comfort and Heat Build Up

One of the most important things about headphones is comfort, especially long term comfort.

The comfort of open-back headphones and closed-back headphones can’t directly be compared in all aspects because there are so many different kinds of headphones designs for both styles.

One area where they can be compared is heat build-up. A big issue that plagues the long-term comfort of closed-back headphones is how quickly the earcups get hot. Often many closed-back headphones will get hot after 30 to 90 minutes with many people not being able to use their headphones for longer because of how uncomfortable it can get.

Due to the nature of open-back headphones, they deal with this issue a lot better. Since the side of the earcup is open, not only does this affect sound but this gives your ear access to air on the other side of the driver.

Heat still generates within the earcup but it does not become as unbearable as closed-back headphones, at least not as quickly. Since the hot air does not get trapped your ears can stay a lot cooler for a lot longer. This is especially useful for those who get hot ears quickly or those who use headphones for long periods.

If you wear headphones for long durations and are in a private space, you could notice a benefit from an open-back option.

Should You Get Open Back or Closed Back

What Is Best For Gaming – Open Back

Angled view of open back headphones with setup in the background

One of the main benefits of open-back headphones is that they provide a wider sound than closed-back headphones. This directly benefits gamers because it is easier to hear who is around you. The location of information of where information is coming from is usually more accurate on open-back headphones compared to closed-back too.

With a wider sound, everything can feel more immersive in open-world titles and it can also provide more information in competitive titles. With a greater sense of space, it is easier to understand how close or far another player may be and where exactly a gunshot may have come from.

If you talk while you game with others you may want to be able to hear your own voice. Often closed-back headphones make it harder to hear yourself, especially with a loud game playing. This can be quite weird.

With open-back headphones, this can be less of an issue. Since you can hear your voice you can also hear other things around you. If you are gaming in a loud environment that can distract you from your game too.

Another important consideration is long term comfort.

When gaming you can be playing for a few hours at a time and some people even game for most of their day as a job. This means that you will want headphones that are comfortable, especially for long periods of time.

While the comfort of the earcups and headband is different for each headphone, most open-back headphones will accumulate heat and a reduced rate compared to closed-back options and will accumulate less of it overall. Heat is not trapped in the headphones because the earcup is open to an extent.

Heat build-up is often one of the most uncomfortable things about wearing headphones. This can make wearing headphones a lot more comfortable, especially for longer periods.

When you are gaming you are typically at a more private place like a desk. This means it does not matter if noise comes out of your headphones. This means you can use open-back headphones without bothering others.

What Sounds The Best – Open Back?

Someone’s taste in sound is a very subjective matter as some people like sounds closer to their ear others like a wider soundstage and some may like more bass while others may prefer a more balanced sound signature.

Open-back and closed-back drivers often result in different sounding headphones. If you want the best bass experience there are good options that are open-back but some of the best pairs are closed-back. If you want a wider sound or something with solid vocals, your best bet is with open-back.

Open-back headphones typically are praised for having improved sound over closed-back headphones in many ways. We would say open-back headphones are the best sounding in many cases but because sound is so subjective you want fully determine what truly is better, especially with so many headphone options.

Overall what matters is that your headphones suit your preferences and needs. Getting open-back headphones will often be your best bet for having great sound quality but they’re a few more premium closed-back offerings that are quite strong such as the DT 1770 from Beyerdynamic.

What Is Best For Public Listening – Closed Back

Close up of closed back headphones

If you are in a public environment often or you need headphones for going out, closed-back headphones are the best option here.

The main downside of all open-back headphones is that sound is able to leak out of the earcup. Although this is a result of a wider soundstage and optionally more immersive experience, this can allow other people to hear what you are listening to.

The level of sound leakage depends on each pair but is an issue with all open-back headphones to an extent. It also depends on what volumes you are playing audio at. In some cases someone can only hear what you are listening to when right next to you and other times they may be on the other side of a room, still able to discern what you are playing.

Overall this won’t affect the listener and actually assists in making the sound feel very wide. This just makes open-back options bad if you are in an environment where people won’t want to hear what you are listening to like a bus or open office.

Closed-back headphones leak no sound most of the time and maybe a little at very high volumes but it is usually not an issue. Closed-back headphones, like earbuds, are commonly used and almost nobody will use open-back headphones because of this issue.

On top of all this, closed-back headphones often support features like Bluetooth connectivity for ease of use and active noise cancellation to make them a better option in public.

Closed-back headphones are just the more practical option in a public setting, even if you may lose on some sound quality.


Conclusion

Closed back and open back headphones on a desk

Overall open-back headphones will often deliver better sound for the same price as a closed-back offering but closed-back headphones deliver more practicality. Open-back headphones limit you to a private environment that should also be quiet but you can use open-back headphones anywhere without bothering others and some even have noise cancellation so you aren’t distracted from what you are listening to.

If you are a gamer or you just want to appreciate a wider and potentially clearer sound, then open-back headphones are great but they aren’t needed. Closed-back headphones don’t deliver bad sound and often can deliver better bass.

There is no wrong choice between the two but instead better use cases for both. Within both categories there are hundreds of options with different features and sound profiles to consider so doing additional research after seeing what is best for your use case is very important.

If you want to see more of our content, check out our newest articles.

Create a website or blog at WordPress.com

Up ↑