Throughout my life, I have been a tech enthusiast. Starting from a young age I got experience in multiple fields including building PCs, programming, writing about computer peripherals, and more. I wish to spread knowledge about these different fields and provide information about different niches that may be popular but are not written about often.
As new hardware comes out, new graphics technologies develop. The newest leap is ray tracing, made mainstream by Nvidia’s RTX graphics cards.
Now that most modern GPUs are integrating the technology and games are starting to add support, let’s see if Ray Tracing is actuallyworth it.
Ray Tracing vs Rasterization
CC: Nvidia
Ray tracing may be new and exciting but what came before it? Rasterization is the current norm for graphics in video games.
Rasterization creates a 3D environment by processing polygons. The polygons are then processed by a shader to make up a specific color and shade. These polygons get turned into pixels. All the colors and shades are decided by parameters that the game developer has set up.
Ray tracing on the other hand directs lines from the light source in the game and calculates how light bounces off objects or gets impedes by them to show where the lighting would go. This makes effects a lot more realistic.
While rasterization can look very good, there is a lot less potential. Ray tracing can portray how different objects affect lighting around a room but rasterization cannot. For example, with ray tracing, if you have a very reflective material, then the light will bounce off that material onto other things. In contrast with rasterization that material may look metallic but still will not have any effect on anything else in the environment.
Additionally, ray tracing requires fewer initial parameters to be set up by game developers. Ray tracing uses realistic lighting physics which means developers do not need to make many calculations to suit their specific game environment and physics can be more consistent across games.
Does Ray Tracing Improve Your Gaming Experience?
Although ray tracing does provide some eye candy, how much does it improve the gaming experience and will enabling it make you a better gamer?
The main takeaway about ray tracing is that it most likely will not make you a better gamer. The whole point of ray tracing is the improvement in graphics.
Real-time ray tracing provides no improvements in games like competitive shooters but in some games, the improvement in shadows and reflections may help you to see things that are off your screen.
Where ray tracing improves your experience is in the actual looks and immersion. Better graphics can help you get sucked into the game, especially when you are in a campaign or story game that gives you time to enjoy eye candy. You are able to appreciate your environment more as ray tracing makes games look more realistic.
A graphic increase is often able to transfer a game like Minecraft with RTX which keeps the same core concept and physics but the gameplay is altered.
If you do not care about graphics or only play online competitive shooters such as CS:GO or Valorant then ray tracing wont benefit you.
One of the biggest criticisms about ray tracing is the lack of games that support the feature. Currently, there are around 40 titles with 10 to 20 more that are said to release in 2021. All these titles fully support ray tracing with Nvidia’s RTX GPUs but the same cannot be said about AMD. AMD supports a decent amount of these games but the performance is not that good on most of them or the creators worked on DXR for AMD as an afterthought.
Some games that feature ray tracing are Battlefield V, Cyberpunk 2077, Fortnite, and Metro Exodus. If you want more information about different games that support ray tracing, check out this list from Wikipedia.
The experience with Nvidia’s graphics cards is pretty good, especially with their DLSS technology, which optimizes the onscreen image to look the same while putting less load on the GPU. You can get 60 fps at 1080p on any of Nvidia’s RTX cards but if you want to play at a higher resolution then you have to pay for a better RTX card.
The issue is that to get a quality high refresh experience, you still need to pay quite a bit of money if you want to play at any resolution higher than 1080p. This also assumes that you are able to even get a graphics card in this current climate.
We would not recommend waiting to get a graphics card just because you want an RTX card from Nvidia but in the coming years, many of the most popular games will support ray tracing. Getting a system with the hardware to support ray tracing is not necessary yet and we would not say that it is too early to invest, especially if some of your favorite titles do or will not gain support soon.
Ray tracing is a great feature for those who care about graphics. If you want to future proof then getting an RTX card or a next-gen console is your best bet.
Ray Tracing Beyond Gaming
Ray tracing is not just for gaming. Ray tracing has been used for years in professional situations. For example, many animated movies use ray tracing. It has especially gotten popular for 3D modeling, rendering, and movie animation in recent years.
As ray tracing has become more popular smaller creators and studios have been able to use ray tracing. This is causing it to continue to grow in the professional space. Not only will games start to look more realistic in forms of lighting and reflections but the same will also apply to animated movies and renders.
Additionally, ray tracing has grown very popular in the world of game development. Game engines like Unity or Unreal Engine are making it easier for smaller game developers to make games that have better-looking graphics.
Overall this all helps movie and game developing industries forward as smaller creators are starting to be able to work with ray tracing.
Different Implementations
Although Nvidia started the movement towards real-time ray tracing, they now have other competitors. Aside from Nvidia’s 20 and 30 series GPUs, AMD has their 6000 series GPUs, and then the next-gen consoles from Sony and Microsoft also have their own implementations.
Nvidia has their RTX implementation that works with DLSS rather than AMD that uses the universal standard DXR. While both can look the same, Nvidia’s system works with more games and runs faster. This is partially due to the fact that DLSS improves the framerate of games.
Sony’s PS5 and Microsoft’s Xbox Series X also support ray tracing and due to great optimizations, the performance is pretty good for the price.
Overall Nvidia still does ray tracing the best.
Conclusion: Is Ray Tracing The Future?
To put it shortly, ray tracing is the future.
This is just the beginning of a new wave. The benefits to graphics are great for the consumer and with all this tech going mainstream it will only push forward innovation. Games will look a lot better in the future and with the easy access to enable it in game engines now, many indie games or titles may be able to have ray tracing.
It is important to understand that the tech is not perfect right now and it is not everywhere. Many games do not have all the elements of ray tracing as they may only support ray-traced shadows or reflections for example. Ray tracing is constantly improving to look and run better.
Over the next, five to ten years is when we could start to see ray tracing properly replace rasterization. During this time hardware will also improve greatly as companies like Nvidia have made large strides towards their RTX tech.
If you enjoyed this article and you want to talk more about tech then consider joining our Discord and as always thanks for reading!
If you have started learning more about audio and if you want to invest in a more premium audio setup, one of the things you have come across is headphone amps.
Headphone amps are one of the best ways to improve sound quality. In many cases, amps are required for specific headphones or speakers. Amps deliver extra power to your headphones or speaker, often helping to bring out sounds that were recessed and lacking before.
Let’s explore how amps benefit an audio setup and if getting one is a worthy investment for your headphones.
Do Headphone Amps Improve Sound Quality?
A headphone amp is a device that amplifies the volume of sound coming from a DAC, a component in all devices that processes the digital signal from a computer and converts it into an analog signal that headphones can use. An amp can take the form of either an external device or a part integrated into your computer. The addition of power that is also cleaner can improve the sound quality of your headphones.
Compared to an integrated solution, a dedicated amp provides more power so your headphones are able to work the best they can. Additionally, if you find that you are using most of the volume scale when listening to things then an amp will give you much more headroom, fixing this issue.
Amps do not do much to improve the clarity or accuracy of the sound but the additional power improves the quality of the sound in other ways. The extra power that an amp provides could help sounds that were once muffled or recessed to be able to reach their full potential.
Another issue that amps fix is distortion. The integrated audio solutions in computers or phones can cause distortion at high volumes. Since amps process sound better this is less of an issue.
It is important to understand that an amp will not always improve audio. If you are using a cheap pair of headphones then you will notice no improvement. On the flip side, some headphones need an amp to function properly. There are many headphones, often in the $100 to $300 range, that are efficient enough that they do not require an amp but could still see some gains.
An amp should not change the sound signature of your headphones but give them the power to have their correct sound signature. Tube amps or amps with EQing built in can make changes to the sound.
Overall amps do improve sound quality.
Is An Amp Necessary?
Headphone amps can improve your audio but in some situations, they are not a worthy investment. If you use headphones that do not need more power or cleaner power then an amp would just be a waste of money.
Something like a pair of cheap earbuds or bluetooth headphones will not see a benefit from the extra power. In contrast, if you use high-fidelity headphones, often costing anywhere from $200 to upwards of $1000, then you often need or will heavily benefit from an amp.
Some headphones do not need an amp but could see a slight benefit from one. In this case, we wouldn’t recommend getting an amp if you are on a tight budget although it could give you a slightly better experience.
To understand how efficient your headphones are there are two things you need to look at. First sensitivity, which shows how loud headphones can get with a certain amount of power. This is usually measured in dB/mW. Second impedance, which shows how much power the headphones need. It is typically measured in ohms.
Headphones with an impedance of 32 ohms or less and sensitivity of 100 dB or more usually do not need an amp. As you get to headphones that use 60-80 ohms or more and sensitivities of 95dB or less, you will notice that many of these headphones need an amp. It is important to look at both factors and read reviews as the necessity for an amp depends.
Another factor is about how much of your volume range you are using. If you need to turn up your volume to 70 to 100% volume, then an amp may benefit you. You will get more headroom for volume and an amp will take away most distortion that integrated audio solutions create at high volumes.
Most modern computers have a decent integrated sound card with an amp so getting a dedicated amp is only important if you are investing in premium headphones. If your current headphones will not see a benefit from getting an amp, then getting new headphones is usually the recommended option. A dedicated amp is just a recommended option if you need or want more power for your headphones.
How Does A Headphone Amp Work ?
An amp’s purpose is to take a very quiet, low-power audio signal from a DAC, and increase the volume of that signal. Then the headphones or speakers will be able to turn this information into sound waves.
Without an amp, either integrated into a computer or as an external device, your headphones would not be able to create any sound for you.
A dedicated amp will provide more power and volume for your headphones than integrated solutions. The better an amp the more power it will be able to provide. Additionally, better amps will give cleaner power to your headphones resulting in a cleaner sound. Cheap amps often have distortion in the sound at higher volumes.
Amps have three core parts to how they work. There is the input, the amplification components themselves, and finally the output. There are two ways that the amplification process works work.
Solid State/Transistor Amps: These amps use, as the name implies, transistors to amplify the signal given to them. Inside there will be multiple positively or negatively charged transistors that are calibrated to boost the sound in a way that is as clean and efficient as possible.
Tube Amps: Tube amps instead use vacuum tubes surrounded by glass. They function similarly to lightbulbs by burning electrons from a filament to instead of creating light, amplify sound. Tube amps can be compared to record players that provide a more fun sound that modern tracks on software or CDs replace with a very clean sound. There is a sort of warmth adding to the bass. As a downside sometimes the glass of the tubes can cause some negative effects on the sound if you are using more sensitive headphones with a less premium tube amp.
In the end, the function of an amp is to increase the volume of the information coming from your audio source, for example, an external DAC or your PC. It does not matter if it is a tube amp or solid-state amp, the end goal is the same.
Different Kinds Of Amps
Although amps can control the power in different ways, transistors or tubes, there are different kinds of amps to look at depending on your situation.
Regular Headphone Amp: This is the standard type of headphone amp.
Gaming Amp: Gaming amps function similarly to regular headphone amps but usually prioritize features that gamers would appreciate like a mic input and virtual surround sound.
Portable Amp: These are great for situations where you want to drive high-quality headphones on the go or if you want a powerful amp in a small package. Portable amps are often designed to fit in your pocket and are a great option for those who want to use premium IEMs while out or if you want an amp between your office and home.
Finding what is right for you is the most important thing in this case. For most people, a regular headphone amp will do the job. There are some cases where a gaming amp or portable option may suit your general needs more.
Conclusion
Amps are beneficial with trying to improve the sound quality of your headphones, IEMs, or speakers and in many cases, they are even necessary for them to run properly. Sounds that were previously recessed, distorted, or not even present will be more significant and apparent.
You should also consider if an amp is worth it in your situation. You will not notice a difference with an amp with a sub $100 pair of headphones or the cheap earbuds that came with your phone.
It is also important to note that most people will not notice a substantial difference by getting an amp. This is because most people do not use power-hungry headphones or are not very bothered by worse audio quality.
For those who want a more premium sound and may be using more powerful headphones, an amp is a more worthy investment for them.
You also do not need to spend alot of money on an amp. You can find options for about $100 that give great performance up until you are spending upwards of $500 on headphones. Just note that you should always prioritize the headphones in your budget but always consider an amp if your headphones need that extra kick.
Additionally, if you are creating a setup with high-quality headphones and you are getting a headphone amp, you may want to consider a DAC to provide a cleaner, more accurate sound that could also benefit your sound experience.
I hope you enjoyed and as always thanks for reading!
If you have any questions please join our discord and feel free to ask anything.
When looking for a new gaming mouse you may have been considering switching to a new wireless gaming mouse. The Logitech G703 Hero adds to Logitech’s extensive line of wireless gaming mice, providing performance striking above its price point.
Let’s dig in and see if the Logitech G703 Hero is the mouse for you.
The Verdict
⭐⭐⭐⭐
Rating: 4 out of 5.
The Logitech G703 Hero is a wireless gaming mouse with excellent performance.
It improves over the previous version with the use of the accurate HERO sensor and it supports Logitech’s Lightspeed connectivity.
The G703 has an ergonomic shape with large buttons and comfortable rubber side grips. The mouse supports tons of grip styles and is very comfortable over long periods of use.
You also get a lot of in-depth functionality with the software. The G703 also supports a lot of different features like an adjustable weight, Powerplay compatibility, and onboard memory.
The only major downsides of the mouse are the outdated micro-USB connection and the software that could be a bit confusing to use at first. Additionally, the shape of the mouse applies to a specific niche but I found it quite easy to adjust to.
So if you are looking for a wireless mouse with a great sensor, decent lightweight, and solid build then the G703 is a fantastic option to consider.
In the box, you will find the mouse with all the essentials and some accessories.
Manual: There is a quick start guide to walk you through basic things like using and charging the mouse.
Cable: Logitech includes a braided USB-A (regular USB) to micro-USB cable to both charge the mouse or use the extender.
Dongle: This dongle allows for the mouse’s lightspeed wireless connection for very low latency.
Extender: If your mouse is far away from your computer or you are experiencing connection issues, an extender is included as a great solution to the issue.
Powerplay Puck: The puck is attached to the bottom of the mouse with magnets and is necessary for using the Powerplay feature.
Weight: Included is a 10g weight if you feel the mouse is too light.
Sticker: Logitech always throws in a sticker showing their blue G logo with their gaming products. It’s a nice touch.
Build Quality
The Logitech G703 is made from a mix of strong plastic and rubber. Rubber is used on the scroll wheel and on the sides for extra comfort and grip. Even at 95g, the G703 is quite robust.
The mouse looks all black with a translucent section for the G logo. The style obviously belongs to a gaming mouse but is not overly gamery.
The mouse feet on the bottom provide a smooth glide, allowing quick flicks and consistent travel. In my testing, they were not as good as the most premium mice like the Logitech G Pro Superlight or Razer Viper but they are better than many popular mice like the Logitech G203 or G502.
Overall the G703 has a fantastic build, especially for the price. My only disappointment with the design of the mouse is the use of micro-USB over USB-C. While this doesn’t affect the functionality, it’s nice to have.
Style and Comfort
Logitech’s G703 has an ergonomic design but is not super sculpted. The mouse is great for those who are right-handed but it doesn’t lock you into any position so it is comfortable with all mouse grip styles.
I had no issues using the G703 with a fingertip, claw, and palm grip. Some mice lock you into a palm grip or claw grip but the G703 provides flexibility in this field.
Many people don’t like the design but I found it very easy to get used to and very comfortable, even during multiple-hour gaming sessions. The rubber helps a lot over time and it makes the mouse very easy to grip and hold.
Additionally, the buttons are quite large so they are easy to find. Typically buttons are quite small on the side of the mouse but the G703 has the biggest side buttons on any mouse so you can easily rest your fingers on the side buttons.
Switches and Scroll Wheel
The Logitech G703 has 6 buttons in total. They all have satisfying clicks and are very responsive. The switches are from Omron and have eliminated the double-clicking issues that Logitech used to face. These switches are some of the best ones that I have used in any gaming mouse.
On the left side of the mouse are two side buttons. They are some of the biggest side buttons that I have seen on the mouse making them very easy to find. Additionally, the scroll wheel has nice tactile steps and feels very solid.
Sensor and Polling Rate
Logitech’s Hero sensor uses optical technology, which is the norm among modern gaming mice. It is one of the most accurate and efficient sensors in any mouse. Additionally, the sensor itself is quite lightweight which is why Logitech makes some of the lightest mice on the market.
The sensor goes up to 25.6K DPI and can be adjusted through the software in increments of 50. Most people opt for a DPI between 200 and 1200, but the high range shows the accuracy of this mouse.
This fantastic sensor goes along with the industry-standard 1000Hz polling rate.
Powerplay Compatibility
If you want a wireless peripheral but the requirement to charge it is an issue for you, Logitech’s Powerplay could be the solution for you.
For this to work with the G703 you must purchase their Powerplay mousemat. This is an additional investment, but the mousemat will charge the mouse resulting in endless battery life.
Adjustable Weight
If you want a slightly heavier mouse, you can utilize the 10g weight. Adding the weight will increase the overall weight to 105g. You can easily add the weight by pressing it into the slot on the bottom of the mouse.
Using the mouse with its stock weight was the best for me. The G703 felt balanced and it made me more consistent in shooters. I was able to land headshots more frequently, manage recoil more easily, and make more accurate flicks.
If you want to further lower the weight, taking off the Powerplay puck on the bottom is an easy way to shave off a few grams making the mouse about 92g. The difference isn’t huge but still noticeable.
Vibrant RGB Lighting
The Logitech G703 supports bright RGB lighting on the logo and scroll wheel. The lighting looks good at night and throughout the day. If RGB isn’t for you you can always turn it off or dim it.
You can control all the lighting with the G Hub software and you get a lot of functionality. You can have separate or synced lighting between the logo and wheel. Also, there are tons of colors and present affect to choose from.
You can also sync the lighting with a game or movie you are watching. For, example the color of your mouse will change because of the team you are on. This isn’t too crazy just on the mouse because you probably will be more focused on the game but if you have other Logitech products then you can sync this with them and the experience is quite unique.
Wireless Connectivity
Apart from the standard wired connection, the G703 also supports wireless connectivity via Logitech’s low latency Lightspeed technology.
The lightspeed connection via a dongle is about as fast as a wired connection. It is incredibly fast and reliable. If you ever have any issues like interference or you are just very far from your device you can also use the included extender. Without the extender, I was able to use my mouse over 20 feet away from my computer with no issues.
With wireless mice, battery life is always an important consideration. The battery is quite strong considering the mouse supports RGB lighting. You can get 35-60 hours of use off a single charge depending on how bright the lighting is and the polling rate. When you need more battery, you can completely charge the mouse in about 2 hours.
The mouse also has battery-saving methods. The lighting will dim after a minute of inactivity and the G703 goes to sleep after 5 minutes. Waking from sleep is essentially instant. Additionally, the lighting on the mouse will turn red if the battery goes below 15%. Overall the battery life is pretty good and the power-saving measures make it not a concern.
In-Depth G Hub Software
The Logitech G703 works with the G Hub software to control it. You can do basic things like change the lighting, sensitivity, remap buttons or do more complex things like control game integration.
Setting everything up isn’t too difficult once you have gotten used to the software. As soon as you open the Software you will be able to see the estimated battery life.
Although G Hub is very functional, it can be very confusing to those who are new to it. Pages like game integration are not the easiest to find and saving profiles and presets can be confusing.
Additionally, I have run into occasional bugs. Sometimes a different DPI than I wanted would become my default DPI for the onboard profile or not all my lighting presets would save. Logitech has fixed most of the bugs that I have faced but I still think the software has its issues.
Onboard Memory
Logitech’s G703 stores up to five onboard profiles. You can save your preferred sensitivity, button mappings, and lighting all to the mouse.
Onboard memory is helpful if use your mouse with different devices. Additionally, if you don’t like Logitech G Hub this is nice because you can quickly save your profiles, and then you won’t need the software anymore.
Conclusion: Is The Logitech G703 Hero Good For Gaming?
The Logitech G703 Hero delivers a great experience for gamers, even for pros, at a great value.
The G703 supports the Lightspeed connection that has equal latency to a wired connection but the lack of a wire means you don’t have to worry about your mouse getting caught on anything or drag. The need for a mouse bungee is not existent.
Inside the mouse, you get high-quality Omron switches and Logitech’s famous HERO sensor that is among the best on the market.
The shape may not be for everyone but most people can get used to it and the mouse supports a wide variety of grips. It also has a solid build while still maintaining a decently low weight.
Building a computer can be confusing, especially if you need to work out what parts you need to get. One component that you may be unsure about is a sound card.
In the past, dedicated sound cards were essential when building a computer because motherboards did not have any onboard audio solution. As motherboards started to get onboard sound cards people often still opted to get sound cards as it would give them more performance and onboard solutions at the time did not sound very good.
The main issue is if a sound card is still necessary today if you are building a computer.
In short, the answer is no, you do not need to purchase a dedicated sound card if you are building a computer. Almost all modern computers, motherboards, and other electronics will have an integrated sound card and most sound good enough for the vast majority of people.
If you want to learn more about sound cards, see how one could benefit you, or you want some recommendations, then we will cover it all here.
Dedicated Sound Card vs Integrated Sound Card
There are two different implementations of sound cards, integrated and dedicated solutions.
A dedicated sound card is a component that can be connected to the motherboard of a computer or can be plugged in via PCB. Many may add one while building a computer or upgrading the audio of an old motherboard if it doesn’t sound very good.
An integrated sound card is one that is built into a specific device, in this case, a computer. Most motherboards will have an integrated sound card built-in. You will find integrated solutions in phones, tablets, and most computers.
Integrated solutions provide a convenience factor as it is one less thing that people have to consider. In fact, the vast majority of people don’t even think about sound cards are even know what they are while buying electronics. This is due to dedicated solutions being so popular.
A dedicated sound card typically requires a PCIe slot on your motherboard. This could be an issue with ITX-specific motherboards since they have one PCIe slot. If you have a graphics card taking up the slot then you won’t be able to use a sound card.
USB sound cards also exist but often do not sound as good. They are commonly included with gaming headsets and they are great if you need a sound card but you don’t have space or don’t want to add a component to your computer.
Integrated sound cards may not have as good quality as dedicated cards, but they take up less space, are more convenient, and the sound quality is good enough for most people.
Benefits of A Sound Card
In the past, getting a dedicated card was essential. Computer processors weren’t powerful enough for integrated solutions at the time.
As processors became more powerful, integrated solutions came about, but they still weren’t that great. For users who used their PC for more than just browsing the web and emails, a sound card was necessary.
Integrated solutions have constantly been improving but haven’t been that great until the past 10 to 5 years. Motherboard audio now suits the needs of most people. The main reason to get a sound card now is if you are creating with a premium audio setup or you are upgrading an older system.
Regular headphones most likely won’t see a sound benefit from a sound card but higher-quality headphones could see a sound improvement in clarity and quality.
Some sound cards support both virtual and true surround setups. Some models support 5.1 surround sound and there are some gaming options that support 7.1 surround sound. They are great for those who are looking for an immersive speaker or headphone setup for music listening, gaming, or movie watching.
It is also worth noting that a sound card may give you a bit better PC performance by taking some of the load off of your processor but if that is your own priority it is better to just invest that money into a better processor.
Consider Getting An Amp & DAC Instead
Many people consider a sound card to not be a worthy investment when instead you can get an amp and DAC setup with better performance for the price. Creating a setup with both or just an amp is a great way to improve your setup and you can get past some of the issues that sound cards face.
Another way an amp and DAC setup can be better than a sound card is the space and looks. Sound cards will take up a slot on your computer’s motherboard and they often don’t look that great but amps and DACs often look a lot better and instead only take up space on your desk rather than in your PC.
Arguably the worst thing about sound cards and onboard audio is interference. Interference will negatively affect the sound that is outputted by your audio device and is caused by other electrical components. This issue is especially apparent with IEMs as they are very sensitive but can also affect headphones and speakers. Interference can be better or worse depending on the card but it is on all models.
With amps and DACs, you will find not only better audio performance but also more features. You can find gaming DACs such as the Sennheiser GSX 1000 that features virtual surround sound, a mic input, and much more. While there are sound cards with similar features you will find more interesting and useful features in the amp and DAC market.
Like sound cards, amps and DACs are only really needed for more powerful, high-performing headphones but an amp and DAC setup has more potential as there are many more options, especially at higher price ranges. Often an amp and DAC is the better way to go over a sound card.
Recommended Sound Cards
Value Sound Card Recommendation
If you are on a budget but still need to upgrade your audio setup, the Creative Sound Blaster Audigy FX 5.1 is the best option for under $50. The Audigy FX supports 5.1 surround sound but if you want more inputs for 7.1 surround sound and slightly improved sound you can also upgrade for a bit more to the Creative Sound Blaster Audigy RX 7.1.
Both are a step up from motherboard audio and provide plenty of outputs. Additionally, both these options have enough power for many high-quality speakers and headphones as they are able to supply up to 600 ohms of power.
Best Sound Card Recommendation
If you want a surround sound setup, especially for speakers, the Creative Sound Blaster AE-5 is fantastic. The AE-5 delivers excellent sound performance and is considered one of the best sound cards regardless of the price. It supports virtual 7.1 surround sound that is very accurate, providing great immersion in games.
This sound card not only has solid sound quality but also great looks. The card has a sleek black or white casing with RGB lighting.
This card is a great way to improve the looks of your PC. It delivers enough power and lots of clarity for all kinds of music and premium headphones.
Conclusion
Today you will not need a sound card if you are building a PC but if you plan to build a setup that will run premium audio equipment or you are upgrading an older setup then you could notice a benefit.
Although they aren’t necessary they do provide specific benefits for those who those who want to run a high-quality audio setup or want an audio setup that could provide a more immersive gaming experience.
If you are looking at a higher quality setup then you should definitely consider getting a DAC and amp. They share many of the benefits that you can get with a sound card but don’t face some issues that they have like audio interference from other components.
Overall there are many ways to improve your audio experience but most people will be perfectly fine with the audio performance of modern motherboards.
The Logitech MX Master 3 is a productivity mouse that is packed with features. The MX Master 3 comes with all the essentials that you will want like wireless connectivity along with other features that can optimize your workflow.
Let’s take a close look at the MX Master 3 and decide if Logitech’s third iteration is the right one for you.
The Verdict
⭐⭐⭐⭐⭐
Rating: 5 out of 5.
Logitech’s MX Master 3 is a productivity mouse, packed with many features making it a great option for productivity and creative work. Its various features could improve the efficiency of your workflow.
The MX Master 3 packs great performance with a high-quality sensor and a fantastic build. It delivers innovative features such as a horizontal scroll wheel, the MagSpeed scroll wheel, app presets, and much more to help you get more done, faster.
Things like the in-depth software help you get much more out of the mouse. Wireless connectivity, a USB-C port, and fast charging provide a nice user experience too.
Unless you are on a budget or game the majority of the time this mouse is a great option, especially if you do creative work. Its price is a bit hefty at around the $100 mark but it definitely is worth it.
If you think the MX Master 3 is for you, check it out on Amazon.
Inside the box, Logitech gives you everything that you need to use the mouse.
Cable: You get a high-quality rubber USB-A to USB-C cable. It supports fast charging and also allows you to use the mouse wired.
Wireless Dongle: The mouse does support Bluetooth but if you want a more stable connection that is also a bit faster, Logitech gives you a 2.4ghz dongle that is plug and play.
Paperwork: There is some paperwork inside the box but all the useful instructions are on Logitech’s product page.
Build Quality
The MX Master 3 has fantastic build quality.
The mouse is definitely one of the heaviest mice I have used at 141g. Although the weight may not be ideal for gaming, it feels quite hefty and it is not an issue because this mouse is not designed for gaming.
The MX Master is made of plastic, rubber, and metal. The core build is made from sturdy plastic with metal scroll wheels, and rubber where your palm and thumb rest.
The scroll wheels have no wobble and provide a texturized grip. The main scroll wheel has sharp, tactile steps while the secondary wheel is buttery smooth. All the buttons on the MX Master feel snappy and sound quite good. Omron switches are used for peak reliability, especially in the long term.
You can find the mouse in both a graphite gray color and a black color too. The cable is a dark gray for both versions.
Overall, the MX Master 3 has a nice feel and the materials used give you confidence in the product.
Shape and Comfort
The MX Master 3 has an ergonomic shape. It fits the mold of your hand and the buttons are perfectly in reach. This makes the mouse very comfortable to hold, especially for long periods.
Besides the 2 main buttons, the buttons that you will be pressing the most are all controlled with your thumb which maintains the user’s comfort.
If you use a palm grip with your mice then this mouse will be fantastic for you. Using the mouse with other grips is possible but it is not nearly as comfortable. The mouse is fairly large but if you have small or big hands then this mouse will be comfortable for you so that is not a concern.
On top of the ergonomic design, the fact that they use rubber where the pam and thumb rest makes the mouse a lot more comfortable.
Overall this is one of the best mice that I have ever used for comfort and it is obvious that Logitech put a lot of work into the design of this mouse. The MX Master 3 is comfortable and does not look out of place compared to other ergonomic mice.
Buttons and Scroll Wheels
On the MX Master 3, you get physical buttons. All have a solid, tactile feel with a pleasant sound. All these buttons can be remapped.
Along with the buttons, you get aluminum scroll wheels. Both have a texture to them to make them easier to find.
MagSpeed Wheel
The main scroll wheel supports a very unique feature that is one of the main changes from the previous from previous versions of the mouse. It functions similarly to Logitech’s Hyperscroll.
You can scroll through 1000 lines of code or over 100 pages in a PDF in just a second. This makes this mouse very useful when scrolling between different parts of a project. I also found it very useful in daily tasks like scrolling back to the top of a news article or quickly scrolling to a different part of a music playlist.
Initially, the scroll wheel will function like a regular mouse wheel with tactile steps. As you try to spin the scroll wheel faster, it will automatically move into a freespin mode. In this mode, the wheel will glide smoothly and quietly.
This system uniquely utilizes electromagnets. The wheel is electronically powered, allowing the user to have more accuracy and control.
Horizontal Scroll Wheel
One of the most unique features about the MX Master is its second scroll wheel that is horizontal.
Most mice only have a vertical scroll wheel to move up and down but with a horizontal scroll wheel, you can maneuver from side to side.
Logitech supports many app presets that make the horizontal wheel have different functions. In editing apps you can use the wheel to scroll through a timeline, drawing apps will change the size of the brush, and in zoom or teams, it will change the volume.
A horizontal wheel is a great way to improve the speed and efficiency of your workflow.
The Sensor and Buttons
Logitech’s MX Master 3 uses their Darkfield laser sensor. Logitech is renowned for making some of the best performing sensors and the Darkfield is no different.
The Darkfield laser sensor can track on almost any surface, including glass. This means that you don’t need a mousepad for good accuracy.
This sensor goes up to 4,000 DPI, which can be adjusted through the software. This sensor may not be suitable for gaming but from my testing, it performed quite well.
Wireless Connectivity
In addition to a wired connection, you can also connect the MX Master 3 either with a 2.4ghz USB dongle or via Bluetooth.
The dongle will have less latency than Bluetooth and it is plug and play. If you wish to use the mouse with multiple devices then Bluetooth will be needed though.
You can connect to up to 3 devices via Bluetooth and then 1 with the dongle. This great if you want to use the mouse with multiple devices and it enables the Logitech Flow feature to work.
To change between the devices there is a button on the bottom of the mouse that you can press to change between any of the three devices.
Battery Life and Quick Charge
The battery one of the best things about this mouse. It lasts for up to 70 days, supports fast charging, and has battery-saving measures.
I rarely need to charge the mouse and when it reaches low battery the light on the side of the mouse will light up red. That means that I need to plug it in at the end of the day and then I will have battery for another 2-3 months.
After owning the mouse for almost 6 months I have only needed to charge it twice.
If you are out of charge, a single minute will give you a couple hours of use and 3 minutes can get you through the day.
When you stop using the mouse it will go into a power-saving mode but will automatically wake up when you need to use it again.
In-depth Logitech Options Software
The MX Master 3 is supported by the Logitech Options software. It gives you a lot of in-depth control over different parts of the mouse so you can be more productive and efficient with your workflow.
You have control over basic things like changing the mouse sensitivity, checking mouse battery, remapping buttons, and much more.
You can also control more specific things like gestures or control button mappings for specific apps.
App Specific Presets
You have the option to enable or disable different preset options for some popular apps with the MX Master 3. These presets can also be edited. This allows the buttons on your mouse to have specific functions only in specific apps.
There are presets for Microsoft Teams, Zoom, the Microsoft Office Suite, the Adobe Suite, different web browsers, and more.
For example, in Microsoft Word, the horizontal wheel will be used to zoom in and the side buttons are used for undo and redo.
Gestures
Where you rest your thumb there is a gesture button. In total, you can make up to 5 gestures.
You enact these gestures by either pressing down the button or pressing down the button and then moving the mouse up, down, left, or right. With each of these movements, you can apply custom presets to execute functions more quickly.
One very useful gesture is after pressing the gesture button you can move the mouse left or right to skip or go back to a previous song.
Logitech Flow
Logitech Flow is arguably one of the coolest features of this mouse.
Logitech Flow is unique because it allows you to use one mouse with multiple systems easily. You can work on two devices at once or you can even transfer files between the two systems.
For this to function, you need to connect to devices via Bluetooth connectivity on this mouse, and then connect to the computers in your network. This allows you to use multiple systems and even transfer files between them over the air.
The ability to transfer files quickly and easily between two systems can be very helpful. This removes the need for a flash drive and the process is also much faster.
Logitech’s MX Master 3 is a great mouse. It delivers tons of features, has a comfortable design, and gives you functionality for some of the most popular professional apps.
The MX Master 3 may not be the best mouse for gaming but if you do creative work or you are a power user then this mouse will give you a lot more functionality at your fingertips than most mice.
If price isn’t a factor this is probably the best mouse you can get for productivity. Overall it is a fantastic workhorse mouse and you can’t go wrong with it.
The Keychron K6 is a mechanical keyboard that is absolutely packed with features such as Bluetooth connectivity and RGB lighting.
In a compact and efficient 65% layout, the K6 delivers many features that make it a great option for anyone who needs a solid keyboard for a good price.
Let’s dive in and take a deeper look at the Keychron K6.
The Verdict
⭐⭐⭐⭐⭐
Rating: 4.5 out of 5.
The Keychron K6 is 65% that delivers backlighting, macOS support, and the option to get a hotswappable PCB.
In addition to that, the board features wireless connectivity with Bluetooth 5.1 with an 80-hour battery life.
You get a solid case with an adjustable height and if you are willing to pay about 10 dollars more you can get aluminum bezels.
Keychron gives you a ton of customization on what features you want, obviously at an increased cost, to get an aluminum case, hotswap PCB, and RGB lighting. You are also given the option to choose the three main kinds of switch, clicky, tactile, and linear.
If you want a board with a ton of features and great value all with a compact layout, the Keychron K6 is a great option. It’s not only a great value offering but the K6 also makes for a great travel board.
In the box, the K6 comes with several items that will help you get up and running as well as some extras to improve your experience with the board. In the box you will find:
USB-C Power Cable: You get a nice braided cable that is USB-C and has a 90-degree angle because the port is on the side. No kinks developed after months of use.
Warranty and Information: Keychron gives you all the essential information on how to use the board with clear instructions along with a pamphlet for warranty information.
Extra Keycaps: You get additional keycaps to add orange accents and for better support for both Windows and macOS. There are modifier keys for Windows and macOS-specific keys.
Keycap Puller: A wire puller is included which makes the process of taking off keycaps very easy while not scratching your keycaps like with cheaper plastic pullers.
Key Switch Puller: If you get the hotswap version of the board then a metal switch puller is included. It is not amazing but it does the job.
Overall it is great that you get so many things in the box and the extras really tie in the experience.
Build Quality
The Keychron K6 has two case designs. Plastic and aluminum. The majority of the case is made from plastic aside from the aluminum top plate. If you do opt for the aluminum version there will be aluminum bezels around the sides for a more hefty feel and premium look.
There is little flex to the board and it feels quite sturdy, especially if you get the aluminum version.
There are 3 levels of height adjustment to the board with a flat typing angle, 6-degree angle, and 10-degree angle. On the bottom of the board, you will also find for moderately size rubber feet to keep the board from sliding around.
The front height was a common complaint with older Keychron boards but while it is still not ideal it is a bit better with the K6. I am able to comfortably type without my wrist rest.
On the left side of the board, you will find a USB-C port along with two buttons. The first button allows you to switch between Windows/Android and macOS/iOS. The other button allows you to switch between Bluetooth, wired, and off.
This is quite a convenient spot for the buttons as it is not in the way and easy to reach but it is not the nicest spot for the cable. It makes cable managing your keyboard cable a lot harder if you are using it in wired and removes the possibility to use custom cables.
For most people, this won’t be too much of an issue, especially if you plan to use the board with Bluetooth.
The Keycaps
The K6 comes with a set of ABS keycaps in the OEM profile with doubleshot, shine-through legends. Included are some alternate keycaps including some mac keys and accent keys if you want to add an orange accent to the light or escape keys.
Since the keycaps are made of ABS they will develop shine over time but since the set is pretty good quality for a prebuilt board, it will take at least a month for it to show up. This shine will come from the natural greases and oils from your hands.
The OEM profile is the standard among pre-built mechanical keyboards. The keycaps are contoured to match the shape of your hands. Since this is similar to most pre-built mechanical keyboards, if you have used another in the past it will be very easy to get used to.
Since the keycaps use the doubleshot method for the main legends this means that the legends are reliable and won’t fade away. Although the main legends are shine through there are some printed sub legends to show extra functions that work with the fn1 and fn2 keys.
The keycaps, aside from the orange accent keys, have a gray theme with the use of both light and dark gray. They have a very smooth feel too. The legends on the modifiers look modern and simplistic which is very nice in comparison to other pre-built boards that have aggressive-looking legends.
The Switches
Underneath the keycaps, Keychron gives you 3 switch options. You get a clicky, tactile, and linear switch from Gateron.
Gateron Red
A light linear switch with a smooth travel
Gateron Brown
A medium weight tactile switch with a light tactile bump
Gateron Blue
A medium weight clicky switch. It has a loud sound and sharp tactility
Gateron provides some great switches for pre-built boards. All these switches are good options but if you get the hotswappable version of the board, you can replace the stock switches with any option of your choosing.
Gateron’s switches have a durability of 50 million keystrokes which just means that these switches will last a very long time and will probably last longer than the majority of other components on the board.
The Stabilizers
Stabilizers often have a big effect on how a keyboard sounds and Keychron’s stabilizers are some of the better ones that I have tried on a prebuilt keyboard. Keychron has opted to use Cherry Style plate mount stabs that are factory lubed for a better sound and feel.
The sound and feel will also change based on what switches you use. Clicky switches will block out any rattle from the stabilizers while linear switches could make rattle or ping more obvious.
Overall the stabs are not perfect but they are much better than the stabilizers on most gaming keyboards. If you are coming from a Corsair, Razer, or similar keyboards these stabilizers will be an upgrade. If you get hotswap version of the board then you can easily mod the spacebar to sound and feel even better by lubing it and clipping it yourself.
Software (or Lack Thereof)
Unfortunately, Keychron has no official software or firmware for any of their keyboards.
Keychron has rumored that they are making a software of some sort but little details are known about it and its release date.
Luckily there are some options that Keychron suggests for you to use. On Windows, they recommend that you use Sharpkeys and Karabiner for MacOS (Note: Karabiner won’t work on Linux and GNU based systems). Both softwares work by remapping the buttons of the keyboard input at a low level in the operating system.
This means that all these changes will not actually save to the board so if you move the board to another device none of your mappings will be there. This also means that if you plan to use any other board with your computer that the mappings will be changed because of these softwares.
Hotswap PCB
If you choose to pay extra, you can get a K6 with a hotswappable PCB. This means that you can change the switches without needing to desolder anything. This process takes a few seconds just to take out or put in a switch.
The board supports both 3 and 5 pin switches and it is north-facing. This means that the keyboard supports switches from most switch manufactures including Kailh, Cherry, Drop, and much more. The fact that the sockets are north-facing means that there could be interference between the switch and the keycap with high-end GMK keycap sets but it does allow more of the lighting to get through. This will not be an issue for most people that are in the market for this board though.
A PCB with hotswap sockets is a very useful feature and it makes this board great for those who want to get into the mechanical keyboard hobby but if you just want a keyboard to type on then there is no need to spend the extra money.
Bluetooth Connectivity
One feature that makes the Keychron K6 such a great option is the fact that you can connect the board to three devices with Bluetooth 5.1. This is very useful for those who may use multiple devices or want to travel with the keyboard.
The Bluetooth works with Windows, MacOS, iOS, and Android.
The board supports a 4000maH rechargeable lithium-ion battery. The battery is rated for 80 hours or 10 days with 8 hours of usage, while backlighting is on. This was consistent with my testing. After about 5 minutes of inactivity, the board will go into a low power mode turning off the LEDs. The only complaint you may have is that it takes a few seconds for the board to turn back on.
The latency with Bluetooth actually is not bad. Although I would not recommend it for gaming it is not a terrible experience. Depending on the game, it was not even noticeable that I was still on Bluetooth.
It is worth mentioning that I did have some connectivity issues when I first got the board. At first, the board would not go into pairing mode. I fixed this issue by leaving the board to charge for a few hours and then it worked. Ever since I have never had any issues with Bluetooth.
Mac Support
A very nice feature about all Keychron boards is MacOS support. Many boards only officially support Windows so some boards either won’t work or some of the modifier keys may have no functionality.
On the side of the K6 is a button to change between Windows/Android or Mac/IOS. This is complemented nicely by the Apple-specific keycaps.
This feature is very nice because it means you can use this keyboard no matter what operating system you plan to use. If you are primarily a Mac user then this is one of the best boards that you can get.
Back Lighting
The Keychron K6 features either white or RGB backlighting the RGB option will cost a bit more. The RGB lighting is not as bright as gaming keyboards that I have tried from Corsair, Logitech, or Razer. It is not very bright but is still noticeable.
RGB lighting is always nice to have to add to a desk theme and the white blends well in an office environment.
The LEDs along with the modern font of the keycaps are not obtrusive and don’t make the board look overly gamery. The LEDs are versatile for any situation.
Due to the keyboard having no dedicated software currently, all the effects are on the board. There are a variety of effects from static colors to type lighting. With the white LED models you won’t have nearly as many lighting effects.
You can also easily turn on and off the LEDs by pressing either fn1 or fn2 and the light button.
The sub $100 price range is very competitive but the Keychron K6 emerges as a great option with great performance and features.
It delivers tons of utility with a nice-looking case. You get Bluetooth, macOS support, backlighting, and the chance to get a hotswappable PCB. You get all the utility that you need while in a compact 65% layout.
The wireless connectivity helps this board be very portable and it allows you to have a clean setup.
The board is quite sturdy with minimal flex and a decent weight for its size.
The only major drawbacks of the board are the fact that the USB-C port is on the side limiting your options for custom cables and cable management options as well as potential Bluetooth connectivity issues. Luckily the connection issue that I faced had a simple fix but, unfortunately, these issues are common.
If you are interested in checking out this board then you can see the Keychron K6 on Amazon.
The Surface Headphones 2 are a pair of headphones for enjoying music especially while on the go.
Microsoft positions the pair in a highly competitive market of Bluetooth, ANC headphones with an interesting twist on having a more unique interface and look.
Let’s dive in and take a look and see how they compete.
The Verdict
⭐⭐⭐⭐⭐
Rating: 5 out of 5.
If you want an excellent pair of headphones that has Bluetooth, ANC, and a solid build, the Microsoft Surface Headphones are a great option to consider. They are a great option for music listening at home or on the go.
If you want everything that the top Bluetooth headphones deliver at a slightly cheaper price this is a great option. Microsoft’s Surface Headphones 2 are still very competitive but have a better value over some of the more expensive offerings on the market.
The Surface Headphones 2 are often compared to more expensive options like Sony’s XM4s or Bose NC700s. Although the Surface Headphones are 100 or more dollars less expensive, they compete very closely with these options and are often compared to both.
The build is strong along with a comfortable design that makes these a great option no matter where you are. You can use them throughout the day. Along with this, you get similar sound quality as other premium Bluetooth headphones.
The interface is one of the most unique things about this pair and the inclusion of dials makes interacting with the device very easy while still having a lot of functionality.
Additionally, there is support from many other features like a carrying case, software support, fast charging, ANC, and ambient sound.
If your main priority is having the best sound quality then there are other options to consider but for a Bluetooth pair, this is excellent.
Everything is packaged very nicely. In the box you will find the headphones and some accessories.
Carrying Case: A carrying case holds almost everything that you will need to use the headphones, including the pair themselves. It is a well-made, hard case with fabric.
Headphones: Inside the carrying case are the headphones with some protective paper that you can peel off.
USB-A to USB-C: You get a rubberized cable for fast charging the device at 4.1ft (1.5m) .
3.5mm to 3.5mm adapter: If you want to use the pair wired, you get a 3.1 ft (1.2m) long cable.
Instructions: In the case, by the cables, you will find the instructions on how to use the buttons and gestures.
Manual: You will also get a manual that covers everything that you may need to know like contacts and support.
Technical Details
Drivers: 40mm Dynamic Drivers
Frequency Response: 20Hz to 20kHz
Sensitivity(Sound output): 115dB with cable or Bluetooth
Noise cancellation: Up to 30dB for active, up to 40dB for passive
Inputs: USB-C, 3.5mm
Weight: 0.64lbs (290g)
The Build
The build of the Surface Headphones is quite good. You have good use of aluminum, plastic, fabric, and pleather. Plastic is used for most of the design with aluminum for the frame. You can also see aluminum connecting the earcups to the headband. The earcups and top of the headband use pleather with fabric inside the earcups.
I have accidentally dropped the pair and they have been fine. Through regular use, you should have no issues. You get the standard build with other headphones premium ANC headphones.
There is no sweat rating on the Surface Headphones but I had no issues with regular use or exercise. I wouldn’t want to risk anything with more premium headphones but I have taken the pair on runs and to the gym and had zero problems. They are fine from my testing but there is no official rating to back it up. I would also not recommend using the pair in the rain as there is a high risk of damage.
After using the pair for about a year, there are some sweat stains on the inside but it is nothing too bad and there is no effect on the performance of the device.
To back up the build of the device is a 1 year warranty.
The pair feels well build and nice to the touch. I have no complaints.
Style and Comfort
You have two color options with the Surface Headphones 2. You can get a matte black or a light gray. Both look quite nice and are resistant to scratches and other cosmetic issues.
There Microsoft logo is on the lower part of the headband on both sides. It is a reflective material that is consistent with the logos on the other Surface line’s products. Overall this style looks quite nice, especially if you own other Surface products.
The comfort of the Surface Headphones 2 is pretty good and it is among the best for Bluetooth headphones. There is a decent amount of cushioning on both the headband and earcups so there are never pressure points. I only found that there would be too much pressure if you are using the headphones for extended periods of time of two or more hours.
Using glasses with this pair is not as good as some other headphones that I have tried but it is pretty good.
Although there isn’t too much pressure, the Surface Headphones stay on your head really well even if you are running or jumping. The Surface headphones are a decent option for working out but they don’t support any official sweat rating so use them at your own risk. I have not had any issues with my pair and I have had them since they came out, using them for everything from working to going to the gym.
The earpads use of pleather makes them very comfortable but if your ears get hot easily then you could run to comfort issues. My ears get hot no matter what headphones I use. With the Surface Headphones, my ears get uncomfortably hot after about 45 minutes of usage. For most people, you could probably use the pair for upwards of two hours.
Another potential issue you may encounter with the Surface Headphones is that your ears may touch the drivers. The material on the inside is some sort of soft fabric so it doesn’t get uncomfortable.
Most people will not have an issue with the size of these headphones unless you have a very small head. Most small heads will fit well but children may encounter problems.
The headphones are quite light at 290g or 0.64lbs. This helps them not feel heavy on your head even after long periods of time. The low weight also makes the headphones very portable.
Sound Quality
Frequency Response Results From Sonarworks
The Surface Headphones have a more “appealing” and “fun” sound signature that is mainstream among Bluetooth headphones. There is more of a V curve meaning there is more of a boost in bass and some of the vocals.
The bass hits quite nicely and vocals don’t sound harsh but unfortunately, the mid-range controlling most instruments is a bit recessed.
Although these headphones have the same sound profile as many consumer headphones there are some other factors considered like the clarity of the sound and separation between different sounds.
I would say that you get what you pay for. The sound quality is better than most of the cheaper offerings and even options at the same price range. The quality is quite good but not as good as maybe the Sony XM4s, although they are more expensive.
I noticed that the quality of the sound was the same between wired and Bluetooth. This is also due to the fact that most audio platforms, like Spotify or Apple music, only playback audio at a quality of 320kbps. The amount of information in the music would have to be much different to notice much of a difference between wired and wireless.
Overall the sound is quite good and unless you are used to very premium headphones or audiophile quality pairs the sound is amazing for most. The only issues I felt were that the mid-range instruments were not as present as I hoped and although there is quite a lot of bass and it is able to hit hard, it was not necessarily always clean. This is common among popular noise-canceling headphones.
That being said, this is a deep-level analysis from someone who has tried more premium sounding headphones so the sound signature and quality will be great for most people in the market for Bluetooth headphones.
The Interface
One of the most unique aspects of the Surface Headphones is the interface. Most high-end Bluetooth headphones will support gestures to skip songs or change the volume but Microsoft takes it a step further.
Microsoft uses two dials, two buttons, and both earcups are touch capacitive.
One button is used to turn on and off the device and the other button is used to activate either Cortana or your device’s virtual assistant. This makes communication with Google Assistant or Siri very easy, even if you don’t have your phone is in another room.
The controls on the earcups allow you to skip or go back to a track as well as pause and play. It doesn’t matter which earcup you use because the controls work on both.
Finally, arguably the most unique thing about the Surface Headphones, the dials. These dials are smooth and continuous. On the edge of the earcups are two dials. The left one controls the level of ANC as the dial on the right controls the volume.
The control that is given to you from the dials makes the Surface Headphones very easy to use and the interface is one of the best on any headphone. It is very easy to use and you have a lot of functionality without needing your phone.
Software
Software is always a great thing to go alongside a pair of headphones. With the Surface Headphones, Microsoft has their Surface Audio app both on the PC and phone.
The software allows you to monitor important things like battery or volume and gives you access to in-depth functionality.
With the software you can change the name, edit EQs, change language, and update the device.
Over the air updates can improve things like battery life and even sound quality.
Cortana and Voice Assistants
One interesting feature of the Surface Headphones is the inclusion of a voice assistant, Cortana. You can use Cortana to do things like read emails to you or interact with any Microsoft app.
Ultimately I don’t find Cortana to be useful but you can still use the headphones with the virtual assistant of your device. To interact with the assistant of your device, simply long-press the side of either earcup.
Connectivity
The Surface Headphones support the industry standard Bluetooth 5.0.
I was able to go about 100 feet (30.5 meters) away from my computer or phone with obstacles in the way before the audio started to cut out. Without walls or other obstacles, you can probably be over 200 feet (61 meters) away from your device without it cutting out.
You could leave your device and walk anywhere around most apartments and even many homes without the audio cutting out. At the gym, you could potentially leave your phone in a locker if it is close enough to you.
Pairing the device is also easy. Simply press the power button and then press again and hold for about five seconds until you hear, “You’re ready to pair”. Whenever you turn on the device it will automatically connect to paired devices.
You can pair with multiple devices for seamless switching from a phone and computer with audio plays from a different device.
Overall this is standard Bluetooth performance with options from the likes of Sony and Bose but it is still quite good and works with few issues.
You can also use the Surface Headphones wired if you want via the 3.5mm cable.
Battery and Charging
The battery and charging are not as good as some of the industry leaders but the performance is still quite good, especially for the price.
Microsoft’s Surface headphones can charge to 100% in under two hours and get an hour of playtime after 5 minutes of charging. Sony has a charging speed with their XM3s of five hours in just 10 minutes.
As for the battery, you can get about 20 hours of music playback while using Bluetooth and ANC. I found that this was enough to last me over a week with two to three hours of daily usage. While using them at work, they can last me a few days if using them for the majority of the day.
Microphone
In order to have noise cancellation, the headphones need multiple mics. As a result, the Surface Headphones have a better mic than most headphones I have tried and on par with more premium Bluetooth Headphones.
They are better than the mics of AirPods but still worse than a dedicated microphone.
The sound is good enough for calling but I would not recommend using Surface Headphones for any recording.
ANC and Ambient Sound
One of the defining features of the Surface Headphones is ANC or active noise cancellation alongside an ambient sound mode.
In total, you have 13 levels of ANC adjustment from amplified ambient sound to full noise cancellation.
The ANC performance is not the best but it can block out the surroundings while in a bus and remove a lot of the sound of a plane or vacuum. It is pretty good and definitely one of the best options but still trails the likes of Bose and Sony with their flagships.
As for the ambient sound, it is quite clean sounding. It sounds as if you were hearing all the sounds around you with your own ears.
There is an amplified ambient sound mode. This makes everything louder than it actually is. I found it very useful to listen to people talking to me from another room and it helps you to hear your surroundings while still listening to music.
Alternatives
Many of the alternatives to the Surface Headphones are at higher price points but they are still able to compete in many areas.
Sony XM4
The Sony WH-1000XM4s is arguably one of the best headphones in this category of Bluetooth, ANC headphones. Compared to the Surface Headphones 2 they can’t compete with the dials and the build is very similar. They both share many features like being able to connect to different devices, fast charging, and more.
The XM4s do perform better in multiple fields though. Sound, ANC, and Battery are all a bit better with the Sonys. The performance is not huge but the XM4s deliver some of the best performance in these fields for Bluetooth headphones. You get 30 hours of battery life, a cleaner sound, and arguably the best ANC in any headphones.
It is important to mention that the XM4s are often $100 more than the Surface Headphones 2 and understanding if spending the extra money is worth it is essential to understanding which one is best for you.
Bose NC 700
The Bose NC 700s are another fantastic option that is positioned often at a higher price point than even the XM4s. They deliver a minimalistic look, a similar design concept to the clean look of the Surface Headphones.
They have similar build quality, comfort, Bluetooth performance, and battery life. Where the Bose NC 700s pull ahead is in cleaner sound and some of the best ANC. The ANC is better at blocking out consistent sounds like an airplane and sudden sounds like a door closing.
Again the Bose NC700s are also, usually, over $100 more than the Surface Headphones 2. They may have less value but then looks, and improved ANC and sound quality may make it worth it for them.
Competing with the best Bluetooth headphones, the Surface Headphones 2 delivers great value and performance competing heavily with the top options.
They are a great option to use both while you work and while you work out and they can get you through the day with long battery life. Microsoft delivers on giving a solid build with great sound quality and ANC.
All this is supported by the abundance of other features like fast charging, a carrying case, software support, and the interface with dials. The interface itself makes the headphones such a great option along with everything else.
The Surface Headphones 2 are well rounded and will deliver everything most people need at a price that is cheaper than its competitors
When looking at headphones, there are two kinds of headphones that you need to decide between. Open-back and closed-back headphones.
Open-back headphones can provide many benefits in sound and long-term comfort, while closed-back headphones can be friendly in more situations and can have a more “fun” sound signature. Both types are tailored for different situations with various pros and cons.
Let’s take an in depth look at the differences and see what is best for you.
Open vs Closed Back: The Main Differences
Open Back
Closed Back
Location
Only good for private listening
Good for use anywhere
Sound
Has best sound stage and mids
Has best bass
Heat Buildup
Can be an issue after a couple hours
Can become an issue after an hour
Bluetooth?
Can’t work with Bluetooth
Bluetooth compatible
Premium Market
Most of the high-end market is open back
Some of the premium market
Open-Back: Open-back headphones are headphones with the driver being open or partially open. The earcups will often have grills to allow the sound out. This allows for a much more open sound, other benefits in treble and midrange, and improved long-term comfort. Heat build-up is less of an issue.
Closed-Back: Closed-back headphones are when the earcup is fully closed off. This traps in sound allowing the headphones to be more suitable in a public environment. Closed-back headphones also make it possible to have features such as Bluetooth connectivity. They typically have better bass response in comparison to closed-back headphones.
How Does Open-Back Affect Sound?
The main reason why open-back headphones are so beneficial is the many benefits to sound that they can have. The open driver allows some of the sound to exit the earcup away from the ears. This can improve the accuracy, the soundstage, and many other elements of the sound.
The main downside of the open drivers is that they leak sound. This means that if you are listening to music or playing a video game someone in the same room as you may be able to hear what you are listening to or at least the fact that you are listening to something. This is not ideal for public music listening.
While the open-back design can make the sound feel wider and more open, it can also cause you to hear more of the environment around you. If you are in a very noisy environment this could ruin the listening experience but at the same time, music listening is never that great in a noisy environment with both types of headphones.
Soundstage and Imaging
The biggest and most noticeable difference that you will notice between open and closed-back headphones is the soundstage and imaging.
Soundstage is the space and environment of the sound that is created by headphones, IEMs, or similar devices. Imaging is related to the location and size of the instruments or objects in that sound environment.
If you are playing a game it is very easy to pick out the location as to where someone is. You can hear the specific room where someone is and due to a wider sound, there is a wider area for sound to come from. This means you can more accurately hear where someone is in an environment.
The overall sound can feel a lot more immersive in both games and while listening to music. Open-back headphones also allow you to pick out where a sound is coming from better which is very nice, especially for those who like to analyze the music that they are listening to.
Bass
Open-back headphones don’t necessarily change things like the high end and the mid-range but one area where they can cause change is the bass. Typically one of the downsides of open-back headphones is that they often have less bass in forms of quantity. Often the bass is still accurate and still sounds good but there may be less of it.
This isn’t true for all open-back headphones as there are some headphones like the Philips X2HRs that have a lot of bass or planars that have a very punchy sound.
This does not mean that the bass on open-back headphones is bad. In fact, many open-back headphones have a lot of bass, and the low-end sounds very clean and punchy. Many closed-back offerings can make the bass sound muddy.
In the case that you do want more bass, you can always use an equalizer.
Accuracy and Distortion
Another area where open-back headphones can improve the sound is in accuracy and distortion.
Open-back headphones often have improved sound accuracy, most notably in the mid and high range. This improvement over closed-back headphones is consistent in the area of sound distortion. Closed-back headphones often have distortion that can also affect sound accuracy because of echo from the wall on the outside of the driver. Sound can bounce off the closed ear cup causing distortion in the sounds. Open-back headphones are a lot better with this issue.
The levels of accuracy and amount of distortion can all depend on the headphone model regardless if they are open-back or not.
It is important to note that not all open-back headphones have perfect clarity and sound accuracy but they do help. As you spend more, the more premium options in the market will also perform better as well.
How Does Closed-Back Affect Sound?
Closed-back headphones may not have all the benefits of open-back headphones but they can still help to provide a very fun sound signature. There is often a sacrifice for sound quality for practicality to have features like Bluetooth and noise cancellation.
The closed-off driver blocks off sound from escaping. This allows you to not have a problem with sound leakage so you can use closed-back headphones in public. This also can result in an improvement in the bass.
Closed-back headphones may not provide all the sound benefits of open-back headphones but they can deliver a fun sound profile for bass heads and certainly are great for practicality. You can use closed-back headphones without bothering others and also without getting bothered by others.
Soundstage and Imaging
As mentioned previously, closed-back headphones usually have a lesser soundstage in comparison to open-back headphones. This does not mean that the soundstage is bad with closed-back headphones but the soundstage is more intimate and the imaging may be less specific and accurate.
While some open-back headphones may have what seems like an endless soundstage, closed-back headphones vary greatly in soundstage. Cheaper offerings often have minimal soundstage while more premium closed-back headphones can have a much wider soundstage.
Overall the level of soundstage depends greatly but won’t be as good as open-back headphones. The same goes for imaging.
Bass
One area where closed-back headphones have a potential improvement is in the bass. Open-back headphones often have clean sounding base but closed-back headphones will usually have more bass. Depending on the quality of the headphones the bass will sound more punchy and less muddy.
Often cheaper closed-back pair will have bass that is there but does not really have any impact and it may have a lot of distortion causing it to sound what is described as muddy. Although cheaper offerings may have a large quantity of bass, the quality is not that good.
On the flip side, more premium offerings can deliver clear, punchy bass in great quantities that can be very enjoyable, especially for bass heads.
The additional bass can allow for a more fun-sounding pair of headphones. This means that many-closed back pairs of headphones are great for just sitting back and listening to music rather than analyzing the sounds or listening to how different instruments interact with each other.
Accuracy and Distortion
One of the worst areas, in particular with budget offerings, that the closed-back headphones affect sound is by adding distortion and echo.
To most people, you will not notice this issue but if you have tried more premium headphones then the distortion in many closed-back headphones will become more of a noticeable issue. The distortion I am talking about is not from the driver itself but it is a result of sound bouncing off the wall of the earcup causing reverb in the sound, potentially distorting it.
You may not have perfect accuracy in vocals or mid-range with many closed-back options but more premium closed-back headphones will have a very accurate sound with minimal distortion and no audible distortion for most.
This is more of a nitpick and this issue is something that you will only notice if you are using a budget option or if you are accustomed to better options.
Comfort and Heat Build Up
One of the most important things about headphones is comfort, especially long term comfort.
The comfort of open-back headphones and closed-back headphones can’t directly be compared in all aspects because there are so many different kinds of headphones designs for both styles.
One area where they can be compared is heat build-up. A big issue that plagues the long-term comfort of closed-back headphones is how quickly the earcups get hot. Often many closed-back headphones will get hot after 30 to 90 minutes with many people not being able to use their headphones for longer because of how uncomfortable it can get.
Due to the nature of open-back headphones, they deal with this issue a lot better. Since the side of the earcup is open, not only does this affect sound but this gives your ear access to air on the other side of the driver.
Heat still generates within the earcup but it does not become as unbearable as closed-back headphones, at least not as quickly. Since the hot air does not get trapped your ears can stay a lot cooler for a lot longer. This is especially useful for those who get hot ears quickly or those who use headphones for long periods.
If you wear headphones for long durations and are in a private space, you could notice a benefit from an open-back option.
Should You Get Open Back or Closed Back
What Is Best For Gaming – Open Back
One of the main benefits of open-back headphones is that they provide a wider sound than closed-back headphones. This directly benefits gamers because it is easier to hear who is around you. The location of information of where information is coming from is usually more accurate on open-back headphones compared to closed-back too.
With a wider sound, everything can feel more immersive in open-world titles and it can also provide more information in competitive titles. With a greater sense of space, it is easier to understand how close or far another player may be and where exactly a gunshot may have come from.
If you talk while you game with others you may want to be able to hear your own voice. Often closed-back headphones make it harder to hear yourself, especially with a loud game playing. This can be quite weird.
With open-back headphones, this can be less of an issue. Since you can hear your voice you can also hear other things around you. If you are gaming in a loud environment that can distract you from your game too.
Another important consideration is long term comfort.
When gaming you can be playing for a few hours at a time and some people even game for most of their day as a job. This means that you will want headphones that are comfortable, especially for long periods of time.
While the comfort of the earcups and headband is different for each headphone, most open-back headphones will accumulate heat and a reduced rate compared to closed-back options and will accumulate less of it overall. Heat is not trapped in the headphones because the earcup is open to an extent.
Heat build-up is often one of the most uncomfortable things about wearing headphones. This can make wearing headphones a lot more comfortable, especially for longer periods.
When you are gaming you are typically at a more private place like a desk. This means it does not matter if noise comes out of your headphones. This means you can use open-back headphones without bothering others.
What Sounds The Best – Open Back?
Someone’s taste in sound is a very subjective matter as some people like sounds closer to their ear others like a wider soundstage and some may like more bass while others may prefer a more balanced sound signature.
Open-back and closed-back drivers often result in different sounding headphones. If you want the best bass experience there are good options that are open-back but some of the best pairs are closed-back. If you want a wider sound or something with solid vocals, your best bet is with open-back.
Open-back headphones typically are praised for having improved sound over closed-back headphones in many ways. We would say open-back headphones are the best sounding in many cases but because sound is so subjective you want fully determine what truly is better, especially with so many headphone options.
Overall what matters is that your headphones suit your preferences and needs. Getting open-back headphones will often be your best bet for having great sound quality but they’re a few more premium closed-back offerings that are quite strong such as the DT 1770 from Beyerdynamic.
What Is Best For Public Listening – Closed Back
If you are in a public environment often or you need headphones for going out, closed-back headphones are the best option here.
The main downside of all open-back headphones is that sound is able to leak out of the earcup. Although this is a result of a wider soundstage and optionally more immersive experience, this can allow other people to hear what you are listening to.
The level of sound leakage depends on each pair but is an issue with all open-back headphones to an extent. It also depends on what volumes you are playing audio at. In some cases someone can only hear what you are listening to when right next to you and other times they may be on the other side of a room, still able to discern what you are playing.
Overall this won’t affect the listener and actually assists in making the sound feel very wide. This just makes open-back options bad if you are in an environment where people won’t want to hear what you are listening to like a bus or open office.
Closed-back headphones leak no sound most of the time and maybe a little at very high volumes but it is usually not an issue. Closed-back headphones, like earbuds, are commonly used and almost nobody will use open-back headphones because of this issue.
On top of all this, closed-back headphones often support features like Bluetooth connectivity for ease of use and active noise cancellation to make them a better option in public.
Closed-back headphones are just the more practical option in a public setting, even if you may lose on some sound quality.
Conclusion
Overall open-back headphones will often deliver better sound for the same price as a closed-back offering but closed-back headphones deliver more practicality. Open-back headphones limit you to a private environment that should also be quiet but you can use open-back headphones anywhere without bothering others and some even have noise cancellation so you aren’t distracted from what you are listening to.
If you are a gamer or you just want to appreciate a wider and potentially clearer sound, then open-back headphones are great but they aren’t needed. Closed-back headphones don’t deliver bad sound and often can deliver better bass.
There is no wrong choice between the two but instead better use cases for both. Within both categories there are hundreds of options with different features and sound profiles to consider so doing additional research after seeing what is best for your use case is very important.
The Sennheiser GSX 1000 is a great DAC for gamers and those who can benefit from its many features.
With support for a mic input, virtual surround sound, a screen interface, and more, Sennheiser’s GSX 1000 is a great option for those who game often. It delivers plenty of features with only one drawback, the price.
Let’s take a look at the GSX and see if it is right for you.
The Verdict
⭐⭐⭐⭐⭐
Rating: 4.5 out of 5.
If you game often but want an improved audio experience the Sennheiser GSX 1000 is a great option for you. It will improve the audio quality for both your headphones and microphone.
Those who have been looking for more adjustment to their mic and sound setting or are looking for more clarity. If you are a fan of virtual surround sound, the GSX 1000 has the best surround sound processing in any DAC in terms of accuracy and sound clarity. As a result, the GSX 1000 can further your immersion in games.
Features such as a touch screen, dial, profiles, and more allow you to have more customization. This allows you to change the settings to suit your preferences.
The GSX 1000 won’t be able to drive power-hungry, premium headphones but that is also not what it was designed to do. It is a great way to improve a gaming headset or make a regular pair of headphones have features such as virtual surround sound.
If you need to power premium headphones or you don’t need things like the input or virtual surround sound then this option is not the best for you. Getting a non-gaming DAC and amp will probably suit your needs best.
It is worth mentioning that we tested the GSX 1200 Pro but it is exactly the same as the GSX 1000 with the addition of a couple minor features. We will high highlight the additional features of the GSX 1200 Pro in this review too.
When you open up the box you will find everything you need to get started. In the box you will find:
The DAC: The GSX comes surrounded with foam presented to you quite nicely.
Micro USB Cable: To power the device and send information to the DAC, Sennheiser gives you a red USB A to Micro USB cable. It is best to use this cables as you may have issues with other cables.
3.5mm to 3.5mm Cable: This cable only comes with the GSX 1200 Pro so you can connect it to other GSX 1200s for latency-free LAN parties.
Quick Start Guide: This guide tells you how to get the device up and running and provides links to their website so you can learn how to use the device.
Manual: This tells you anything you would need to know that is not the basic stuff on the quick start guide.
The Build
The build of the GSX is pretty good. The materials aren’t necessarily high end but like most Sennheiser products it is built well and does not give the impression that it can be broken easily or it won’t break quickly.
The construction is mostly plastic with some rubber, aluminum, and glass. The body is all plastic and it doesn’t feel cheap. Rubber is used for some long pads on the bottom so the DAC doesn’t move when doing things like adjusting the volume. The scroll wheel is made of aluminum with glass for the screen.
Sennheiser’s GSX 1000 weighs in at about 10.6 ounces or 0.66 pounds.
Looks And Interface
The GSX 1000 has a black build with silver and white accents on the scroll wheel and logo on the flip-out leg. There are also red accents as the wire is red and there is red LED lighting around the scroll wheel to go with the screen. Although the LEDs can’t change color it is nothing too intrusive and would not ruin a desktop theme.
The GSX 1000 is quite small being 5.63 inches long by 5.47 inches wide with a height of 2.76 inches. It is quite portable if you want to take it to move it to a different setup or go to LAN parties.
One of the most unique features of the GSX 1000 is its interface and the way you interact with it. On the top of the device, there is a screen. On the screen not only does it display the volume but it is a touch screen. On the screen, you can change the output, add sidetone, switch between stereo and surround sound, add reverb to the sound, change the direction of where the sound is focused, and choose from preset EQs.
In addition to the screen, there are also four touch-capacitive buttons or sensors on the four edges of the device to select profiles. Just slide your finger over the LED and you will switch to that profile. The only issue is that profiles will not work when HD audio is enabled. Having four profiles is nice if you want one profile for regular stereo audio and then different profiles for the different games that you play.
On the GSX 1200 Pro variant, you can hold the top left and bottom right sensors for 10 seconds and then your device will go into “Tournament Mode” meaning the settings cannot be changed. This is to make sure you don’t accidentally press something when quickly changing volume or anything else.
Gaming DACs and amps have a dial to change the volume but they are usually oriented on the front rather than on the top of the device with the GSX. Depending on your preference the dial of GSX 1000 may be more comfortable to use for you.
In addition to the main volume wheel, you have a scroll wheel on the right side to control your mic input volume and with the GSX 1200 Pro, you will also have another scroll wheel on the left side to control the amount of volume coming in from people talking to you. This scroll wheel is only needed if you are using the feature of zero latency talking via connecting this DAC to other GSX 1200s.
Inputs and Outputs
As for inputs and outputs, the selection is sufficient for most people, especially the market that the GSX 1000 applies to. The GSX is not recommended for those who want a ton of outputs for a speaker setup but for gamers who it is for it will have everything that you need.
To send all the information to the DAC and power there is a micro USB cable. On the GSX 1200 model only you can have latency-free conversations with others who have the DAC next to you which is what the 2.5mm ports are for. The last three ports are 3.5mm for the speaker and headphone outputs and the mic input.
The fact that the ports for a headphone and mic connection are on the back is one of the biggest cons for me as it can make cable management harder and it can put the cable in an awkward position.
The Sound
Although modern motherboards have pretty decent sound, the GSX 1000 is a step up and a good improvement if you have an older computer or a laptop.
You will notice an improvement an increase in the clarity of the sound and separation between different elements of music like instruments.
After using this DAC it will feel as if a veil has been lifted away from the sound and the detail of each note will be more noticeable. Sounds that may have sounded more recessed and in the background like vocals will be more forward.
Overall this benefit in sound won’t be necessarily noticeable while gaming but you will notice it when listening to music.
If you are listening to music for a longer period of time it is recommended that you enable HD audio. When you do enable this mode the sound clarity will be even clearer than before but you will be locked with stereo sound and will not be able to change the EQ, use profiles, or control Sidetone.
This mode is only really good while listening to music but while gaming you will want to go back to the regular mode or you won’t have access to most of the settings.
To enable HD audio you must go to your “Sound Settings” then go to the “Sound Control Panel”. Then you will find the GSX 1000. In the settings of the device, you will go to the “Advanced” tab and then put the quality to the highest quality.
Depending on what you are doing you will want to select a different option. If you are listening to music putting the DAC’s quality to the highest setting will put it into HD audio mode but otherwise putting it to the second-highest setting will enable all the features while retaining most of the audio quality.
It is unfortunate that you have to choose between having HD quality sound and having access to the features of this device but the option of HD audio is nice and there is definitely an improvement in clarity.
Even though the GSX 1000 will improve sound quality if you don’t need the features of this device, a dedicated amp and DAC will improve your setup the most.
7.1 Surround Surround Sound
One of the most unique features that the GSX delivers is virtual surround sound. Headphones are a stereo device meaning they create sound using two speakers or drivers but the GSX1000 makes it possible to simulate an experience where there are more speakers for an overall more immersive sound.
The GSX 1000 is known for its virtual surround because of how accurate and immersive it is. Most gaming headsets support virtual surround sound but the directionality of the sound is often not that accurate and the sound may actually be more distorted because of how bad the surround sound method is for the headset.
Sennheiser developed this device to have much better surround sound than gaming headsets. The difference is night and day. The implementation is probably the best out of any gaming DAC or gaming headset out there in accuracy and the customization that you can have on the sound to make it more immersive. A GSX 1000 can make most stereo headphones perform better in the surround sound experience than even dedicated gaming headsets.
The virtual surround sound implementation from Sennheiser helps position sounds better than headsets from Logitech, Corsair, and other companies. These other companies create a surround experience by making all of the sounds seem to surround you rather than correctly positioning where each gunshot, engine sound, or plane is coming from.
With the GSX 1000 you can hear the exact floor and room someone may be in while gaming headsets often have more distortion and less accuracy in the sound.
I found that while testing the GSX in various titles, it was great for simulators, open-world titles, and some competitive shooters. In contrast, you will see no benefit in 2D games or titles where locations of sound are not as important.
It is also worth mentioning that surround sound is often not all competitive shooters will benefit from surround sound. You may like using it with games like CSGO or Rainbow Six Siege but surround sound won’t necessarily make you a better player.
Overall what matters are the games that you play and your preferences.
Mic input
Another great feature about the GSX 1000 is the option for a mic input. If you have a headset with both a microphone and headphone jack then you can plug them into the GSX 1000 for more control and better sound.
With the GSX 1000, the sound of your mic should be cleaner and you can adjust the gain easily. The option to change the mic volume so quickly is great as some applications take in more or less sound than others. This can also make it easier than having to go into settings to change the volume of your mic.
Sidetone
If you have closed-back headphones, like a gaming headset or noise-canceling headphones, it can be annoying or weird to not be able to hear yourself.
Sidetone fixes this by taking your mic input and putting some of that back into what you hear. The quality of it is also quite good. It sounds as good as your mic would sound raw and you could potentially not even notice a difference.
It is similar to the transparency mode of Apple’s noise cancellation products or any other noise cancelling product with that option.
On the screen you can also change if you don’t want Sidetone or the amount of volume that you want to hear of yourself.
Zero Latency Communication
Unfortunately this feature only works with the GSX 1200 Pro but in theory what it allows you to do is quite interesting.
Typically when using apps like Discord, Zoom, or Teams there is a little bit of delay between when people talk and the other person hears it. Typically this ok when you’re not in the same room but if you are calling other people while in the same room this slight delay can be quite annoying.
If you are at a tournament or LAN party and the rest of your team or friends have the GSX 1200 Pro then you can connect up to eight devices together. Doing so will allow you to have communication with each other with no latency or lag between the sound.
You can also change the volume of how much you hear your teammates with the scroll wheel on the left hand side.
Although this is quite a cool concept in theory, in practice it probably isn’t worth it for everyone in a team to get one for just this feature.
Alternatives
Sound Blaster G6
The biggest competitor to the GSX 1000 is the Sound Blaster G6. They share features like a mic input and virtual surround sound.
When comparing the GSX to the G6 the GSX has the step up in the interface, the mic input, and virtual surround sound.
While both have a dial for the device volume, the GSX has a screen to control the interface and a scroll wheel control for your mic volume. The G6 has neither but it does have software support and a few buttons to enable things like virtual surround sound. The software gives you the same functionality as the GSX’s screen like EQ editing.
The mic input is the same but the GSX has more features like Sidetone so you can hear yourself and control your mic volume.
Although both options have virtual surround the GSX 1000 has slightly more accurate virtual surround sound and the option to add reverb to the sound and change where the direction of sound is coming from.
There are two areas where the G6 has a step up over the GSX 1000. It provides more power and it is usually a lower price. If you want to use something that is more power-hungry than a gaming headset or efficient headphones then the G6 will fair better. The price difference is not very big but is notable because it brings up the idea of value. If you won’t need the mic input, don’t care for the screen, and are willing to sacrifice on slightly worse virtual surround then the G6 is a better option.
Schiit Fulla 3
The Schiit Fulla 3 does not have all the features of the GSX 1000 like Sidetone, virtual surround sound, or a screen but it still packs as much power as the G6, is the most compact option here, and is the cheapest option.
If you don’t care for exciting features like virtual surround sound then this is one of the best options you can get if you need a mic input. You can find the Fulla 3 for about $100 on Schiit’s for most of the year.
The sound quality is quite good and it can power power-hungry headphones at the $300 price range. If you want to use a Sennheiser HD6XX with this then it can drive the pair really well.
Schiit Hel
Schiit’s Hel is the most expensive alternative to the GSX 1000/1200 Pro but also provides the most power. It delivers the same features as the younger brother, the Fulla 3, but significantly more power. If you have premium headphones but still want to use a mic input then this your best option.
The Hel can power premium headphones like the Beyerdynamic DT990, HiFiMan HE400i, HiFiMan Sundara, and Sennheiser HD6XX.
In the category of gaming DACs and amps, the GSX 1000 delivers the most features to the consumer, albeit at a higher cost.
You may not be able to power $300+ headphones but, the GSX is a step over motherboard audio so you will get cleaner sound in your headphones or speakers with more separation between sounds and less distortion. The GSX 1000 will also improve your mic sound so you can sound better not just in discord but if you are recording something like a voice-over.
In addition to better sound, the interface, virtual surround sound, and other customization make the GSX 1000 and great DAC. The screen that always displays the volume is very useful to see volume instantly along with an easy to use touch screen and dials. The virtual surround sound implementation is accurate and probably the best out. Finally the customization to things like the mic with Sidetone is a really nice addition and gives the GSX 1000 a step over the competition.
Although the GSX 1200 Pro has a couple additional features, the sound and core features are the same. It is not worth it to pay more for the GSX 1200 Pro unless you need the additional features so for most people it is recommended to buy whatever is the cheapest option.
If you think that either suits your needs, check out the GSX 1000 and GSX 1200 Pro on Amazon for a good price.
In the past few years, virtual assistants have become commonplace in homes. More and more products are gaining smart home functionality to work with these virtual assistants. With growing popularity and need for functionality, it is key that companies making these assistants put out products that are fast and effective.
The Nest Mini 2 improved from the original Google Home and is one of the best value options when looking to invest in a virtual assistant. Not only can you get arguably the best virtual assistant but you get a pretty decent speaker to tie in the experience.
Let’s find out if the Google Nest Mini 2 is truly good and investing in Google’s Assistant will benefit you.
The Verdict
⭐⭐⭐⭐⭐
Rating: 5 out of 5.
If you have been looking for a smart speaker with great value, the Google Nest Mini (2nd generation) is a fantastic option to consider. It is a speaker with good sound and even better functionality.
For those who want a greater smart home experience or just want a virtual assistant. You get a lot of support with the Google Home App and arguably the best virtual assistant with Google Assistant.
Google Assistant can answer a countless number of questions while being quick. You can settle disputes or ask or get work done faster through fast translations and calculations all with a virtual assistant.
You can even use the Nest Mini as a desktop speaker. It can sit on a desk or be moved around due to its compact size.
The sound quality is pretty solid especially for the price and it is a step over a monitor and even phone speakers.
Google’s Nest Mini also has a great build and look. It can fit in any environment with a stylish but minimalistic build and multiple color options to choose from.
If you want something more powerful or a more premium setup then getting something like the Nest Mini’s bigger brother, the Google Nest Audio Speaker, or a more premium speaker setup if you don’t want or need a virtual assistant..
When you open up the box everything is packaged quite nicely.
Included in the box are all the essentials you need to use the device and get started. Aside from the speaker, inside the box you will find:
The AC Power Cable: You get a standard single pin AC power cable. It’s quite nice quality and doesn’t distract from the look of the speaker.
Manual/Quick Start Guide: This will tell you the basic functions of the device and how to get started.
If you ever lose the manual or need more help the google home app can provide you with the resources you need, as well as just asking Google Assistant.
The Build and Style
Google gives us quite a nice looking and well made device with the Nest Mini 2.
The frame of the device is made from sturdy plastic and is quite rigid. There is no flex in the device anywhere. On the outside of the device, it is made from some sort of mesh fabric and rubber.
The bottom and sides are made from the rubber allowing it to stay in place well and not move around on a surface no matter how slippery. The top of the device looks and feels quite nice due to the use of the fabric. The fabric is inviting when wanting to use the touch functions for doing things like changing volume. It also makes the device look better rather than the use of all plastic which can make a device look cheap.
Google made the Nest Mini very compact with a diameter of about 3.85 inches a height of 1.65 inches. It is also quite light, weighing in at only 0.4 pounds. This makes it a great option on the go. You can easily bring the device to a hang out with some friends or move it to different rooms when you need it.
Google gives you four color options to choose from. Chalk (White), Charcoal (Black), Sky (Blue), and Coral. All look pretty good with a slight contrast from the fabric to the rubber.
As for the interface, the Nest Mini has one physical switch and three touch-sensitive buttons. The switch is used to mute the microphone. Then you have the three buttons for volume control on each side. The button top button is used to play and pause media, stop an alarm or timer, and if you press and hold for 15 seconds you can factory reset the device.
On top of the device, there are four LEDs. These turn on when you are talking to Google Assistant, the mic is off, or you are pressing any of the buttons. On the sides, there are two additional LEDs but those only turn on when pressing any of the buttons to show you where to press to increase or decrease volume. When changing volume the LEDs will be used to show you what volume you are at by using different brightness for the four LEDs.
When you mute the mic the lights will turn red and will not turn off until it is unmuted. For all other situations, the LEDs will be white. When you are talking to Google Assistant the four LEDs will activate and have a breathing effect as you talk to it. Overall the system is quite intuitive and works well.
To power the device there is one plug for AC power that goes to a plug, in the wall. It is a bit unfortunate that the Nest Mini 2 doesn’t use USB, but not a huge deal.
Overall the Google Nest Mini 2 is has a great build, especially for the price. The build of the device is strong and it has an appealing look. The use of materials even competes with smart speakers in higher price ranges. I’m quite impressed here.
Sound Quality
Since this is ultimately a speaker one of the most important factors is the sound quality. In comparison to the competition and for the price the quality of sound is pretty good.
The sound quality is probably good for most people in general. It is cleaner and packs more of a punch than the different monitor speakers I tried and the speakers from modern smartphones including the iPhone 11 Pro and Oneplus 7T Pro.
If you are used to using monitor speakers these will have a lot more clarity and will deliver a lot more bass. As for phone speakers, the sound will still be better with minimal improvements in clarity, just punchy bass, and an overall fuller sound where you can hear more of each sound.
This is not mentioning the fact that this speaker can get considerably louder than both monitor and phone speakers. Either may be good in a situation where you are right next to the device but if you want to actually fill a room with good sound, the Nest Mini will blow the other two out of the water.
When comparing the Nest Mini 2 to dedicated speakers it is able to compete in lower price ranges. The Nest Mini delivers similar sound quality with bass and treble that is solid to those of speakers in the sub $30 category. If the speaker unit does have a subwoofer the Nest Mini just can’t compete as it won’t be able to provide as much clarity and bass as those units.
For a single speaker the sound is good and it will be just as good as many portable speakers.
If you want to use this speaker as a desktop speaker you can connect to your computer, assuming it has Bluetooth, there is some latency added. This is not an issue when listening to music but it is not recommended to use this speaker for gaming if you wish to use your Nest Mini as a desktop speaker.
I have been using the Nest Mini as my desktop speaker for the past few weeks and although it may not be good as super high-end speakers it is definitely solid at this price range especially considering it can do a lot more besides just being a speaker.
Google Home Support
One of the key things that enables almost all the functionality of the Nest Mini 2 is the Google Home app.
The Google Home app is essential to setting up the app, connecting to services such as Spotify or YouTube Music, and gives you functionality with smart home capable products such as Philips Hue lights. The software also allows you to change things like the language or languages you want to speak in, the voice of Google Assistant, and much more.
Besides changing the virtual assistant settings and connecting to services you can also edit the EQ to add more treble or bass, play and pause media, and control the volume.
The app enables you to control everything “smart” about the speaker. It has a lot of functionality and for the most part, is pretty easy to use. It’s what makes smart speakers so special.
Google Assistant and Special Features
The fact that the Nest Mini is a smart speaker provides a ton of functionality to the device and is what makes it special. Google Assistant can do many things from starting timers to setting reminders to answering questions.
Having the functionality of a device that will answer most of my immediate questions right away is very useful. I can have the Google Assistant do a command to figure something out while I am working on another part of the issue as if Google Assistant is a real assistant. Depending on your use case you could greatly benefit from a virtual assistant not just for smart home use.
One capability on the device that I found to be very useful was the ability to pair the speaker via Bluetooth to my desktop. If your device support Bluetooth you can use this speaker rather than something like monitor speakers and you will notice a sound improvement.
To further add to the sound Google also allows you to pair the speaker with multiple other Nest Audio speakers more a more full and potentially more immersive sound. I wouldn’t recommend buying two Nest Minis for this specific feature but if you have two of them it is a nice feature to have at any time
If you want to not have the speaker resting on a desk or counter you can hang it on a nail from the wall. This causes the sound to fire towards you which is nice in situations where just you are listening from the speaker. Hanging the Nest Mini from the wall also can provide a potentially cleaner look or may just blend well with your wall.
Although the small size is not intended for good portability it does make the Nest Mini great for being a device that you can take to a party easily. It is not as good as a portable speaker but if you don’t want to spend the extra money on a portable speaker and you have access to a wall outlet you can use it in most places as it is compact and light.
Alternatives
Amazon Echo Dot 4th Gen
The main competitor to Google’s Nest Mini 2 is the Amazon Echo Dot 4th Generation. Overall the build, sound quality, and app support are about the same. The major differences are a few more minor features and the amount of support for each ecosystem.
With the Google ecosystem, you could interact with the speaker and an android phone and everything would be seamless. Also, some smart home products don’t have support for Alexa but only Google and Apple Home.
The Nest Mini is smaller in size in comparison to the 4th generation of the Echo Dot. The Echo Dot has more of a rounded shape making it take up more space. As for the construction itself, the materials used are mostly consistent except the Echo Dot uses some plastic where the Nest Mini uses rubber.
The sound is mostly the same but Google takes the edge just by having slightly more clarity and less of a “hollow” sound.
The main difference between the two besides the looks is the virtual assistants. They are quite similar in functionality with apps that can both do basically the same things as well. Google’s Assistant does take the edge in some situations for the most part but it is negligible.
Overall whatever you choose is up to your preference and there are a few minor features to look out for like if you want to hang the speaker from a wall with the Nest Mini or if you want to pay a bit extra and get an integrated clock with the Echo Dot.
Google Home Mini (1st Generation)
The Nest Mini (2nd gen) looks quite similar to the Home Mini (1st gen) with the only build difference is that the sides of the Home Mini use plastic rather than rubber. To power the devices you use AC power for the Nest Mini compared to Micro USB for the Home Mini. Single prong AC power is easier to plug in as it is the same shape all the way around compared to micro USB.
As for sound, there are minor improvements all around but it is not big enough to make an upgrade if you already have the 1st generation. Another minor improvement is the UI. There are now lights to mark where you change the volume just to make it more obvious on the Nest Mini.
The assistant is still the same between the two so both are equal in performance in that field.
Overall the Nest Mini is better than the Home Mini and getting the Nest Mini is definitely the better option even at a slightly higher price but if you already own a Home Mini there is no major reason to upgrade.
Apple HomePod Mini?
If you are in the Apple Ecosystem or want to get into it then your cheapest option is to go with the Apple HomePod Mini. This isn’t the fairest comparison to the Nest Mini 2 as it is double the price usually so for the sake of argument we will mostly compare the functionality.
The HomePod smart speakers are only truly good if you are in the Apple ecosystem as you will need Apple-specific devices for it to work best. As a result, you pay Apple’s premium for this seamless experience. If you use android or like to use services that are competitors of Apple’s your best experience would be with something from Google or Amazon.
After comparing Apple’s Siri, Amazon’s Alexa, and Google Assistant I found that Google Assistant and Alexa had the most functionality and could answer the most questions. Google Assistant has some exciting features that neither have like taking calls for you too.
Although Apple is known for having products with quite a good sound quality I don’t believe that investing in the HomePod mini is worth it over getting either something from Amazon or Google unless you are looking for the seamless and easy experience that Apple provides with their ecosystem.
At the $25 to $50 price range, the Google Nest Mini (2nd generation) is a great option for a smart speaker.
It could be the first step in creating a smart home or the final piece to bring everything together. The Nest Mini is a great option for those who want a small yet very functional device at a great price.
Google’s Nest Mini has a great virtual assistant, a ton of support for smart home devices, and has support with the in-depth Google Home App.
The build and sound quality are both strong with the build quality competing with speakers at higher price ranges.
Overall the Nest Mini is quite impressive and a strong option to consider.
If you enjoyed this article consider checking out some of our other posts.


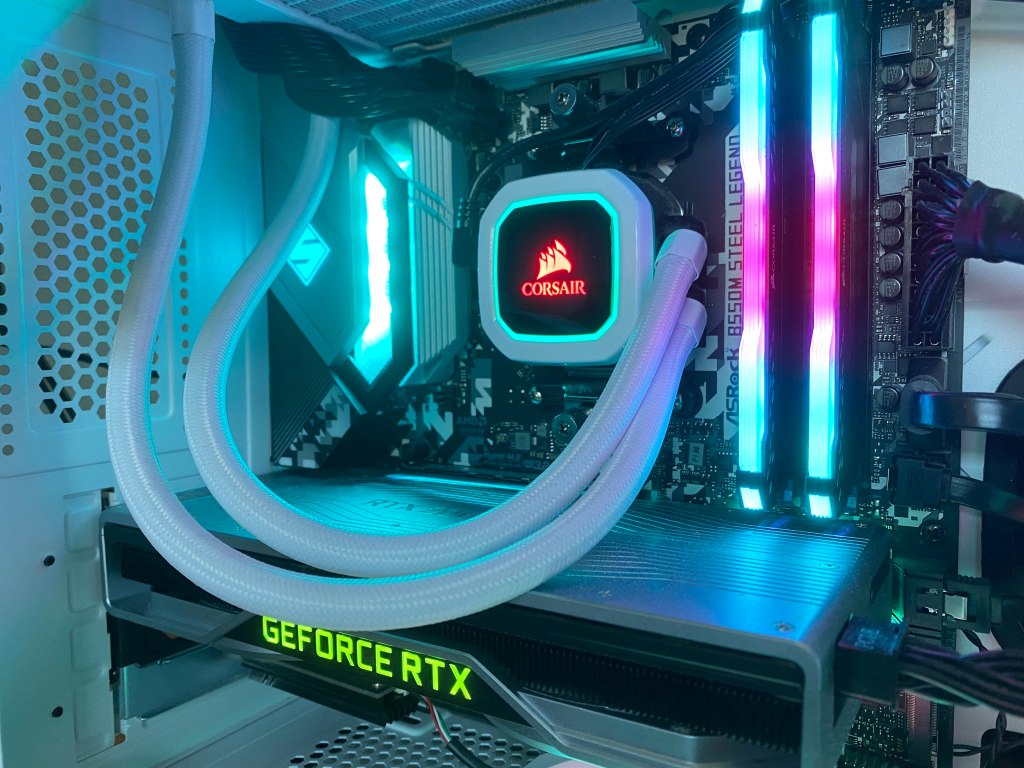
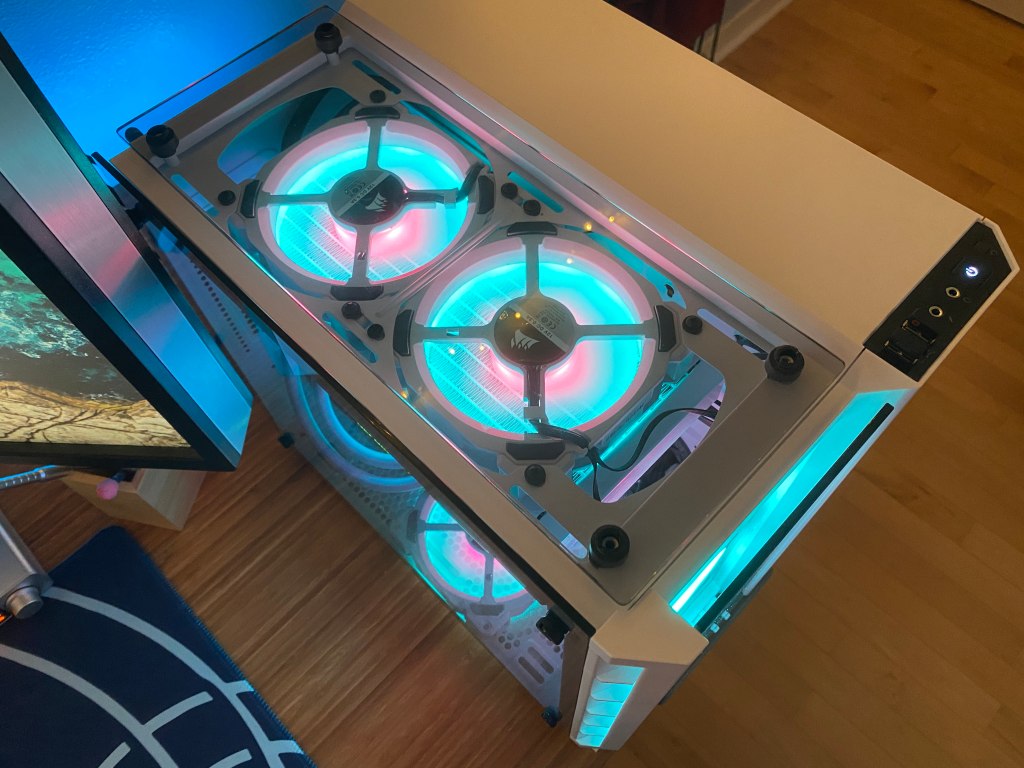
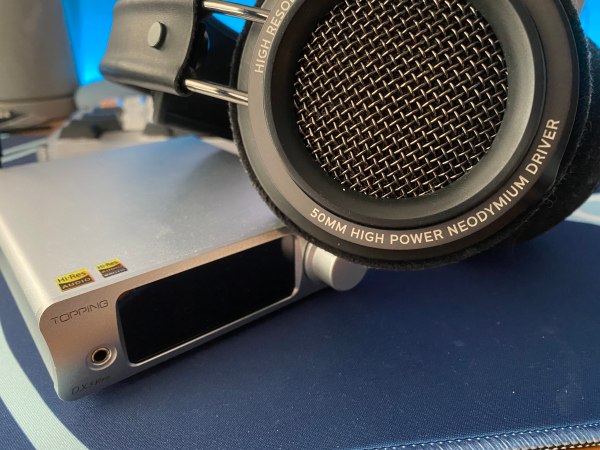

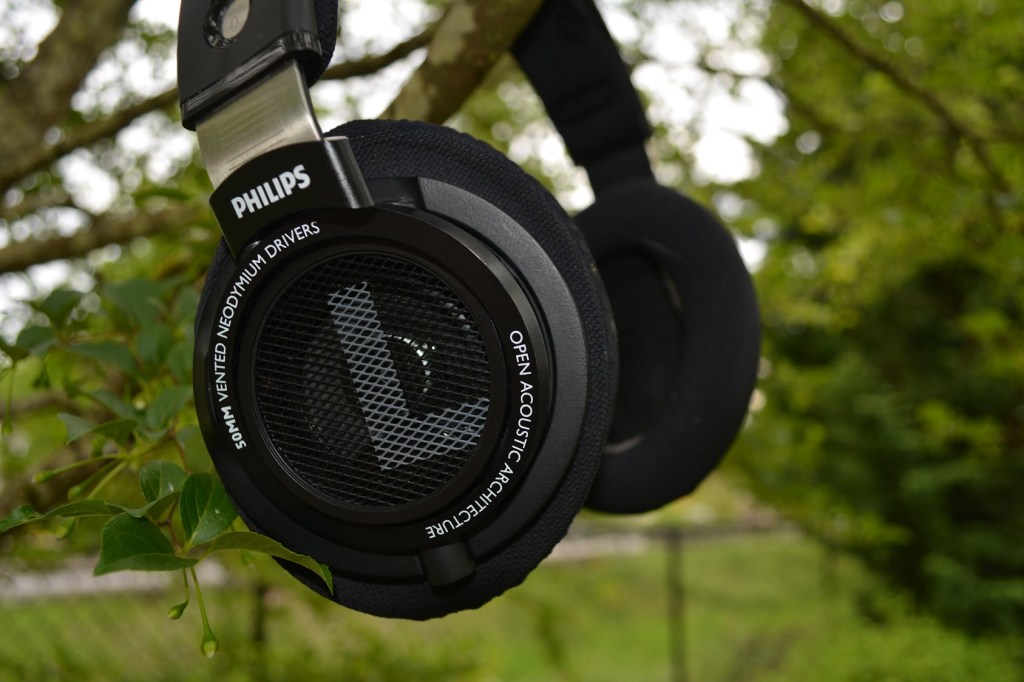
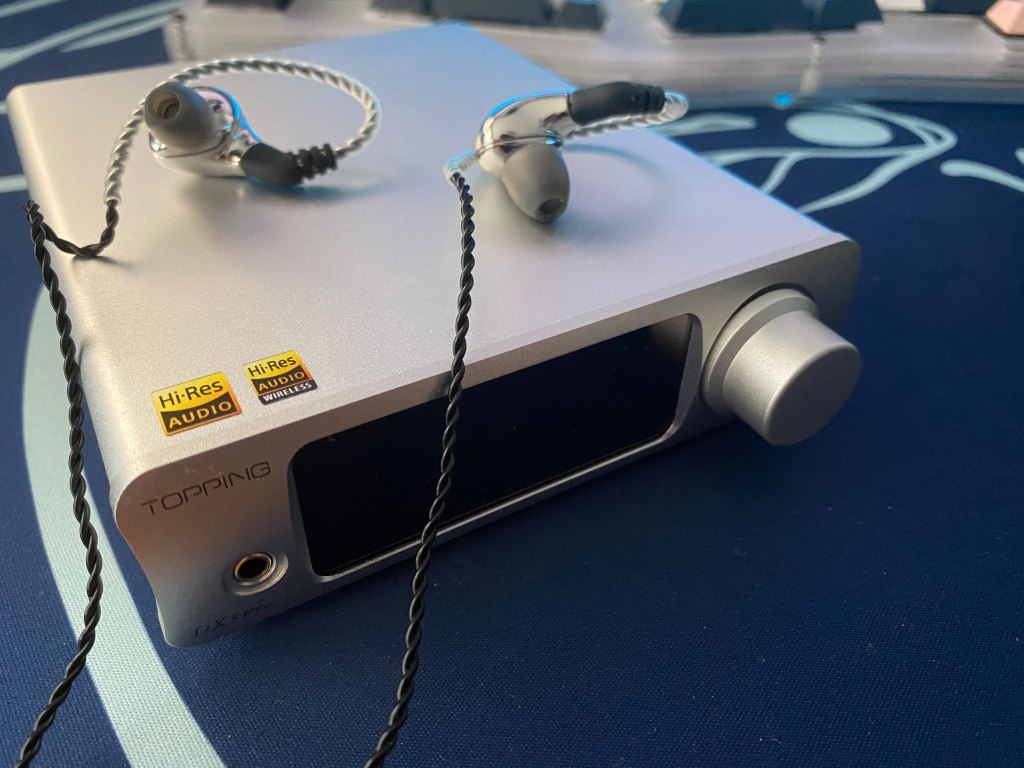


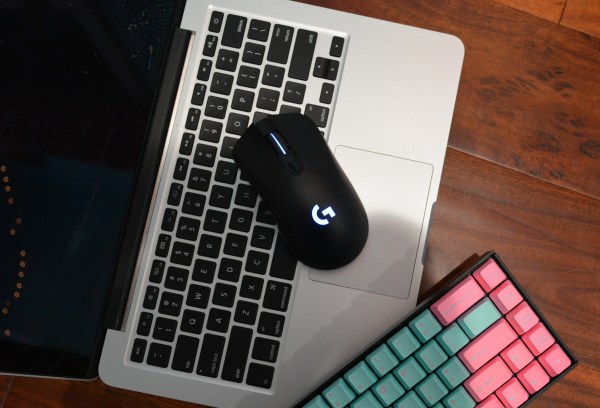

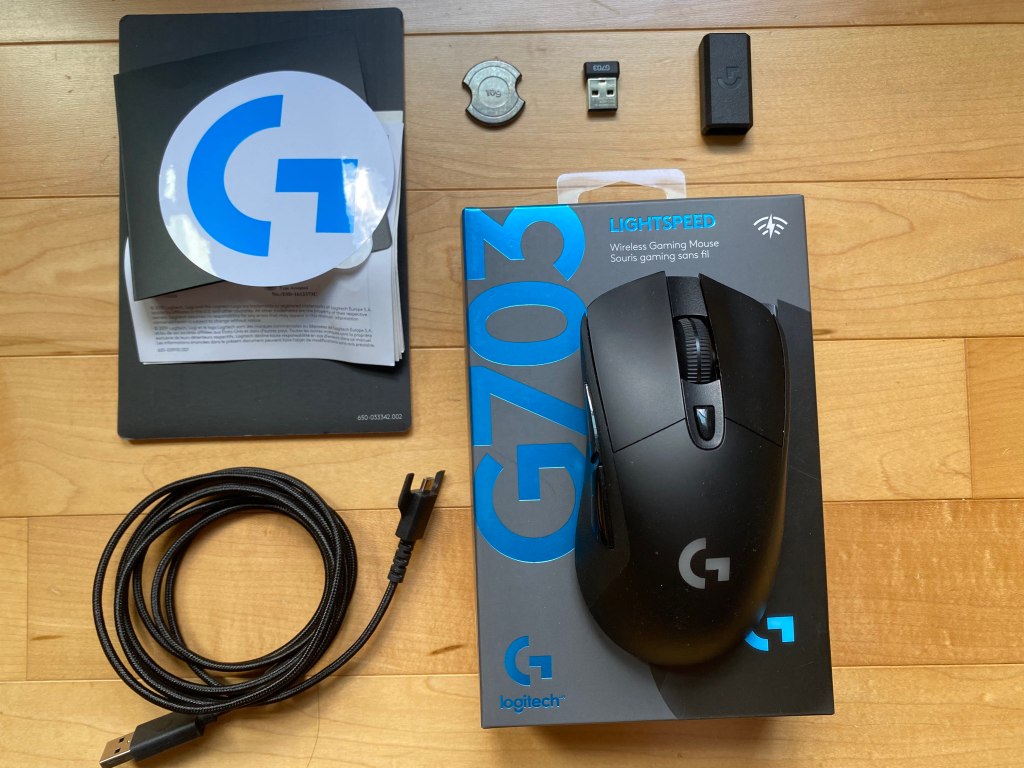

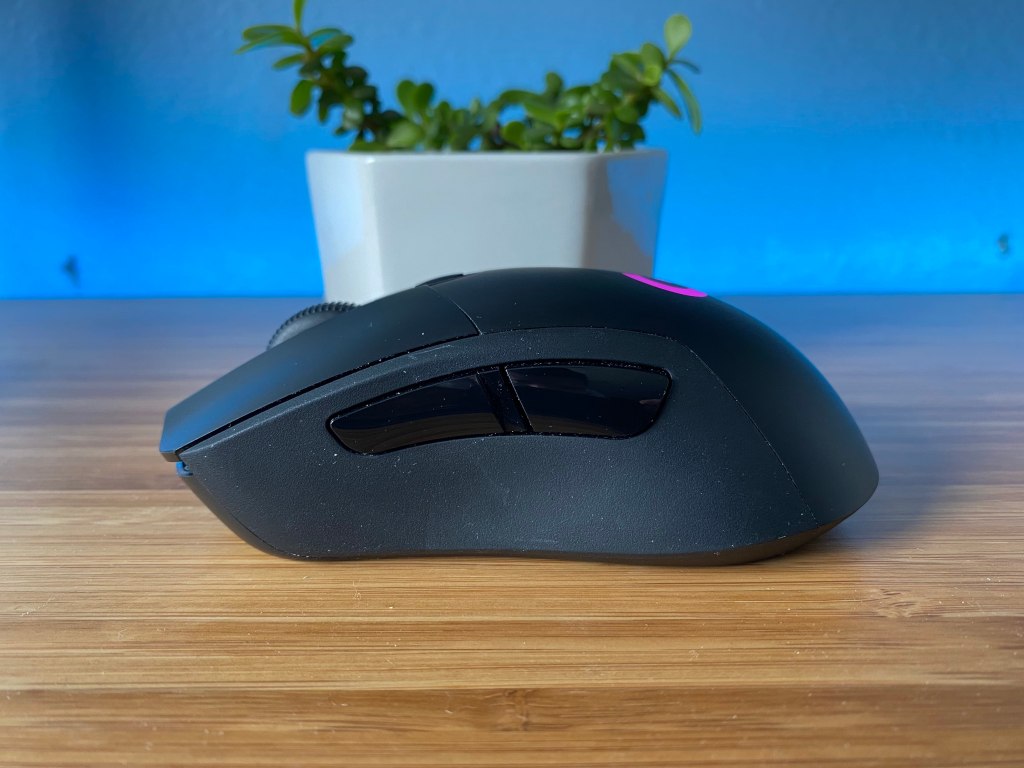

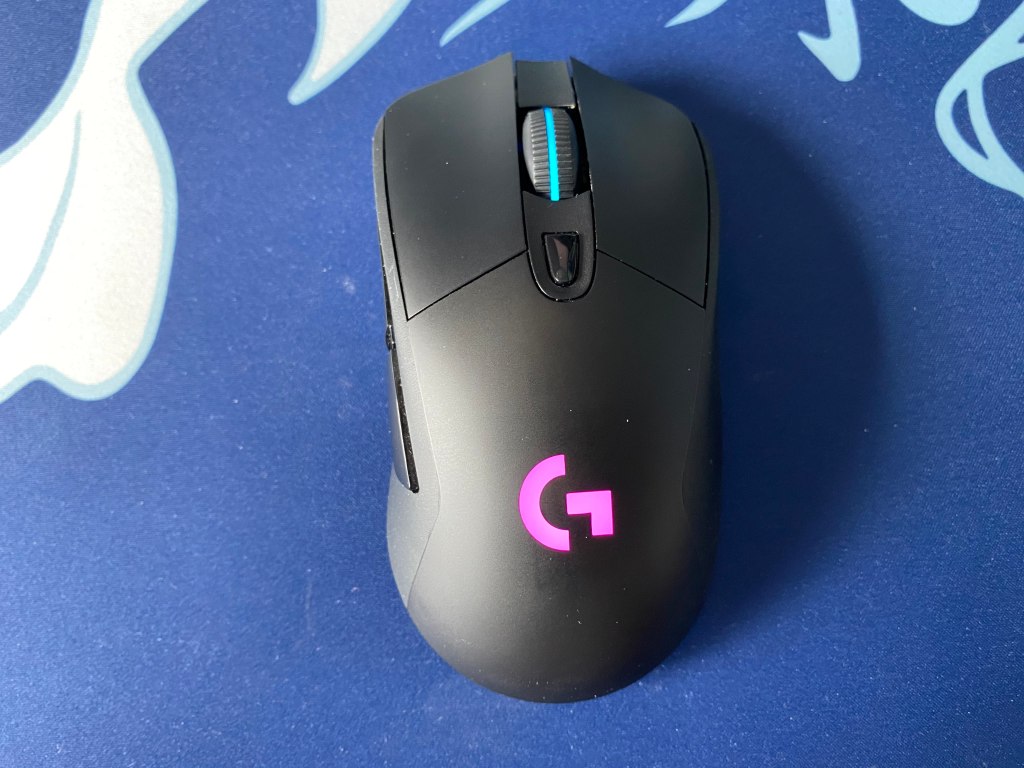
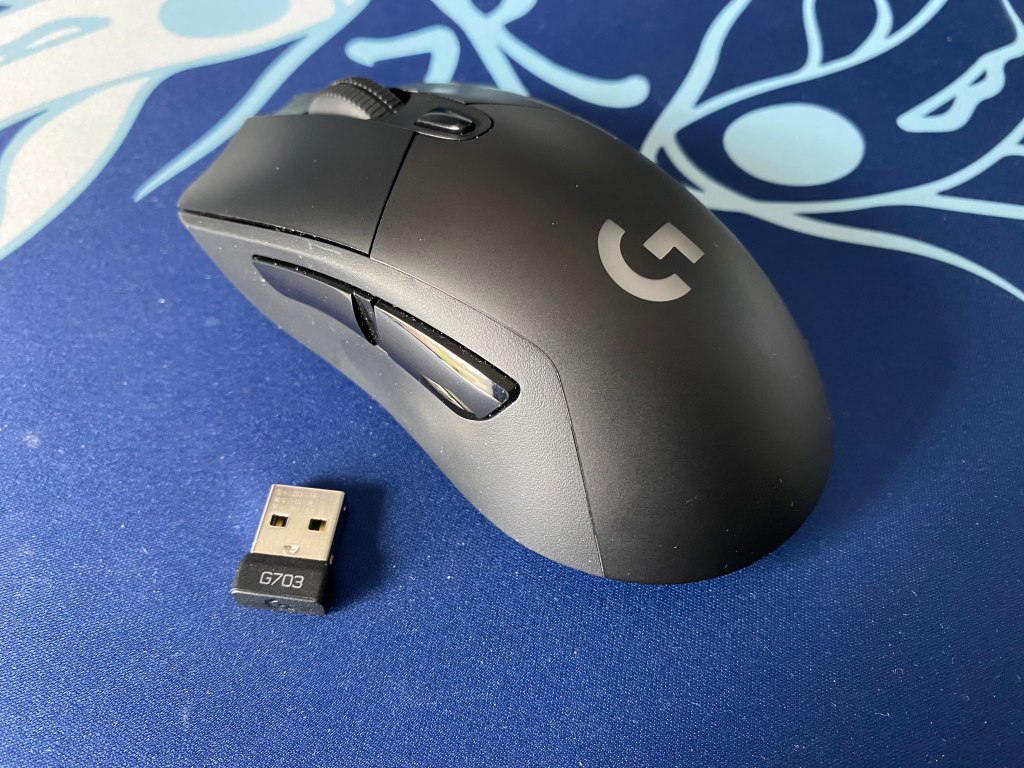
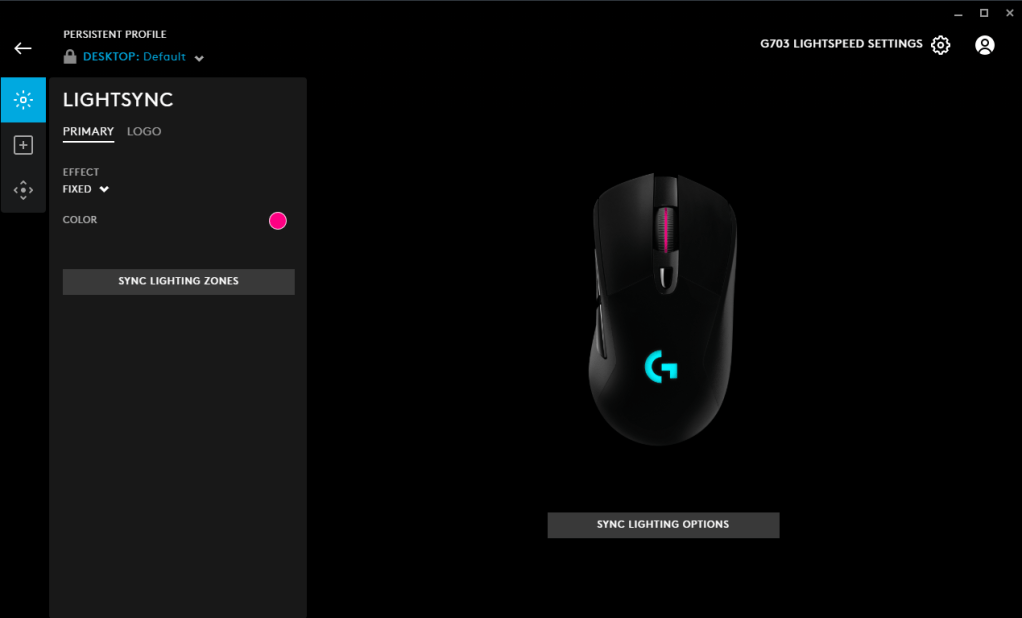
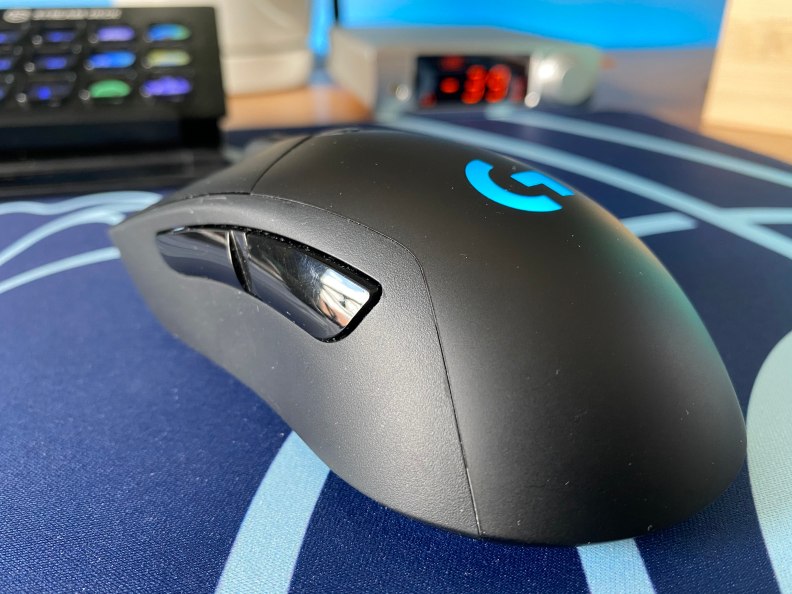
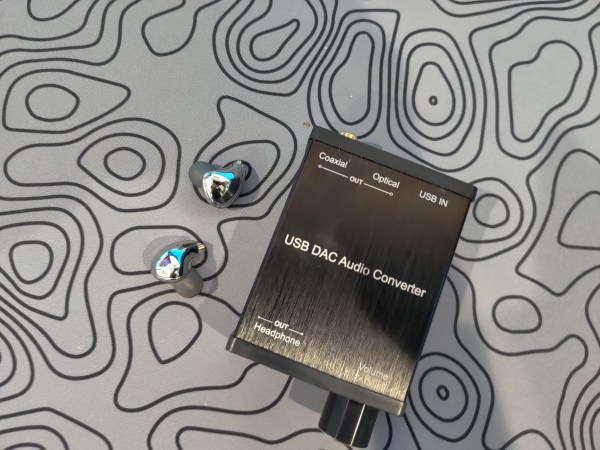
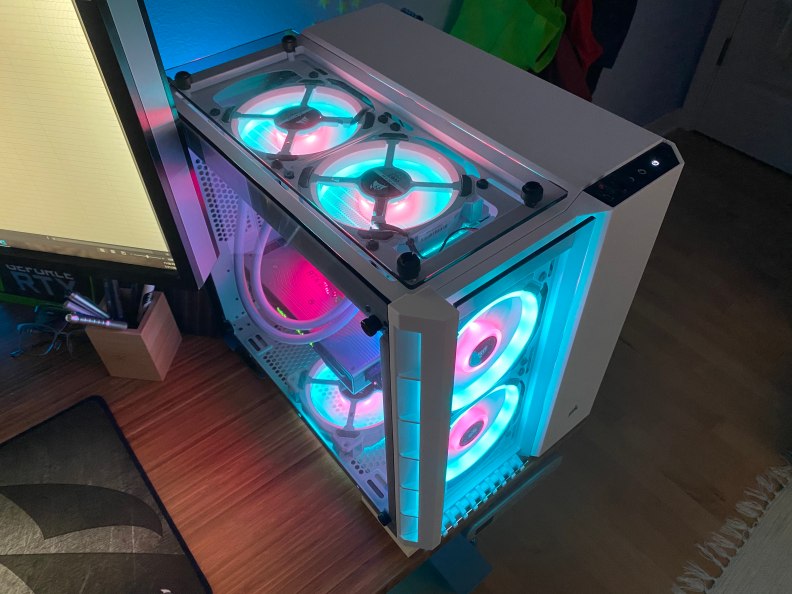

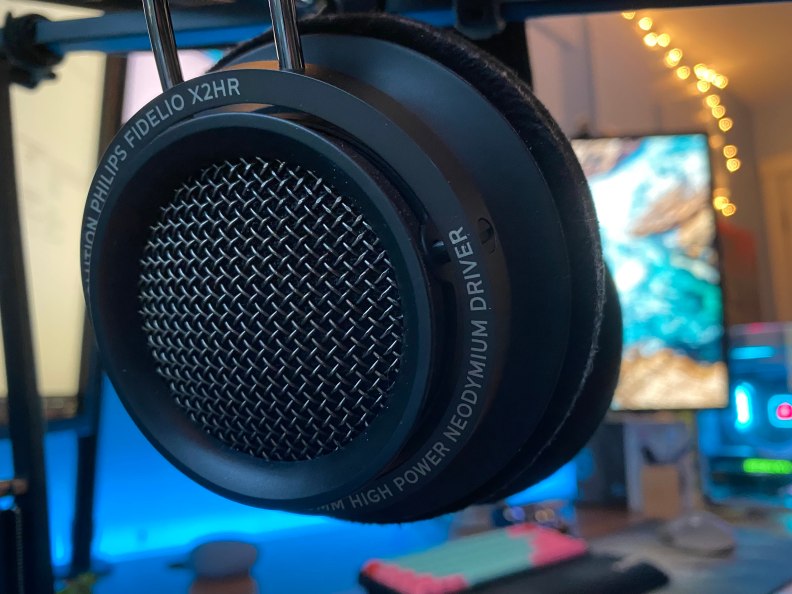

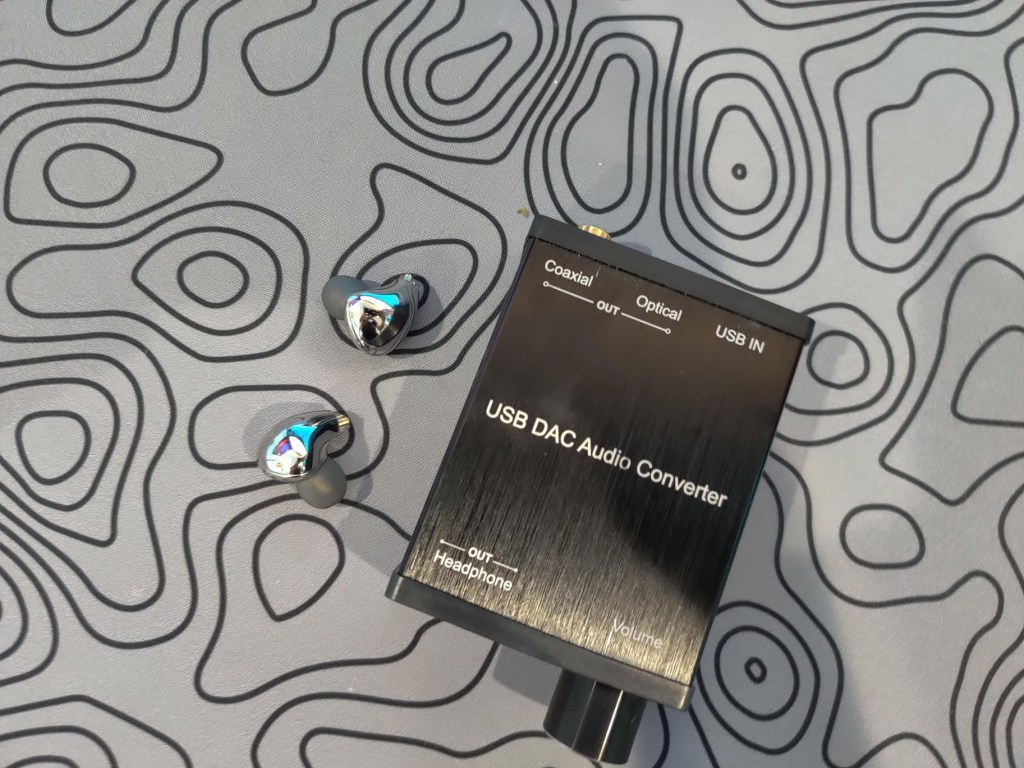

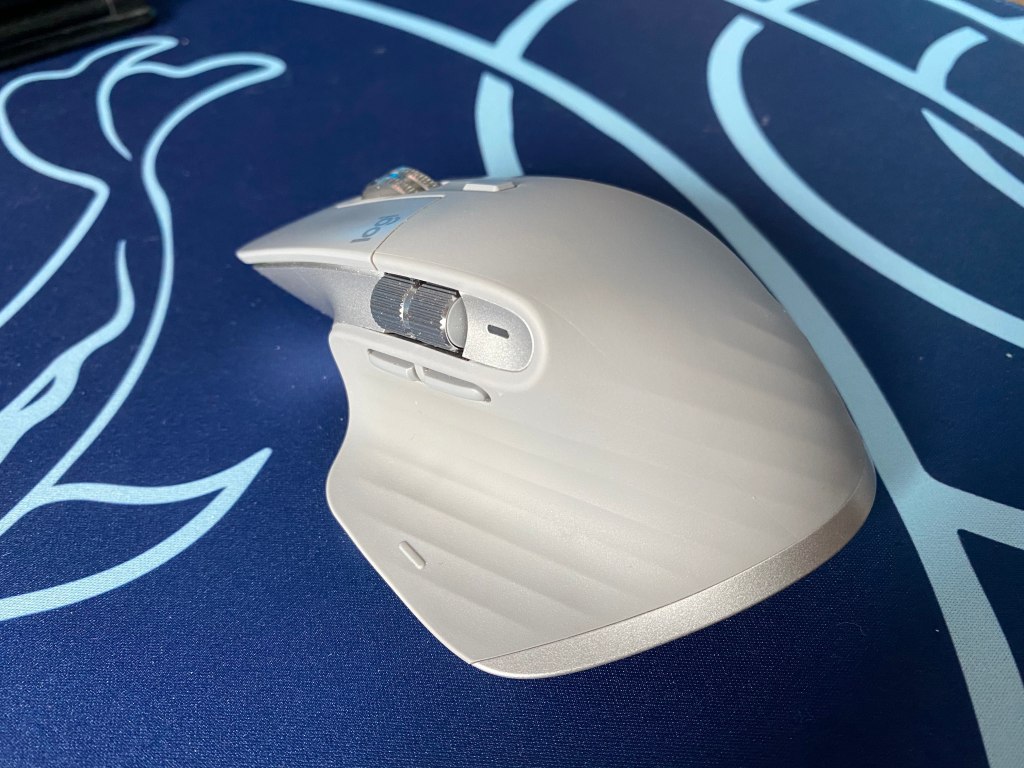
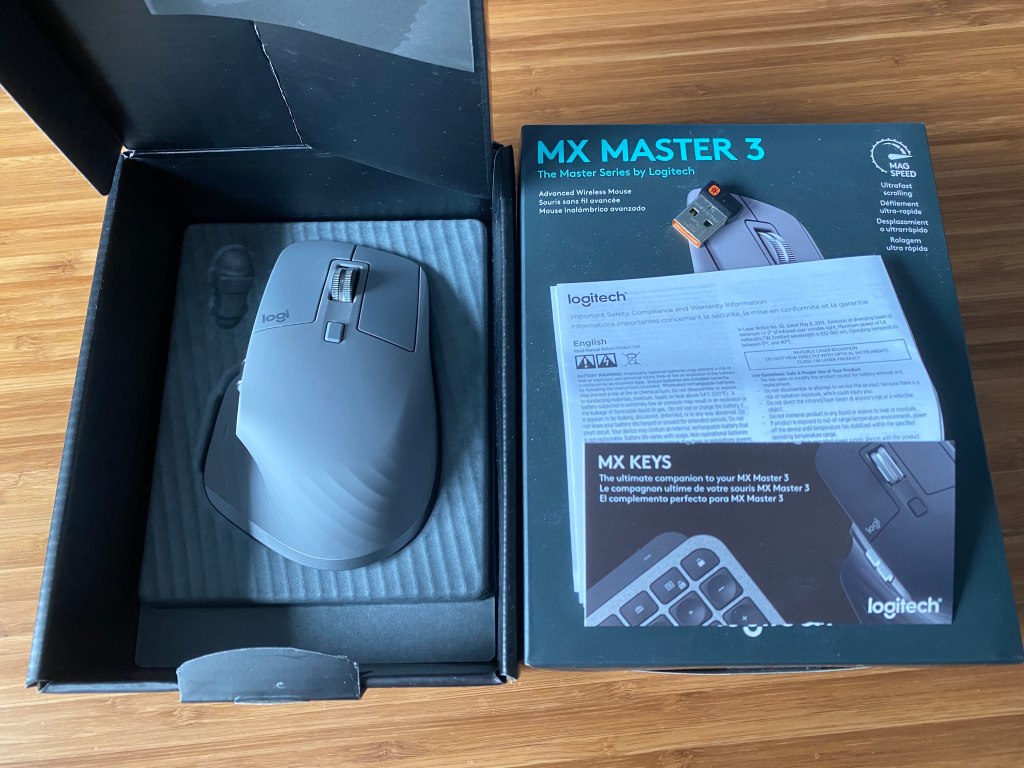
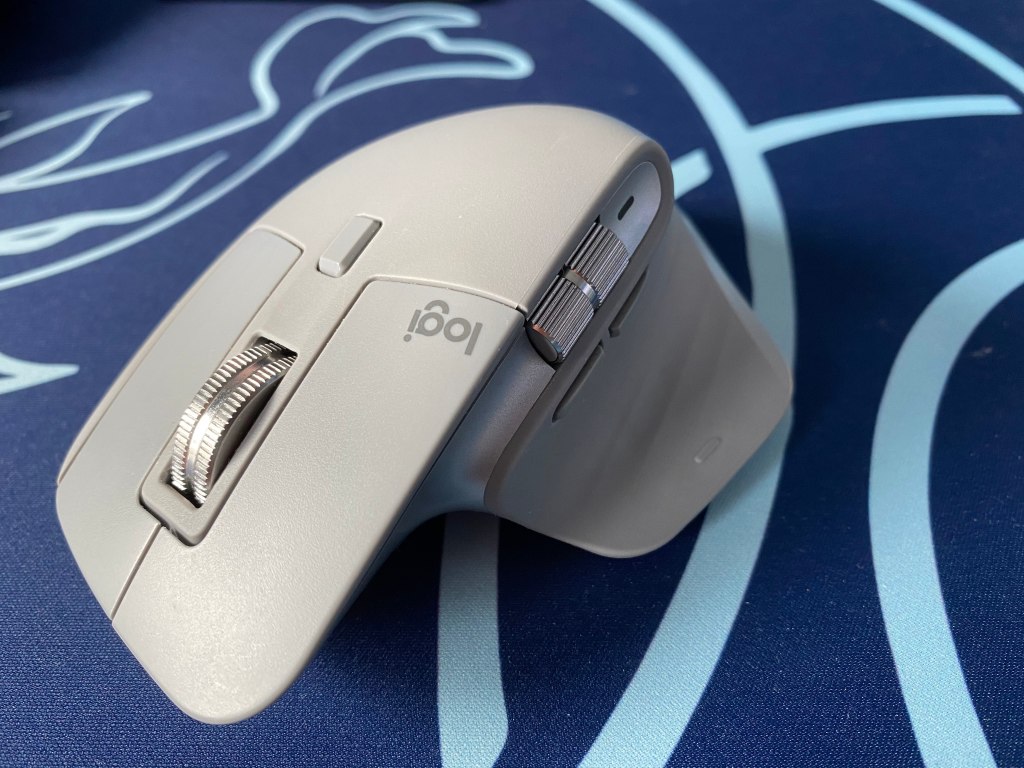
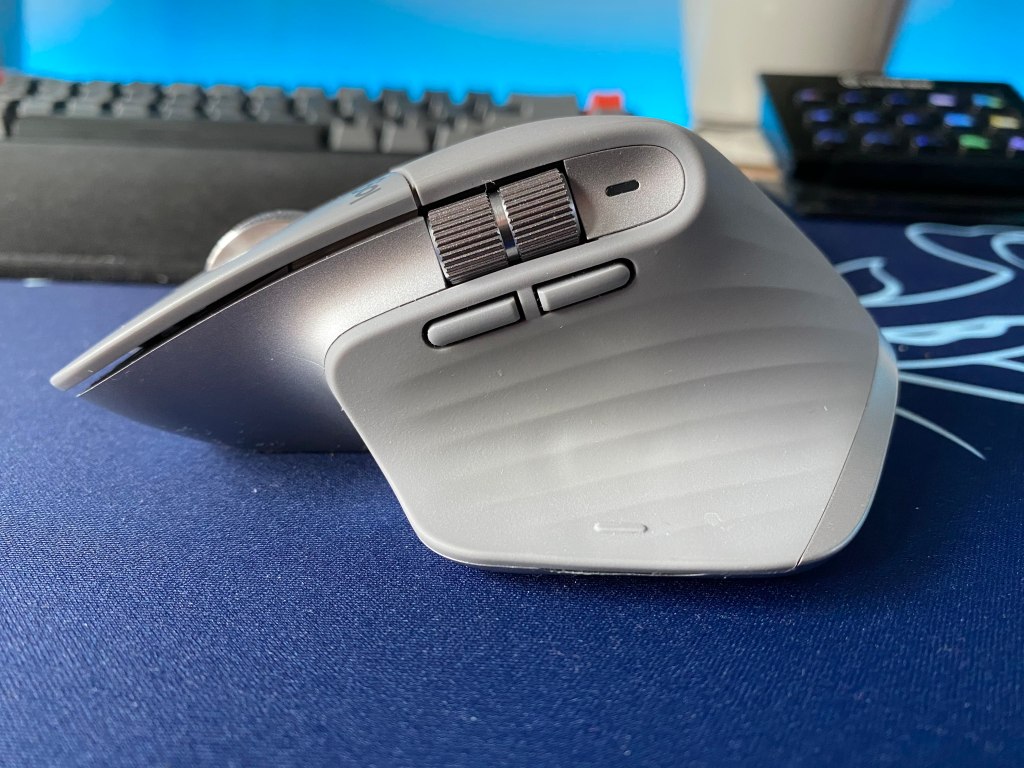
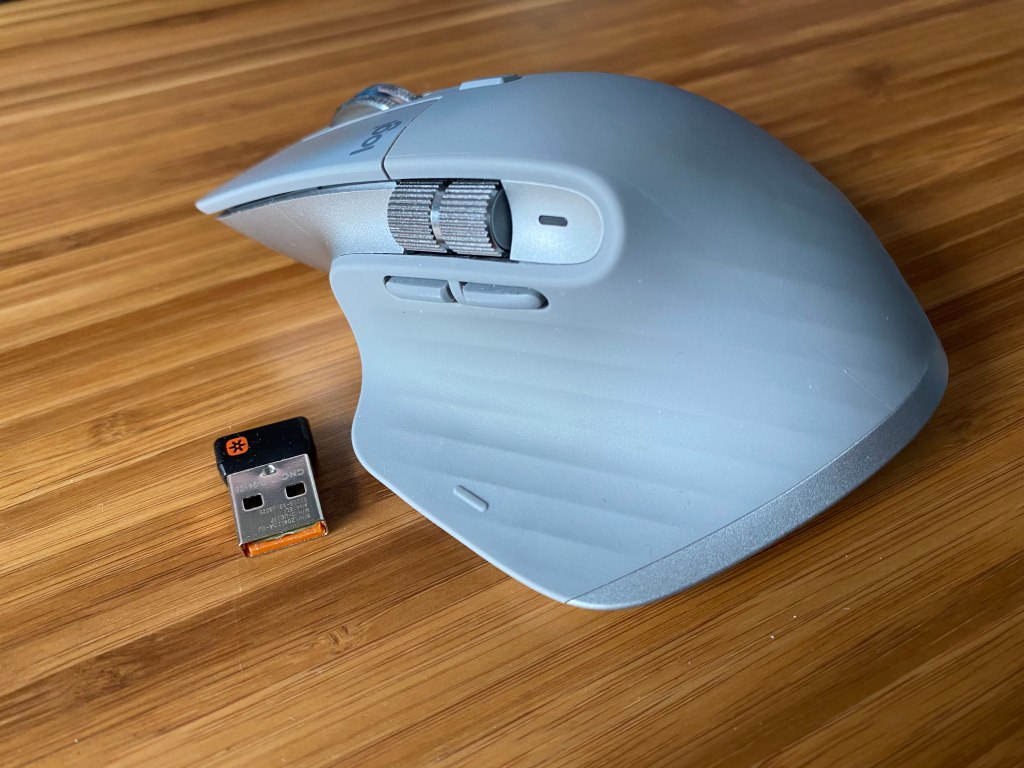

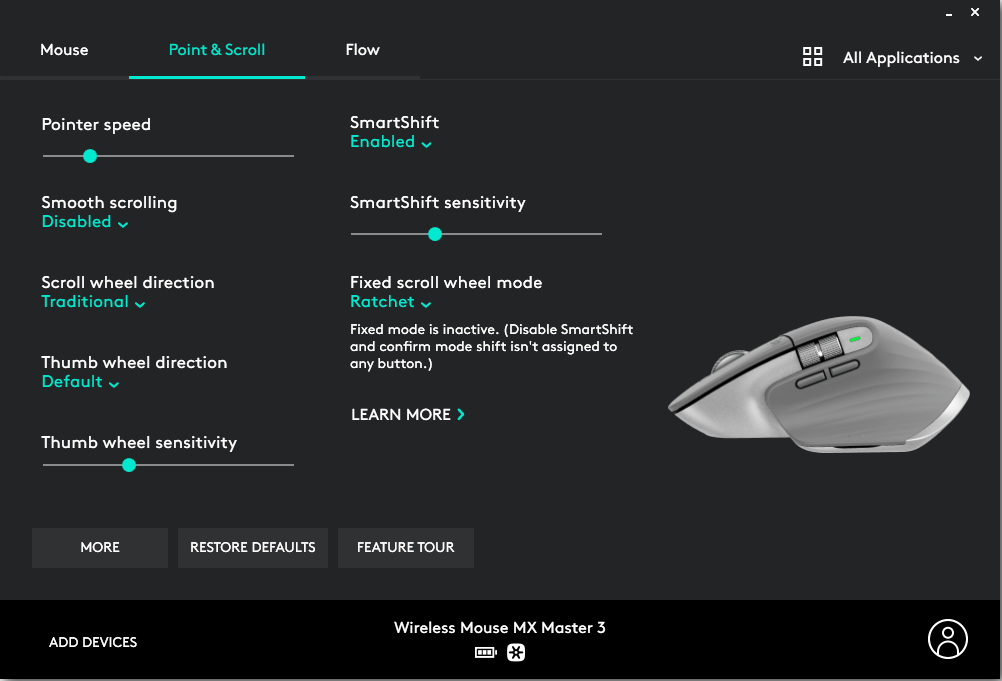
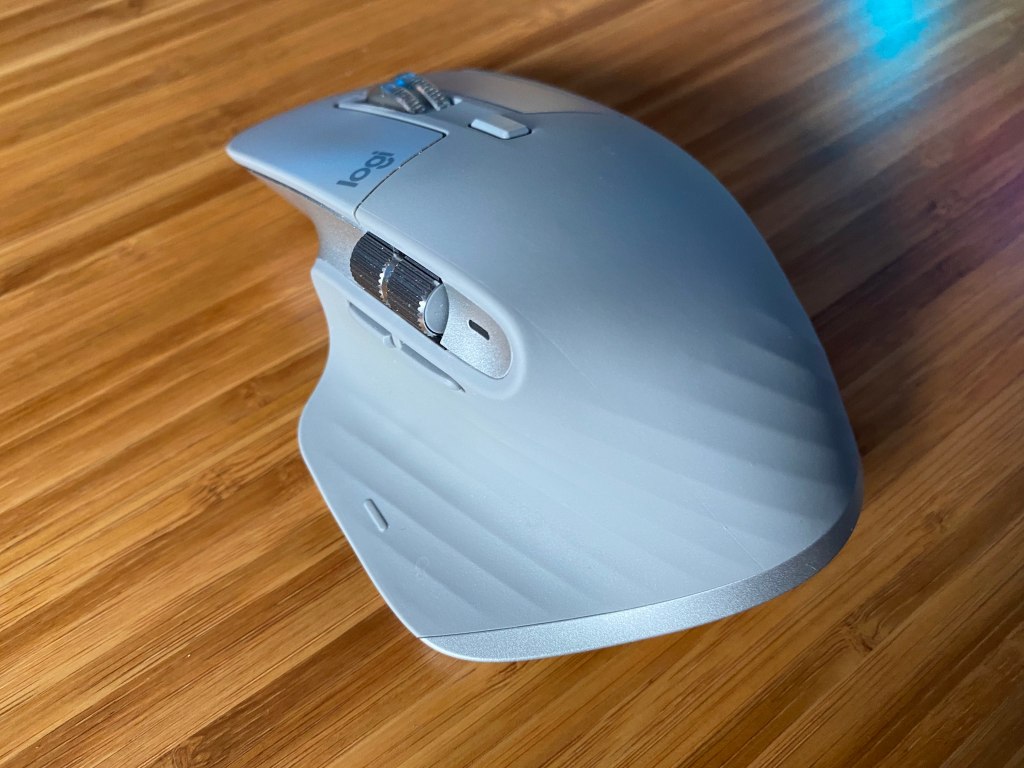

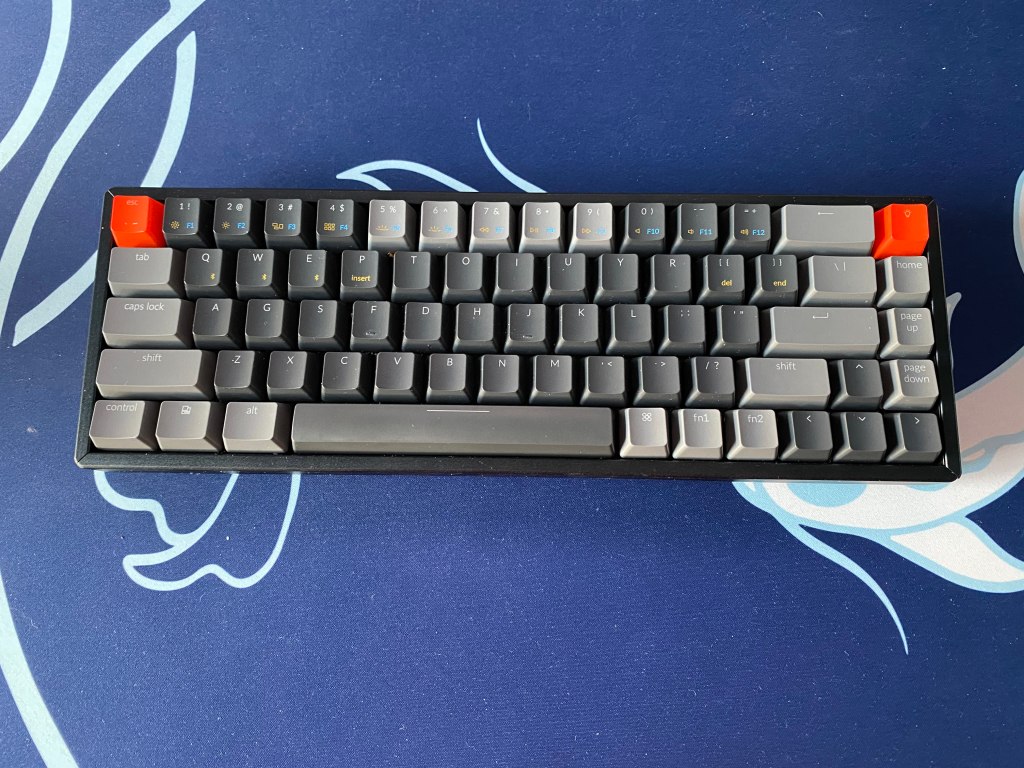
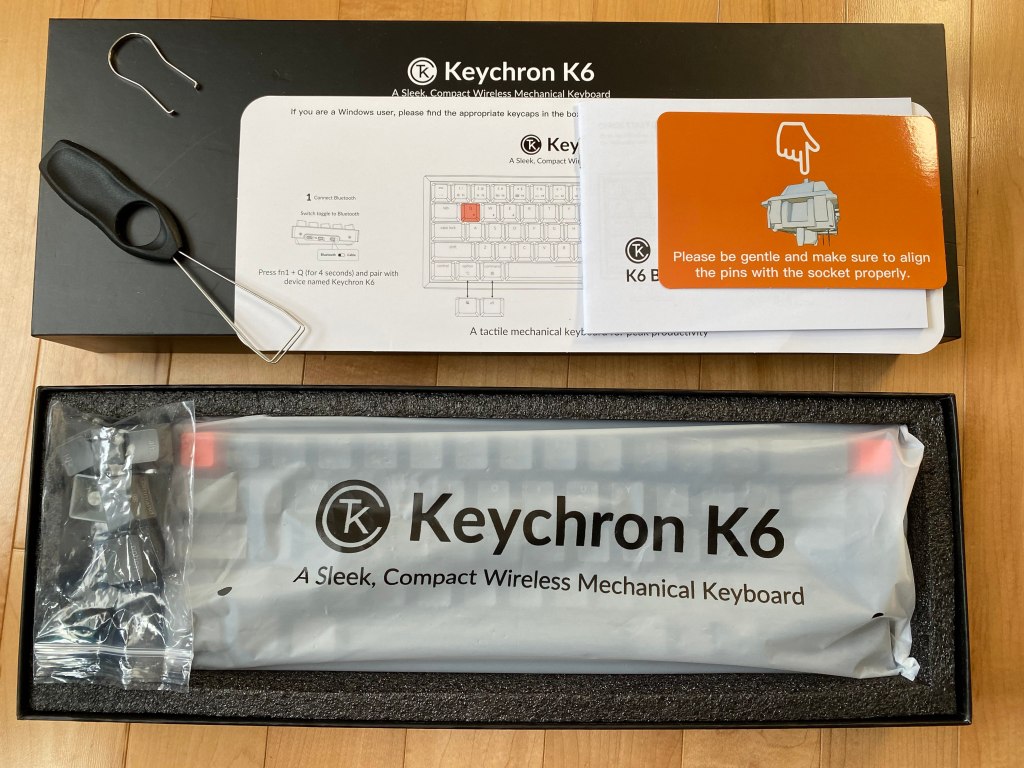
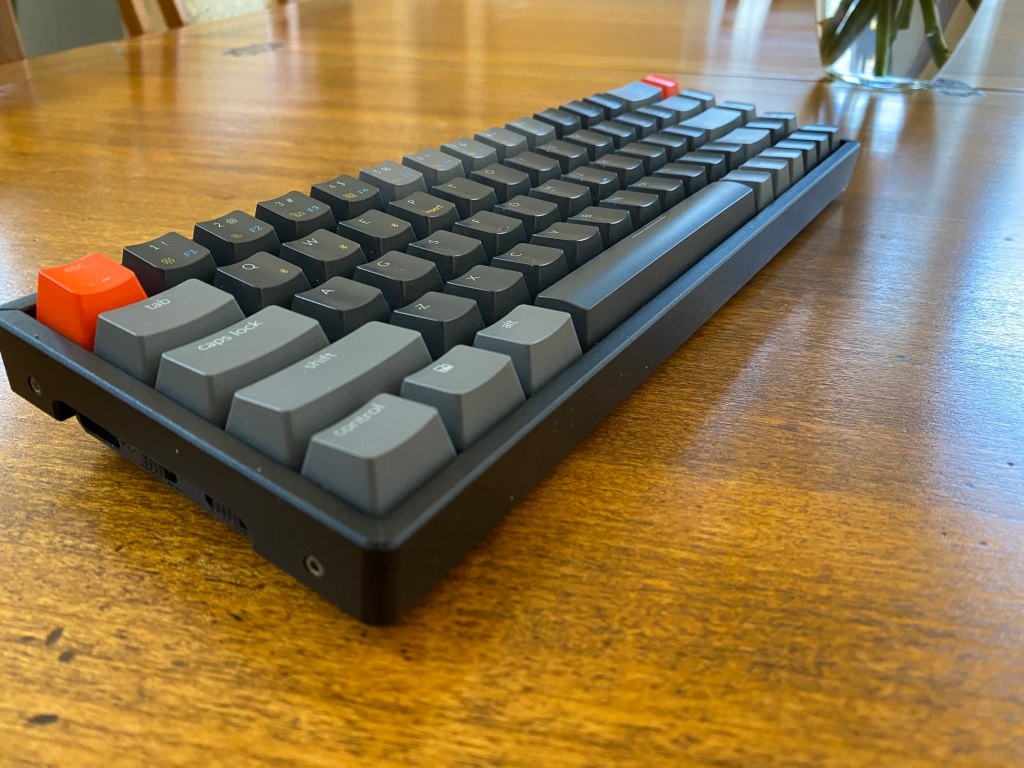
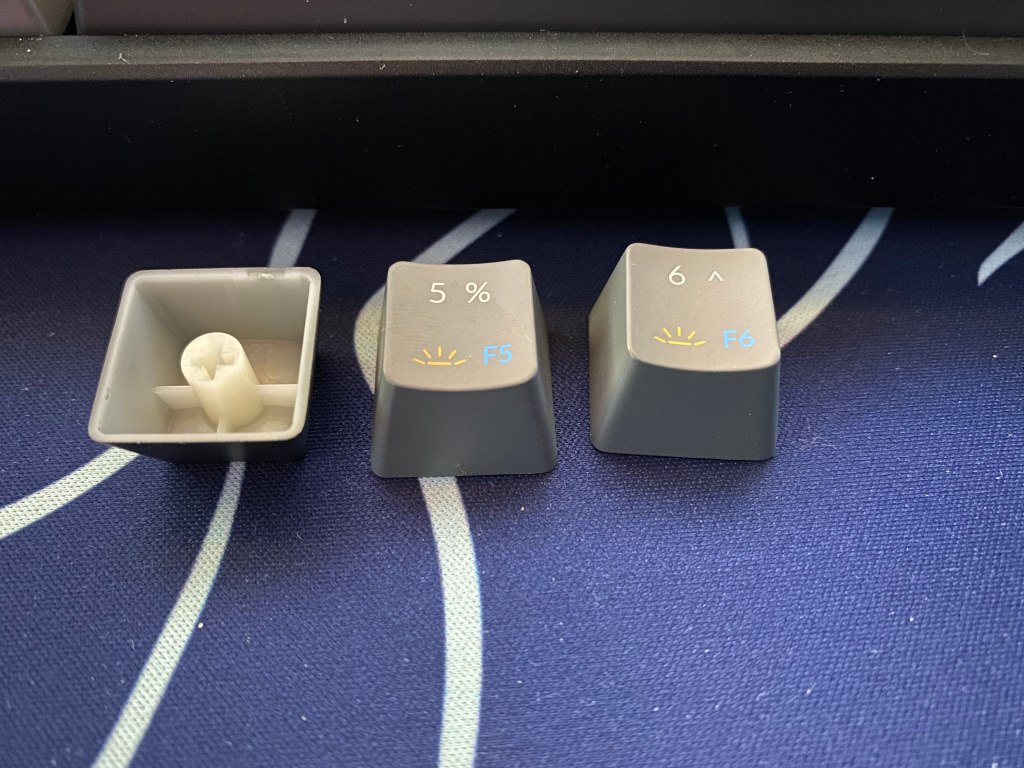
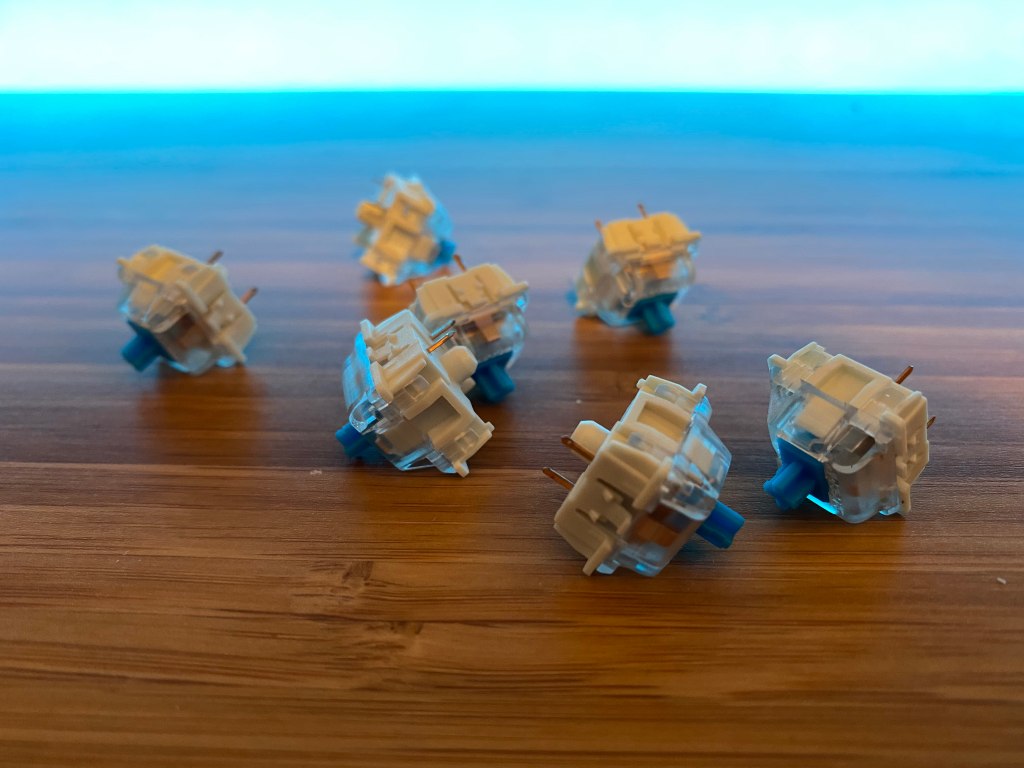
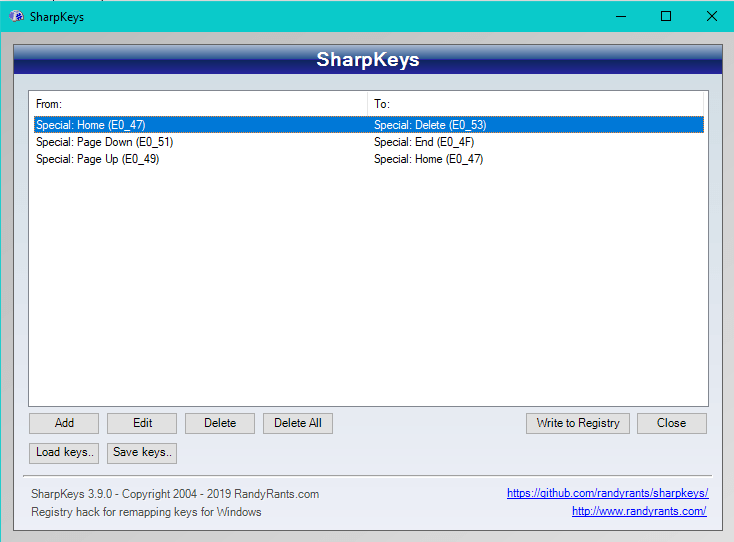
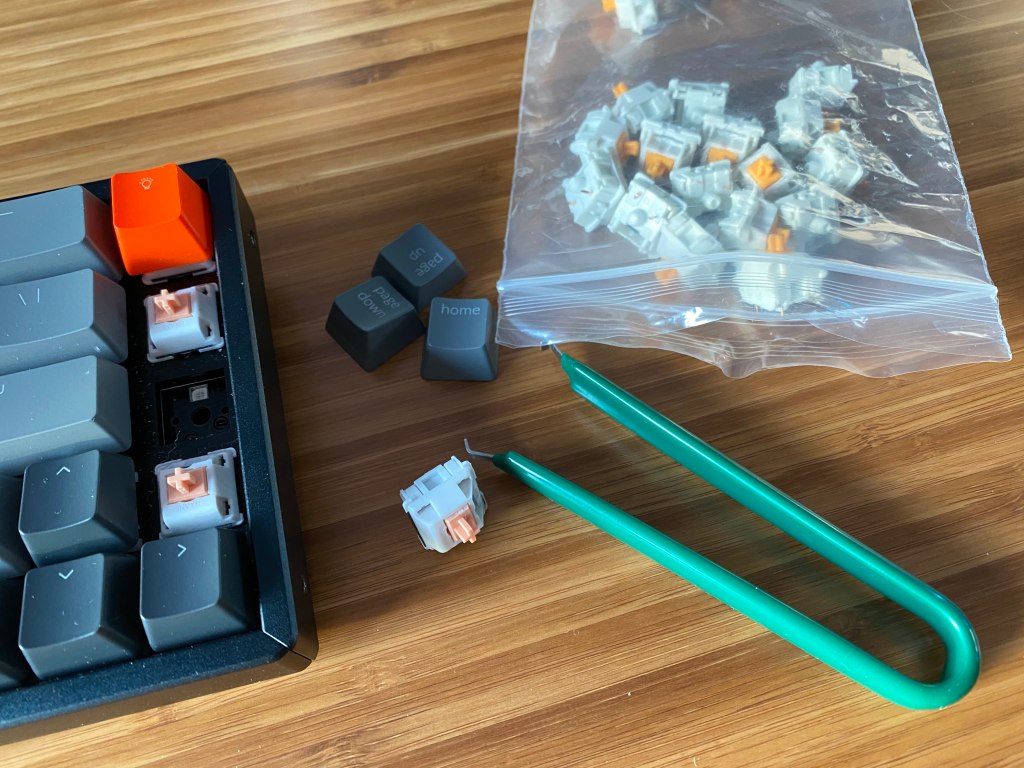
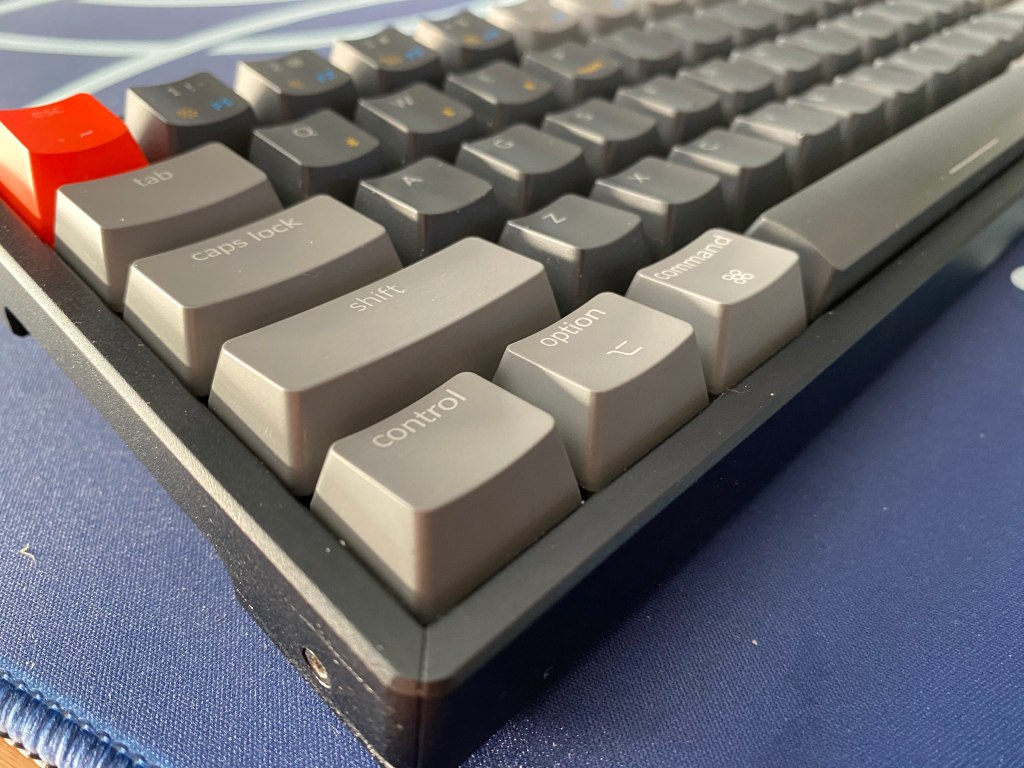

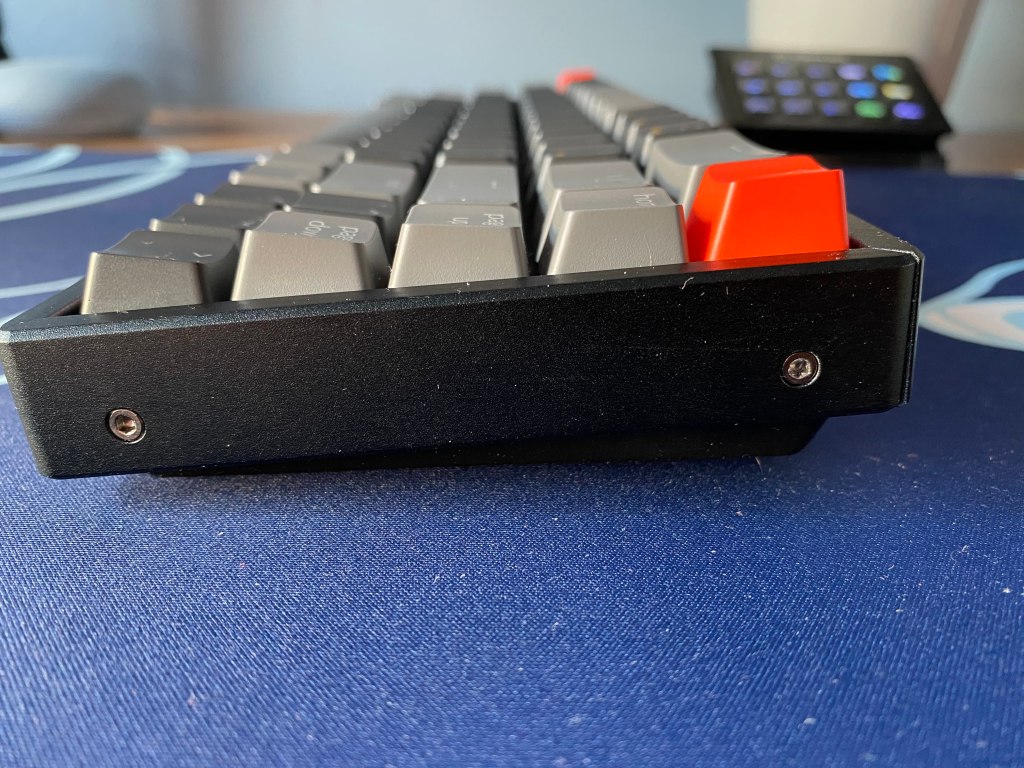

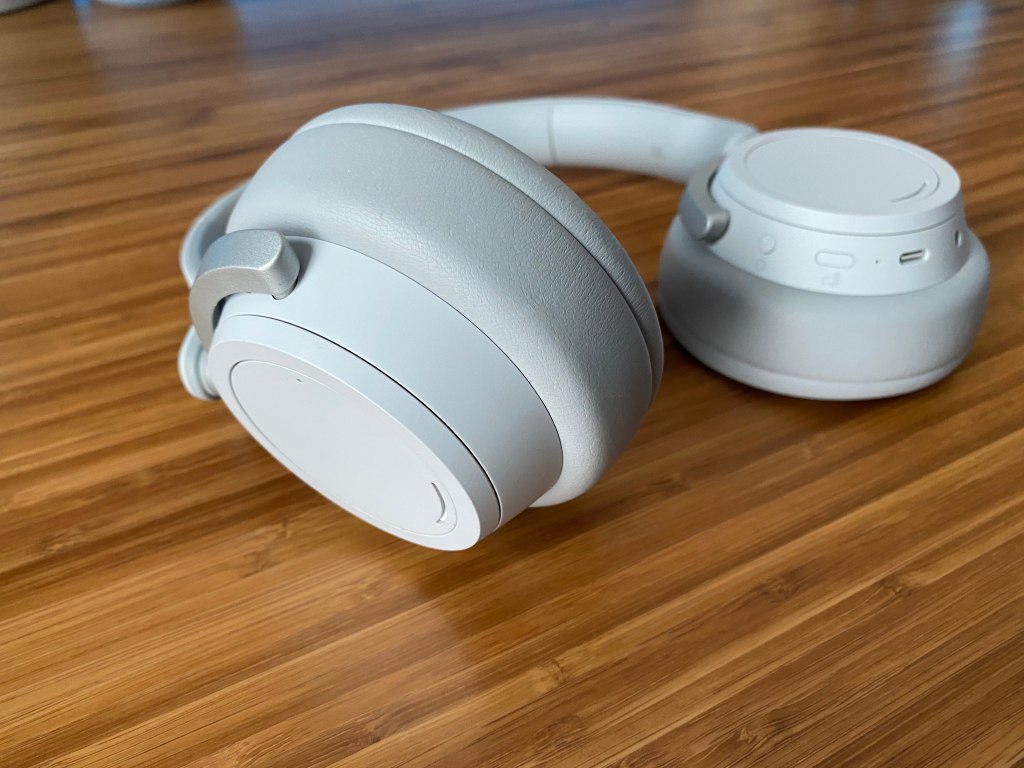
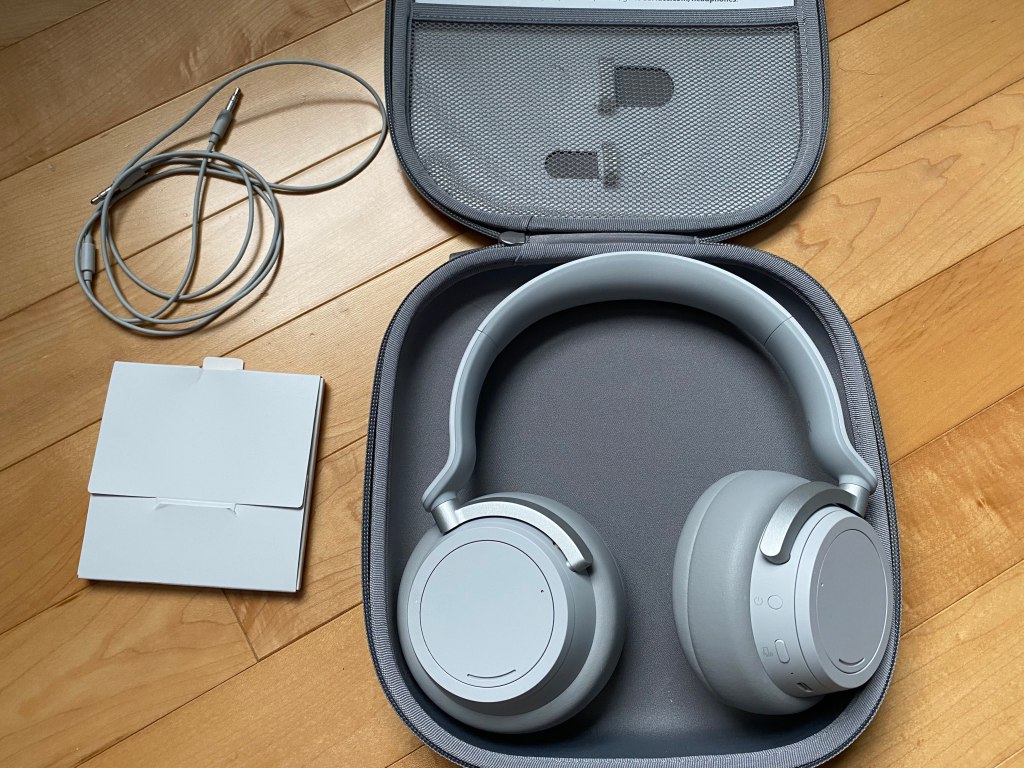

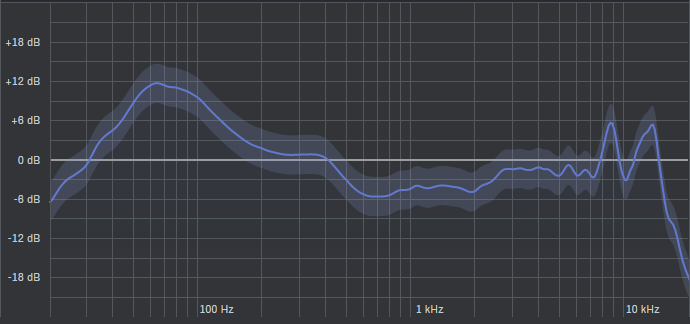
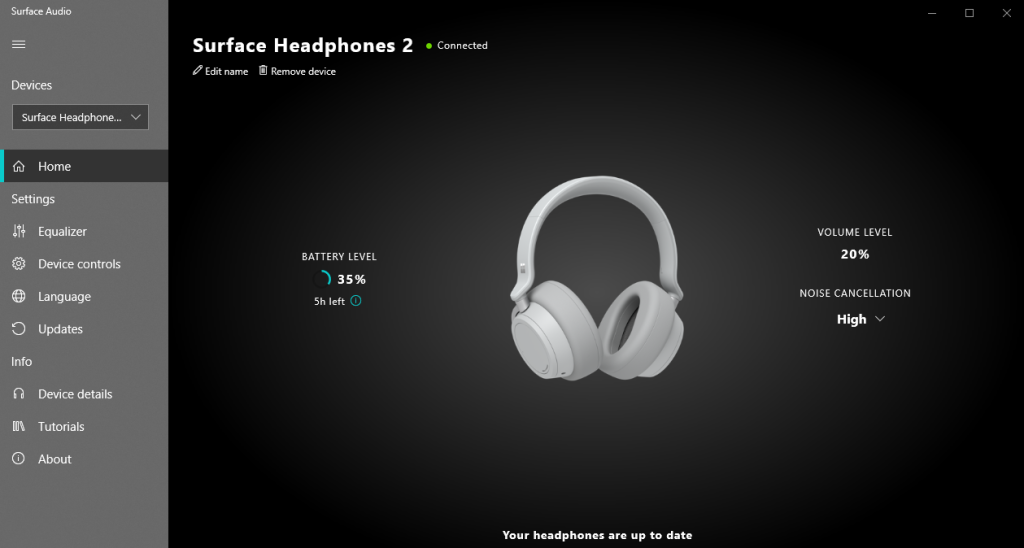
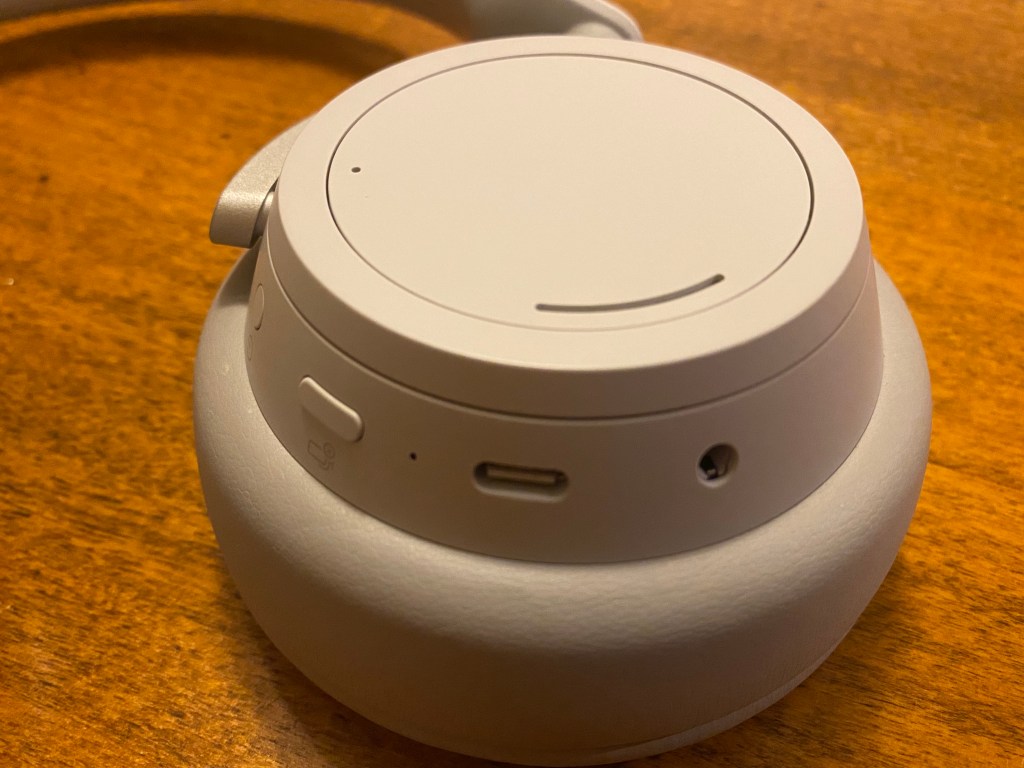
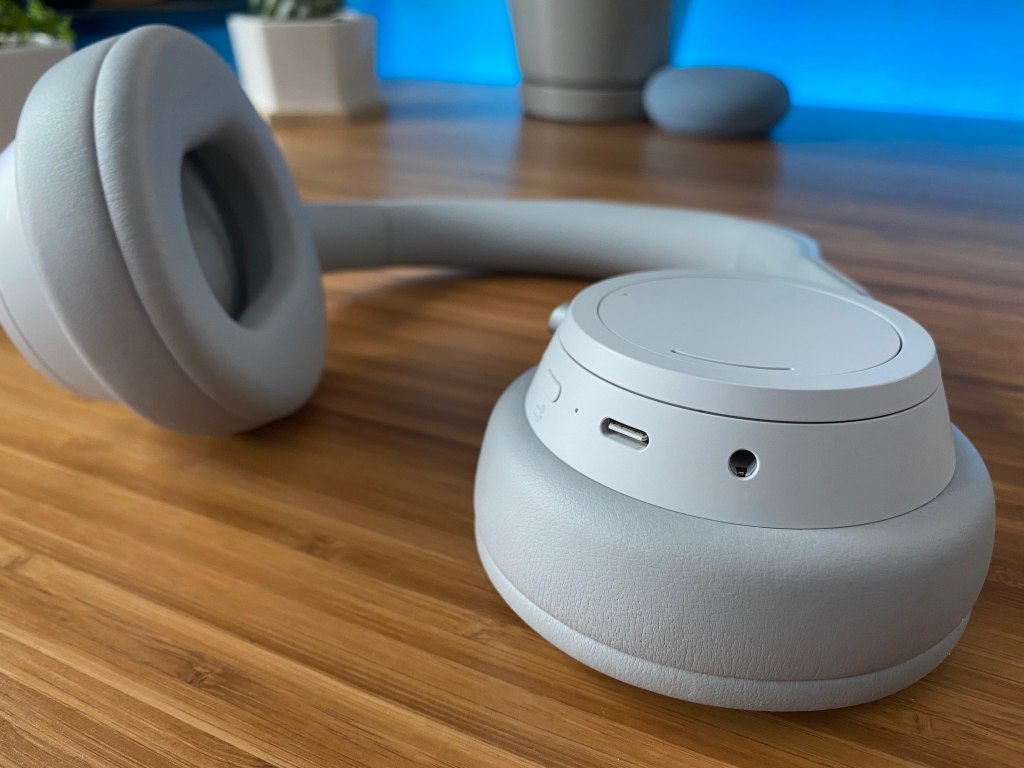

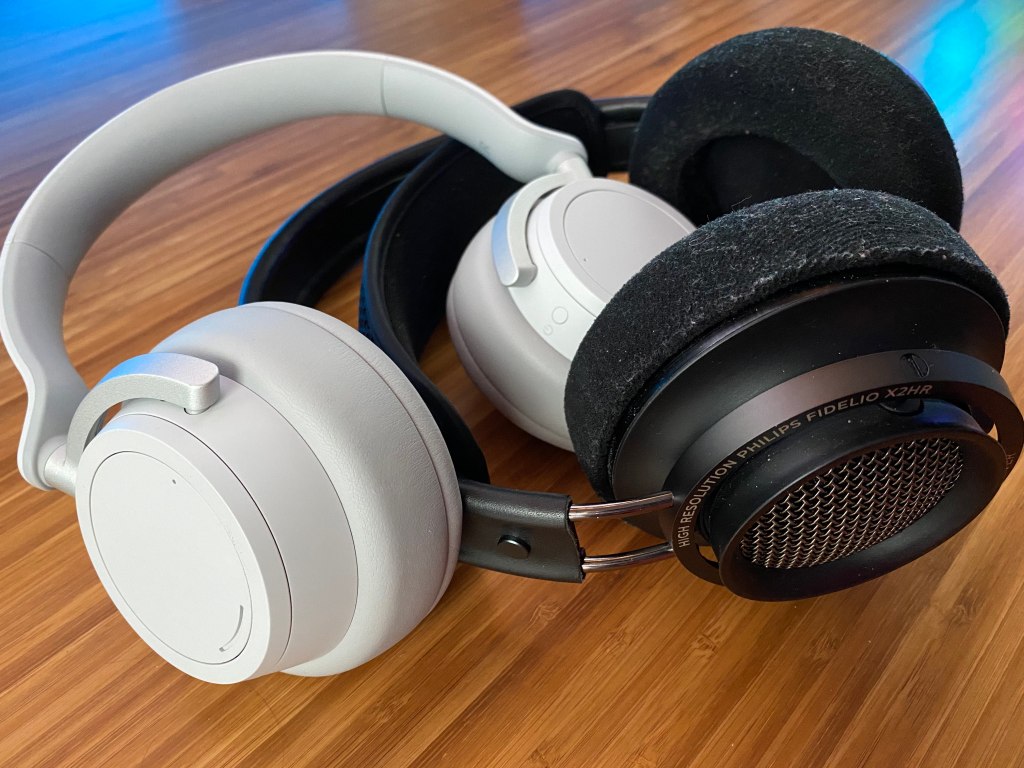
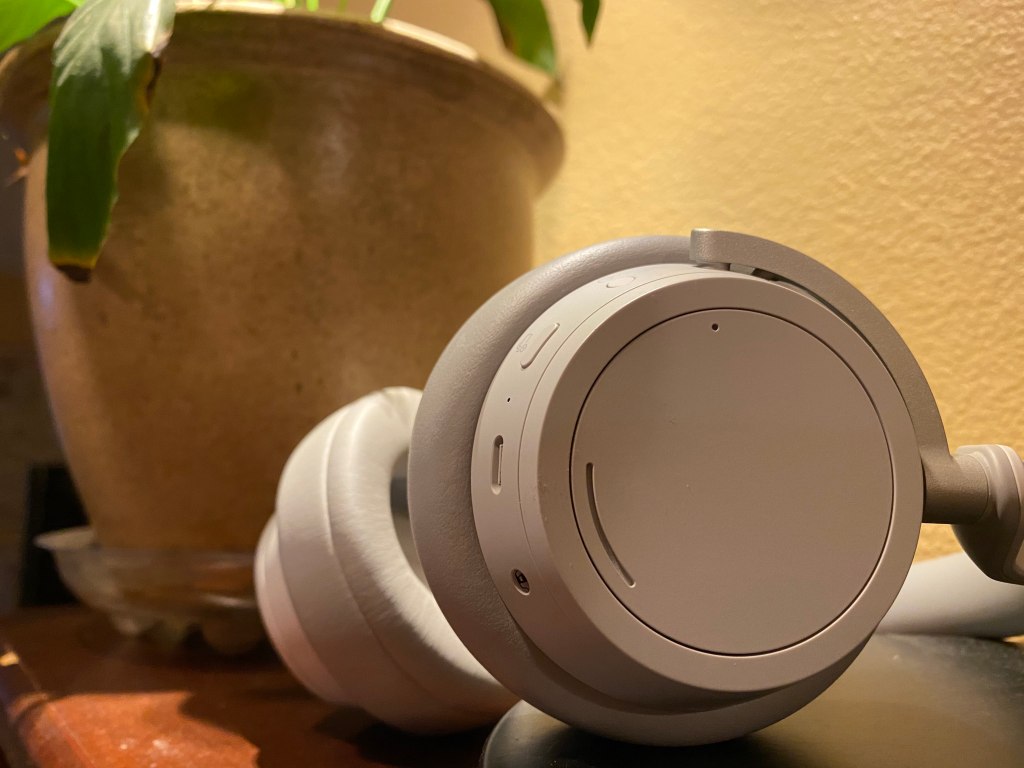


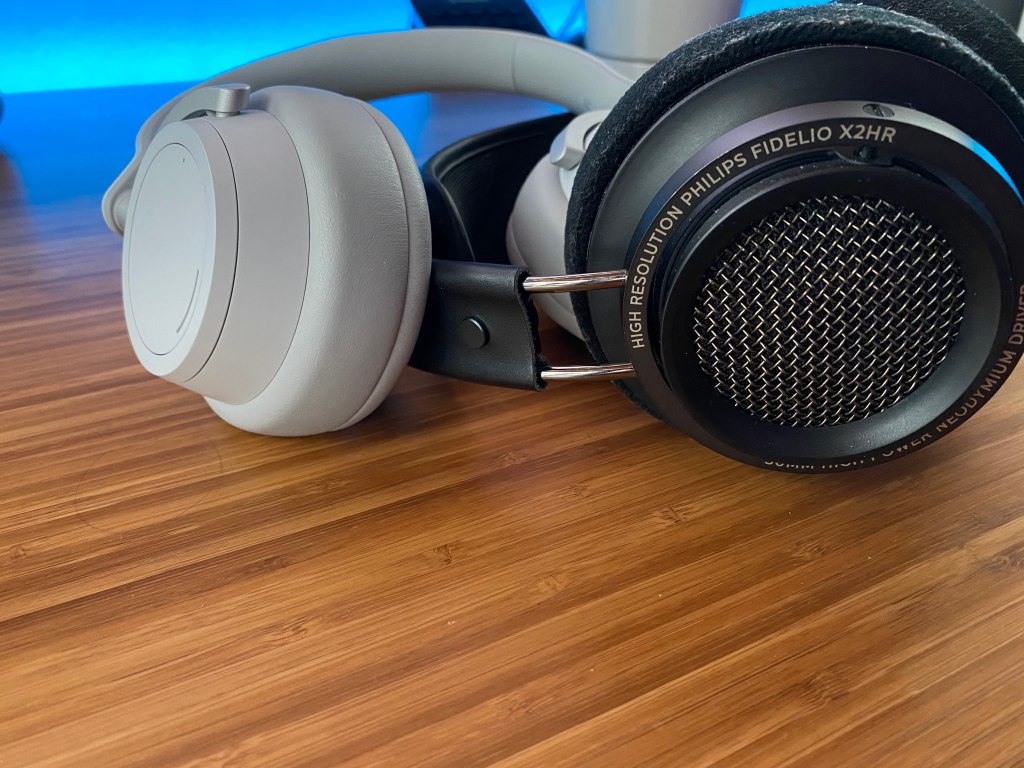

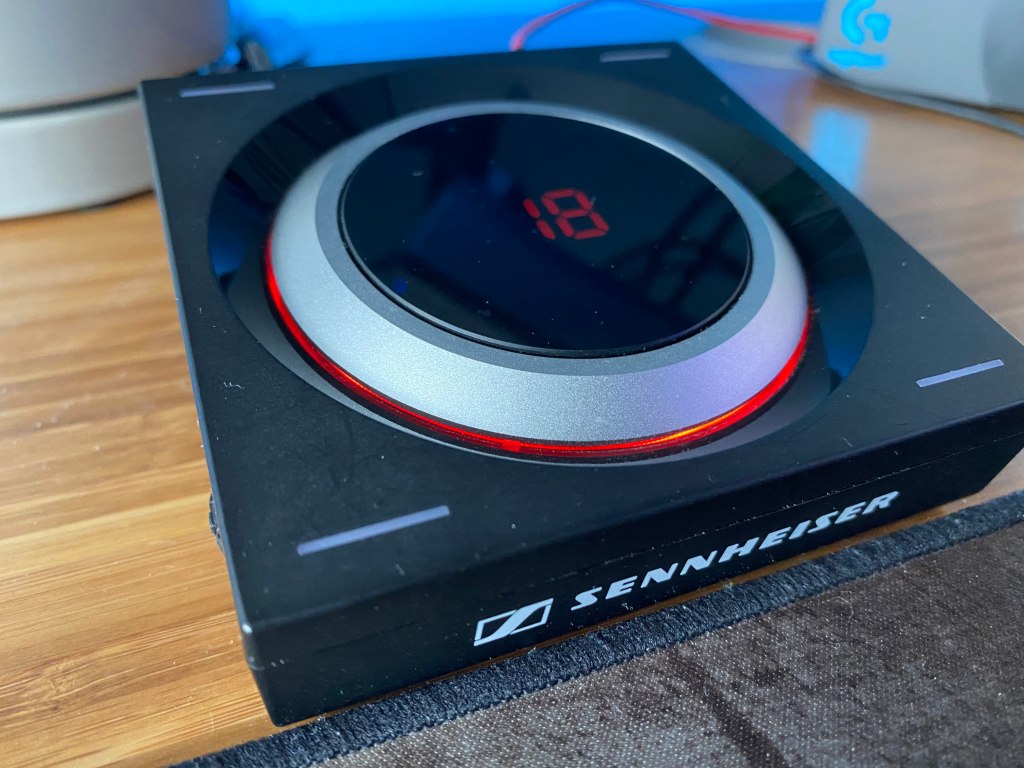

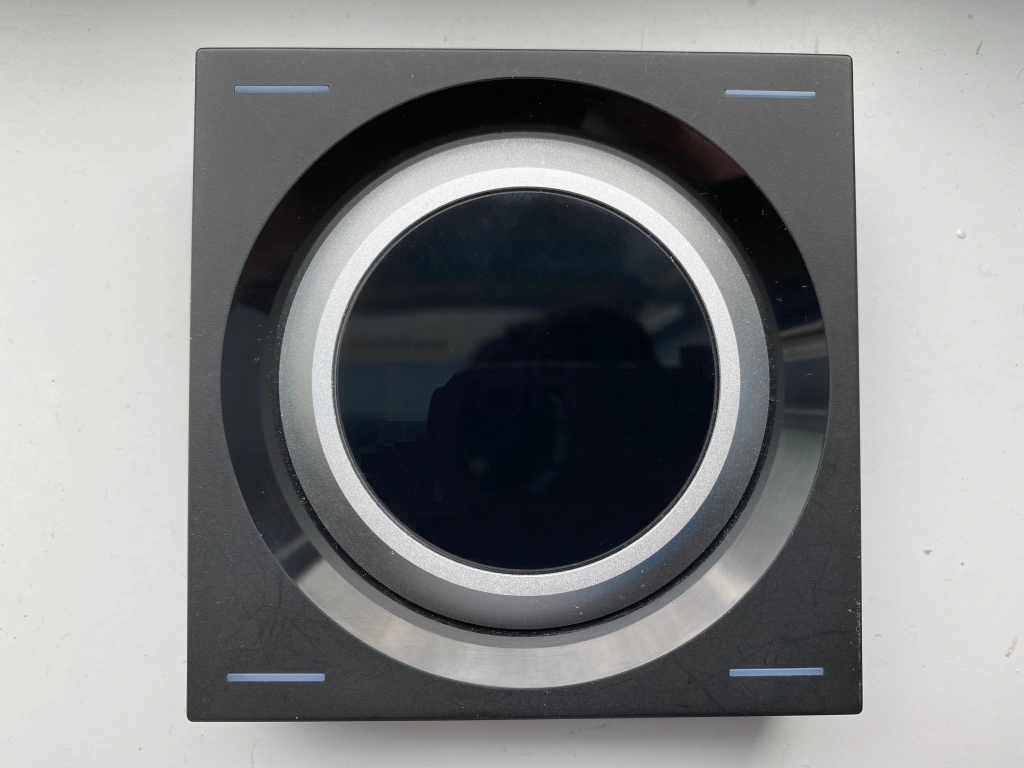
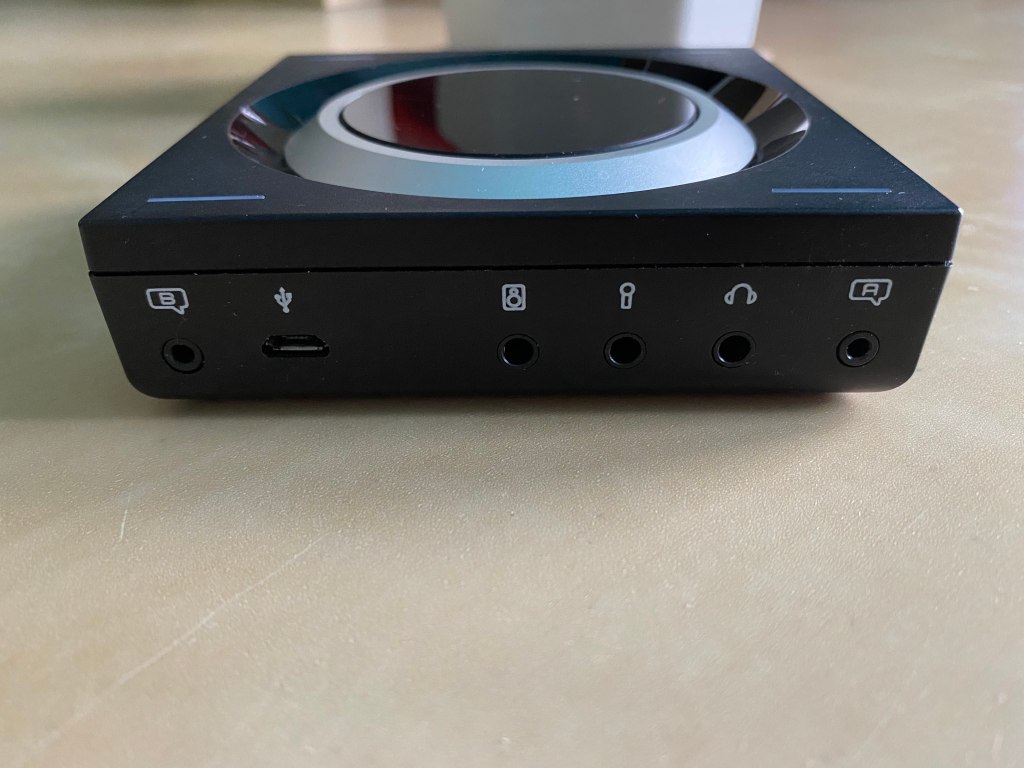
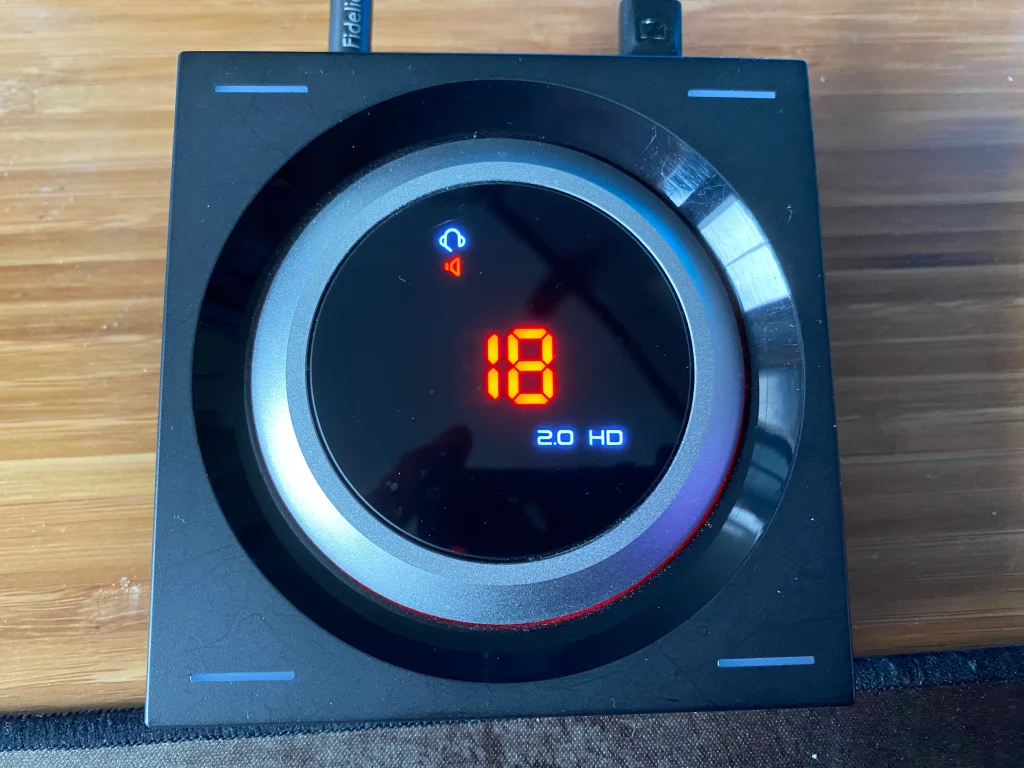
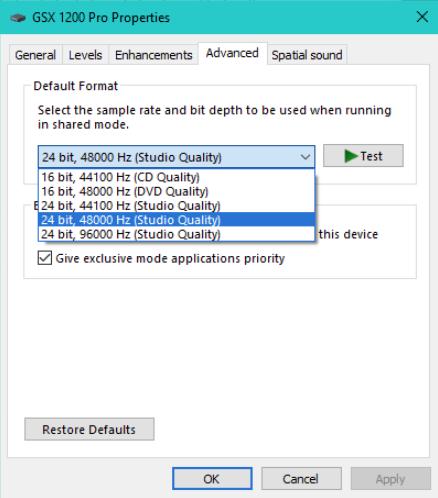
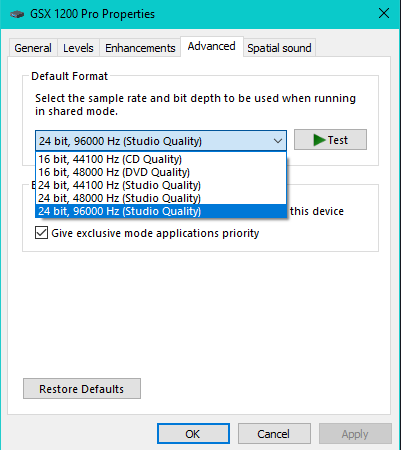
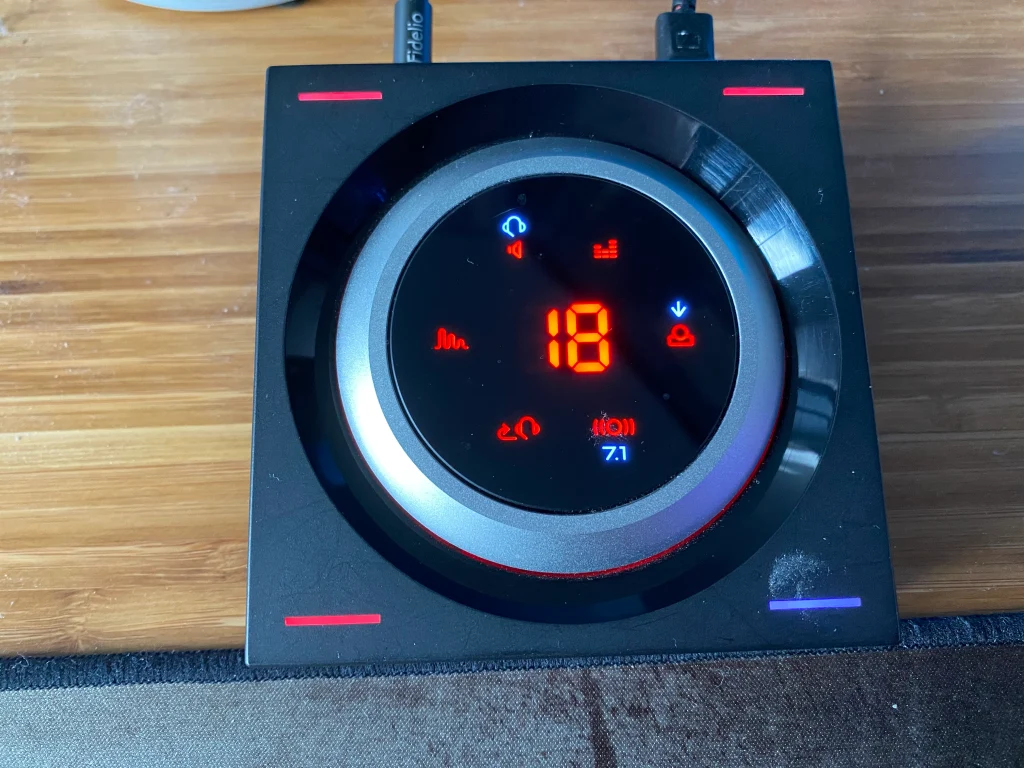
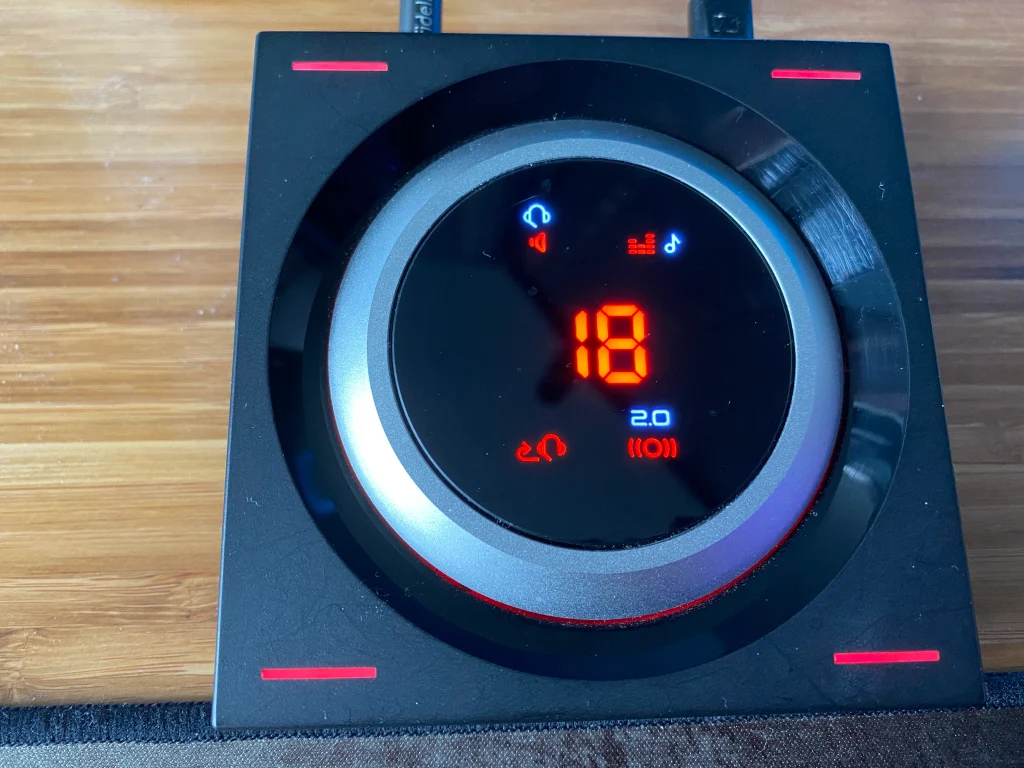

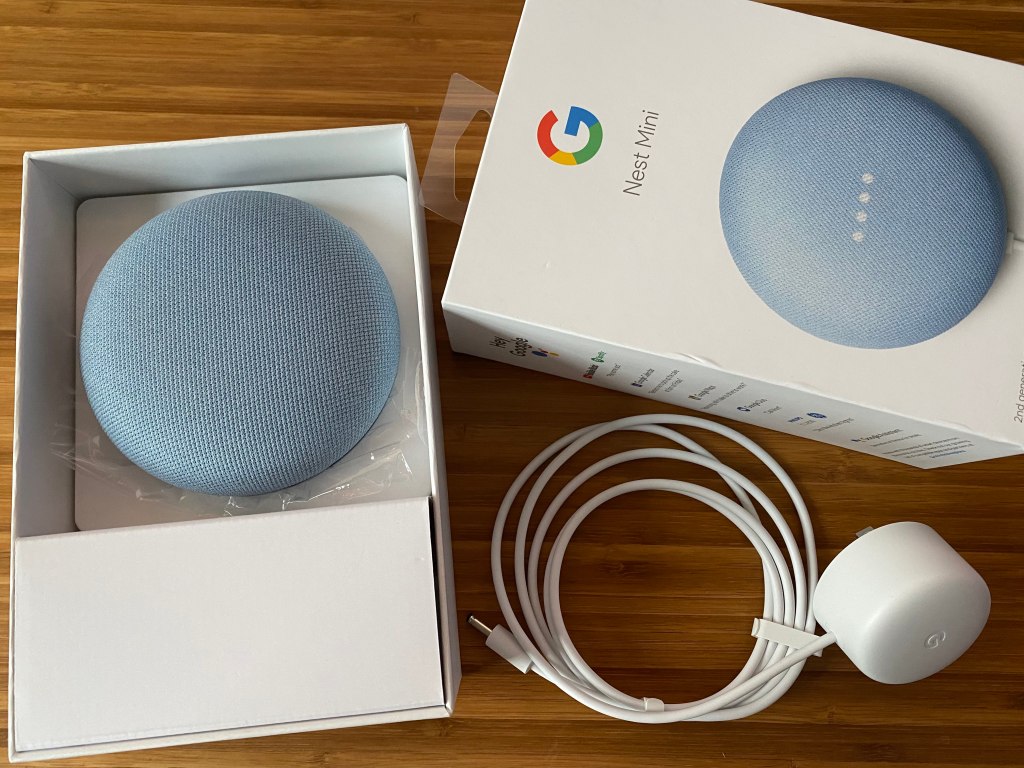


You must be logged in to post a comment.