
The Keychron K6 is a mechanical keyboard that is absolutely packed with features such as Bluetooth connectivity and RGB lighting.
In a compact and efficient 65% layout, the K6 delivers many features that make it a great option for anyone who needs a solid keyboard for a good price.
Let’s dive in and take a deeper look at the Keychron K6.
The Verdict
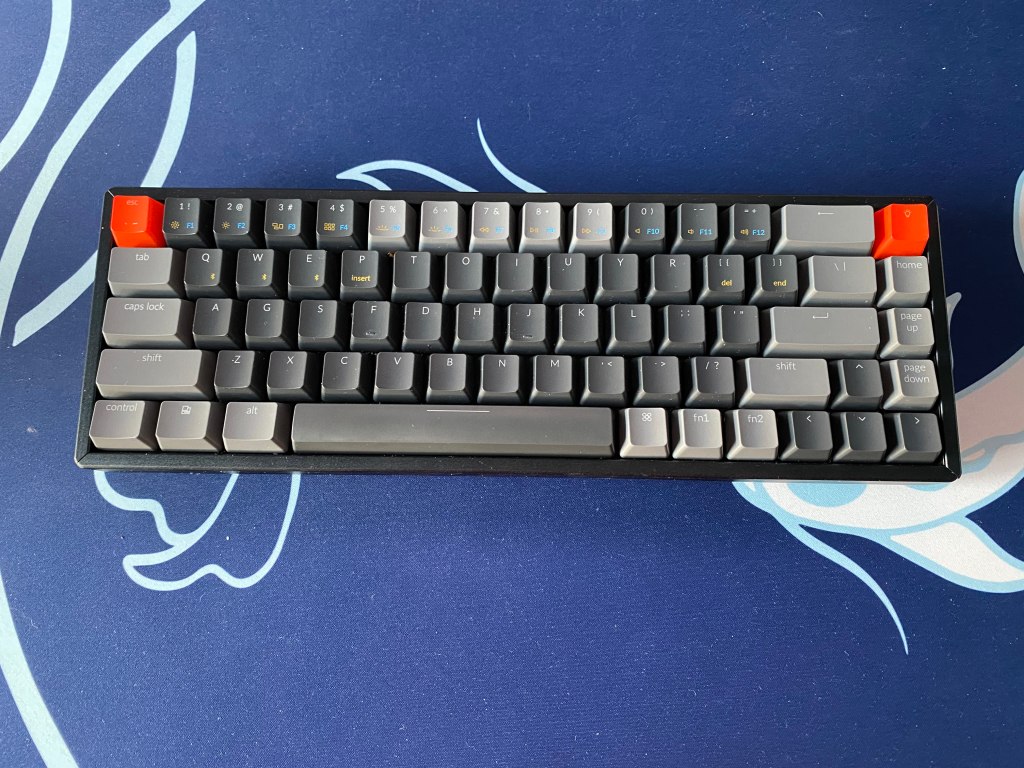
The Keychron K6 is 65% that delivers backlighting, macOS support, and the option to get a hotswappable PCB.
In addition to that, the board features wireless connectivity with Bluetooth 5.1 with an 80-hour battery life.
You get a solid case with an adjustable height and if you are willing to pay about 10 dollars more you can get aluminum bezels.
Keychron gives you a ton of customization on what features you want, obviously at an increased cost, to get an aluminum case, hotswap PCB, and RGB lighting. You are also given the option to choose the three main kinds of switch, clicky, tactile, and linear.
If you want a board with a ton of features and great value all with a compact layout, the Keychron K6 is a great option. It’s not only a great value offering but the K6 also makes for a great travel board.
In The Box
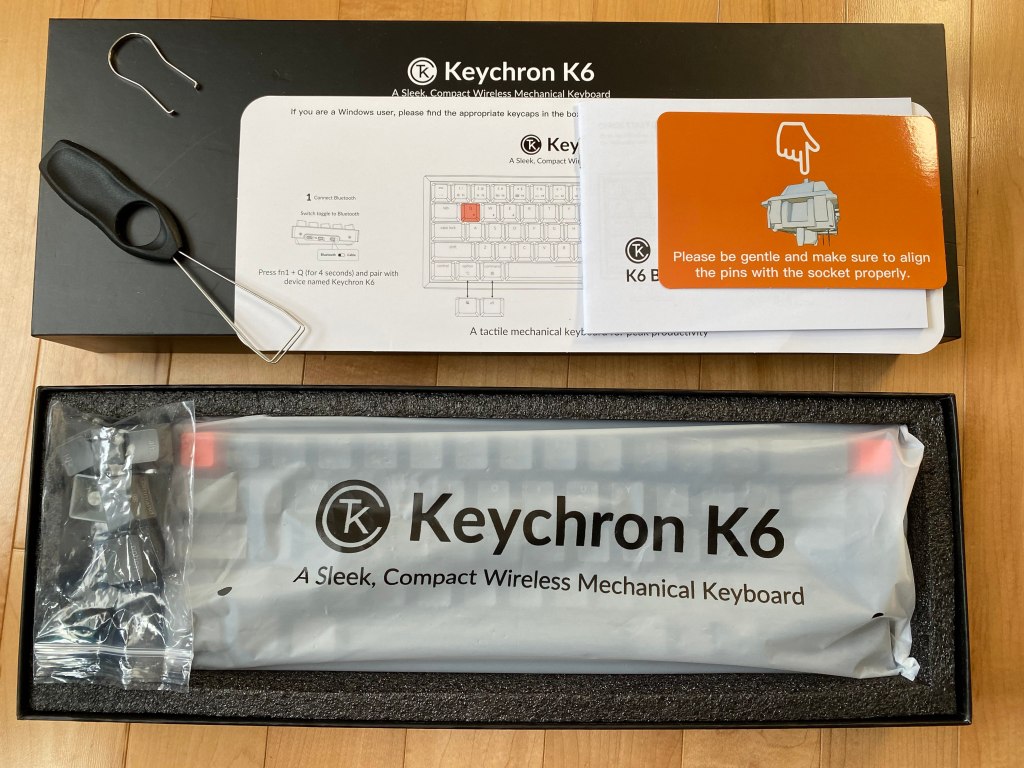
In the box, the K6 comes with several items that will help you get up and running as well as some extras to improve your experience with the board. In the box you will find:
- USB-C Power Cable: You get a nice braided cable that is USB-C and has a 90-degree angle because the port is on the side. No kinks developed after months of use.
- Warranty and Information: Keychron gives you all the essential information on how to use the board with clear instructions along with a pamphlet for warranty information.
- Extra Keycaps: You get additional keycaps to add orange accents and for better support for both Windows and macOS. There are modifier keys for Windows and macOS-specific keys.
- Keycap Puller: A wire puller is included which makes the process of taking off keycaps very easy while not scratching your keycaps like with cheaper plastic pullers.
- Key Switch Puller: If you get the hotswap version of the board then a metal switch puller is included. It is not amazing but it does the job.
Overall it is great that you get so many things in the box and the extras really tie in the experience.
Build Quality
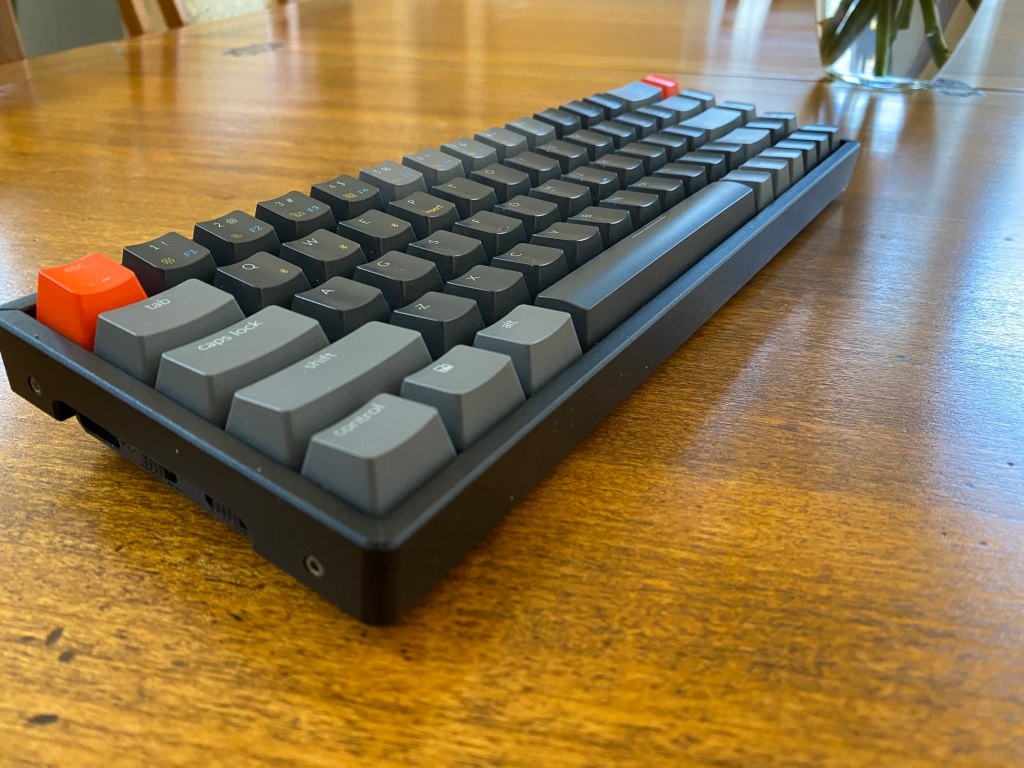
The Keychron K6 has two case designs. Plastic and aluminum. The majority of the case is made from plastic aside from the aluminum top plate. If you do opt for the aluminum version there will be aluminum bezels around the sides for a more hefty feel and premium look.
There is little flex to the board and it feels quite sturdy, especially if you get the aluminum version.
There are 3 levels of height adjustment to the board with a flat typing angle, 6-degree angle, and 10-degree angle. On the bottom of the board, you will also find for moderately size rubber feet to keep the board from sliding around.
The front height was a common complaint with older Keychron boards but while it is still not ideal it is a bit better with the K6. I am able to comfortably type without my wrist rest.
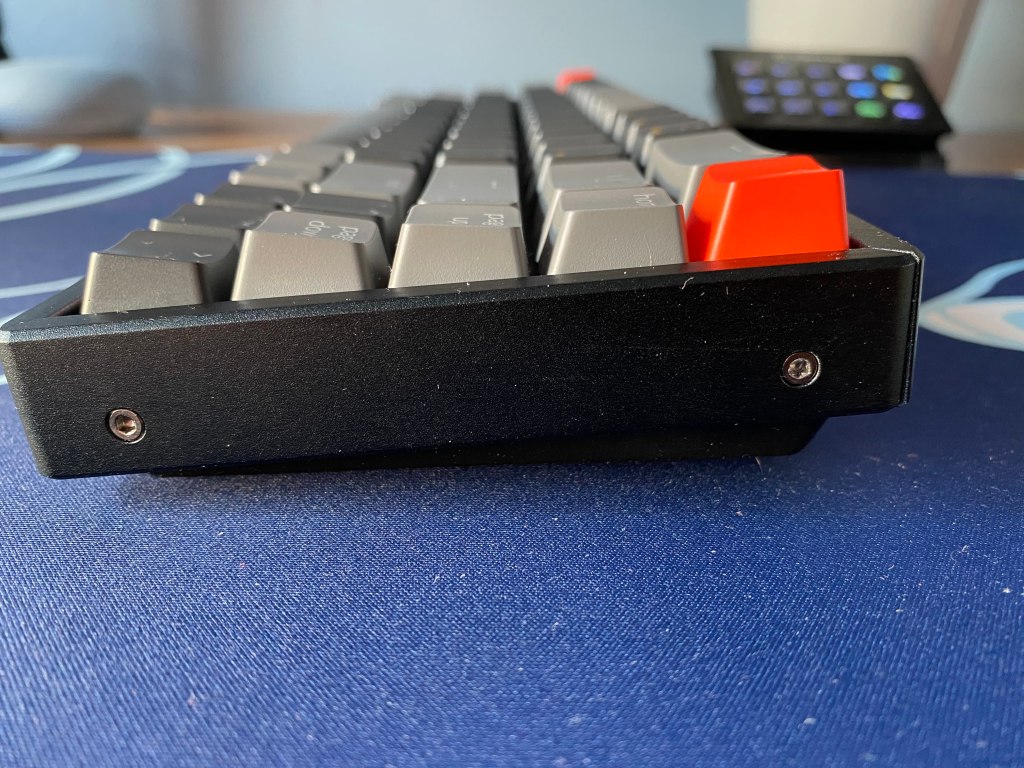
On the left side of the board, you will find a USB-C port along with two buttons. The first button allows you to switch between Windows/Android and macOS/iOS. The other button allows you to switch between Bluetooth, wired, and off.
This is quite a convenient spot for the buttons as it is not in the way and easy to reach but it is not the nicest spot for the cable. It makes cable managing your keyboard cable a lot harder if you are using it in wired and removes the possibility to use custom cables.
For most people, this won’t be too much of an issue, especially if you plan to use the board with Bluetooth.
The Keycaps
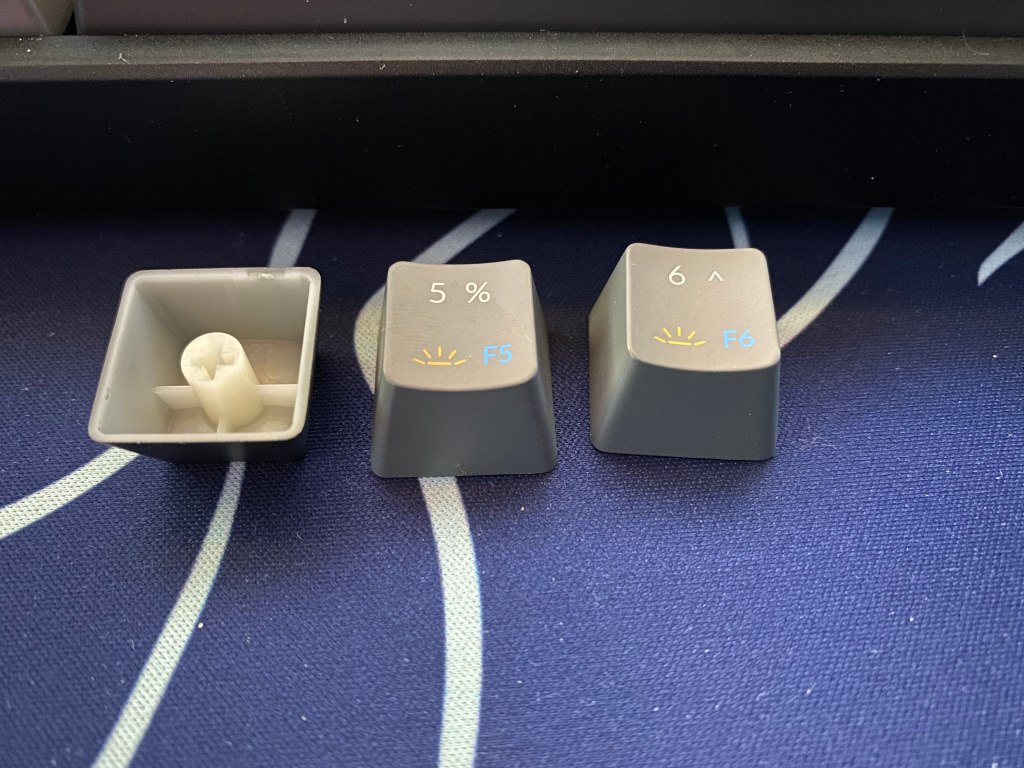
The K6 comes with a set of ABS keycaps in the OEM profile with doubleshot, shine-through legends. Included are some alternate keycaps including some mac keys and accent keys if you want to add an orange accent to the light or escape keys.
Since the keycaps are made of ABS they will develop shine over time but since the set is pretty good quality for a prebuilt board, it will take at least a month for it to show up. This shine will come from the natural greases and oils from your hands.
The OEM profile is the standard among pre-built mechanical keyboards. The keycaps are contoured to match the shape of your hands. Since this is similar to most pre-built mechanical keyboards, if you have used another in the past it will be very easy to get used to.
Since the keycaps use the doubleshot method for the main legends this means that the legends are reliable and won’t fade away. Although the main legends are shine through there are some printed sub legends to show extra functions that work with the fn1 and fn2 keys.
The keycaps, aside from the orange accent keys, have a gray theme with the use of both light and dark gray. They have a very smooth feel too. The legends on the modifiers look modern and simplistic which is very nice in comparison to other pre-built boards that have aggressive-looking legends.
The Switches
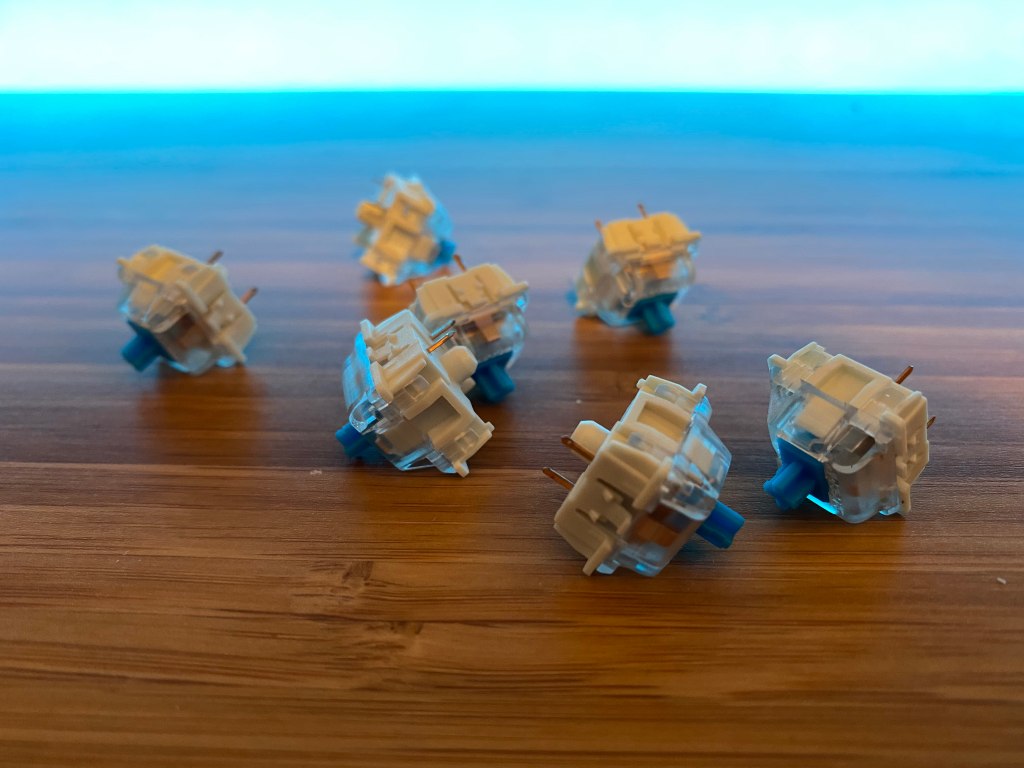
Underneath the keycaps, Keychron gives you 3 switch options. You get a clicky, tactile, and linear switch from Gateron.
| Gateron Red | A light linear switch with a smooth travel |
| Gateron Brown | A medium weight tactile switch with a light tactile bump |
| Gateron Blue | A medium weight clicky switch. It has a loud sound and sharp tactility |
Gateron provides some great switches for pre-built boards. All these switches are good options but if you get the hotswappable version of the board, you can replace the stock switches with any option of your choosing.
Gateron’s switches have a durability of 50 million keystrokes which just means that these switches will last a very long time and will probably last longer than the majority of other components on the board.
The Stabilizers
Stabilizers often have a big effect on how a keyboard sounds and Keychron’s stabilizers are some of the better ones that I have tried on a prebuilt keyboard. Keychron has opted to use Cherry Style plate mount stabs that are factory lubed for a better sound and feel.
The sound and feel will also change based on what switches you use. Clicky switches will block out any rattle from the stabilizers while linear switches could make rattle or ping more obvious.
Overall the stabs are not perfect but they are much better than the stabilizers on most gaming keyboards. If you are coming from a Corsair, Razer, or similar keyboards these stabilizers will be an upgrade. If you get hotswap version of the board then you can easily mod the spacebar to sound and feel even better by lubing it and clipping it yourself.
Software (or Lack Thereof)
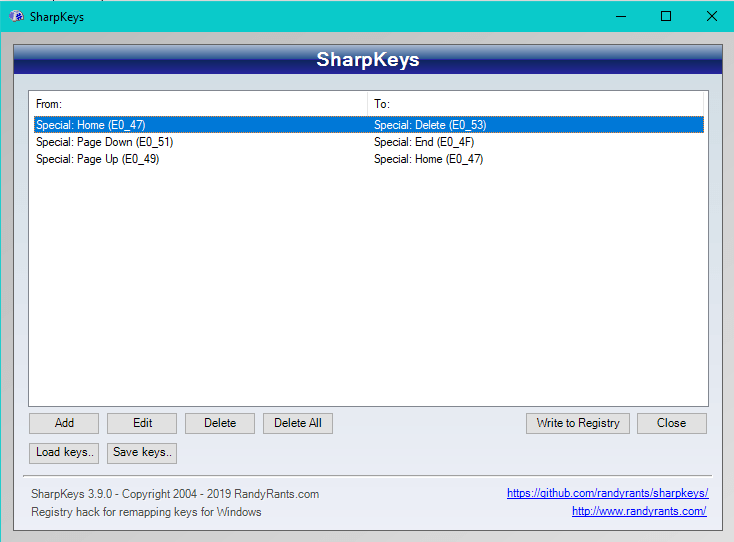
Unfortunately, Keychron has no official software or firmware for any of their keyboards.
Keychron has rumored that they are making a software of some sort but little details are known about it and its release date.
Luckily there are some options that Keychron suggests for you to use. On Windows, they recommend that you use Sharpkeys and Karabiner for MacOS (Note: Karabiner won’t work on Linux and GNU based systems). Both softwares work by remapping the buttons of the keyboard input at a low level in the operating system.
This means that all these changes will not actually save to the board so if you move the board to another device none of your mappings will be there. This also means that if you plan to use any other board with your computer that the mappings will be changed because of these softwares.
Hotswap PCB
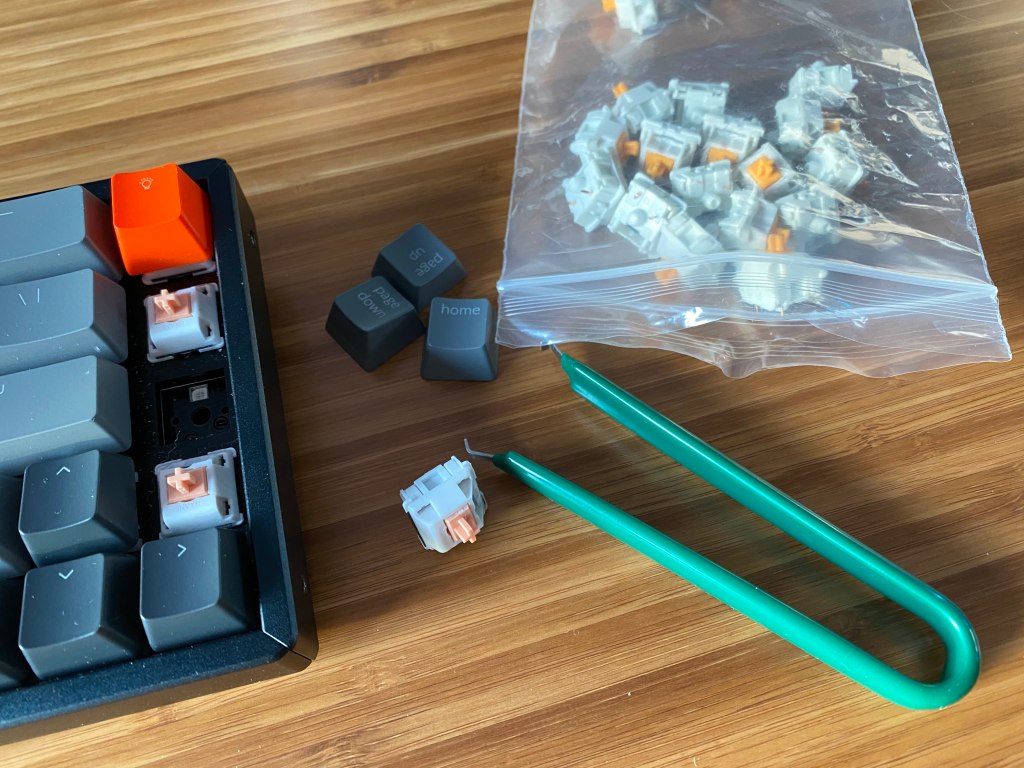
If you choose to pay extra, you can get a K6 with a hotswappable PCB. This means that you can change the switches without needing to desolder anything. This process takes a few seconds just to take out or put in a switch.
The board supports both 3 and 5 pin switches and it is north-facing. This means that the keyboard supports switches from most switch manufactures including Kailh, Cherry, Drop, and much more. The fact that the sockets are north-facing means that there could be interference between the switch and the keycap with high-end GMK keycap sets but it does allow more of the lighting to get through. This will not be an issue for most people that are in the market for this board though.
A PCB with hotswap sockets is a very useful feature and it makes this board great for those who want to get into the mechanical keyboard hobby but if you just want a keyboard to type on then there is no need to spend the extra money.
Bluetooth Connectivity
One feature that makes the Keychron K6 such a great option is the fact that you can connect the board to three devices with Bluetooth 5.1. This is very useful for those who may use multiple devices or want to travel with the keyboard.
The Bluetooth works with Windows, MacOS, iOS, and Android.
The board supports a 4000maH rechargeable lithium-ion battery. The battery is rated for 80 hours or 10 days with 8 hours of usage, while backlighting is on. This was consistent with my testing. After about 5 minutes of inactivity, the board will go into a low power mode turning off the LEDs. The only complaint you may have is that it takes a few seconds for the board to turn back on.
The latency with Bluetooth actually is not bad. Although I would not recommend it for gaming it is not a terrible experience. Depending on the game, it was not even noticeable that I was still on Bluetooth.
It is worth mentioning that I did have some connectivity issues when I first got the board. At first, the board would not go into pairing mode. I fixed this issue by leaving the board to charge for a few hours and then it worked. Ever since I have never had any issues with Bluetooth.
Mac Support
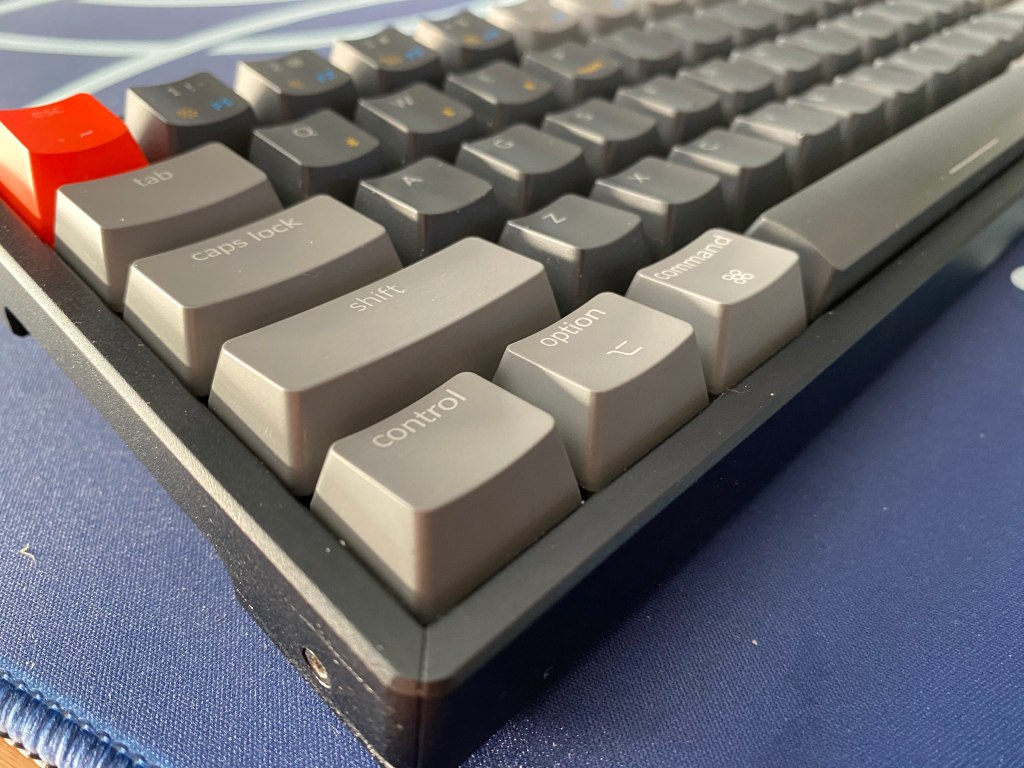
A very nice feature about all Keychron boards is MacOS support. Many boards only officially support Windows so some boards either won’t work or some of the modifier keys may have no functionality.
On the side of the K6 is a button to change between Windows/Android or Mac/IOS. This is complemented nicely by the Apple-specific keycaps.
This feature is very nice because it means you can use this keyboard no matter what operating system you plan to use. If you are primarily a Mac user then this is one of the best boards that you can get.
Back Lighting

The Keychron K6 features either white or RGB backlighting the RGB option will cost a bit more. The RGB lighting is not as bright as gaming keyboards that I have tried from Corsair, Logitech, or Razer. It is not very bright but is still noticeable.
RGB lighting is always nice to have to add to a desk theme and the white blends well in an office environment.
The LEDs along with the modern font of the keycaps are not obtrusive and don’t make the board look overly gamery. The LEDs are versatile for any situation.
Due to the keyboard having no dedicated software currently, all the effects are on the board. There are a variety of effects from static colors to type lighting. With the white LED models you won’t have nearly as many lighting effects.
You can also easily turn on and off the LEDs by pressing either fn1 or fn2 and the light button.
Conclusion: Should You Get The K6?
The sub $100 price range is very competitive but the Keychron K6 emerges as a great option with great performance and features.
It delivers tons of utility with a nice-looking case. You get Bluetooth, macOS support, backlighting, and the chance to get a hotswappable PCB. You get all the utility that you need while in a compact 65% layout.
The wireless connectivity helps this board be very portable and it allows you to have a clean setup.
The board is quite sturdy with minimal flex and a decent weight for its size.
The only major drawbacks of the board are the fact that the USB-C port is on the side limiting your options for custom cables and cable management options as well as potential Bluetooth connectivity issues. Luckily the connection issue that I faced had a simple fix but, unfortunately, these issues are common.
If you are interested in checking out this board then you can see the Keychron K6 on Amazon.
Also if you enjoyed this article consider checking out some of our other keyboard reviews.


You must be logged in to post a comment.